Introduction
Afghani Cilantro Chutney, also known locally as “Dhaniya Chutney,” is a vibrant, aromatic condiment integral to Afghan cuisine. Its bright green hue and zesty flavor profile make it a versatile accompaniment that elevates a wide array of traditional dishes—from succulent kebabs and grilled meats to rice pilafs and vegetable platters. This condiment exemplifies the Afghan culinary philosophy of balancing bold flavors with fresh ingredients, offering a refreshing yet spicy kick that complements rich, savory dishes. Crafted from a simple combination of fresh cilantro leaves, green chilies, garlic, and a few aromatic spices, it embodies the essence of Afghan home cooking—simple, wholesome, and full of flavor. The history of this chutney traces back centuries, passed down through generations, reflecting the cultural tapestry of Afghanistan’s diverse regions and culinary traditions.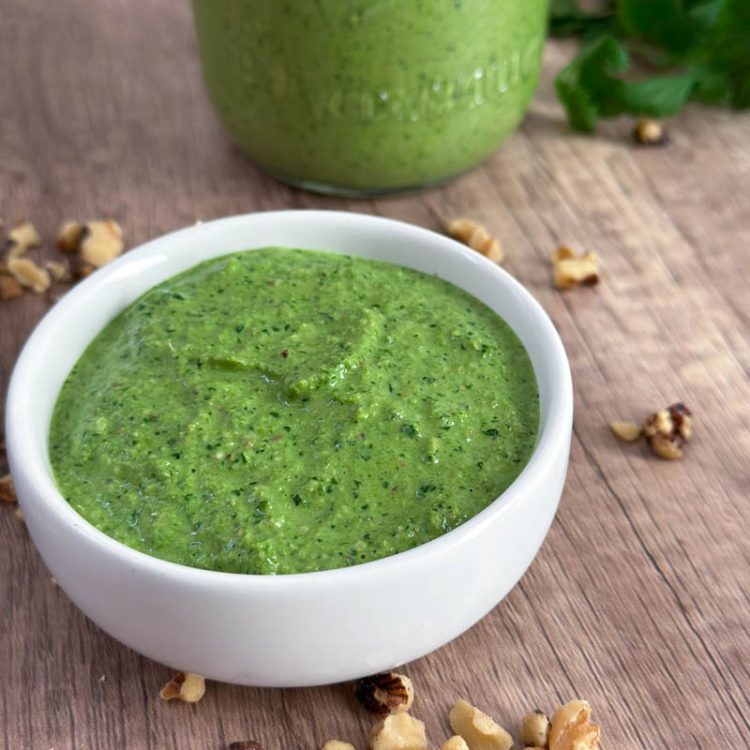
Time
The entire process of preparing Afghani Cilantro Chutney, from gathering ingredients to serving, generally takes about 15 to 20 minutes. This makes it an ideal quick condiment to whip up for meals or gatherings. The preparation involves washing, chopping, blending, and adjusting seasoning, all of which are straightforward steps that can be completed efficiently, even by novice cooks. For those with more experience, the process can be expedited further, but it remains a simple task suitable for any level of culinary proficiency.
Needed Equipment
- Sharp kitchen knife
- Cutting board
- Measuring spoons
- Measuring cups
- Blender or food processor
- Spatula or spoon for transferring chutney
- Serving bowl or jar for storage
- Lemon squeezer or juicer (optional, if adding lemon juice)
- Small bowl for pre-measuring spices
Tags
Afghan cuisine, Condiments, Chutney, Vegetarian, Vegan, Gluten-free, Spicy, Fresh herbs, Sauce, Afghan food, Homemade
Serving Size
Approximately 2 tablespoons (about 30 grams) per serving. This quantity is typical for a condiment serving, but it can be adjusted according to personal preference or meal requirements.
Difficulty Level
Easy. This recipe involves simple steps—washing, chopping, blending, and seasoning—that require minimal culinary skills. It’s perfect for beginners and can be completed quickly without special equipment or techniques.
Allergen Information
- Contains garlic (a common allergen for some individuals)
- Contains cumin (spice allergen for some)
This chutney is free from gluten, dairy, nuts, and soy, making it suitable for most allergy considerations, provided no additional ingredients are added. Always check ingredient sources if buying pre-made or if sensitive to specific spices.
Dietary Preference
Vegan, Vegetarian, Gluten-Free, Dairy-Free, Nut-Free (unless added with nuts), Soy-Free
Course
Condiment, Sauce, Side Dish
Cuisine
Afghan
Ingredients
| Ingredient | Quantity | Notes |
|---|---|---|
| Fresh cilantro leaves | 1 bunch (about 1 cup packed) | Wash thoroughly and remove thick stems |
| Green chilies | 2-3 medium | Adjust according to spice preference; deseed for milder flavor |
| Garlic cloves | 2-3 cloves | Peel before blending |
| Ground cumin | 1/4 teaspoon | For aromatic depth |
| Salt | to taste (about 1/4 teaspoon) | Adjust as needed |
| Water | 2-3 tablespoons | Adjust to achieve desired consistency |
| Lemon juice (optional) | 1 teaspoon | For added tanginess |
Instructions
Step 1: Gathering and Preparing the Ingredients
Start by selecting fresh, vibrant cilantro leaves. The quality of your cilantro significantly impacts the flavor and color of the chutney. Rinse the cilantro thoroughly under cold running water to remove dirt, dust, and any residual pesticides. Gently shake off excess water or pat dry with a clean towel. Remove the thick stems, especially if they are woody or tough, as they can affect the smoothness of the chutney. Roughly chop the cilantro to facilitate easier blending.
Step 2: Preparing the Chilies and Garlic
Choose fresh green chilies, preferably medium-sized for balanced heat. Wash them carefully; if you prefer a milder chutney, deseed the chilies by slicing lengthwise and removing the seeds. For a spicier version, leave the seeds intact. Peel the garlic cloves and crush or chop them roughly. The garlic will add pungency and depth to the flavor profile of the chutney.
Step 3: Measuring Spices and Water
Measure out the cumin powder, salt, and water. Using precise measurements ensures consistency in flavor and texture. Set these aside within easy reach to streamline the blending process.
Step 4: Blending the Ingredients
Place the chopped cilantro, green chilies, garlic, cumin, and salt into the blender or food processor. Add one tablespoon of water initially to help the blending process. Blend on low speed, gradually increasing to high, until a smooth, uniform paste forms. Scrape down the sides of the blender as needed to ensure all ingredients are evenly processed. If the mixture is too thick or difficult to blend, add additional water gradually until the desired consistency is achieved—typically smooth but not runny.
Step 5: Adjusting Seasonings and Final Touches
Once blended, taste the chutney and adjust the seasoning. If more salt or spice is desired, add accordingly and blend briefly again. For a tangy flavor, squeeze in fresh lemon juice and blend to incorporate. The lemon juice not only enhances flavor but also helps preserve the vibrant green color.
Step 6: Serving and Storage
Transfer the finished chutney into a clean bowl or jar. Serve immediately or refrigerate for later use. The chutney can be stored in an airtight container for up to 3 days, during which its flavor may deepen. Stir well before serving if stored.
Preparation Tips
- Freshness is key: Use freshly harvested cilantro and chilies for the best flavor and vibrant color.
- Adjust spice levels: Start with fewer chilies and add more if you prefer extra heat.
- Blending consistency: Add water gradually to prevent over-thinning; aim for a thick, spreadable paste.
- Preservation: Add a teaspoon of lemon juice to extend shelf life and maintain color.
- Optional additions: For a variation, include a small piece of ginger or a pinch of coriander powder.
Nutritional Information
| Nutrient | Per Serving (2 tbsp) |
|---|---|
| Calories | 15-20 kcal |
| Total Fat | 0.5 g |
| Sodium | 50-100 mg |
| Total Carbohydrates | 2-3 g |
| Dietary Fiber | 0.5-1 g |
| Sugars | 0 g |
| Protein | 0.5-1 g |
| Vitamins & Minerals | Rich in vitamin A, vitamin K, small amounts of vitamin C, calcium, and iron |
Tips and Tricks
- Use fresh herbs: Fresh cilantro provides the best flavor and color, so avoid using dried or frozen herbs.
- Balance heat and flavor: Adjust the number of chilies based on your spice tolerance. Deseeding the chilies reduces heat.
- Enhance shelf life: Adding a splash of lemon juice or a thin layer of olive oil on top can help preserve the chutney longer.
- Experiment with textures: For a chunkier chutney, pulse the ingredients briefly or chop them by hand instead of blending completely smooth.
- Make ahead: The flavor develops further after resting for a few hours, making it ideal for preparing in advance.
Add-ons
- Chopped onions or shallots for extra sweetness and texture
- Fresh mint leaves for a cooling contrast
- Fried cumin seeds or toasted spices for a smoky flavor
- Small amounts of yogurt or lemon zest for variation
Side Dishes
- Grilled kebabs and skewers
- Steamed or grilled vegetables
- Rice pilaf or biryani
- Flatbreads like naan or pita
- Roasted meats, such as lamb or chicken
Improvements
- Adding toasted spices: Toast cumin or coriander seeds before grinding to deepen flavor.
- Incorporating tangy elements: Use tamarind paste or a dash of vinegar for a different acidity profile.
- Varying herbs: Mix in parsley or mint for a personalized flavor twist.
Save and Store
Keep any leftover chutney in an airtight glass jar or container in the refrigerator. For optimal freshness, consume within 2-3 days. To extend shelf life, add a few drops of lemon juice on top before sealing, and ensure the chutney is stored in a clean, dry environment. Avoid contamination by using a clean spoon each time you scoop out the chutney. If you wish to keep it longer, consider freezing small portions in ice cube trays, then transfer to a freezer bag for up to one month. Thaw in the refrigerator before use.
FAQ
Can I make this chutney ahead of time?
Yes, preparing the chutney a few hours in advance allows flavors to meld. For longer storage, keep it refrigerated and consume within a few days.
Is this chutney spicy?
The spiciness depends on the number of green chilies used and whether the seeds are included. Deseeding reduces heat, making it suitable for milder palates. Adjust accordingly to suit your taste.
Can I use dried cilantro instead of fresh?
Fresh cilantro provides the best flavor and color; dried cilantro can be used but will significantly alter the taste and vibrancy. For authentic flavor, fresh is recommended.
What are some variations I can try?
You can add ingredients like ginger, mint, or yogurt for different flavor profiles. Experiment with different spices such as coriander or black pepper to customize the chutney.
Conclusion
Crafting Afghani Cilantro Chutney at home is a delightful way to bring authentic Afghan flavors to your table. Its fresh, spicy, and tangy profile makes it a perfect accompaniment for grilled meats, rice dishes, and bread. The simplicity of ingredients and ease of preparation mean you can whip up this condiment in minutes, elevating everyday meals into flavorful experiences. Whether served as a dip, a side, or a finishing touch, this chutney embodies the vibrant spirit of Afghan culinary tradition. Remember, the quality of your ingredients directly influences the final taste, so choose fresh, vibrant herbs and peppers for the best results. Explore variations and incorporate your favorite herbs and spices to make this chutney uniquely yours. Enjoy the process, and savor the explosion of flavors with every bite.
References
- Afghan Food and Cooking, by Jeffrey S. Schnelle, 2005.
- Traditional Afghan Recipes, Afghan Cultural Heritage, 2018.
This detailed recipe has been crafted specifically for the Love With Recipes platform, aiming to provide comprehensive, authentic, and practical guidance for culinary enthusiasts eager to explore Afghan cuisine. Happy cooking!