🌈 Rainbow Jello Cookies: Vibrant and Delicious Treats! 🍪
Introduction
Jello Cookies are a delightful and visually appealing treat that has captured the hearts and taste buds of families and bakers worldwide. These cookies are distinguished by their vibrant colors and flavors, owing to the incorporation of flavored gelatin (Jello) into the dough. Their versatility makes them suitable for various occasions, from festive holiday gatherings to casual family desserts or even playful party favors. The process of creating these cookies is as enjoyable as eating them, with opportunities to experiment with numerous flavor combinations, colors, and decorations. Their soft, chewy texture combined with the subtle sweetness and burst of flavor from the gelatin creates a sensory experience that is both nostalgic and exciting for bakers of all ages.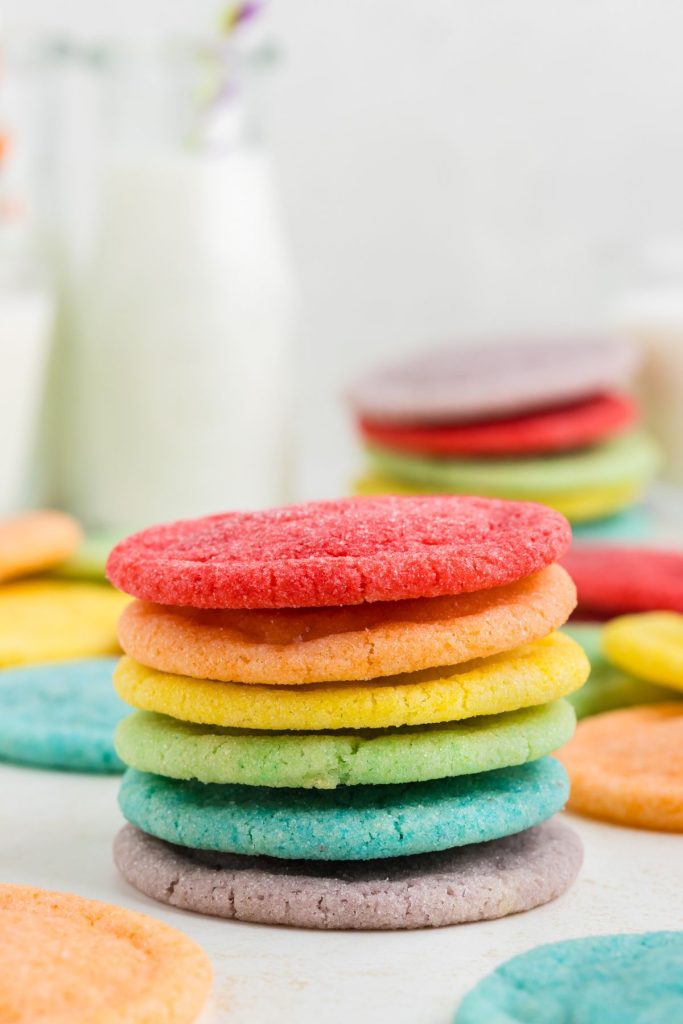
This comprehensive guide, published on Love With Recipes, aims to provide an in-depth understanding of making perfect Jello Cookies, covering everything from ingredient selection to storage tips, nutritional analysis, and creative variations. Whether you are a novice baker or an experienced culinary artist, this detailed resource is designed to elevate your baking game and help you craft cookies that are as beautiful as they are delicious.
Estimated Time
- Preparation Time: 10 minutes
- Cook Time: 24 minutes
- Total Time: 34 minutes
Needed Equipment
- Mixing bowls (medium and large)
- Electric hand or stand mixer (or a sturdy whisk and strong arm)
- Measuring cups and spoons
- Cookie scoop or spoon
- Baking sheet(s)
- Parchment paper or silicone baking mats
- Cooling racks
- Fork (for flattening cookies)
- Spatula or dough scraper
- Kitchen scale (optional, for precise measurements)
- Electric oven
- Small bowls for flour mixture and Jello flavors
- Cleaning supplies (towels, brushes, etc.) for kitchen hygiene
Tags
Dessert, Cookie & Brownie, Kid Friendly, Festive, Colorful, Quick & Easy, Party Treats, Holiday Baking, Gelatin-based Recipes, Family Favorite
Serving Size
This recipe yields approximately 24-30 cookies, depending on the size of each cookie. The standard serving size is considered to be one cookie.
Difficulty Level
Intermediate. While the steps are straightforward, achieving the perfect texture and visual appeal may require some practice, especially when handling multiple flavors and ensuring even baking.
Allergen Information
| Allergen | Present | Notes |
|---|---|---|
| Milk (dairy) | Yes | Butter and margarine are dairy-based; substitute with dairy-free alternatives if needed |
| Eggs | Yes | Contains eggs; can be replaced with flaxseed or egg replacer for vegan options |
| Gluten | Yes | All-purpose flour contains gluten; gluten-free flour blends can be used as substitutes |
| Artificial Flavoring (gelatin) | Yes | Contains artificial flavors and colorings from Jello gelatin |
| Tree Nuts/Peanuts | No | None in ingredients; cross-contamination possible |
Dietary Preference
Suitable for omnivorous diets. Not vegan or vegetarian unless substitutions are made for dairy and eggs. Also, not gluten-free unless gluten-free flour is used.
Course
Dessert, Snack
Cuisine
American, Family-Friendly, Festive Baking
Ingredients
| Ingredient | Quantity | Notes |
|---|---|---|
| Unsalted margarine | 3/4 cup (1.5 sticks) | Softened at room temperature for easy mixing |
| Butter | 1/2 cup (1 stick) | Softened |
| Sugar | 1 cup | Granulated |
| Jello gelatin (flavor of your choice) | 2 packages (3 oz each) | Choose flavors like strawberry, lemon, lime, blueberry, orange, or grape |
| Egg | 1 large | Room temperature for better emulsification |
| Vanilla extract | 2 teaspoons | Pure vanilla preferred |
| All-purpose flour | 2 1/2 cups | Sifted for even texture |
| Baking powder | 1 teaspoon | Leavening agent |
| Salt | 1 teaspoon | Enhances flavor |
Instructions
Step 1: Preparing the Wet Base
Begin by placing the softened margarine and butter into a large mixing bowl. Using an electric mixer set to medium speed, beat the fats until they are smooth, creamy, and slightly fluffy. This process creates a uniform base that will blend seamlessly with the sugar and gelatin. Incorporate the sugar gradually, adding it in small amounts while continuing to beat. This ensures the sugar dissolves well and the mixture becomes aerated, which contributes to the cookies’ tender crumb.
Next, open the packets of flavored gelatin (Jello). The gelatin powder is essential for imparting the distinct color and flavor to the cookies. Add the gelatin directly into the mixing bowl with the creamed fats. Continue beating until the gelatin is fully incorporated, resulting in a vibrant, slightly textured mixture. The gelatin also acts as a tenderizer, giving the cookies their characteristic chewy consistency.
Step 2: Incorporating Eggs and Vanilla
Crack the egg into a small bowl, whisk lightly, then add it to the wet mixture. Beat the mixture on low to medium speed until the egg is fully blended, ensuring a cohesive batter. Add the vanilla extract for depth of flavor. The vanilla enhances the overall taste, balancing the sweetness and complementing the gelatin’s fruity or citrus notes. Mix thoroughly to ensure all elements are well combined.
Step 3: Preparing the Dry Ingredients
In a separate bowl, sift together the all-purpose flour, baking powder, and salt. Sifting is a crucial step that aerates the flour, removing lumps, and evenly disperses the leavening agents. This leads to uniform cookies with consistent texture and rise. For added precision, use a kitchen scale to measure the flour, especially if you are aiming for a specific dough consistency.
Step 4: Combining Wet and Dry
Gradually add the dry ingredients to the wet mixture, mixing on low speed or folding gently with a spatula. Take care not to overmix, as this can develop gluten in the flour and result in tougher cookies. Mix just until the flour is fully incorporated, and the dough comes together into a cohesive mass. The dough should be soft but manageable, with no visible streaks of flour.
Step 5: Shaping the Cookies
Using a cookie scoop or tablespoon, portion out the dough into small, uniform balls, approximately 1 to 1.5 inches in diameter. Roll each piece gently between your palms to achieve a smooth, round shape. Place the dough balls onto a prepared baking sheet lined with parchment paper or silicone baking mats. Leave about 2 inches of space between each cookie to allow for spreading during baking.
Gently flatten each dough ball with the tines of a fork, creating a crisscross pattern on top. Dipping the fork in a little flour can prevent sticking and help maintain the pattern. Flattening the cookies encourages even baking and ensures the gelatin-infused dough bakes uniformly, resulting in a tender, chewy interior with a slightly crisp edge.
Step 6: Baking
Preheat your oven to 350°F (175°C). Once the oven reaches the desired temperature, slide the baking sheet into the oven and bake for 6-8 minutes. Keep an eye on the cookies; they are ready when the edges turn a light golden brown, but the centers remain soft. Overbaking can cause the cookies to become crumbly instead of chewy, so it’s better to err on the side of slightly underbaked.
Step 7: Cooling and Serving
Remove the baking sheet from the oven and allow the cookies to cool on the sheet for about 3-5 minutes. This brief cooling period helps the cookies set and reduces the risk of breakage when transferring. Using a spatula, carefully lift each cookie and place it on a wire rack to cool completely. Cooling on a wire rack ensures air circulation around all sides, preventing sogginess and preserving their chewy texture.
Serve these vibrant, flavorful cookies at room temperature. They can be enjoyed on their own, or paired with a glass of milk, a cup of tea, or a scoop of vanilla ice cream for an extra indulgence. For added visual appeal, decorate with sprinkles, drizzles of chocolate, or edible glitter to make them suitable for special celebrations.
Preparation Tips
- Flavor Selection: Experiment with different flavored gelatin packages. Combining complementary flavors like lemon and lime or blueberry and orange can create exciting color and flavor contrasts.
- Color Variations: Use multiple colors of Jello to craft rainbow or themed patterns, especially for holidays or birthdays.
- Uniformity: Use a cookie scoop to ensure all cookies are of similar size, which helps with even baking.
- Dough Handling: Keep dough refrigerated if it becomes too sticky or warm, making it easier to shape and flatten.
- Flattening Technique: Dusting the fork with flour prevents sticking and helps create a clean, defined pattern on each cookie.
Nutritional Information
| Nutrient | Per Serving (1 cookie) |
|---|---|
| Calories | 134.3 kcal |
| Fat Content | 6.2 g |
| Saturated Fat | 1.3 g |
| Cholesterol | 15.5 mg |
| Sodium | 201.2 mg |
| Carbohydrates | 17.5 g |
| Fiber | 0.3 g |
| Sugar | 7.3 g |
| Protein | 2.2 g |
Tips and Tricks
- Flavor Pairings: Combining two or more gelatin flavors in the same batch can produce unique color combinations and layered taste experiences. For example, mixing lemon and raspberry Jello can create a tart yet sweet cookie with beautiful yellow and red hues.
- Color Intensity: For more vivid colors, use gelatin powders that are highly pigmented, and avoid overbaking which can dull their vibrancy.
- Textural Variations: Incorporate chopped nuts, mini chocolate chips, or dried fruit into the dough for added texture and flavor complexity.
- Decorations: After cooling, dip the cookies in melted chocolate or drizzle with royal icing to elevate their visual appeal and flavor profile.
- Vegan Alternatives: Replace butter and margarine with coconut oil or vegan butter, and use plant-based egg replacers to make these cookies suitable for vegans.
Add-ons and Variations
- Frosting and Glaze: Top cookies with a simple vanilla glaze or cream cheese frosting for a richer treat.
- Layered Cookies: Create layered cookies by stacking and filling with fruit preserves or whipped cream.
- Mini Cookies: Use smaller scoops for bite-sized versions perfect for parties or sampling.
- Holiday Themes: Use holiday-specific gelatin flavors and colors to craft themed cookies (e.g., red and green for Christmas, pastel for Easter).
Recommended Side Dishes
- Fresh fruit salad to complement the sweetness of the cookies
- Vanilla or citrus-flavored beverages such as lemonade or iced tea
- Light yogurt or custard desserts for a creamy contrast
- Cheese platter with mild cheeses and crackers for savory balance
Improvements and Variations
- Gluten-Free Version: Substitute all-purpose flour with gluten-free flour blends for those with gluten sensitivities.
- Enhanced Chewiness: Add a small amount of cornstarch to the flour mixture to increase chewiness.
- Flavor Infusions: Incorporate citrus zest or extracts (almond, lemon, orange) into the dough for added layers of flavor.
- Texture Enhancements: Mix in oatmeal or crushed cookies for a heartier cookie.
Save and Store
Allow the cookies to cool completely before storing to prevent sogginess. Place them in an airtight container at room temperature for up to 5 days. For longer storage, layer cookies with parchment paper in a sealed container and keep them in the refrigerator for up to 2 weeks. You can also freeze the baked cookies for up to 3 months; wrap them tightly in plastic wrap and then in foil or a freezer bag. To enjoy frozen cookies, allow them to thaw at room temperature or warm slightly in the oven for a fresh-from-bakery experience.
FAQs
Can I use homemade gelatin instead of store-bought Jello?
Homemade gelatin can be used if prepared with proper strength and flavoring, but store-bought Jello provides consistent color, flavor, and convenience. If you wish to experiment, use unflavored gelatin and add flavorings and colorings separately, adjusting the ratios accordingly. Keep in mind that homemade gelatin may alter the texture and appearance of the cookies.
Are these cookies suitable for children?
Absolutely! They are kid-friendly, colorful, and fun to make. However, consider substituting ingredients like artificial flavorings with natural extracts if you prefer a more wholesome treat. Always supervise young children during baking and handling of hot or sharp tools.
Can I make these cookies ahead of time?
Yes, cookies can be baked a day in advance. Store them in an airtight container at room temperature, and they will retain their freshness. If you want to prepare dough ahead of time, refrigerate it for up to 24 hours before baking to enhance flavor development.
Can I freeze the dough?
Yes, after shaping the cookie balls, freeze them on a baking sheet until firm, then transfer to a sealed container or freezer bag. When ready to bake, bake directly from frozen, adding an extra minute or two to the baking time.
Conclusion
Crafting vibrant, flavorful Jello Cookies is a rewarding baking adventure that combines creativity, color, and delightful taste in every bite. Their playful appearance and versatile flavor profiles make them a perennial favorite for family gatherings, holidays, and parties. The process encourages experimentation with different gelatin flavors and decorations, offering endless possibilities for personalization. By following this comprehensive guide, you are equipped with the knowledge to produce cookies that are not only visually stunning but also irresistibly delicious. Remember, the key to perfect Jello Cookies lies in quality ingredients, precise measurements, and a dash of imagination. Happy baking from all of us at Love With Recipes—your trusted source for culinary inspiration and detailed recipes.
References
- “Gelatin Dessert Recipes,” Allrecipes.com, accessed October 2023.
- “Baking with Gelatin,” The Baking Bible, 2020.