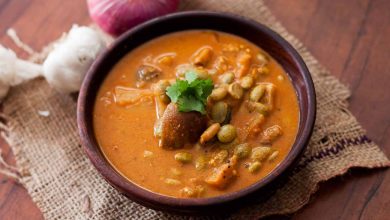
Assamese Poita Bhat With Aloo Pitika Recipe
Discover the delightful flavors of Assam with this exquisite Assamese Poita Bhat With Aloo Pitika recipe, which serves as a wholesome and nourishing breakfast option. This dish, which combines fermented rice with a creamy mashed potato side, encapsulates the culinary essence of the region while being gluten-free and incredibly easy to prepare. The use of simple ingredients, along with the traditional methods, results in a comforting meal that is both satisfying and full of flavor.
Ingredients
| Ingredient |
Quantity |
| Cooked rice (soaked overnight) |
1 cup |
| Curd (Dahi / Yogurt) or Buttermilk |
1/4 cup (or 1/2 cup buttermilk) |
| Onions (chopped) |
2 tablespoons |
| Green Chillies (finely chopped) |
2 |
| Salt |
To taste |
| Potatoes (Aloo) |
3 |
| Turmeric powder (Haldi) |
1/2 teaspoon |
| Mustard oil |
1 tablespoon |
| Additional Green Chillies |
2 |
| Additional Salt |
To taste |
Nutritional Information (Per Serving)
| Nutrient |
Amount |
| Calories |
350 |
| Protein |
10 g |
| Carbohydrates |
60 g |
| Dietary Fiber |
5 g |
| Sugars |
3 g |
| Fat |
12 g |
| Saturated Fat |
1 g |
| Sodium |
150 mg |
Note: Nutritional values are approximate and can vary based on specific ingredient brands and cooking methods.
Preparation Time
| Activity |
Time (minutes) |
| Preparation |
5 |
| Cooking |
20 |
| Total Time |
25 |
Servings
Cuisine
Course
| Course |
| North Indian Breakfast |
Diet
Instructions
To prepare the delightful Assamese Poita Bhat With Aloo Pitika, begin by soaking the leftover cooked rice in 2 cups of water overnight, allowing the grains to absorb the moisture and ferment slightly, which enhances their flavor and texture.
Step 1: Prepare the Poita Bhat
- The following morning, drain the soaked rice and transfer it to a mixing bowl.
- Add the beaten curd (or buttermilk) to the rice, mixing it thoroughly until all grains are coated.
- Incorporate salt to taste, along with the chopped onions and finely chopped green chilies. Mix these ingredients well to ensure a uniform distribution of flavors.
- Set this mixture aside, allowing the flavors to meld together while you prepare the aloo pitika.
Step 2: Prepare the Aloo Pitika
- In a separate pot, bring water to a boil and add the potatoes. Cook them until they are tender and easily pierced with a fork, which typically takes about 15-20 minutes.
- Once cooked, drain the potatoes and let them cool slightly. Then, peel the skin and mash them well in a mixing bowl. Aim for a smooth consistency, ensuring there are no lumpy pieces.
- Heat the mustard oil in a kadai (wok) over medium heat. Allow the oil to become hot and just begin to smoke; this step is crucial as it enhances the flavor of the oil.
- Carefully add the turmeric powder to the hot oil, whisking it quickly to prevent burning, and then pour this mixture over the mashed potatoes.
- Mix the turmeric-infused oil into the potatoes thoroughly, ensuring that the vibrant color is evenly distributed.
- Finally, add the remaining chopped green chilies and additional salt to taste. Mix everything well until the aloo pitika is creamy and flavorful.
Step 3: Serve
Your Assamese Poita Bhat With Aloo Pitika is now ready to be enjoyed. Serve the fermented rice alongside the flavorful aloo pitika, making for a satisfying and traditional Assamese breakfast that is sure to please anyone at your table.
This Assamese Poita Bhat With Aloo Pitika recipe is not just a meal; it’s a celebration of regional flavors and simplicity. Perfect for those mornings when you crave comfort food with a twist, this dish is easy to prepare and deliciously satisfying. Enjoy the taste of Assam right in your kitchen!

