Authentic Italian Pane Cafone: Rustic Country Bread Recipe
Pane Cafone (Traditional Italian Rustic Bread)
Category: Leavened Breads
Serves: 1
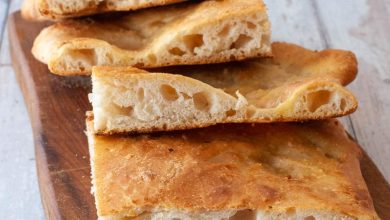
This traditional Italian bread, known as Pane Cafone, is a rustic delight made with a sourdough starter, multiple stages of kneading, and a long rise for an airy texture. Perfect for any meal, this recipe provides step-by-step instructions for crafting this delicious, hearty loaf.
Ingredients & Nutritional Information
| Ingredient | Quantity |
|---|---|
| Sourdough starter (lievito madre) | 70g |
| All-purpose flour (Farina 0) | 80g |
| Water | 50ml |
| All-purpose flour (Farina 0) | 90g |
| Water | 50ml |
| Semolina flour (rimacinata) | 400g |
| Water | 550ml |
| Fine salt | 25g |
| All-purpose flour (Farina 0) | 450g |
Instructions
Making Pane Cafone involves three separate stages of dough preparation, followed by multiple hours of rising, for a bread that’s both flavorful and perfectly textured. Let’s start step by step:
Step 1: Preparing the First Dough
- Begin with your sourdough starter. Take 70g of your active starter and place it in a bowl. If it’s not yet fully activated, make sure to refresh it beforehand.
- Dissolve the sourdough starter with your hands, and then slowly add the 80g of all-purpose flour to the mixture. As you mix, you’ll form a smooth, homogenous dough.
- Shape the dough into a small ball and cover it with plastic wrap. Let it rise for 3 hours in a slightly floured bowl, ideally in a warm environment, such as a turned-off oven with the light on.
- After 3 hours, the dough should have doubled in size and be ready for the next step.
Step 2: Preparing the Second Dough
- In a larger mixing bowl, take the first dough and dissolve it with 50ml of water. Mix until it is well combined.
- Gradually add in the additional 90g of all-purpose flour and knead the dough until you achieve a smooth, elastic texture.
- Cover the bowl with plastic wrap and place it in the oven with the light on for another 3 hours. This second dough should also double in size during this time.
- Once this dough has risen, it will be ready for the final stage.
Step 3: The Final Dough
- Take the second dough and transfer it into the bowl of a stand mixer fitted with the dough hook attachment. If you don’t have a stand mixer, you can continue kneading by hand.
- Slowly add half of the 550ml of water, alternating with the water in which the salt has been dissolved. Continue mixing until the dough begins to come together and pull away from the sides of the bowl.
- Once the ingredients have been incorporated, switch the stand mixer to a medium-low speed and knead the dough for 10 minutes, allowing it to become smooth, elastic, and firm enough to hold its shape.
- If kneading by hand, knead the dough for about 15 minutes until you feel the dough become smooth and slightly tacky but not sticky.
Step 4: Shaping the Loaf
- Once the dough has reached the desired consistency, transfer it onto a lightly floured surface.
- Begin the folding process to strengthen the dough. Stretch the dough into a rectangular shape, then fold the left side towards the center, followed by the right side, creating a simple envelope fold. Repeat this step once or twice for extra strength.
- After folding, gently elongate the dough a little more with your hands. At this point, you can decide to shape the dough into either one large loaf or two smaller loaves.
- If you are making two loaves, divide the dough evenly. For each piece, perform the following: lightly flatten it with your hands, then fold the sides inwards toward the center, roll it into a log shape, and seal the seam tightly.
- If you are making one large loaf, fold the two ends of the dough underneath itself and round the loaf into a round shape.
- Press the top seam of each loaf with your fingers to seal it and help shape the loaf.
Step 5: Proofing
- Line a baking sheet with two clean kitchen towels, placing them side by side. Lightly flour the towels with semolina flour to prevent sticking.
- Place your shaped loaves onto the towels. Dust them generously with more semolina flour and fold the towels over the dough to cover it.
- Cover the entire baking sheet with plastic wrap or place it into a large food-safe plastic bag. Allow the dough to rise for 8-10 hours, or until the loaves have puffed up significantly.
Step 6: Baking the Pane Cafone
- Preheat your oven to 240°C (475°F) for a conventional oven, or 220°C (430°F) for a convection oven. If you have a baking stone, place it in the oven while it heats up to ensure an even and consistent bake.
- Carefully remove the loaves from the towels and transfer them onto a piece of parchment paper.
- If you wish, you can skip scoring the dough or opt to make a few slashes on the top to encourage an appealing oven spring.
- Slide the parchment paper with the loaves onto the hot baking stone or directly onto a heated baking sheet in the oven.
- To create steam for a crisp crust, you can either spray water into the oven with a sprayer 3-4 times during the first 5 minutes of baking or place a small pan with ice cubes in the bottom of the oven.
- Bake the bread for 20 minutes at 240°C (475°F) or for 30 minutes in a convection oven.
- After 20 minutes, reduce the temperature to 200°C (390°F) or 180°C (350°F) for convection ovens and bake for an additional 15-20 minutes, until the bread is golden and sounds hollow when tapped on the bottom.
- Remove the loaves from the oven and let them cool completely on a wire rack.
Tips & Variations
- Texture Adjustment: If you want an even airier loaf, you can experiment with increasing the hydration level slightly, by adding a bit more water in the final dough stage.
- Flour Substitutes: If you can’t find semolina, you can substitute it with more all-purpose flour or whole wheat flour for a different texture and flavor.
- Storage: Pane Cafone is best eaten fresh, but it can be stored in a breadbox or wrapped in a clean kitchen towel for up to 3 days. For longer storage, slice and freeze for up to a month.
This recipe is perfect for anyone who enjoys hands-on baking and loves the rich, rustic flavors of Italian bread. It’s a bit of a labor of love but totally worth the effort. Enjoy it as the centerpiece of a hearty meal or with a simple drizzle of olive oil and a pinch of sea salt!


