Dairy-Free Lemon Vanilla Cake
Introduction
In the world of baking, finding recipes that cater to specific dietary needs without compromising on flavor or texture can be a delightful challenge. This Milk-Free Cake exemplifies that balance, offering a light, airy, and flavorful dessert that is entirely free from dairy ingredients. Perfect for those with lactose intolerance, dairy allergies, vegans, or anyone seeking a wholesome alternative to traditional cakes, this recipe emphasizes simplicity and accessibility, utilizing common pantry staples to create a luxurious treat. The subtle brightness of lemon zest combined with the fragrant notes of vanilla elevates this cake beyond ordinary desserts, making it a versatile choice for everyday indulgence or special occasions. As a proud contributor to the Love With Recipes platform, I aim to deliver a comprehensive, detailed guide that ensures perfect results with every bake, regardless of your experience level.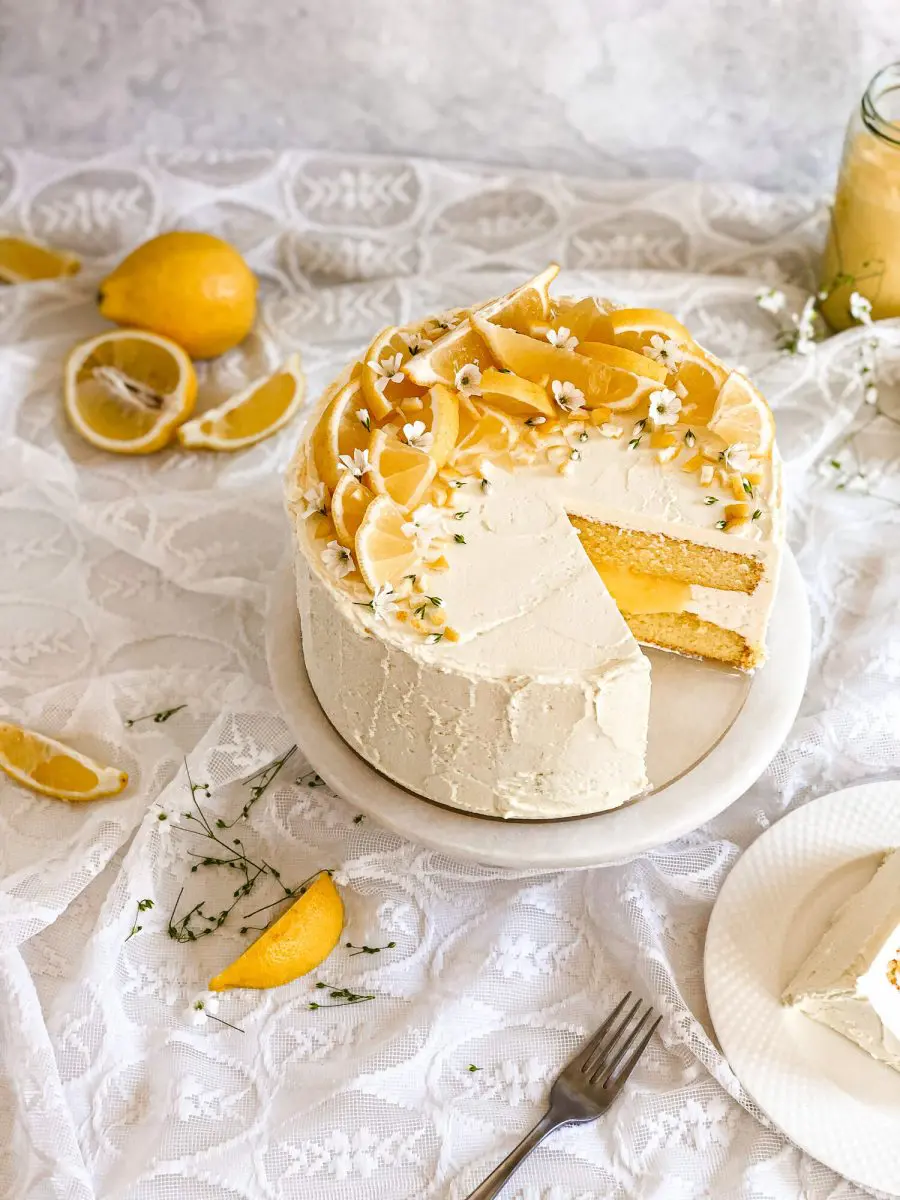
Time
- Total Preparation Time: 15 minutes
- Total Baking Time: 30-35 minutes
- Cooling Time: 20 minutes
- Estimated Total Time: approximately 1 hour and 10 minutes
Needed Equipment
Essential Baking Tools
- Standard 22 cm (8.5-inch) round cake pan – preferably with a removable bottom for easy unmolding
- Mixing bowls – at least two, one for wet ingredients and one for dry ingredients
- Electric hand mixer or stand mixer with beaters – for whipping eggs and sugar to achieve lightness and volume
- Measuring cups and spoons – for accuracy in ingredient proportions
- Digital kitchen scale – optional but recommended for precise measurement of ingredients like flour and sugar
- Sifter or fine mesh sieve – essential for aerating flour and evenly incorporating baking powder
- Rubber spatula or silicone scraper – for folding ingredients gently and scraping batter from bowls
- Cooling rack – to allow the cake to cool evenly and prevent moisture buildup
- Parchment paper or non-stick baking spray – for lining or greasing the pan
- Toothpick or cake tester – for checking doneness
- Kitchen thermometer (optional) – to verify oven temperature for precise baking
Tags
- Dairy-Free
- Vegan Option
- Egg-Free (with substitutions)
- Simple Dessert
- Healthy Baking
- Vegetarian
- Snacks & Sweets
- Party Treat
Serving Size
This recipe yields approximately 8 generous slices, making it ideal for family gatherings, small parties, or a cozy dessert for two. Each slice provides a satisfying portion while keeping the calorie and sugar content moderate, especially considering the absence of dairy and added fats beyond sunflower oil.
Difficulty Level
Intermediate. While the steps involved are straightforward, achieving the perfect airy texture requires careful attention to mixing techniques, especially when whipping eggs and sugar. Managing the folding process to incorporate dry ingredients without deflating the batter also demands some finesse. However, with patience and precision, even novice bakers can master this recipe and produce professional-quality results.
Allergen Information
| Allergen | Present in Recipe |
|---|---|
| Eggs | Yes |
| Wheat (Gluten) | Yes |
| Sunflower Oil | Yes |
| nut oils or nuts | No |
Note: For vegan adaptation, eggs can be replaced with flaxseed or chia seed gel (see Add-ons section).
Dietary Preference
- Dairy-Free
- Vegan (with substitutions)
- Egg-Free (with substitutions)
- Refined Sugar-Free (optional, see Tips and Tricks)
Course
Sweet Dessert / Snack
Cuisine
Global / International (adaptable to various flavor profiles)
Ingredients
Ingredient Table
Lemon zest½ lemonUse a microplane for fine zest
| Ingredient | Quantity | Notes |
|---|---|---|
| All-purpose flour | 200g | Ensure it’s sifted for lightness |
| Eggs | 3 large | At room temperature for better emulsification |
| Sugar | 180g | Granulated; for sweetness and aeration |
| Sunflower oil | 120g | Neutral-flavored oil for moisture |
| Water | 100g | lukewarm is preferable |
| Vanilla bean | 1 bean | Split and scrape seeds for maximum flavor |
| Baking powder | 16g | Ensure it’s fresh for proper rising |
| Powdered sugar | As needed | For dusting after baking |
Instructions
Step 1: Preparing Your Workspace and Ingredients
Begin by setting your oven to 180°C (350°F), a temperature optimal for baking a tender, evenly risen cake. While the oven preheats, prepare your cake pan by greasing it thoroughly with a neutral oil or non-stick spray. To prevent the cake from sticking and to facilitate easy removal, dust the greased pan with a light layer of all-purpose flour, tapping out any excess. Alternatively, line the bottom with parchment paper for an even cleaner release.
Step 2: Whipping the Eggs and Sugar
In a large, clean mixing bowl, introduce the three eggs and the 180 grams of sugar. Using an electric hand mixer or a stand mixer fitted with beaters, begin to whip on medium speed. The goal is to incorporate air into the mixture, creating a light, voluminous batter. This process typically takes about 2 to 3 minutes but can vary depending on your equipment. The mixture should turn pale, increase in volume, and develop a silky texture. Proper whipping is crucial for achieving the cake’s signature fluffiness.
Step 3: Incorporating Fragrant Additions
Once the eggs and sugar are whipped to a creamy, airy consistency, add the lemon zest from half a lemon. Use a microplane to grate the zest finely, ensuring that the oils are released for maximum flavor. Scrape the seeds from the vanilla bean pod using the back of a knife or a small spoon, then add these to the bowl. Mix briefly just to distribute the zest and vanilla seeds evenly throughout the mixture, ensuring a fragrant, flavorful cake.
Step 4: Sifting and Gently Folding in Dry Ingredients
In a separate bowl, sift together the 200 grams of all-purpose flour and 16 grams of baking powder. Sifting not only aerates the flour but also ensures the baking powder is evenly distributed, which is essential for uniform rising. Gradually add the sifted dry ingredients to the wet mixture, using a spatula or spoon to fold gently. Avoid vigorous stirring, which can deflate the batter. Instead, fold carefully in a figure-eight motion, just until the flour disappears into the mixture. This technique preserves the airiness achieved during whipping, crucial for a fluffy cake.
Step 5: Incorporating Liquids – Sunflower Oil and Water
Slowly pour in the 120 grams of sunflower oil while gently folding the batter. The oil contributes to the moist, tender crumb of the cake without compromising its lightness. Then, add 100 grams of water, which helps loosen the batter, making it easier to fold and ensuring a smooth, homogeneous consistency. Continue folding gently until all ingredients are just combined. Be cautious not to overmix at this stage, as excessive mixing can deflate the batter and result in a denser cake.
Step 6: Pouring Batter into the Pan and Baking
Transfer the batter into your prepared cake pan, spreading it out evenly with a spatula. Place the pan in the preheated oven and bake for approximately 30-35 minutes. During baking, the cake will rise and turn golden. To check for doneness, insert a toothpick or cake tester into the center; if it comes out clean with no moist batter attached, your cake is ready. If not, bake for an additional 5-minute interval, checking again to avoid overbaking.
Step 7: Cooling and Final Touches
Once baked, remove the cake from the oven and allow it to cool in the pan for about 10 minutes. This resting period helps the cake set and prevents it from breaking apart during unmolding. Gently run a knife around the edges, then invert the cake onto a wire rack. Let it cool completely before handling further. To add a touch of elegance and sweetness, dust the cooled cake with powdered sugar using a fine sieve. For a more indulgent presentation, consider serving with fresh berries, coconut whipped cream, or a drizzle of dairy-free chocolate sauce.
Preparation Tips
- Use room temperature eggs: This helps achieve maximum volume during whipping, as eggs whip better when at room temperature.
- Precise measurement: Use a digital scale for flour and sugar to ensure accuracy, which is key for consistent results.
- Do not overmix: Gentle folding preserves the air in the batter, essential for a fluffy texture.
- Oven calibration: Ensure your oven is accurately heated; a faulty thermostat can affect baking times and cake quality.
- Avoid opening the oven door early: Premature opening can cause the cake to deflate. Wait until the minimum baking time has elapsed before testing.
Nutritional Information
| Nutrient | Per Serving (Approximate) |
|---|---|
| Calories | 280 kcal |
| Fat | 16 g |
| Carbohydrates | 30 g |
| Protein | 4 g |
| Fiber | 1 g |
| Sugar | 22 g |
Tips and Tricks
- Flavor variations: Incorporate citrus zest (orange or lime) or add a teaspoon of almond extract for a different aromatic profile.
- Enhancing moisture: Substitute part of the water with dairy-free coconut milk or almond milk for richer flavor and texture.
- Vegan adaptation: Replace eggs with a flaxseed or chia seed gel (mix 1 tablespoon of ground flax or chia seeds with 3 tablespoons of water, let sit for 5 minutes until gel-like).
- Reducing sugar: For a less sweet version, cut down sugar to 150g, but note that sweetness impacts the cake’s rise and crumb.
- Gluten-free version: Use a gluten-free flour blend in place of all-purpose flour, ensuring it contains xanthan gum or add 1 teaspoon to maintain structure.
Add-ons
- Fruits: Fresh berries, sliced peaches, or cherries can be layered or served on the side.
- Glazes: A simple lemon glaze made from powdered sugar and lemon juice enhances flavor.
- Frosting: Dairy-free whipped coconut cream or vegan cream cheese frosting can add richness.
- Chocolate drizzle: Melt dairy-free dark chocolate and drizzle over cooled cake for an indulgent touch.
Side Dishes
- Fresh fruit salad
- Vegan vanilla ice cream
- Herbal tea or coffee
- Sweetened coconut or almond yogurt
- Light fruit compotes or jams
Improvements and Variations
- Adding nuts: Incorporate chopped walnuts or almonds into the batter for added crunch and nutrition.
- Layered cake: Slice the cooled cake horizontally and fill with fruit preserves or vegan cream for a layered dessert.
- Spice Infusion: Add ground cinnamon or nutmeg to introduce warm, aromatic notes.
- Alternative flours: Experiment with spelt or oat flour for different textures and flavors.
Save and Store
Allow the cake to cool completely before storing. Wrap it tightly in plastic wrap or place it in an airtight container. It can be stored at room temperature for up to 2 days in a cool, dry place or refrigerated for up to 5 days. For longer storage, freeze slices individually wrapped in parchment paper and stored in a freezer-safe bag. Thaw at room temperature for best results before serving.
FAQ
Can I make this cake vegan?
Yes, simply replace eggs with a flaxseed or chia seed gel. Use plant-based vanilla extract if vanilla bean isn’t available. All other ingredients are vegan-friendly.
Can I substitute gluten-free flour?
Absolutely. Use a high-quality gluten-free flour blend designed for baking. Ensure it contains xanthan gum or add 1 teaspoon to help mimic gluten’s elasticity and structure.
Is this cake suitable for diabetics?
This cake contains sugar, but you can reduce the amount or substitute with natural sweeteners like erythritol or stevia. Keep in mind that altering sweetness may affect texture.
What are some creative flavor options?
Consider adding spices like cinnamon or cardamom, infusing with herbs like basil or rosemary, or mixing in grated carrot or zucchini for added moistness and nutrition.
Conclusion
This Milk-Free Cake stands out as a versatile, health-conscious dessert that does not sacrifice flavor or fluffiness. Its straightforward preparation process makes it accessible to bakers of all levels, while the combination of lemon zest and vanilla creates a refreshing aroma and taste. Whether served plain or dressed up with toppings, this cake is guaranteed to impress and satisfy. The adaptability of the recipe allows for numerous modifications, ensuring it can suit various dietary needs and flavor preferences. For more innovative recipes, tips, and culinary inspiration, visit Love With Recipes, where we celebrate inclusive, flavorful baking for everyone.
References
- “Vegan Baking: From Cakes to Cookies,” by Isa Chandra Moskowitz, 2019.
- “The Art of Gluten-Free Baking,” by Alice Medrich, 2017.