Colorful Pasticcini di Torta: Mini Italian Sponge Cakes with Custard and Hazelnut Crust
Pasticcini di Torta: A Delightful Sweet Treat for Every Occasion
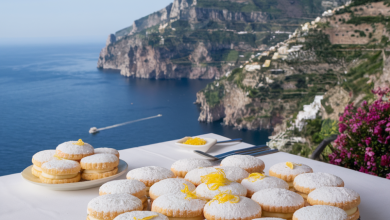
If you’re in the mood for a delicate, colorful dessert that combines the fluffy goodness of sponge cake with the rich creaminess of custard and a fun, decorative twist, look no further than the Pasticcini di Torta. These mini cakes, often referred to as “little cake pastries” in English, are the perfect indulgence for any occasion, from festive celebrations to simple afternoon teas. They feature a light sponge base, a luscious custard filling, and a vibrant icing that will brighten any dessert table.
This recipe will guide you through making 25 delicious individual pastries, each topped with edible decorations like colorful icing, crushed hazelnuts, and floral accents. Follow along for this exquisite combination of soft, sweet layers and creative design.
Ingredients
Here’s what you’ll need to make these stunning pastries:
| Ingredient | Quantity |
|---|---|
| Eggs | 2 |
| Granulated Sugar | 180g |
| Vanilla Bean | 1 |
| Seed Oil (vegetable oil) | 90g |
| Water | 95g |
| All-Purpose Flour | 150g |
| Potato Starch (Fecola di Patate) | 40g |
| Baking Powder | 6g |
| Table Salt | To taste |
| Egg Yolks | 6 |
| Whole Milk | 400g |
| Fresh Cream (Heavy Cream) | 100g |
| Granulated Sugar (for cream) | 140g |
| Cornstarch | 50g |
| Vanilla Bean (for cream) | 1 |
| Gelatin Sheets | 4g |
| Powdered Sugar (Icing Sugar) | 1kg |
| Water (for icing) | 4g |
| Food Coloring (Optional) | As desired |
| Crushed Hazelnuts | As desired |
| Edible Decorations | As desired |
| Edible Rice Paper Flowers | 25 |
Instructions
1. Prepare the Sponge Cake Base:
To create the perfect sponge base for your pasticcini, start by preparing the batter. In a large bowl, beat the eggs with sugar and water using electric beaters until the mixture becomes light and fluffy. Slice open the vanilla bean and scrape out the seeds. Add the vanilla seeds to the egg mixture and continue whisking until well combined.
Next, sift the flour, potato starch, and baking powder together in a separate bowl. Gradually add these dry ingredients to the wet mixture, one spoonful at a time, ensuring that everything is incorporated smoothly.
Pour the batter into individual molds or a shallow baking pan and bake at 180°C (350°F) for about 25-30 minutes or until golden brown and a toothpick inserted into the center comes out clean. Let the sponge cakes cool completely before proceeding with the next steps.
2. Prepare the Custard Cream:
Now, let’s make the rich custard filling. Begin by slicing the vanilla bean open once again. In a saucepan, heat the milk and cream until just below boiling. Add the vanilla bean to infuse the flavors.
Meanwhile, in a bowl, whisk together the egg yolks, granulated sugar, and cornstarch until smooth and pale. Once the milk and cream mixture is heated, remove the vanilla bean pod and slowly pour the hot liquid into the egg mixture while whisking constantly to temper the eggs.
Return the mixture to the saucepan and cook over low heat, stirring continuously until it thickens into a creamy custard. Once thickened, remove from heat and add the softened gelatin (previously soaked in cold water for 10 minutes). Stir until the gelatin is fully dissolved and incorporated.
Transfer the custard to a shallow dish and cover with plastic wrap to prevent a skin from forming. Let it cool completely in the fridge.
3. Assemble the Pasticcini:
Once the sponge cakes have cooled, carefully slice them in half horizontally to create two layers. Take the bottom half of each pastry and fill it generously with the chilled custard. Place the top half of the sponge on top, pressing down lightly to create a sandwich-like structure.
4. Prepare the Icing:
For the colorful, glossy finish, sift the powdered sugar into a bowl. Gradually add the water and mix until smooth. Divide the icing into four bowls. In each bowl, add a few drops of food coloring to create different shades: pink (with red colorant), yellow, green (by mixing yellow and blue), and blue. Stir each bowl until the color is evenly distributed.
5. Coat the Pasticcini:
Place each assembled pastry on a wire rack with a plate underneath to catch any excess icing. Pour the colored icing over each pasticcino, covering it completely with a smooth, even layer. Allow the icing to set for a few minutes.
6. Add Hazelnut Crust and Decorations:
Once the icing has set but is still slightly tacky, take the edible glue and apply a thin line around the edge of each pastry. Roll the sides in crushed hazelnuts so that the nuts stick to the edges, creating a crunchy, flavorful border.
After this, it’s time to decorate! Use food-safe pens or edible markers to add a decorative design to the top of each pasticcino. You can also place soft edible pearls or other small sugar decorations on top for a touch of elegance.
Finally, place a delicate edible rice paper flower in the center of each pastry to complete the look.
Serving and Enjoying
These Pasticcini di Torta are best enjoyed fresh but can be stored in an airtight container in the refrigerator for up to 2-3 days. The sponge remains soft, the custard filling stays creamy, and the colorful icing adds a touch of sweetness to each bite.
Perfect for birthdays, tea parties, or any festive occasion, these pastries will impress your guests with their beauty and deliciousness. So, gather your ingredients, roll up your sleeves, and treat yourself and others to a delightful homemade Italian dessert!
Nutritional Information (Approximate per serving):
| Nutrient | Amount per serving |
|---|---|
| Calories | 200-250 kcal |
| Fat | 10g |
| Saturated Fat | 1.5g |
| Carbohydrates | 30g |
| Sugars | 22g |
| Protein | 3g |
| Fiber | 1g |
| Sodium | 40mg |
Tips for Success
- Make Ahead: The custard filling can be made a day in advance to save time on assembly day.
- Customization: Feel free to experiment with different flavors for the custard or change the colors of the icing to match your theme.
- Decoration Ideas: Get creative with your designs! You can add sprinkles, edible glitter, or even small chocolate decorations for a personal touch.
These Pasticcini di Torta will quickly become a favorite in your dessert repertoire, bringing together the best of flavors and presentation. Enjoy the process, and even more, enjoy the delicious results!

