
Introduction
Pan Yan Pickle is a cherished condiment originating from the United Kingdom’s rich culinary history. Revered for its vibrant, tangy, and subtly spicy flavor profile, this pickle has cemented its place in British households and pub menus alike. Typically composed of an assortment of vegetables such as cauliflower florets, onions, and gherkins, all suspended in a robust vinegar-based brine infused with spices, Pan Yan Pickle offers a tantalizing burst of flavors that elevate any meal. Whether enjoyed alongside cold cuts, cheeses, sandwiches, or as a tangy accompaniment to hearty British fare, making your own Pan Yan Pickle at home allows you to customize flavors, control ingredients, and savor a truly authentic product. This extensive guide, published on Love With Recipes, will walk you through every detail of creating this classic British pickle, from ingredient selection to storage tips, nutritional insights, and expert advice to perfect your craft.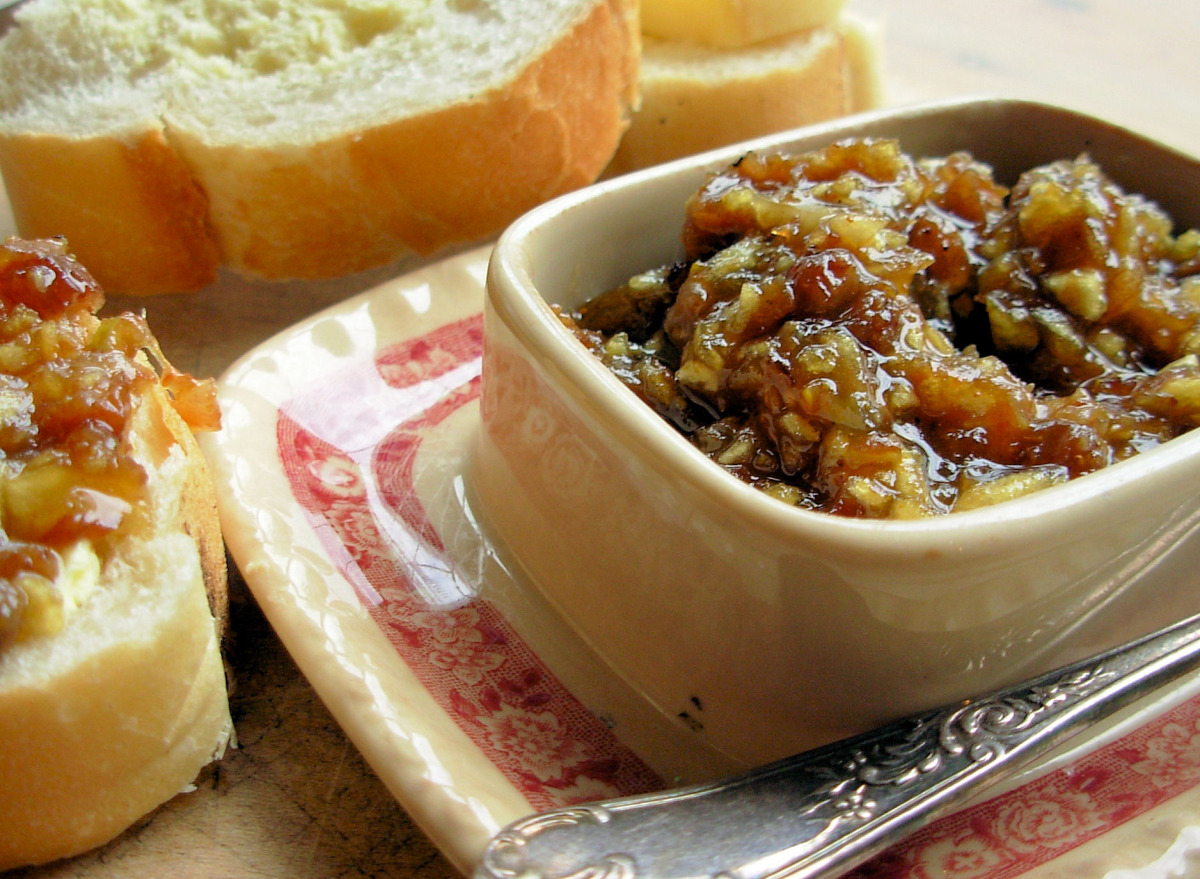
Time
The entire process of preparing Pan Yan Pickle involves multiple stages, with an approximate total time of 4 to 6 weeks for optimal flavor development. The initial active preparation and cooking takes roughly 2 hours, including chopping, cooking, and jar sterilization. Following this, the pickles require a maturation period of at least 3 to 4 weeks, during which the flavors meld and intensify. Patience during this aging process is essential to achieve the best taste and texture. If you’re short on time, you can enjoy a fresh version after a week of refrigeration, but for the full authentic flavor, allow the pickles to mature in a cool, dark place for the recommended period.
Needed Equipment
- Sharp Chef’s Knife: For precise chopping of vegetables.
- Cutting Board: A sturdy surface to prepare your vegetables safely.
- Large Heavy-bottomed Pot: For cooking the brine and vegetables.
- Measuring Cups and Spoons: To accurately measure ingredients like vinegar, sugar, and spices.
- Wooden Spoon or Silicone Spatula: For stirring the mixture.
- Sterilized Glass Jars with Lids: For storing the finished pickle. Mason jars are highly recommended.
- Large Funnel: For transferring hot pickle mixture into jars without spillage.
- Kitchen Tongs or Jar Lifter: For handling hot jars safely.
- Boiling Water Bath Canner or Large Pot: To sterilize jars and seal the pickles properly.
- Cooling Rack or Towel: For cooling jars after sterilization.
- Labels and Marker: To date and identify your jars.
- Storage Space: A cool, dark, and dry place like a pantry or cellar for maturation.
Tags
British Cuisine, Pickles, Preserves, Condiments, Fermentation, Homemade, Traditional Recipes, Vegan, Vegetarian, Preserving, Foodie, Heritage Recipes, Easy to Make
Serving Size
One standard jar (approximately 500 grams or 1 pound) yields about 12 to 15 servings, depending on portion size. Each serving can be approximately 30 grams, which makes it an ideal accompaniment in small quantities to enhance various dishes.
Difficulty Level
This recipe is classified as moderate difficulty. It requires some basic culinary skills such as vegetable chopping, boiling, sterilizing jars, and understanding flavor balancing. If you are comfortable with preserving techniques and following safety guidelines, you will find this process rewarding and manageable.
Allergen Information
Pan Yan Pickle typically does not contain common allergens. However, always verify ingredients used, particularly in spice mixes (mustard seeds, turmeric, celery seeds). Cross-contamination can occur during processing if equipment isn’t properly cleaned. If you have specific allergies, customize the recipe accordingly and consult ingredient labels.
Dietary Preference
This pickle recipe is suitable for vegetarians and vegans, as it primarily consists of vegetables, vinegar, sugar, and spices. It contains no animal-derived ingredients. For gluten-free diets, ensure all spices and vinegars used are gluten-free.
Course
Condiment, Side Dish, Appetizer
Cuisine
British
Ingredients
Ingredient Quantities and Details
| Ingredient | Quantity | Description / Notes |
|---|---|---|
| Cauliflower florets | 300 grams (about 2 cups) | Fresh, firm cauliflower, cut into bite-sized pieces |
| Onions | 2 medium | Finely diced or sliced |
| Gherkins | 150 grams (about 1 cup) | Small pickled cucumbers, chopped |
| Carrots (optional) | 1 medium | Julienned or diced for added sweetness and color |
| Bell peppers (optional) | 1 small | Diced, enhances flavor and color |
| Brine | ||
| Vinegar (malt or white wine vinegar) | 2 cups (480 ml) | Provides tanginess and preservative qualities |
| Sugar | ½ cup (100 grams) | Adjust to taste for sweetness balance |
| Mustard seeds | 1 tablespoon | For flavor and spice |
| Turmeric powder | 1 teaspoon | Color and subtle earthy flavor |
| Celery seeds | 1 teaspoon | Additional spice note |
| Ground black pepper | ½ teaspoon | For mild heat and flavor depth |
| Salt | 1 teaspoon | Enhances preservation and flavor |
Instructions
Step 1: Preparation of Vegetables
Start by thoroughly washing all fresh vegetables. Use cold water to rinse the cauliflower, onions, gherkins, and any optional vegetables like carrots and bell peppers. Pat dry with clean kitchen towels or paper towels. Carefully chop the cauliflower into small, uniform florets—about 1 to 1.5 inches in size—to ensure even cooking and good texture. Finely dice the onions, aiming for small, consistent pieces that will absorb the flavors well. Chop the gherkins into small cubes or slices, depending on preference, but keeping them small helps in achieving a balanced texture and flavor distribution. If adding carrots and peppers, julienne or finely dice them to match the size of other ingredients. These preparations ensure that the vegetables will cook evenly and blend harmoniously in the final pickle.
Step 2: Preparing the Brine
In a large, heavy-bottomed pot, combine the vinegar, sugar, spices, and salt. Use a measuring cup for accuracy. Place the pot over medium heat, stirring continuously with a wooden spoon or silicone spatula to dissolve the sugar and salt completely. Bring the mixture to a gentle boil. This process allows the spices to release their flavors into the liquid, creating the aromatic and flavorful brine essential for authentic Pan Yan Pickle. As the mixture heats, you will notice the spices infusing the vinegar, turning the liquid a slightly golden hue. Once boiling, reduce heat to low and keep the brine simmering gently while you prepare the vegetables.
Step 3: Cooking the Vegetables
Add the prepared cauliflower, onions, gherkins, and optional vegetables to the simmering brine. Stir gently to ensure all pieces are evenly coated. Increase the heat slightly and bring the mixture back to a gentle boil. Allow the vegetables to cook for approximately 10-15 minutes, stirring occasionally. The goal is to soften the vegetables slightly while maintaining their crunch and vibrant texture. Overcooking can lead to mushy vegetables, which is undesirable. Use a slotted spoon or tongs to test the tenderness of the cauliflower and carrots. Once the vegetables reach an ideal balance of softness and firmness, remove the pot from heat and let it cool slightly. This step is crucial as it allows the flavors to meld and prevents over-softening during storage.
Step 4: Jar Sterilization and Filling
While the vegetable mixture cools, sterilize your glass jars and lids. The best method is to wash them thoroughly with hot, soapy water, rinse well, then place them in a boiling water bath for at least 10 minutes. Use tongs or jar lifters to handle hot jars, and place them on a clean towel or cooling rack to dry completely. Sterilization prevents microbial contamination and prolongs shelf life. Once jars are dry, use a funnel to carefully ladle the hot pickle mixture into the jars, leaving about half an inch of headspace at the top to allow for expansion during sealing. Wipe the rims with a clean cloth to remove any residue, then seal tightly with sterilized lids. Label the jars with the date and contents for future reference.
Step 5: Sealing and Maturation
For optimal preservation, process the filled jars in a boiling water bath for 10-15 minutes. This step ensures a proper vacuum seal and extends shelf life. Carefully remove the jars with tongs, place them on a towel, and allow them to cool naturally at room temperature. As they cool, listen for the “pop” sound of the lids sealing. Once cooled, check that the lids are concave and tightly sealed. Store the jars in a cool, dark, and dry place such as a pantry or cellar. Allow the pickle to mature for at least 3 to 4 weeks before consuming. During this period, the flavors will deepen, and the vegetables will absorb the tangy, spicy notes, resulting in a flavorful British condiment ready to elevate your meals.
Preparation Tips
- Vegetable Quality: Use fresh, firm vegetables for the best texture and flavor. Avoid wilted or bruised produce.
- Spice Adjustments: Feel free to modify spice quantities based on your taste. For more heat, add chili flakes or fresh chilies.
- Vinegar Choice: Malt vinegar is traditional, but white wine vinegar offers a milder tang. Ensure the vinegar has at least 5% acidity for proper preservation.
- Sweetness Balance: Adjust sugar levels according to your preference for tangy or sweeter pickle.
- Sterilization: Proper sterilization of jars is critical to prevent spoilage and ensure safety.
- Labeling: Always label your jars with the date of preparation to monitor freshness.
Nutritional Information
| Nutrient | Per 30g Serving | Remarks |
|---|---|---|
| Calories | 10-15 kcal | Dependent on sugar content and vegetables used |
| Total Fat | 0 g | Virtually fat-free |
| Sodium | 150-200 mg | Moderate; adjust with salt and vinegar |
| Total Carbohydrates | 2-4 g | Includes natural sugars from vegetables and added sugar |
| Sugars | 1-2 g | Adjustable based on sugar added |
| Dietary Fiber | 0.5-1 g | From vegetables like cauliflower and carrots |
| Protein | 0.2 g | Minimal; not a protein source |
| Vitamins & Minerals | Varies | Rich in Vitamin C, Vitamin K, and antioxidants from vegetables |
Tips and Tricks
- Flavor Infusion: Let the pickles mature for at least 3 weeks; the longer they sit, the more complex the flavor.
- Spice Variations: Experiment with adding cloves, cinnamon, or bay leaves for a more aromatic pickle.
- Texture Preference: Keep vegetables slightly undercooked if you prefer crunchier pickles; extend cooking time for softer texture.
- Color Enhancement: Use vibrant vegetables and turmeric for an appealing visual presentation.
- Storage: Keep jars tightly sealed and stored away from direct sunlight to preserve color and flavor.
Add-ons
- Chili flakes or fresh chilies for spiciness.
- Fresh herbs like dill or coriander seeds for additional aroma.
- Additional sweeteners like honey or maple syrup for nuanced sweetness.
- Crushed garlic or ginger for a more savory, pungent flavor.
Side Dishes
- Cold cuts and cured meats such as ham, salami, or roast beef.
- Cheese platters featuring British cheeses like Cheddar, Red Leicester, or Stilton.
- Sandwiches and wraps with hearty fillings.
- Traditional British fish and chips, adding a dollop of Pan Yan Pickle on the side.
- Charcuterie boards for entertaining guests.
Improvements
- Incorporate different vegetables like radishes or turnips for variety.
- Use flavored vinegars such as apple cider or balsamic for unique twists.
- Experiment with fermenting for a more traditional, probiotic-rich version.
- Add a splash of whiskey or malt for a distinctive, aromatic complexity.
Save and Store
Once sealed and cooled, store your jars in a cool, dark, and dry environment like a pantry or cellar. Proper storage extends the shelf life up to 6 months or more, provided the jars remain sealed and free from spoilage signs. After opening, keep the pickle refrigerated and consume within 2-3 weeks for optimal freshness. Always check for any signs of mold, off-odor, or discoloration before consuming stored pickles.
FAQ
Can I substitute malt vinegar with white vinegar?
Yes, but malt vinegar provides the traditional flavor characteristic of British pickles. If using white vinegar, adjust the spice and sugar levels to balance the acidity and flavor profile.
How long does homemade Pan Yan Pickle last?
When properly sealed and stored, it can last 4 to 6 months. Always check for signs of spoilage before consumption.
Can I customize the vegetables in the recipe?
Absolutely. Feel free to add or substitute vegetables like radishes, turnips, or small carrots to suit your taste preferences.
Is this recipe suitable for vegans?
Yes, it contains only vegetables, vinegar, sugar, and spices, making it fully vegan-friendly.
How do I know if the jars are properly sealed?
Properly sealed jars will have a concave lid that does not flex when pressed. You should hear a popping sound during cooling, indicating vacuum sealing. Check the lid’s tightness regularly.
Conclusion
Crafting your own Pan Yan Pickle is a rewarding culinary project that combines traditional British flavors with a personal touch. From selecting fresh, quality vegetables to carefully balancing spices and ensuring proper sterilization, every step contributes to a superior homemade condiment. The patience invested during the maturation phase pays off with a complex, tangy, and savory pickle that enhances countless dishes. Whether you’re an experienced preserver or a culinary novice eager to explore British heritage, this recipe provides a comprehensive pathway to creating a delightful, authentic Pan Yan Pickle. Remember, preserving is both an art and a science—enjoy the process, experiment with flavors, and cherish the delicious results. For more recipes and food preservation tips, visit Love With Recipes, your trusted platform for culinary inspiration and detailed guides.
References
- Official British Food Heritage Resources — for historical context and traditional ingredients.
- Food Preservation Techniques by the National Center for Home Food Preservation — for sterilization and safety guidelines.