Introduction
Welcome to the ultimate guide to crafting the quintessential American dessert—cherry pie—that embodies tradition, flavor, and culinary craftsmanship. This comprehensive recipe, brought to you by Love With Recipes, meticulously details every step to ensure a perfect, flaky, buttery crust complemented by a luscious, fruit-forward filling. Inspired by America’s Test Kitchen (ATK), renowned for their scientific approach to perfecting recipes, this cherry pie is designed for both novice bakers and seasoned pastry enthusiasts eager to elevate their baking game. Whether you’re preparing for a summer family gathering, a patriotic celebration, or simply craving a slice of nostalgia, this recipe promises to deliver a visually stunning and delectable dessert that will impress everyone at your table. Let’s embark on a detailed journey through the art of cherry pie making—covering everything from ingredient selection to advanced baking tips—so that your homemade pie becomes a cherished family tradition or a show-stopping centerpiece for any occasion.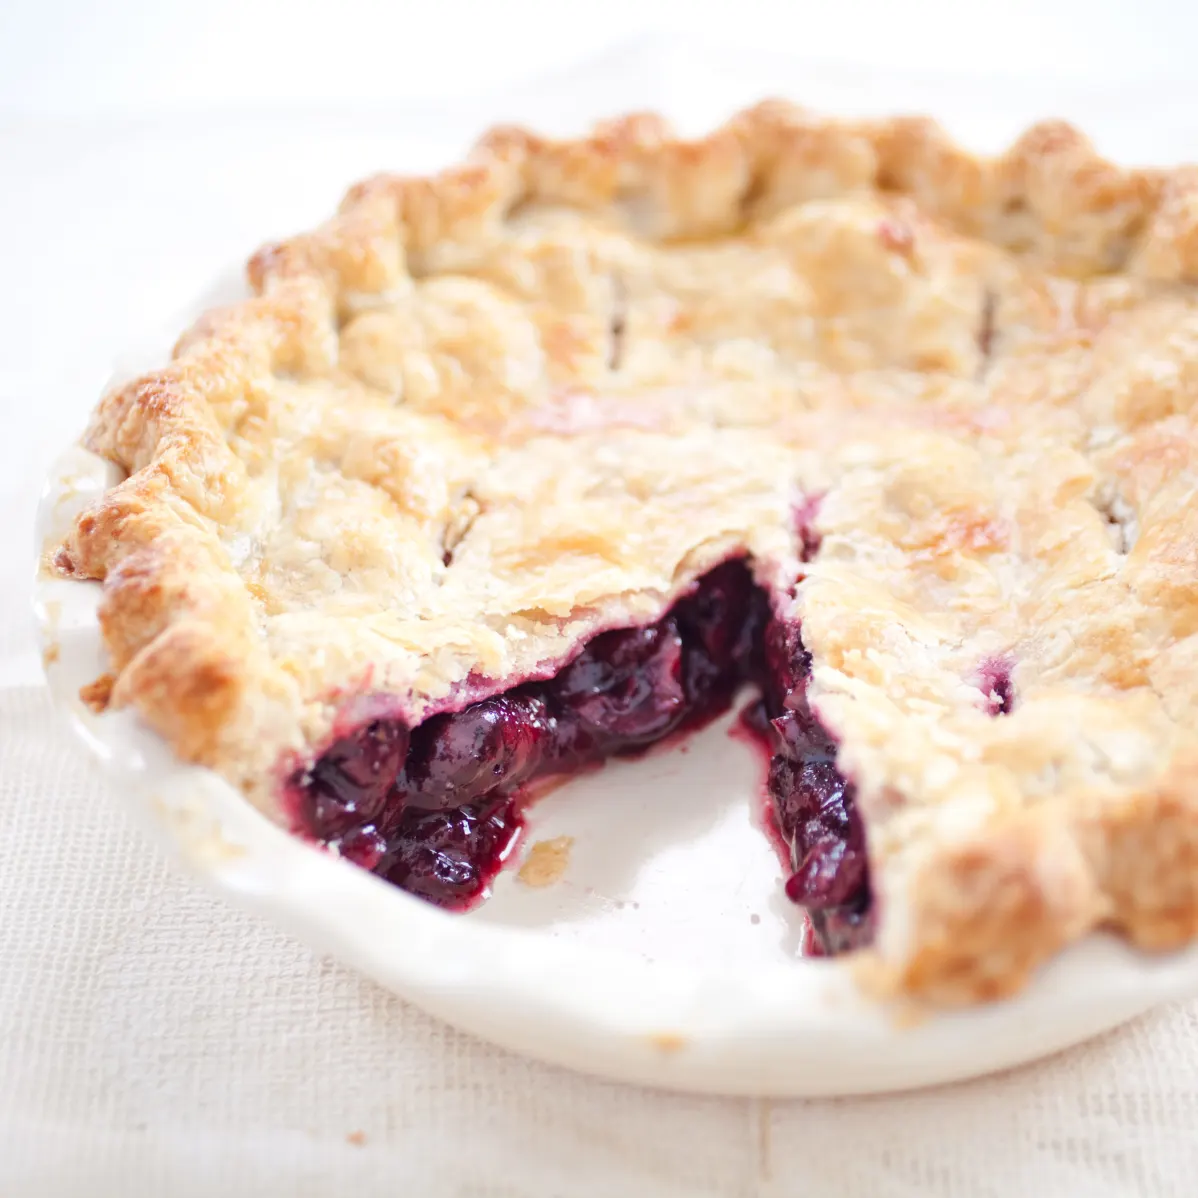
Time
Preparing an authentic American-style cherry pie is a process that demands patience and attention to detail. The total time commitment ranges approximately from 2 hours to 2 hours and 30 minutes, depending on your familiarity with pie-making techniques and the complexity of your crust. Here’s a detailed breakdown:
- Preparation of crust and filling: 45 minutes to 1 hour
- Chilling and resting dough: 30 minutes to 1 hour (can be concurrent with other preparations)
- Assembling the pie: 15 to 20 minutes
- Baking time: 45 to 60 minutes
- Cooling and setting: 1 hour (recommended for optimal filling stability)
Note: For best results, allocate additional time for ingredient preparation, such as pitting cherries and chilling the dough, to ensure optimal texture and flavor development. The entire process, from start to finish, is a labor of love but highly rewarding.
Needed Equipment
To achieve a professional-quality cherry pie, assemble the following equipment:
- Mixing bowls: Various sizes, preferably stainless steel or glass
- Measuring cups and spoons: Accurate measurement tools for both liquids and solids
- Pastry blender or food processor: For cutting in butter into the flour
- Rolling pin: Heavy-duty, non-stick preferred for rolling out dough
- Pie dish: A 9-inch (23 cm) ceramic or glass pie dish for even baking
- Plastic wrap or parchment paper: For chilling and resting dough
- Silicone baking mat or floured surface: For rolling out the crust
- Sharp paring or cherry pitter: For removing pits from cherries efficiently
- Juice extractor or citrus reamer: For adding lemon juice
- Pastry brush: For egg wash
- Kitchen scale: Optional, for precise measurement of ingredients
- Aluminum foil: To prevent over-browning of crust edges, if needed
- Baking sheet: To catch drips and prevent oven mess
- Cooling rack: For cooling the pie evenly post-baking
- Timer: Essential for monitoring baking duration
Tags
American Dessert, Classic Pie, Fruit Pie, Baked Goods, Summer Dessert, Patriotic Recipes, Baking from Scratch, Family Favorite, Love With Recipes, Authentic Recipes
Serving Size
Each standard pie yields approximately 8 slices, serving 8 individuals comfortably. For larger gatherings or more generous portions, cut into 6 to 8 slices accordingly. Consider serving with a dollop of whipped cream or a scoop of vanilla ice cream to elevate the dessert experience.
Difficulty Level
This recipe is rated as Intermediate. While it involves multiple steps—such as making crust, preparing filling, assembling, and baking—the process is straightforward with careful attention to detail. Mastering the pie crust technique is the most critical skill, but with patience, even beginners can achieve excellent results. Advanced bakers may enjoy experimenting with crust variations or filling enhancements.
Allergen Information
| Allergen | Presence | Notes |
|---|---|---|
| Gluten | Yes | From wheat flour in crust |
| Dairy | Yes | Butter used in crust |
| Eggs | Yes | Egg wash applied before baking |
| Nuts | No | Recipe does not contain nuts, but cross-contamination possible depending on ingredients used |
| Sulfites | No | Not used in recipe |
Dietary Preference
This recipe is suitable for omnivores and can be adapted for specific dietary needs:
- Vegetarian — Yes, contains no meat products
- Vegan — Not inherently, as it contains butter and eggs; can be modified with plant-based butter and egg replacers
- Gluten-Free — Not naturally; requires substitution of wheat flour with gluten-free alternatives
- Lactose-Free — Can be made by using dairy-free butter
Course
Dessert — perfect for special occasions, casual gatherings, or as a sweet ending to any meal.
Cuisine
American — rooted in traditional American pie-making, with influences from European pastry techniques.
Ingredients
Pie Crust
| Ingredient | Quantity |
|---|---|
| All-purpose flour | 2 1/2 cups (300 grams) |
| Unsalted butter (cold, cubed) | 1 cup (226 grams) |
| Salt | 1 teaspoon (6 grams) |
| Ice water | 4 to 6 tablespoons (60-90 ml) |
Cherry Filling
| Ingredient | Quantity |
|---|---|
| Fresh or frozen cherries (pitted) | 4 cups (600 grams) |
| Sugar | 1 cup (200 grams) |
| Cornstarch | 3 tablespoons (24 grams) |
| Fresh lemon juice | 2 tablespoons (30 ml) |
| Fresh lemon zest | 1 teaspoon (optional) |
| Almond extract | 1/2 teaspoon (2.5 ml) |
| Pinch of salt | – |
Instructions
Preparing the Pie Crust
Begin by creating a flaky, tender crust that forms the foundation of your cherry pie. In a large mixing bowl, whisk together the all-purpose flour and salt to ensure even distribution. Using a pastry blender or a food processor fitted with a blade, cut the cold butter into the flour mixture until the mixture resembles coarse crumbs with pea-sized pieces of butter remaining. This process is crucial for achieving a flaky texture—small bits of butter melt during baking, creating layers within the crust.
Next, gradually add ice water, one tablespoon at a time, mixing gently with a fork or your fingers after each addition. The goal is to bring the dough together without overworking it, which can develop gluten and result in a tough crust. Stop adding water once the dough begins to hold together when pressed. Divide the dough into two equal portions, shape each into a flat disc, wrap tightly in plastic wrap, and refrigerate for at least 30 minutes or up to 2 hours. Resting the dough allows the gluten to relax and the fat to chill, ensuring a sturdy yet tender crust.
Preparing the Cherry Filling
While the dough chills, prepare your cherry filling. If using fresh cherries, pit them carefully using a cherry pitter or small paring knife. For frozen cherries, allow them to thaw and drain excess moisture. In a large mixing bowl, combine the pitted cherries with sugar, cornstarch, lemon juice, lemon zest (if using), almond extract, and a pinch of salt. Gently toss to coat evenly. Let the mixture sit for 10-15 minutes, allowing the flavors to meld and the cornstarch to thicken the juices slightly. This resting step enhances the filling’s consistency and flavor profile.
Rolling Out the Dough
Remove one disc of dough from the refrigerator and let it sit at room temperature for about 5 minutes for easier handling. Lightly flour your work surface and rolling pin to prevent sticking. Roll the dough into a 12-inch (30 cm) circle, rotating it periodically and adding minimal flour as needed. Maintain an even thickness, typically about 1/8 inch (3 mm). Carefully transfer the rolled-out dough to your pie dish by gently draping it over the rolling pin and unrolling it onto the dish. Trim excess dough, leaving about 1/2 inch (1.3 cm) overhang around the edges.
Assembling the Pie
Pour the prepared cherry filling into the pie crust, spreading it evenly. Dot the filling with small pieces of butter if desired, which adds richness and a glossy finish. Roll out the second dough disc similarly and place it over the filling, or create a lattice pattern for a decorative touch. Trim the top crust or lattice edges, then fold and crimp the edges of the bottom and top crusts together to seal the pie. Use your fingers or a fork to crimp for a decorative, airtight seal.
Baking the Pie
Preheat your oven to 375°F (190°C). Place the assembled pie on a baking sheet lined with parchment or aluminum foil to catch any drips. Brush the top crust with an egg wash made from beaten egg and a splash of water for a shiny, golden finish. Cut small slits or a decorative pattern into the top crust to allow steam to escape during baking. Bake for 45-60 minutes, or until the crust is deep golden brown and the filling is bubbling through the slits.
Check periodically and tent the edges with aluminum foil if they brown too quickly. Once baked, remove the pie from the oven and transfer it to a cooling rack. Allow it to cool for at least an hour to let the filling set properly, which makes slicing easier and prevents runny filling.
Preparation Tips
- Chill your ingredients: Cold butter and ice water are essential for flaky crusts. Keep ingredients cold throughout.
- Use fresh cherries: For optimal flavor, fresh cherries are preferred, but high-quality frozen cherries work well.
- Prevent sogginess: Ensure the filling is not overly juicy; if necessary, reduce liquid content or pre-cook the filling slightly.
- Decorative touches: Add lattice, cut-out shapes, or a decorative crust for visual appeal.
- Practice crimping: Use your thumb and forefinger to create a decorative edge, which also helps seal the crust.
Nutritional Information
| Nutrient | Per Slice (1/8 of pie) |
|---|---|
| Calories | Approx. 350 kcal |
| Total Fat | 15 grams |
| Saturated Fat | 8 grams |
| Cholesterol | 20 mg |
| Sodium | 180 mg |
| Carbohydrates | 55 grams |
| Sugars | 30 grams |
| Protein | 3 grams |
| Fiber | 2 grams |
Tips and Tricks
- Upgrade your crust: Incorporate a tablespoon of apple cider vinegar or vodka into your dough for extra flakiness.
- Use fresh lemon zest: Enhances the brightness of the filling without overpowering the cherries.
- For a glossy crust: Apply an egg wash and sprinkle with coarse sugar before baking for a professional appearance.
- Store excess filling: Keep leftover cherry filling refrigerated for use in smoothies or as a topping for pancakes.
- Make ahead: Assemble the pie a day in advance, refrigerate covered, and bake fresh before serving.
Add-ons
- Vanilla ice cream: A classic pairing that melts beautifully over warm pie slices.
- Whipped cream: Lightly sweetened whipped cream adds a creamy texture.
- Chocolate drizzle: For a decadent twist, drizzle melted dark chocolate over the sliced pie.
- Almond slivers: Toasted almonds sprinkled on top add crunch and flavor depth.
Side Dishes
- Vanilla Bean Ice Cream: Complements the warm, fruity filling with creamy richness.
- Fresh Mixed Berries: Adds a tart contrast and visual appeal.
- Herbal Tea or Coffee: Enhances the dessert experience with aromatic beverages.
- Light Lemon Sorbet: Cleanses the palate between bites.
Improvements
- Whole wheat crust: Substituting part of the flour with whole wheat for added fiber and a nutty flavor.
- Reduce sugar: Adjust sugar levels for a less sweet, more natural cherry flavor.
- Spice infusion: Add cinnamon, nutmeg, or cardamom to the filling for extra warmth.
- Gluten-Free Version: Use almond flour or gluten-free baking mix for the crust.
- Vegan Adaptation: Replace butter with coconut oil or vegan margarine and eggs with flaxseed or chia seed slurry.
Save and Store
Leftover cherry pie can be stored in an airtight container at room temperature for up to 2 days or refrigerated for up to 4-5 days. For longer storage, wrap slices tightly in plastic wrap or foil and freeze for up to 2 months. To reheat, bake at 350°F (175°C) for 10-15 minutes or microwave in short bursts until warm. For best texture, reheat in the oven rather than the microwave to maintain flaky crust quality.
FAQ
Can I use canned cherry pie filling instead of fresh or frozen cherries?
Yes, canned filling is a convenient option, but it may contain added sugars and thickeners, which could alter the flavor and texture. For an authentic taste, fresh or frozen cherries are preferred, but canned can work in a pinch with adjustments to sugar and thickening.
How do I prevent a soggy bottom crust?
Ensure the filling is not overly juicy—consider pre-cooking or draining excess moisture. Use a pie shield or foil ring around the edges to prevent over-browning, and bake on a preheated baking stone or heavy baking sheet to promote even heat transfer.
Can I make this pie ahead of time?
Absolutely. Assemble the pie a day ahead, keep it refrigerated, and bake just before serving. The flavors meld beautifully overnight, and the crust remains crisp if properly stored.
What if I want a lattice crust?
Roll out the second dough disc, cut into strips, and weave over the filling in a lattice pattern. Trim and crimp the edges, then brush with egg wash. This decorative pattern adds visual appeal and allows steam to escape more evenly.
Conclusion
Mastering the art of cherry pie combines science, skill, and a love for traditional baking. With precise ingredient measurements, careful handling of pastry dough, and attentive baking, you can produce a stunning, flavorful dessert that rivals those from renowned bakeries. The detailed steps and tips provided here, inspired by America’s Test Kitchen and shared on Love With Recipes, aim to empower your baking journey from novice to confident pie-maker. Remember, every pie is a reflection of your effort and passion, and the ultimate reward is sharing slices of joy with loved ones. Whether for a holiday, a picnic, or just because, homemade cherry pie is a timeless treat that captures the essence of American baking heritage and your personal culinary artistry.
References
- America’s Test Kitchen Official Website
- “The Pie and Pastry Bible” by Rose Levy Beranbaum