
1. Introduction
Granola bars are more than just a snack – they’re a miniature culinary marvel that packages taste, nutrition, and convenience in every bite. With roots tracing back to 19th-century granola inventions in the United States, these bars have evolved into one of the most versatile snack options. Whether you’re planning a family outing, needing a post-workout energy boost, or simply looking for a quick, wholesome breakfast option, these Anna Olsen Granola Bars fit perfectly into a balanced lifestyle.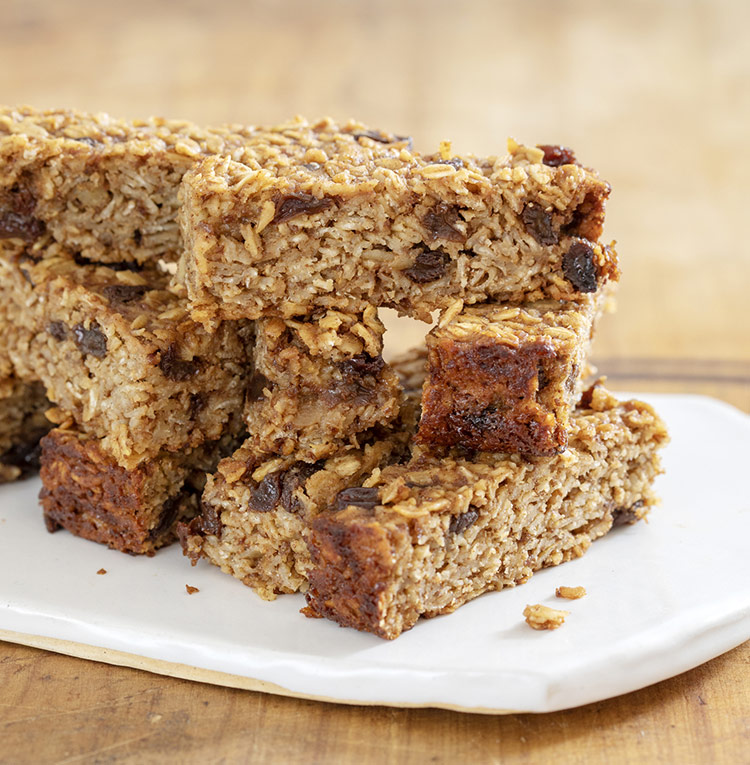
Anna Olsen, a celebrated pastry chef and television personality, has her own delightful take on this classic treat. She focuses on quality ingredients, balanced sweetness, and a versatile flavor profile that can be tweaked to your personal taste. You’ll find that these bars combine the chewiness of oats, the richness of nuts, the natural sweetness of dried fruits, and a hint of spice to create a snack that feels both indulgent and healthy.
In this article, we’ll explore everything from the time required to make these bars, the equipment you’ll need, and the step-by-step instructions to complete them. We’ll also cover nutritional information, tips and tricks for perfect results, allergen and dietary considerations, and ideas for customizing your bars to suit different flavor profiles and occasions. Whether you’re a seasoned home baker or a newcomer to the kitchen, these Anna Olsen Granola Bars will become a household favorite.
2. Time
- Preparation Time: 20–30 minutes
(Chopping nuts, measuring out ingredients, mixing wet and dry ingredients) - Chilling Time: 2–3 hours
(Refrigeration to allow bars to set firmly before cutting) - Total Time: Approximately 3 hours
(Most of the time is hands-off during refrigeration)
These bars don’t require a long baking period in an oven, as many traditional granola bars might. Instead, Anna Olsen’s technique often involves a no-bake process where the sweetener and binding agents hold everything together once chilled.
3. Needed Equipment
Before embarking on your granola bar journey, gather the following equipment and tools:
- Large Mixing Bowl: To combine the dry ingredients (oats, nuts, seeds, dried fruits, etc.).
- Medium Mixing Bowl: For mixing the wet ingredients (nut butter, sweeteners, vanilla extract, etc.).
- Spatula or Wooden Spoon: Used for thoroughly mixing dry and wet ingredients together.
- Measuring Cups and Spoons: Essential for accurate measurement of oats, nuts, sweeteners, and spices.
- Knife and Cutting Board: For chopping nuts, dried fruits, or any additional mix-ins.
- Parchment Paper: To line the baking dish, making it easy to remove the bars once set.
- 8×8 or 9×9 Baking Dish: A standard dish to press the granola mixture into. Size can vary depending on the thickness you desire for your bars.
- Refrigerator: For chilling the bars.
- Sharp Knife: For cutting the bars into individual portions once they are set.
Having these tools ready and organized will streamline your process and help ensure your bars turn out just right.
4. Tags
- #GranolaBars
- #NoBakeRecipe
- #HealthySnacks
- #AnnaOlsenRecipe
- #OatsAndNuts
- #MealPrep
- #FiberRich
- #EnergyBoost
- #VegetarianFriendly
- #EasyRecipe
These tags can help you categorize this recipe for easy reference in a personal cookbook, blog, or recipe-sharing platform.
5. Serving Size
The recipe below yields approximately 12–16 bars, depending on how large or small you cut them. You can adjust this to your preference:
- 12 bars: Larger, more substantial bars suitable for a quick breakfast or a post-workout snack.
- 16 bars: Smaller, more petite bars perfect for lighter snacking or dessert-like bites.
6. Difficulty Level
Easy to Moderate.
Most of the recipe involves simple measuring, mixing, and pressing. The steps are straightforward, requiring no specialized baking techniques. However, attention to detail in measuring and pressing the mixture firmly can affect the final texture.
7. Allergen Information
These granola bars contain common allergens, depending on the ingredients chosen:
- Nuts: Almonds, walnuts, or peanuts (in the form of peanut butter) are typical.
- Seeds: Sunflower seeds, flax seeds, or chia seeds.
- Gluten: Oats can be a concern for those with celiac disease or gluten intolerance. Look for certified gluten-free oats if needed.
- Dairy: Often, these bars are dairy-free, unless butter or milk-based chocolate chips are added.
- Soy: Not inherently included unless soy-based products are substituted.
- Honey: Not suitable for strict vegans, but can be replaced with maple syrup or agave.
Always check your specific ingredients if you have any allergies or intolerances.
8. Dietary Preference
- Vegetarian: Yes.
- Vegan: Potentially, if you use plant-based sweeteners like maple syrup or agave instead of honey, and avoid any dairy-containing additives.
- Gluten-Free: Possible with certified gluten-free oats.
- Dairy-Free: Yes, as long as you don’t introduce dairy-based additions like chocolate chips containing milk solids or butter in place of nut butter.
9. Course
- Snack: These granola bars fit perfectly as a quick, grab-and-go snack any time of the day.
- Breakfast: Pair a bar with fresh fruit or yogurt for a balanced breakfast.
- Dessert: Top with a drizzle of melted chocolate or enjoy with a cup of tea in the evening.
10. Cuisine
These granola bars align with North American cuisine, influenced by the early granola traditions in the United States. However, the concept of mixing oats, nuts, seeds, and sweeteners has become universal, embraced by health enthusiasts and busy individuals worldwide.
11. Ingredients (In Tables)
Below is a suggested ingredient list for Anna Olsen Granola Bars. Feel free to adjust the quantities and types of nuts, seeds, dried fruits, and sweeteners based on personal preference or dietary needs.
| Dry Ingredients | Quantity | Notes |
|---|---|---|
| Rolled Oats (old-fashioned) | 2 cups (about 200g) | Use gluten-free oats if needed |
| Nuts (almonds, walnuts, or mixture) | 1 cup (about 125g) | Chopped into small pieces; can be toasted for extra flavor |
| Seeds (flax, chia, pumpkin, etc.) | ¼ – ½ cup (30–60g) | Adjust based on preference; can mix varieties |
| Dried Fruits (raisins, cranberries, apricots, etc.) | ½ – ¾ cup (about 75–100g) | Chop larger fruits (like apricots, dates) into smaller pieces; can use one type or a combination |
| Salt | ¼ tsp | Enhances flavor and balances sweetness |
| Cinnamon (optional) | ½ tsp | Adds a warm spice note |
| Wet Ingredients | Quantity | Notes |
|---|---|---|
| Nut Butter (peanut, almond, or cashew) | ½ cup (about 125g) | Choose a smooth variety for easier mixing |
| Honey or Maple Syrup | ½ cup (120ml) | Adjust sweetness to taste; use maple syrup for a vegan alternative |
| Vanilla Extract (optional) | 1 tsp | Adds a subtle aroma; omit if you prefer a more neutral taste |
Optional Add-Ins: A handful (¼ – ½ cup) of dark chocolate chips, shredded coconut, or even a tablespoon of cocoa powder can be included. Adjust sweetness accordingly.
12. Instructions
Follow these step-by-step instructions to create your own batch of chewy, flavorful Anna Olsen Granola Bars:
- Gather and Prepare Ingredients
- Measure out the rolled oats, nuts, seeds, and dried fruits as listed in the table above.
- Chop any large nuts or dried fruits into smaller, uniform pieces.
- If desired, lightly toast the nuts in the oven at 350°F (175°C) for 5–8 minutes to intensify flavor. Let them cool before adding to the mixture.
- Mix the Dry Ingredients
- In a large mixing bowl, combine the rolled oats, chopped nuts, seeds, dried fruits, salt, and cinnamon (if using).
- Stir gently to distribute all ingredients evenly.
- Combine Wet Ingredients
- In a medium mixing bowl, add the nut butter, sweetener (honey or maple syrup), and vanilla extract (if using).
- Stir or whisk until the mixture becomes smooth and fully integrated.
- If the nut butter is too stiff, you can gently warm this mixture in the microwave or on the stovetop. Do not overheat; just soften enough for easy mixing.
- Incorporate Wet into Dry
- Pour the wet mixture into the large bowl containing the dry ingredients.
- Use a spatula or wooden spoon to combine thoroughly. Every piece of the dry mixture should be coated, forming a sticky, cohesive blend.
- Prepare the Baking Dish
- Line an 8×8 or 9×9 baking dish with parchment paper, allowing some overhang on the sides for easy lifting later.
- Transfer the combined granola mixture into the dish.
- Press Firmly
- Use the back of a spoon, a spatula, or even the bottom of a glass to press the mixture into an even layer.
- Apply firm, even pressure to avoid any air gaps. This ensures the bars stay intact once chilled.
- Chill
- Place the baking dish in the refrigerator.
- Let the bars chill for at least 2–3 hours to firm up. Some people prefer to let them sit overnight for maximum cohesiveness.
- Cut into Bars
- Once the mixture is firm, lift it out using the parchment paper overhang.
- Place it on a cutting board and use a sharp knife to cut into your desired bar size.
- Wipe the knife between cuts if it starts to get sticky.
- Serve or Store
- Serve immediately if you like them cool or bring them to room temperature for a slightly softer bite.
- If not consumed right away, store them properly (detailed in the “Save and Store” section) to maintain freshness.
13. Preparation Tips
- Toast for Flavor: Toasting nuts and seeds can significantly enhance flavor. Keep an eye on them in the oven, as they can burn quickly.
- Temperature Sensitivity: If you live in a warm climate or your kitchen is particularly hot, you may need a bit more refrigeration time to ensure the bars hold together well.
- Binding: If your mixture seems too dry and won’t stick, add an extra tablespoon of nut butter or sweetener. If it’s too wet, sprinkle in a bit more oats.
- Cutting Technique: For clean edges, use a sharp, large knife and press down firmly in one motion. Alternatively, use a serrated knife for a gentle sawing motion.
- Shaping: Instead of using a baking dish, you can shape individual bars using your hands. Just be sure to press firmly for them to hold shape.
14. Nutritional Information (In Tables)
Below is an approximate nutritional profile per bar, assuming a yield of 12 bars and using the standard ingredient quantities listed. Keep in mind that using different nuts, sweeteners, or add-ins can alter these values.
| Nutrient | Approx. Per Bar | Notes |
|---|---|---|
| Calories | 210–240 kcal | Based on typical ingredient usage |
| Total Fat | 10–15 g | Mostly from nuts, seeds, and nut butter |
| Saturated Fat | 1–2 g | Varies based on nut butter choice |
| Trans Fat | 0 g | |
| Cholesterol | 0 mg | Naturally cholesterol-free |
| Sodium | 0–5 mg | May increase if salted nuts are used |
| Total Carbohydrates | 25–30 g | Oats, dried fruits, and sweetener contribute to carb content |
| Dietary Fiber | 3–5 g | Oats, seeds, nuts, and dried fruits are good fiber sources |
| Sugars | 10–15 g | Natural sugars from honey/maple syrup and dried fruits |
| Protein | 5–7 g | Primarily from nuts, seeds, and nut butter |
| Vitamins & Minerals | Varies | Provides iron, magnesium, B vitamins, and other nutrients from whole ingredients |
Disclaimer: These values are estimates. For precise tracking, use a reliable nutrition calculator and exact brands of ingredients.
15. Tips and Tricks
- Customize the Flavor: Add spices such as pumpkin pie spice, cardamom, or nutmeg for unique flavor twists.
- Chocolate Drizzle: Melt some dark chocolate and drizzle over the bars before chilling. This takes them from a simple snack to a tempting treat.
- Experiment with Textures: Consider blending half the oats into a flour-like consistency for a smoother bar, or use quick oats for a less chewy texture.
- Portion Control: If you’re mindful of calorie intake, cut the mixture into smaller squares or make them into “bites” by rolling into balls.
- Freezing: For longer storage, wrap bars individually in plastic wrap and freeze. They can last for up to 3 months in the freezer.
- No Sticking: To prevent sticking when pressing the mixture into the pan, lightly oil or dampen your hands, or place a sheet of parchment paper over the mixture and press with a flat object.
16. Add-Ons
- Coconut Flakes: Add ¼ cup of unsweetened coconut flakes for a tropical twist.
- Chocolate Chips or Chunks: Stir in ¼–½ cup for a hint of indulgence.
- Dried Berries: Substitute half of the raisins or cranberries with freeze-dried berries for an extra burst of tangy flavor.
- Spirulina or Matcha: If you want a healthy green boost, add a teaspoon of spirulina or matcha powder. Be mindful of any flavor changes.
- Peanut Butter Swirl: If you’re using almond butter, swirl a small amount of peanut butter through the pressed mixture for a layered nut flavor.
17. Side Dishes
These granola bars often stand on their own as a snack, but they can be paired with:
- Fresh Fruit Salad: A bright, refreshing accompaniment if you’re enjoying these as part of a breakfast spread.
- Greek Yogurt: Scoop some yogurt onto a plate and place a cut bar alongside for a protein-packed snack.
- Smoothies: If you’re looking for a quick breakfast, blend up a fruit-and-vegetable smoothie to serve with your bar.
18. Improvements
- Flavor Depth: Toast oats, nuts, and seeds prior to mixing. It adds a deep, nutty flavor and enhances the overall taste.
- Texture Balance: If you find the bars too chewy, reduce the proportion of sweetener slightly or increase the quantity of seeds for added crunch.
- Sweetness Variation: Try half honey and half mashed ripe banana to reduce refined sweetener content. You’ll get extra potassium and a mellow banana flavor.
- Protein Boost: Add a scoop of your favorite unflavored or vanilla protein powder. Adjust wet ingredients accordingly to maintain a good consistency.
- Cooling: For a different approach, press the mixture into silicone molds (like muffin cups or bar molds) for individual-serving shapes.
19. Save and Store
- Room Temperature: Up to 1 week in an airtight container, especially if your kitchen is relatively cool and dry.
- Refrigerator: 2–3 weeks in a sealed container, providing a slightly firmer texture.
- Freezer: Wrap each bar individually in plastic wrap or parchment paper and store in a freezer-safe container or zip-top bag. They can last up to 3 months. Thaw a bar overnight in the fridge or for about 30 minutes on the counter.
20. FAQ
Q1: Do I have to bake these granola bars?
A1: Not necessarily. This recipe is typically a no-bake recipe, relying on the binding power of nut butter and sweeteners. If you prefer a firmer, slightly roasted flavor, you could bake the pressed mixture for 10–15 minutes at 325°F (160°C), but it’s optional.
Q2: Can I replace the nut butter with a seed butter for a nut-free version?
A2: Absolutely. Sunflower seed butter or tahini can work well as alternatives, especially for those with nut allergies.
Q3: Can I make these bars sugar-free?
A3: You can reduce or replace sweeteners with sugar-free alternatives (e.g., sugar-free syrup), but the bars may not bind as well. You may need to experiment with the ratio of sticky ingredients to ensure the bars hold together.
Q4: How do I make sure the bars don’t crumble apart?
A4: The key is in the pressing and chilling. Press the mixture very firmly into the pan and allow ample time (2–3 hours or more) in the fridge before cutting.
Q5: Are these bars suitable for weight management?
A5: They can be, if portion-controlled and made with healthy ingredients. They provide beneficial nutrients like fiber, healthy fats, and protein but also contain calories from nuts, seeds, and sweeteners. Enjoy them in moderation.
Q6: What if I’m allergic to oats?
A6: You can try using puffed rice or a combination of quinoa flakes and other cereals. The texture and flavor may vary, but the process remains similar.
Q7: Can kids help in making these bars?
A7: Yes! This recipe is quite kid-friendly. Let kids measure ingredients, stir the mixture, and press it into the pan, teaching them basic cooking skills in a fun and safe way.
21. Conclusion
Crafting Anna Olsen Granola Bars at home is a delightful and straightforward process that rewards you with nutritious, flavorful treats. They encapsulate the best of both worlds: the taste and indulgence we often crave in a snack and the wholesome, natural ingredients our bodies appreciate. Thanks to the flexible nature of this recipe, you can easily tailor it to fit dietary preferences, flavor inclinations, or even seasonal themes. Whether you enjoy them as a quick breakfast bar, a post-workout energy bite, or a sweet treat on a cozy evening, these granola bars offer a versatile addition to your culinary repertoire.
From the 19th-century origins of granola in Dr. James Caleb Jackson’s kitchen to Anna Olsen’s modern twist, these bars bring a slice of food history right into your home. The blending of oats, nuts, seeds, sweeteners, and a hint of spice creates an endearing balance between health and taste. By following the detailed instructions, preparation tips, and storing suggestions provided, you’ll be well on your way to mastering the art of making granola bars that are as delicious as they are nourishing.
22. References
- Jackson, James Caleb. Granula and Early Breakfast Cereals: Historical Beginnings, 1860s.
- Anna Olsen’s Inspired Cooking and Baking Shows: Common variations of her granola bars often feature the core components of oats, nuts, seeds, and dried fruits.
- Various Nutritional Databases (e.g., USDA) for approximate macronutrient calculations.
Note: While Anna Olsen has popularized many dessert and snack recipes, references to her specific granola bar methodology can be found in her TV show archives and cookbooks where she explores healthy snack options with signature twists. Exact references to her official granola bars may vary across episodes and publications.