Introduction
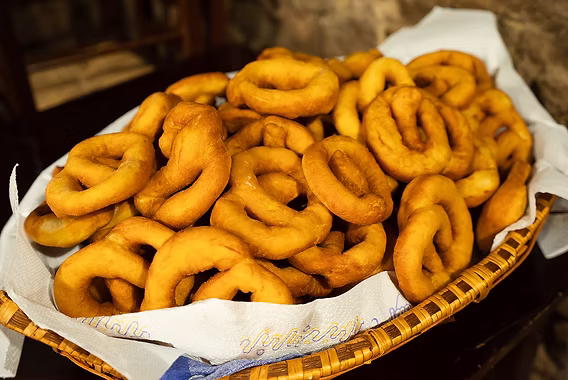
Roman White Pizza, known locally as Pizza Bianca Romana, offers a delightful departure from the traditional tomato sauce-based pizzas that dominate global menus. Rooted deeply in Roman culinary tradition, this leavened bread variant emphasizes the purity of high-quality flour, the richness of extra virgin olive oil, and a delicate balance of salt that highlights the bread’s soft, airy texture and crisp crust. Unlike its tomato-laden counterparts, this pizza is characterized by its simplicity and elegance, often served as an appetizer, snack, or side dish. Whether enjoyed plain or adorned with minimal toppings, its subtle flavors make it a versatile staple in Roman cuisine and beloved worldwide by bread enthusiasts and culinary explorers alike.
This detailed guide, published on Love With Recipes, aims to provide a comprehensive understanding of the traditional Roman White Pizza, including nuanced baking techniques, ingredient selection, and serving suggestions. By exploring its history, variations, and tips for perfection, you will gain not only a recipe but also an appreciation for its cultural significance and culinary finesse.
Time
Total Preparation and Cooking Time
- Preparation Time: 20 minutes
- Rising Time: 30 to 60 minutes
- Baking Time: 15 to 20 minutes
- Cooling and Serving: 5 minutes
Overall, expect to spend approximately 1 hour and 10 minutes to 1 hour and 45 minutes, depending on the rising duration and oven efficiency. Planning ahead ensures the dough has ample time to develop its airy structure, resulting in a perfect crust.
Needed Equipment
- Stand Mixer with Dough Hook Attachment: Essential for uniform kneading, especially if preparing larger batches or seeking consistent results.
- Mixing Bowls: Preferably large, non-reactive bowls for dough fermentation.
- Measuring Cups and Kitchen Scale: To precisely measure ingredients, especially important for yeast activation and hydration levels.
- Silicone Spatula or Dough Scraper: For handling and transferring dough.
- Oven: Conventional or convection oven capable of reaching 220°C (430°F).
- Baking Tray or Pizza Stone: Lightly greased or dusted with flour for optimal baking surface.
- Pastry Brush: For oiling the dough surface.
- Kitchen Towel or Plastic Wrap: To cover the dough during proofing.
- Cooling Rack: For cooling the baked pizza evenly.
Tags
- Leavened Bread
- Italian Cuisine
- Traditional Recipe
- Easy Baking
- Homemade Pizza
- Gluten
- Vegetarian
- Snack
Serving Size
This recipe yields 6 individual pieces of Roman White Pizza, suitable for sharing among friends or family as a snack, appetizer, or side dish. Each piece is approximately 150 grams, making it ideal for light meals or paired with salads and antipasti.
Difficulty Level
Intermediate. While the technique involves standard bread-making processes, attention to detail in kneading, proofing, and baking ensures optimal results. Bakers with some experience in handling yeast doughs will find this straightforward, but beginners can master it with patience and careful observation.
Allergen Information
| Allergen | Presence | Notes |
|---|---|---|
| Gluten | Yes | From wheat flour (Type 0) |
| Sulfites | Potentially | Present in dry yeast |
| Olive Oil | Yes | Extra virgin olive oil used in dough and topping |
Note: This recipe does not contain dairy, nuts, or eggs. However, cross-contamination in processing facilities is possible; always check ingredient labels if sensitivities exist.
Dietary Preference
- Vegetarian
- Vegan (if olive oil is substituted with plant-based alternatives)
- Low Sugar
Course
Appetizer, Snack, Side Dish, Bread Course
Cuisine
Italian — Roman Tradition
Ingredients
| Ingredient | Quantity |
|---|---|
| All-purpose flour (Type 0) | 460 grams |
| Active dry yeast | 2 grams |
| Sugar | 5 grams |
| Water (at room temperature) | 300 grams |
| Extra virgin olive oil | 50 grams (plus 10 grams for topping) |
| Fine salt | 10 grams |
Instructions
1. Preparing the Dough
Begin by gathering all your ingredients and equipment. Place the measured all-purpose flour and dry yeast into the bowl of your stand mixer. The choice of flour is crucial; Type 0 flour, traditionally used in Italian baking, offers a slightly higher protein content and finer grind than standard all-purpose flour, contributing to a superior texture and elasticity of the dough. If Type 0 is unavailable, high-quality bread flour can be a suitable substitute, but for authenticity, Type 0 is preferred.
Using the paddle attachment initially, gently mix the flour and yeast at a low speed for a few seconds to distribute the yeast evenly. Then switch to the dough hook attachment. With the mixer running at medium speed, start pouring the room-temperature water gradually. This slow addition allows the flour particles to hydrate uniformly, ensuring a cohesive dough structure. Keep a close eye, as rapid addition of water can cause uneven hydration, leading to inconsistent gluten development.
The water should be added slowly over a span of approximately 1 minute. During this process, the dough begins to form, and you will notice it pulling away from the sides of the bowl, forming a shaggy mass. The hydration level here is about 65-70%, which is optimal for a soft, airy bread with a slightly chewy crust.
2. Incorporating the Olive Oil
Once the initial mixture is cohesive, start adding the olive oil in small increments. Carefully pour about 20 grams (roughly 2 tablespoons) of extra virgin olive oil at a time while the mixer is running. The oil acts as an emulsifier and tenderizer, contributing to the bread’s moistness and flavor profile.
Allow each addition to fully absorb into the dough before adding the next. This gradual incorporation ensures a smooth, elastic dough that can trap air effectively during fermentation. Olive oil also enhances the crust’s golden hue and adds a subtle fruity aroma characteristic of authentic Roman pizza.
3. Adding Salt and Final Kneading
After the oil has been fully integrated, sprinkle the fine salt over the dough. Continue to knead with the mixer for approximately 15 minutes at medium speed. This prolonged kneading develops gluten strands, which are essential for the dough’s structure, elasticity, and ability to hold gases during rising.
The dough should become smooth, slightly sticky but manageable. If it feels excessively sticky, lightly dust your work surface with flour during transfer. Conversely, if too dry, a few drops of water can be added sparingly.
4. Shape, Ferment, and Rise
Transfer the dough onto a lightly oiled work surface using a silicone spatula or dough scraper. Shape it into a tight ball, ensuring surface tension is maintained. Place the dough into a large, lightly oiled bowl, turning it once to coat all sides with oil. Cover the bowl tightly with plastic wrap or a damp kitchen towel to prevent surface drying.
Allow the dough to ferment at room temperature (around 20-22°C or 68-72°F) for 30-60 minutes. During this period, yeast activity produces carbon dioxide, causing the dough to double in size. The exact time varies depending on ambient temperature, dough temperature, and yeast activity. The goal is a visibly risen dough with a soft, airy interior.
5. Preheating and Preparing for Baking
Preheat the oven to 220°C (430°F) at least 30 minutes before baking to ensure optimal heat distribution. Lightly grease your baking tray with olive oil, which prevents sticking and adds flavor. After the dough has risen, punch it down gently with your fist to release excess gas. Transfer the dough to the prepared tray and stretch it evenly into a rectangular or oval shape, about 1.5 to 2 centimeters thick.
Use your fingertips and palms to gently press and stretch the dough without tearing it, maintaining an even thickness for uniform baking. Drizzle the remaining 10 grams of olive oil over the surface, then sprinkle coarse salt evenly across the top. This salt not only enhances flavor but also contributes to a crispy crust.
6. Baking
Bake the pizza in the preheated oven for 15-20 minutes. The crust should turn a beautiful golden color, with some darker spots for added flavor. The edges should be crisp, yet the interior remains soft and airy. Keep an eye on the pizza after 15 minutes, as oven variances can affect baking time. For a more authentic Roman crust, you may bake on a preheated pizza stone, which creates a crispier bottom.
Once baked, remove the pizza from the oven and transfer to a cooling rack. Let it rest for about 5 minutes to allow the crust to set and to avoid burning your palate. Slice into six pieces and serve immediately.
Preparation Tips
- Flour Quality: Use high-quality Type 0 flour or bread flour for authentic texture and flavor. Sift the flour beforehand to ensure even mixing and avoid clumps.
- Yeast Handling: Activate the dry yeast in a small amount of warm water (about 37°C or 98.6°F) with a pinch of sugar if desired, to confirm activity. However, with such a small amount (2g), direct mixing is sufficient.
- Hydration Level: Adjust water slightly if dough feels too dry or wet. Proper hydration is crucial for a light, airy crumb.
- Proofing Environment: A warm, draft-free area accelerates fermentation. If your kitchen is cool, consider placing the bowl in a slightly warm oven (turned off) or using a proofing box.
- Stretching Technique: Use gentle pressure to stretch the dough, avoiding tearing. Resting the dough for a few minutes after initial shaping can make stretching easier.
- Oven Temperature: A high-temperature bake is essential for achieving a crisp crust reminiscent of traditional Roman pizza. Use a baking stone if available for even better results.
Nutritional Information
| Nutrient | Per Serving (approximate) |
|---|---|
| Calories | 310 kcal |
| Protein | 8 grams |
| Fat | 15 grams |
| Carbohydrates | 36 grams |
| Sugar | 1 gram |
| Sodium | 400 mg |
| Fiber | 3 grams |
Note: Nutritional values are approximate and may vary based on ingredients and portion sizes. This analysis considers no toppings; adding cheese, herbs, or vegetables will alter the nutritional profile.
Tips and Tricks
- Use Cold Water: Water at room temperature ensures consistent yeast activity without prematurely activating or inhibiting fermentation.
- Extend Proofing: Longer fermentation (up to 2 hours) can develop more complex flavors and improve texture, especially if using less active yeast.
- Texture Adjustment: For a chewier crust, knead slightly longer or incorporate a small amount of bread improver or vital wheat gluten.
- Flavor Enhancement: Add fresh herbs like rosemary or thyme into the dough for aromatic variations.
- Experiment with Toppings: While traditionally served plain, a drizzle of honey, a sprinkle of sea salt, or fresh herbs can elevate the flavor profile.
Add-ons
- Fresh herbs: rosemary, thyme, oregano
- Sea salt or coarse finishing salt
- Crushed black pepper
- Olive oil drizzle
- Thin slices of prosciutto or cured meats (for a savory upgrade)
- Cheese varieties: mozzarella, ricotta, or Pecorino Romano (for variation)
- Fresh vegetables: cherry tomatoes, arugula, or mushrooms
Side Dishes
- Mixed green salad with lemon vinaigrette
- Antipasto platter with cured meats, cheeses, and marinated vegetables
- Roasted vegetables such as zucchini, eggplant, and peppers
- Garlic and herb dips or spreads
- Italian olives and breadsticks
Improvements
- Use a sourdough starter instead of commercial yeast for a more complex flavor profile and better fermentation.
- Introduce a pre-ferment or poolish several hours before mixing for enhanced gluten development and taste.
- Experiment with different flours, such as whole wheat or spelt, for nutritional variations.
- Incorporate a small amount of malted barley syrup for added sweetness and browning.
- Adjust hydration and proofing times based on environmental conditions for optimal results.
Save and Store
Leftover Roman White Pizza can be stored in an airtight container at room temperature for up to 2 hours for immediate consumption. For longer storage, cool completely, wrap tightly in plastic wrap, and refrigerate for up to 24 hours. To reheat, place in a preheated oven at 180°C (356°F) for 5-7 minutes or until warmed through and crust regains crispness. Freezing is not recommended for optimal texture but can be done if wrapped well; reheat directly from frozen.
FAQ
Can I make this dough ahead of time?
Yes, you can prepare the dough a day in advance. After the initial kneading, refrigerate it in an airtight container for up to 24 hours. Allow it to come to room temperature before shaping and baking to ensure proper fermentation.
Can I add toppings to this pizza?
Certainly! While traditional Pizza Bianca is served plain with just oil and salt, you can enhance it with toppings such as fresh herbs, cheeses, vegetables, or cured meats after the initial baking. Add toppings in the last 5 minutes of baking if they require cooking.
Is this pizza suitable for vegans?
Yes, by substituting olive oil with plant-based alternatives and ensuring no animal-derived ingredients are added, this recipe can be made vegan. Avoid cheese or use vegan cheese options.
What flour can I use if Type 0 is unavailable?
High-quality bread flour or unbleached all-purpose flour can be used, but results may vary slightly in texture and flavor. For authenticity, Type 0 or similar Italian flours are ideal.
How can I achieve a crispier crust?
Bake on a preheated pizza stone or steel at high temperature. Additionally, ensure dough is stretched thin and baked until edges are dark golden. Using a convection setting or increasing oven temperature slightly can help achieve superior crispness.
Conclusion
Mastering the art of Roman White Pizza reveals the beauty of simplicity and the importance of technique in bread baking. This recipe exemplifies how minimal ingredients, when handled with care, produce a bread that is tender, flavorful, and versatile. Whether served plain as a traditional snack or topped with your favorite ingredients, Pizza Bianca Romana embodies a timeless culinary tradition that welcomes experimentation while honoring its roots. Perfecting this recipe involves understanding the nuances of hydration, kneading, and baking temperature, all of which culminate in a crust that is crispy yet tender, with a rich aroma that transports you straight to the streets of Rome.
For those eager to elevate their baking skills or explore authentic Italian bread, this comprehensive guide offers insights, tips, and variations to suit every palate. Remember, the secret lies in patience, quality ingredients, and attention to detail. Enjoy baking and savoring this exquisite piece of Roman culinary heritage, proudly shared through Love With Recipes.
References
- Gabriele Bonci, “The Bread of Rome,” Rizzoli, 2020.
- Elizabeth David, “Italian Food,” Penguin Classics, 1999.