
Introduction
The No-Bake Cherry Balls recipe offered here on Love With Recipes is an exquisite example of simplicity meeting indulgence. These bite-sized treats are designed to satisfy sweet cravings with minimal effort, making them a perfect addition to your dessert repertoire. Their vibrant cherry center, enveloped in a luscious coconut coating and rolled in crunchy graham wafer crumbs, provides a delightful texture and flavor profile that appeals to a wide range of taste preferences. Whether you’re planning a holiday celebration, a casual get-together, or need a quick homemade gift, these cherry balls are an excellent choice. They’re also ideal for those who prefer no-bake recipes, as they require only a few basic ingredients and less than 20 minutes of active preparation time. The combination of maraschino cherries, buttery richness, and coconut flakes results in a dessert that is both nostalgic and innovative, elevating your dessert experience to new heights.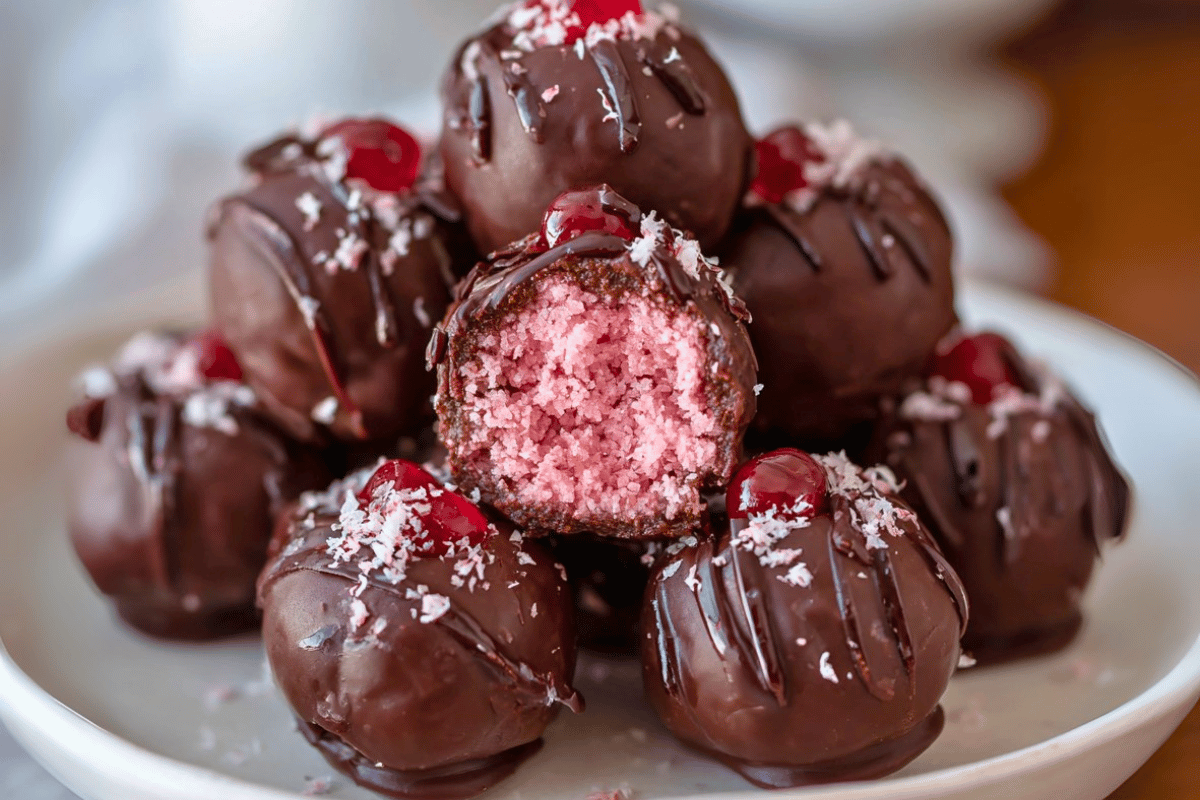
Time
- Preparation Time: 15 minutes
- Total Time: 15 minutes
Needed Equipment
- Mixing bowls (medium and small)
- Measuring cups and spoons
- Small cookie scoop or spoon
- Clean work surface or plate
- Wax paper or parchment paper
- Toothpick or small skewer (optional, for handling cherries)
- Refrigerator or cool storage space
- Airtight container for storage
Tags
dessert, cookie & brownie, fruit, quick, no-bake, easy, holiday, Christmas, snack, bite-sized
Serving Size
Approximately 42 cherry balls, each weighing about 20 grams
Difficulty Level
Easy
Allergen Information
- Contains: Dairy (butter), gluten (graham crackers), soy (if crackers contain soy lecithin), coconut (flakes), cherries (maraschino cherries)
- Potential Cross-Contamination: Processed in facilities handling nuts or other allergens
Dietary Preference
Vegetarian (contains dairy and coconut), gluten-free (if gluten-free graham crackers are used)
Course
Dessert, Snack, Finger Food
Cuisine
American, Holiday/Seasonal
Ingredients
| Ingredient | Quantity | Notes |
|---|---|---|
| Maraschino cherries | 42 cherries | Drained and thoroughly dried |
| Butter | 1/2 cup (113g) | Softened to room temperature for easy mixing |
| Icing sugar (powdered sugar) | 1/2 cup (60g) | Sifted for smoothness if desired |
| Coconut flakes | 1 3/4 cups (140g) | Unsweetened or sweetened, based on preference |
| Orange juice | 1 tablespoon | Freshly squeezed or store-bought |
| Graham wafer crumbs | 1 1/2 cups (150g) | Crushed into fine crumbs |
Instructions
Preparation Phase
Begin by preparing your workspace and ingredients. Place the maraschino cherries on a paper towel and gently pat them dry to remove excess moisture. Proper drying ensures that the coconut mixture adheres well and that the coating process proceeds smoothly. While the cherries are drying, prepare the coconut flakes and graham cracker crumbs by measuring out the required quantities. Having all ingredients ready and within arm’s reach facilitates a seamless assembly process.
Step-by-Step Method
Step 1: Dry the Cherries
Carefully lay the maraschino cherries on a paper towel or clean kitchen towel. Gently press them with another towel or paper towel to absorb excess moisture. This step is crucial because moisture can interfere with the coating process, leading to uneven textures and potential spoilage. Use a toothpick or small skewer to handle the cherries if you wish to avoid fingerprints or to keep them intact during drying.
Step 2: Cream the Butter
In a medium-sized mixing bowl, place the softened butter. Using a hand mixer or a sturdy spatula, beat the butter until smooth and creamy. This process ensures a uniform base for the sweetening ingredients and helps achieve a smooth mixture later. Properly softened butter blends more easily, resulting in a more cohesive mixture.
Step 3: Incorporate Icing Sugar and Orange Juice
Gradually add the icing sugar to the creamed butter, mixing continuously to avoid lumps. Once fully incorporated, add the tablespoon of fresh orange juice. Mix thoroughly until the mixture is smooth and slightly fluffy. The orange juice adds a subtle citrus flavor that complements the cherries and enhances the overall taste profile. If the mixture appears too soft, refrigerate it briefly to firm up.
Step 4: Mix in Coconut Flakes
Add the coconut flakes to the butter mixture in small increments, folding carefully to distribute evenly. The mixture will become soft and slightly sticky. The coconut not only adds texture but also contributes to the flavor complexity. Ensure the coconut flakes are evenly coated and integrated into the mixture.
Step 5: Portion and Wrap the Cherry Centers
Using a small cookie scoop or a teaspoon, portion out a small amount of the coconut mixture. Flatten it slightly and wrap it around each cherry, ensuring the cherry is completely encased. Gently roll the coated cherry between your palms to form a smooth, round ball. The goal is to create a uniform coating that holds the cherry securely inside. This step requires patience to ensure even coverage, but the result is worth the effort.
Step 6: Roll in Graham Cracker Crumbs
Place the graham wafer crumbs in a shallow dish. Roll each coconut-coated cherry ball in the crumbs until fully coated on all sides. This adds a crunchy exterior and a contrasting texture to the soft coconut and cherry interior. Press lightly to ensure the crumbs adhere well, especially around the base.
Step 7: Chill and Set
Arrange the finished cherry balls on wax paper or parchment paper in a single layer. Place them in the refrigerator for at least 30 minutes to allow the flavors to meld and the coating to firm up. Chilling also makes handling and serving easier, ensuring they hold their shape.
Preparation Tips
- Use high-quality maraschino cherries for the best flavor and appearance; drain thoroughly to avoid excess moisture.
- Ensure the butter is softened but not melting to facilitate smooth mixing.
- If the coconut mixture feels too soft, refrigerate it briefly before portioning.
- For a more intense citrus flavor, add a teaspoon of orange zest to the coconut mixture.
- To prevent the mixture from sticking to your hands, lightly dampen your palms with water or wear disposable gloves.
- For uniform cherry balls, use a small cookie scoop or measure with a teaspoon for consistent sizing.
- If you prefer a sweeter coating, substitute graham cracker crumbs with crushed cookies or nuts.
Nutritional Information
| Nutrient | Per Serving (Approx. 1 Cherry Ball) |
|---|---|
| Calories | 71.5 kcal |
| Fat Content | 4.3 g |
| Saturated Fat | 3.1 g |
| Cholesterol | 5.8 mg |
| Sodium | 23 mg |
| Carbohydrates | 8.6 g |
| Fiber | 0.7 g |
| Sugar | 7.4 g |
| Protein | 0.3 g |
Tips and Tricks
- Chill the mixture before portioning to make handling easier and to help maintain shape.
- Use a sturdy spatula or your hands dusted with powdered sugar to prevent sticking when forming balls.
- For a more sophisticated flavor, add a splash of almond or vanilla extract to the coconut mixture.
- To enhance visual appeal, decorate with small sprinkles or edible glitter after coating.
- Adjust sweetness by varying the amount of icing sugar or choosing different types of coconut flakes.
- If you prefer a more intense cherry flavor, chop some cherries and mix into the coconut filling.
- Experiment with different coatings such as crushed nuts, chocolate sprinkles, or cocoa powder for variety.
Add-ons
- Drizzle of melted chocolate over the finished cherry balls for an extra layer of richness.
- Sprinkle with finely chopped nuts or toasted coconut for added texture.
- Insert decorative toothpicks for easy serving or presentation in party platters.
- Wrap individual cherry balls in decorative cellophane bags as homemade gifts.
- Dip in melted chocolate and refrigerate for a chocolate-coated cherry ball variation.
Side Dishes
While these cherry balls are sweet and self-contained, they pair wonderfully with:
- Fresh fruit platter with strawberries, grapes, and citrus segments
- Assorted cheeses and crackers for a sweet and savory contrast
- Light yogurt or vanilla pudding as a refreshing accompaniment
- Miniature coffee or espresso shots for an added flavor boost
Improvements and Variations
- Flavor Infusions: Incorporate a splash of flavored liqueurs such as Grand Marnier, Amaretto, or Cherry Brandy into the coconut mixture for an adult twist.
- Diet-Friendly Options: Use dairy-free butter substitutes and gluten-free graham crackers to cater to dietary restrictions.
- Textural Variations: Add chopped nuts or crispy rice cereal into the coconut mixture for extra crunch.
- Color Themes: Use colored coconut flakes or edible food coloring to match seasonal themes or events.
Save and Store
Keep the cherry balls stored in an airtight container in the refrigerator for up to one week. For longer storage, freeze them in a single layer on a baking sheet, then transfer to a freezer-safe container. Frozen cherry balls can last up to 3 months. Before serving, let them thaw in the refrigerator for about 30 minutes or at room temperature for 10-15 minutes.
FAQ
Can I use fresh cherries instead of maraschino cherries?
Fresh cherries are not suitable because they contain more moisture and lack the flavor profile of maraschino cherries. The maraschino cherries’ syrup and preserved texture are essential for the flavor and consistency of this recipe.
Can I omit the coconut flakes?
Yes, but the coconut adds moisture, flavor, and texture. You can substitute with crushed nuts, cookie crumbs, or leave it out for a less coconut-heavy version.
Is there a way to make these vegan?
Absolutely. Replace the butter with a plant-based margarine or coconut oil, and ensure the graham crackers are gluten-free and vegan. The rest of the ingredients are naturally vegan-friendly.
How can I make these more colorful for a party?
Add food coloring to the coconut mixture or roll the finished balls in colored sprinkles or edible glitter to match your theme.
Conclusion
The No-Bake Cherry Balls recipe from Love With Recipes exemplifies effortless elegance and delightful flavor. Their vibrant appearance, coupled with an irresistible combination of cherry and coconut, makes them a favorite among dessert enthusiasts. Their quick preparation time and minimal ingredients make them an accessible treat for bakers of all skill levels. These cherry balls are not only delicious but also versatile, fitting seamlessly into holiday tables, casual gatherings, or gift baskets. By tweaking the flavorings, coatings, or presentation, you can customize this recipe to suit any occasion or personal preference. Prepare to impress your friends and family with these charming, flavorful confections that require no oven and minimal effort—truly a testament to the idea that sometimes, the simplest recipes are the most memorable.
References
- Love With Recipes. “No-Bake Cherry Balls.” Accessed October 2023.
- Food Network. “Classic No-Bake Cookies.” https://www.foodnetwork.com/recipes/food-network-kitchen/no-bake-cookies-recipe-2108364