Introduction
Embarking on the journey of crafting a luscious, dairy-free dessert that combines the tropical richness of coconut with the subtle sweetness of almonds and the decadent allure of dark chocolate is a culinary adventure worth pursuing. This Coconut Milk Gelato, as featured on Love With Recipes, exemplifies the perfect harmony between creamy texture and bold flavors, making it an ideal treat for hot summer days, special occasions, or simply when you crave a luxurious dessert that aligns with plant-based dietary preferences. The process involves creating a smooth, flavorful base infused with natural sweetness, then transforming it into a velvety gelato with a delightful streak of dark chocolate, reminiscent of classic stracciatella but with a vegan twist. Not only does this recipe offer a satisfying sweet experience, but it also introduces you to the art of dairy-free gelato making, showcasing how simple ingredients can come together to produce an elegant and indulgent dessert.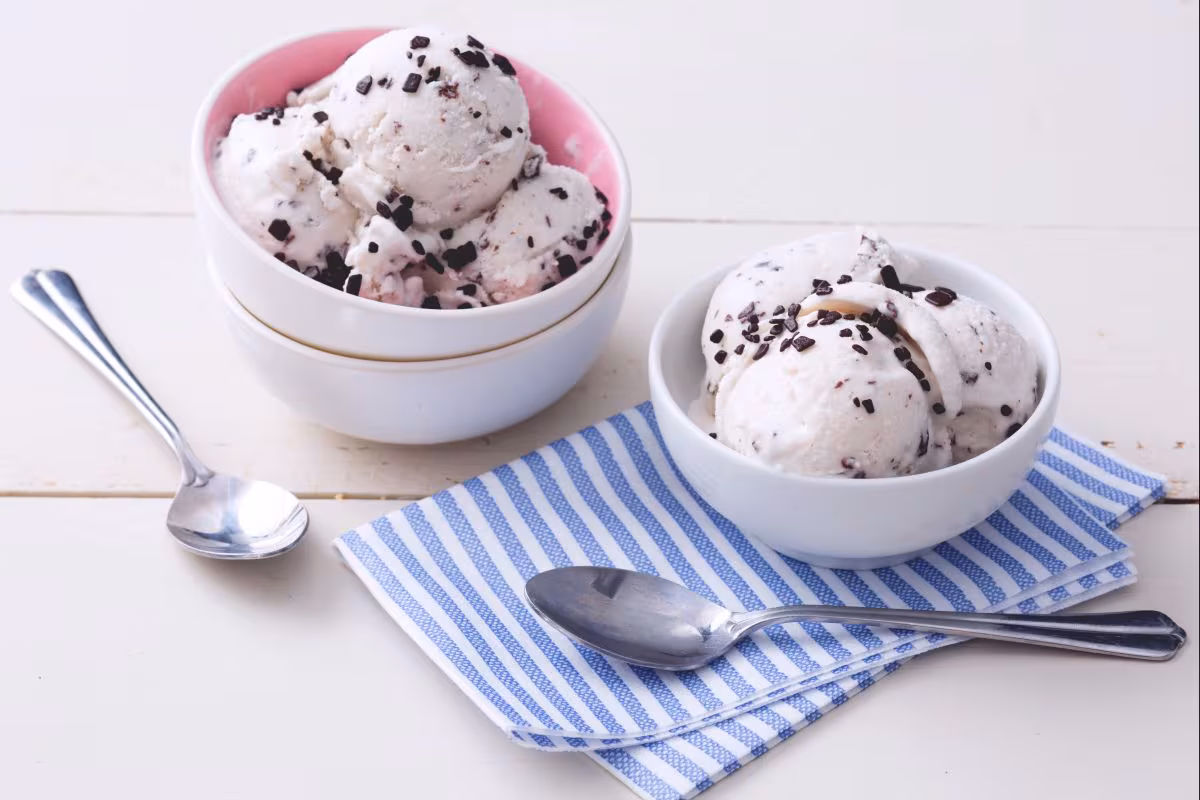
Time
Total Preparation and Freezing Time:
- Preparation Time: 15 minutes
- Chilling Time: 1 hour
- Churning Time: 20 minutes
- Additional Freezing Time (optional): 2-4 hours for firm texture
Overall, from start to finish, expect approximately 4 hours, including chilling and freezing, to enjoy your homemade coconut milk gelato at its best. This timeline ensures the flavors meld beautifully, and the texture reaches the ideal creaminess for serving.
Needed Equipment
Essential Kitchen Tools:
- Medium saucepan — for heating the almond milk and dissolving sugar
- Whisk or spoon — to stir the mixture thoroughly
- Mixing bowls — one for combining coconut milk and the heated almond mixture
- Plastic wrap or airtight lid — for covering the bowl during chilling
- Ice cream maker — crucial for churning and achieving the perfect gelato texture
- Rubber spatula — to scrape the mixture and incorporate chocolate evenly
- Measuring cups and spoons — for precise ingredient measurement
- Fine sieve or strainer (optional) — to ensure smoothness if needed
- Freezer-safe airtight container — for storage if not serving immediately
- Silicone spatula — for mixing and transferring
- Thermometer (optional) — to monitor temperature during heating
Tags
Vegan, Dairy-Free, Gluten-Free, Plant-Based, No-Bake, Summer Dessert, Chocolate, Tropical, Easy, Homemade, No Added Preservatives
Serving Size
This recipe yields approximately four 1-cup servings, making it perfect for small gatherings or intimate dessert indulgences. Adjust the quantities proportionally if serving more guests or planning to make a larger batch for freezing.
Difficulty Level
Intermediate — While the steps are straightforward, achieving the perfect texture requires attention to detail during heating, chilling, and churning. Familiarity with using an ice cream maker enhances the process, but with patience, this recipe is accessible to home cooks with basic culinary skills.
Allergen Information
- Contains coconut and almonds (nut allergens)
- May contain traces of chocolate, which could be a concern for those with soy or dairy allergies (though this recipe is dairy-free)
Note: Always check ingredient labels if using store-bought products to ensure allergen-free compliance.
Dietary Preference
Vegan, Vegetarian, Dairy-Free, Nut-Free (if almond milk is substituted), Gluten-Free (if ingredients are verified gluten-free)
Course
Dessert
Cuisine
Global / Tropical
Ingredients
| Ingredient | Quantity |
|---|---|
| Coconut Milk | 300g |
| Almond Milk | 100g |
| Brown Sugar | 50g |
| Dark Chocolate | 100g |
Instructions
Step 1: Prepare the Base
Begin by gathering all your ingredients and measuring them precisely. Pour the 100 grams of almond milk into a medium-sized saucepan. Place the saucepan on a stove over medium heat, allowing the liquid to warm gradually. As the almond milk heats, add the 50 grams of brown sugar. Stir continuously with a whisk or a sturdy spoon to ensure that the sugar dissolves completely into the almond milk. The mixture should be warmed to a temperature of approximately 60°C (140°F), but do not bring it to a boil, as high heat can alter the texture and flavor. Aim for a gentle simmer just enough to dissolve the sugar thoroughly, creating a sweet, fragrant base. This step is crucial because it helps to infuse the almond milk with sweetness, which will enhance the overall flavor of the gelato. Once the sugar is fully dissolved, remove the saucepan from the heat and set it aside to cool slightly.
Step 2: Combine the Mixtures
While the almond milk and sugar mixture cools, retrieve a clean mixing bowl and pour in the 300 grams of coconut milk. Coconut milk, especially when canned, can vary in consistency. For best results, use full-fat coconut milk for a richer, creamier texture. Once the almond milk mixture has cooled enough to not cook the coconut milk, slowly pour it into the bowl containing the coconut milk. Use a whisk or spoon to stir gently and thoroughly, ensuring the flavors meld seamlessly. This step is critical for creating a smooth, homogeneous base that will churn into a luscious gelato. The blending of coconut and almond milk provides a balanced tropical flavor with a hint of nuttiness, offering a nuanced taste profile that pairs beautifully with dark chocolate.
Step 3: Chill and Mix
Cover the bowl tightly with plastic wrap or an airtight lid to prevent any contamination and to lock in the flavors. Place the bowl in the refrigerator for at least one hour, or until the mixture is thoroughly chilled—preferably for two hours. This step not only ensures food safety but also allows the flavors to develop and intensify. The cold temperature is essential for the churning process, as it results in a smoother, creamier gelato. During chilling, consider stirring the mixture once or twice to prevent a skin from forming on the surface and to promote even cooling. If you have a thermometer, aim for a temperature below 4°C (39°F). Proper chilling is the foundation for a silky, melt-in-your-mouth texture.
Step 4: Make the Gelato
Once the mixture is well chilled, transfer it into your ice cream maker. Follow the manufacturer’s instructions for your specific model, typically pouring the mixture into the frozen bowl or container. Start the machine and let it churn for about 10 minutes. While the machine is running, prepare the dark chocolate by roughly chopping it into small, manageable pieces. As the churning progresses, slowly add the chopped dark chocolate into the mixture. This process creates a beautiful stracciatella effect, where tiny ribbons of chocolate are dispersed throughout the creamy gelato. The slow addition ensures even distribution without clumping, and the churning action prevents the chocolate from sinking to the bottom. Continue churning until the gelato reaches a soft-serve consistency, approximately another 10 minutes. The texture should be thick, smooth, and scoopable, with small chocolate flecks evenly distributed.
Step 5: Achieving the Perfect Texture
If you prefer a firmer gelato, transfer the soft mixture into a freezer-safe airtight container. Cover tightly and freeze for an additional 2-4 hours. During this period, the gelato will harden and develop a more traditional ice cream consistency. For immediate serving, the gelato can be enjoyed right after churning, but note that it will be softer and more like a frozen custard. To serve, allow the gelato to sit at room temperature for 5-10 minutes to soften slightly, making scooping easier and enhancing flavor release.
Preparation Tips
- Ingredient Quality: Use high-quality coconut milk and dark chocolate for optimal flavor. Full-fat coconut milk yields a richer gelato, while high cacao percentage dark chocolate (70% or higher) provides a deep, intense chocolate flavor.
- Chilling Technique: The colder the mixture before churning, the better the texture. Consider pre-freezing your ice cream maker’s bowl if applicable.
- Chocolate Addition: For a more intense chocolate flavor, melt the dark chocolate briefly in a double boiler and drizzle it into the churning gelato instead of adding chopped pieces. Alternatively, incorporate chocolate chips or chunks for varied textures.
- Flavor Variations: Add a splash of vanilla extract, a pinch of sea salt, or a sprinkle of toasted coconut on top for personalized touches.
Nutritional Information
| Nutrient | Per Serving (approximate) |
|---|---|
| Calories | 220 kcal |
| Fat | 15 g |
| Carbohydrates | 18 g |
| Sugar | 12 g |
| Protein | 3 g |
| Fiber | 2 g |
Tips and Tricks
- Pre-freeze Equipment: Ensure your ice cream maker bowl is frozen at least 24 hours prior to churning for optimal results.
- Chocolate Consistency: For uneven distribution, sieve the chopped chocolate before adding, ensuring uniform size and meltability.
- Flavor Intensity: Toast the chopped dark chocolate slightly in a dry skillet to enhance aroma and flavor before adding it to the churned mixture.
- Texture Control: To prevent ice crystals, consider adding a tablespoon of alcohol like vodka, which lowers the freezing point and improves smoothness.
Add-ons
- Chopped toasted nuts such as almonds, hazelnuts, or pistachios for added crunch
- Fresh berries or tropical fruits like mango or pineapple for a fruitier twist
- Swirls of coconut caramel or fruit preserves to add flavor layers
- A sprinkle of sea salt on top for a salted caramel effect
Side Dishes
Complement your coconut milk gelato with:
- Vegan biscotti or almond cookies for dipping
- Fresh fruit salads with citrus or tropical fruits
- Vegan whipped cream or coconut cream topping
- Light, crisp waffle cones or bowls for a traditional presentation
Improvements
- Incorporate infused flavors by adding vanilla beans, cinnamon sticks, or cardamom during the heating process for nuanced taste complexities.
- Use coconut cream instead of coconut milk for an even richer, silkier gelato.
- Experiment with different dark chocolates—varying cacao percentages or adding infused flavors like chili or orange zest for unique profiles.
- For a more decadent experience, swirl in a coconut caramel or fudge ripple before freezing.
Save and Store
To preserve the freshness and texture of your coconut milk gelato, store it in an airtight container in the freezer. For best results, consume within 2 weeks of freezing. To prevent ice crystals from forming, press a piece of parchment paper directly onto the surface before sealing. When ready to serve, let the gelato sit at room temperature for 5-10 minutes to soften slightly, making scooping easier and enhancing flavor release.
FAQ
Can I make this gelato without an ice cream maker?
Yes, although the texture might be slightly different. After chilling the mixture thoroughly, pour it into a freezer-safe container, stirring vigorously every 30-60 minutes for the first few hours to break up ice crystals. This manual method requires patience but can still produce delicious results.
Is this recipe suitable for vegans?
Absolutely. Using plant-based chocolate and ensuring all ingredients are dairy-free makes this gelato vegan-friendly. Love With Recipes encourages plant-based adaptations for a healthier, cruelty-free treat.
Can I add other flavors or ingredients?
Yes, feel free to customize by adding spices, extracts, or mix-ins such as berries, nuts, or infused oils. Just be mindful of the overall consistency and how additional ingredients might affect churning.
What’s the best way to melt dark chocolate for this recipe?
Use a double boiler or microwave in short bursts (15 seconds), stirring in between until smooth. Avoid overheating to prevent seizing or burning, ensuring a glossy, smooth chocolate to incorporate into the churned gelato.
Conclusion
This Coconut Milk Gelato epitomizes the art of crafting a luxurious, dairy-free dessert that is both satisfying and health-conscious. Its velvety texture, complemented by the crunch of dark chocolate, makes it a versatile choice for various dietary needs and flavor preferences. By following Love With Recipes’ detailed instructions, you can elevate your culinary skills and impress guests or family with a homemade treat that’s as beautiful as it is delicious. Remember, the key to excellence lies in quality ingredients, patience during chilling, and gentle churning to achieve that perfect, scoopable consistency. Whether enjoyed immediately or stored for later, this gelato promises a refreshing escape into tropical and chocolatey bliss, embodying the joy of guilt-free indulgence.
References
- “Vegan Gelato Recipes,” The Veggie Table, 2022.
- “Coconut Milk-Based Desserts,” Coconut Content, 2021.