Introduction
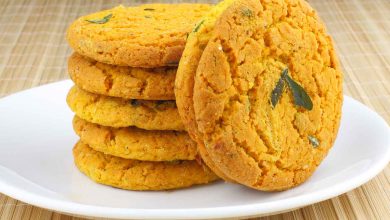
Originating from North India, Mathri is a traditional snack that embodies the rich culinary heritage of the region. Known for its crisp texture and savory flavor, Mathri has been a staple during festive occasions and teatime gatherings for generations. Traditionally, these flaky, crunchy bites are deep-fried in ghee or oil, which imparts a luxurious richness and a distinct aroma. However, with the increasing emphasis on healthier eating habits, baking has emerged as a delightful alternative that preserves the authentic taste and texture while significantly reducing the calorie content and fat intake.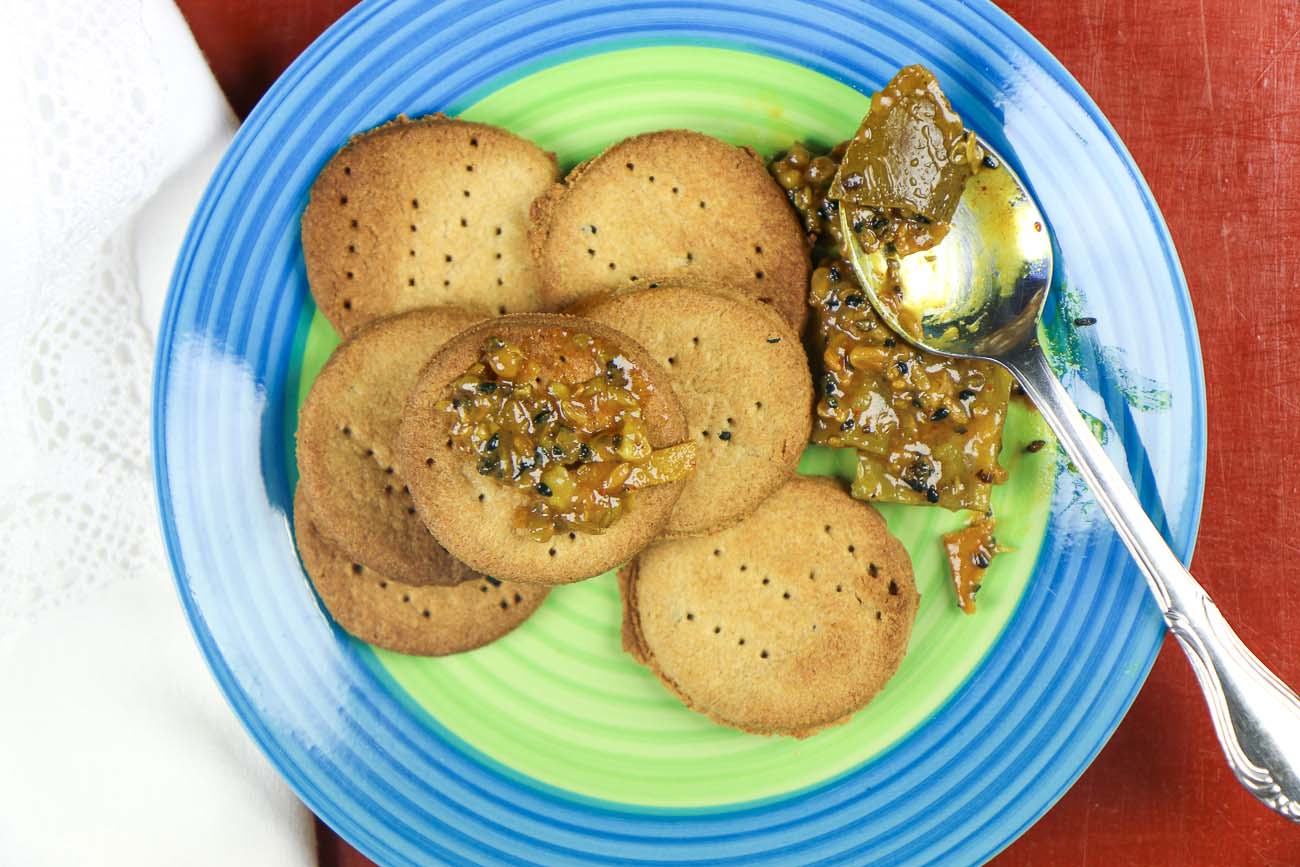
At Love With Recipes, we are committed to bringing you delicious, nutritious, and innovative recipes. This particular Baked Mathri recipe exemplifies that approach—combining traditional flavors with modern health-conscious techniques. It offers a crispy, savory snack that pairs beautifully with a hot cup of chai, a spicy mango pickle, or even as a tea-time appetizer for family and friends. Whether you’re preparing for a festive celebration, a casual tea session, or simply exploring Indian snacks, this baked version of Mathri is a must-try that promises the same satisfying crunch with fewer calories and less oil.
Time
Preparation Time
20 minutes
Cooking Time
40 minutes
Needed Equipment
- Oven with temperature control
- Large mixing bowls
- Measuring cups and spoons
- Rolling pin
- Cookie cutter or small round cutter
- Baking sheet (preferably with parchment paper or silicone baking mat)
- Fork for pricking the dough
- Wire rack for cooling
- Spatula or tongs
- Damp cloth for covering dough
- Knife for chopping butter and spices
Tags
Indian Snacks, Healthy Recipes, Baked Snacks, Tea Time Snacks, Vegetarian, Appetizer, Traditional Indian Food, Low Oil Recipes
Serving Size
This recipe yields approximately 20-25 Mathris, serving about 4-5 people depending on portion sizes. Typically, each person might enjoy 4-5 Mathris as a snack or part of a tea-time platter.
Difficulty Level
Intermediate — requires basic baking skills, dough handling, and shaping techniques, but no advanced culinary expertise.
Allergen Information
| Allergen | Present in Recipe | Notes |
|---|---|---|
| Gluten | Yes | Contains wheat flour |
| Dairy | No | Contains butter, which is dairy |
| Nuts | No | Not included in this recipe |
| Soy | No | Not used in this recipe |
Dietary Preference
Vegetarian — suitable for vegetarians. For vegans, substitute dairy butter with plant-based margarine or oil and ensure other ingredients are vegan-friendly.
Course
Snack, Appetizer, Tea-time Dish
Cuisine
Indian, North Indian
Ingredients
Ingredient Details
| Ingredient | Quantity | Notes |
|---|---|---|
| Whole Wheat Flour | 1 1/2 cups (180 grams) | Preferably fine variety for better texture |
| Salt | 1 teaspoon (5 grams) | Adjust to taste |
| Unsalted Butter (finely chopped) | 1/4 cup (57 grams) | Chilled for best results |
| Whole Black Peppercorns (coarsely crushed) | 1/2 teaspoon (2 grams) | Freshly crushed for aroma |
| Ajwain (Carom Seeds) or Cumin Seeds | 1/2 teaspoon (1 gram) | Optional but recommended for flavor |
| Chilled Water | 2 tablespoons (30 ml) (adjust as needed) | Use cold water to keep dough firm |
Instructions
Step 1: Preheat Your Oven
Begin by setting your oven to 180°C (350°F) and allowing it to preheat thoroughly. Proper preheating ensures that the Mathris bake evenly and develop a crisp, golden exterior. During preheating, prepare your baking sheet by lining it with parchment paper or a silicone baking mat. This prevents sticking and facilitates easy removal of the baked Mathris.
Step 2: Prepare the Dry Ingredients
In a large mixing bowl, combine the whole wheat flour, salt, coarsely crushed black peppercorns, and ajwain or cumin seeds. Use a whisk or fork to mix these ingredients thoroughly, ensuring even distribution of spices and seasonings. This step is crucial for flavor integration and uniformity in each Mathri.
Step 3: Incorporate the Butter
Add the chilled, finely chopped unsalted butter into the dry mixture. Using your fingertips, rub the butter into the flour until the mixture resembles coarse crumbs or a coarse meal. This process is similar to making pastry dough and is vital for achieving the flaky, layered texture characteristic of Mathri. Make sure the butter remains cold to prevent melting, which helps in creating a crispy exterior.
Step 4: Form the Dough
Gradually add chilled water, one tablespoon at a time, mixing with your fingers or a dough scraper. Incorporate the water until the mixture starts to come together into a rough dough. Continue kneading gently until the dough forms a firm, pliable ball. Be cautious not to add too much water; the dough should be firm enough to roll without cracking but not sticky. Adjust the quantity as needed—less water for a firmer dough and more if it feels too dry.
Step 5: Rest the Dough
Cover the dough with a damp cloth or plastic wrap and let it rest for approximately 15 minutes. Resting relaxes the gluten, making the dough easier to roll out and shaping more manageable. During this period, the flavors meld, and the butter solidifies slightly, ensuring a flaky texture after baking.
Step 6: Roll and Shape
Divide the rested dough into smaller portions, typically 2-3. Roll each portion into a smooth ball, then flatten into discs about 2 inches in diameter and approximately 1/2 inch thick. To achieve uniformity, use a rolling pin on a lightly floured surface. Alternatively, for a more traditional look, you may roll out a single large circle and cut into rounds using a cookie cutter or small round cutter. Ensure each rolled Mathri is evenly thick for consistent baking and crispiness.
Step 7: Prepare for Baking
Place the shaped Mathris onto the prepared baking sheet, spacing them at least 1 inch apart to allow for expansion. Use a fork to prick the tops of each Mathri evenly—this step prevents puffing and helps in even baking. Proper pricking also enhances the visual appeal of the Mathris, giving them a traditional, handcrafted look.
Step 8: Baking
Insert the baking sheet into the preheated oven. Bake for approximately 20 minutes, or until the Mathris turn a beautiful golden brown and develop a crispy exterior. Keep a close watch during the last few minutes to prevent overbaking or burning. Baking times may vary slightly depending on oven calibration and the thickness of the Mathris, so monitor their color and texture carefully.
Step 9: Cooling
Once baked, remove the Mathris from the oven and transfer them to a wire rack. Allow them to cool completely at room temperature. Cooling on a wire rack ensures proper air circulation, preventing moisture buildup that could soften the Mathris. The cooled Mathris will become even crunchier as they lose residual heat.
Step 10: Storage and Serving
Store the cooled Mathris in an airtight container. They will stay fresh and crispy for up to two weeks if stored properly. Serve these Mathris with a spicy mango pickle or your favorite achar, alongside a steaming cup of chai or coffee to complete an authentic Indian teatime experience.
Preparation Tips
- Use Cold Ingredients: Keep butter and water chilled to prevent melting during mixing, which is essential for flaky layers.
- Consistent Thickness: Roll the Mathris uniformly to ensure even baking and crispiness.
- Prick the Tops: Use a fork to prick the Mathris before baking, which helps prevent puffing and promotes even browning.
- Adjust Baking Time: Keep an eye on baking time to achieve the perfect golden hue and crunch, as oven temperatures may vary.
- Prevent Moisture: Cool the Mathris completely before storing to avoid condensation and sogginess.
Nutritional Information
| Nutrient | Per Serving (Approximate) | Details |
|---|---|---|
| Calories | 150 kcal | Based on 5 Mathris per serving |
| Protein | 4 grams | Derived mainly from whole wheat flour |
| Fat | 8 grams | Includes butter and negligible oils if used |
| Carbohydrates | 20 grams | Primarily from wheat flour |
| Fiber | 3 grams | Whole wheat flour contributes to fiber content |
Tips and Tricks
- Flavor Variations: Add chopped green chilies or ginger for an extra spicy kick. You can also sprinkle some sesame seeds on top before baking for added flavor and crunch.
- Gluten-Free Version: Substitute wheat flour with gluten-free flour blends, but be aware that texture may vary.
- Batch Baked and Frozen: Prepare dough in advance, shape the Mathris, freeze them on a tray, then transfer to airtight containers. Bake directly from frozen, adding a few extra minutes to baking time.
- Uniform Shapes: Use a cookie cutter for perfect round Mathris, but also feel free to experiment with different shapes for visual appeal.
Add-ons
- Chopped herbs such as cilantro or mint can be kneaded into the dough for fresh flavor.
- Crushed dried fenugreek leaves (kasuri methi) add a subtle, savory aroma.
- Incorporate a teaspoon of ajwain or cumin powder for enhanced flavor.
Side Dishes
- Spicy Mango Pickle (Achar)
- Green Chutney or Mint Yogurt Dip
- Masala Chai or Hot Tea
- Sweetened Milk or Lassi for a contrasting beverage
Improvements
- Enhanced Flakiness: Incorporating a small amount of yogurt into the dough can increase tenderness and flakiness.
- Additional Crunch: Sprinkling sesame seeds or poppy seeds on top before baking adds extra texture.
- Flavor Boosters: Toasted cumin or coriander powders mixed into the dough enhance aroma and taste.
Save and Store
Ensure Mathris are completely cooled before storing to prevent moisture buildup. Keep them in an airtight container at room temperature for up to two weeks. For longer storage, place them in a sealed zip-lock bag or container and refrigerate for up to a month. Reheat briefly in a hot oven before serving to restore crispness.
FAQ
Can I bake Mathri without butter?
Yes, you can substitute butter with plant-based margarine or oil. Keep in mind that using butter adds flavor and flaky layers, so the texture might slightly differ.
Can I make the dough ahead of time?
Absolutely! Prepare the dough, wrap it in plastic, and refrigerate for up to 24 hours. Let it come to room temperature before rolling out and baking.
How do I prevent Mathris from puffing up?
Pricking the tops with a fork before baking allows steam to escape, preventing puffiness and ensuring a flat, crispy appearance.
Is baking Mathri healthier than frying?
Yes, baking significantly reduces fat and calorie content, making it a healthier alternative while maintaining the traditional crunch and flavor.
Conclusion
This baked Mathri recipe offers a perfect fusion of tradition and health consciousness. It enables you to indulge in the crunchy, savory snack loved across North India without guilt. The method emphasizes proper preparation, ingredient quality, and baking techniques to achieve a crispy, flaky texture reminiscent of its deep-fried counterpart. Whether served during festivities, teatime, or as a quick snack, these Mathris are sure to delight your taste buds and impress guests with their authentic flavor and modern health benefits. Dive into the rich flavors of Indian cuisine with this wholesome, oven-baked version that embodies the best of both worlds.
References
- Indian Food and Cooking: The Ultimate Guide by Anjum Anand
- The Art of Indian Snacks by Nita Mehta