Introduction
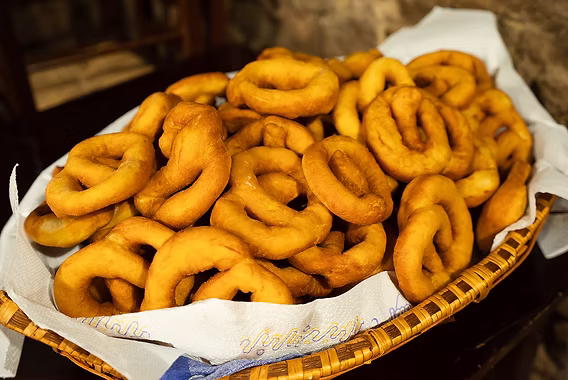
Introducing the beloved Brazilian delicacy known as coxinha, a snack that encapsulates the vibrant culinary spirit of Brazil with its irresistible combination of crispy exterior and savory, tender chicken filling. Often dubbed the Brazilian version of arancini, coxinhas are shaped like miniature chicken drumsticks, making them not only delicious but also visually appealing. This recipe, provided by Love With Recipes, offers a comprehensive guide to creating authentic, crispy coxinhas from scratch, perfect for entertaining guests or enjoying as a hearty snack. The process involves meticulous preparation of the chicken filling, a rich dough, and the frying technique that results in a golden, crunchy shell — a texture contrast that makes these treats so addictive. Embark on this culinary journey and impress your friends and family with these iconic Brazilian bites that are sure to become a household favorite.
Time
- Preparation Time: 30 minutes
- Cooking Time: 30 minutes
- Total Time: 1 hour
The total duration includes all steps from preparing the filling, making the dough, shaping, breading, and frying to achieve perfectly crispy coxinhas. Planning ahead allows sufficient time for each phase, especially if you intend to prepare in advance for an event or gathering.
Needed Equipment
- Large pot or Dutch oven – for preparing the chicken filling and frying
- Sharp knife – for chopping chicken, vegetables, and herbs
- Cutting board – sturdy and spacious
- Wooden spoons or silicone spatula – for sautéing and mixing
- Measuring cups and spoons – precise measurement of liquids and ingredients
- Mixing bowls – for preparing dough, batter, and breading
- Whisk – to prevent lumps when making the bechamel
- Pastry cutter or spoon – to shape the coxinhas
- Cookie scoop or spoon – for portioning and shaping
- Deep-frying thermometer (optional but recommended) – to monitor oil temperature
- Slotted spoon or spider strainer – for removing fried coxinhas
- Paper towels – for draining excess oil
- Cooking tongs – for handling hot coxinhas during frying
- Cooling rack (optional) – to keep coxinhas crispy after frying
Tags
- Brazilian cuisine
- Appetizers
- Snacks
- Fried foods
- Party food
- Finger foods
Serving Size
Serves approximately 6 people, with each person enjoying about 4-5 coxinhas, depending on size. This quantity is ideal for appetizers or party snacks, and can be scaled up or down based on the number of guests.
Difficulty Level
Intermediate — While the process involves multiple steps, including preparing the filling, dough, and frying, with careful attention to detail, even home cooks with moderate kitchen experience can master this recipe. Patience during shaping and frying ensures perfect results.
Allergen Information
| Allergen | Present in Ingredient | Notes |
|---|---|---|
| Gluten | All-purpose flour, bread crumbs | Contains wheat gluten; can be substituted with gluten-free alternatives if necessary |
| Egg | Egg yolk | Provides richness and helps bind the dough |
| Milk | Whole milk | Can be replaced with plant-based milk for dairy-free version |
| Chicken | Chicken breast | For vegetarians or vegans, substitute with seasoned tofu or plant-based protein |
| Oil | Vegetable oil for frying | Use neutral oil such as canola or sunflower oil |
Dietary Preference
- Contains meat — suitable for omnivores
- Gluten-containing — can be adapted for gluten-free diets with substitutions
- Vegetarian/vegan — requires modifications as noted above
Course
Appetizer, Snack, Finger Food
Cuisine
Brazilian
Ingredients
Ingredient List in Detail
| Ingredient | Quantity |
|---|---|
| Chicken breast | 300g |
| Carrot | 1 |
| Celery stalk | 1 |
| Onion | 1 (half finely chopped) |
| Tomato passata | 2 tablespoons |
| Garlic | 2 cloves (minced) |
| Fresh parsley | 2 tablespoons (chopped) |
| Bay leaves | 2 |
| Extra virgin olive oil | As needed |
| Salt | As needed |
| Black pepper | As needed |
| Chicken broth | 400 ml |
| All-purpose flour | 250 g |
| Whole milk | 125 ml |
| Butter | 50 g |
| Egg yolk | 1 |
| Additional all-purpose flour | 50 g |
| Additional whole milk | 75 ml |
| Bread crumbs | As needed |
Instructions
1. Prepare the Chicken Filling
Begin by meticulously preparing your chicken filling, which forms the core of the coxinha. Use a sharp knife to cut the chicken breast into uniform small chunks—about 1 to 1.5 centimeters in size—to ensure even cooking and a tender texture. The uniformity of pieces also simplifies the subsequent chopping process, leading to a smoother, more cohesive filling.
Peel and chop the onion into fine pieces, aiming for half an onion—roughly 40-50 grams, depending on size. The onion contributes sweetness and depth to the filling. Peel the carrot and celery stalk, then chop them into small, uniform pieces to facilitate quick cooking and blending. The chopped vegetables add aroma, moisture, and flavor complexity.
Set the vegetables aside, and prepare to sauté. This initial step is critical as it builds a flavor base, enhancing the overall taste of the filling.
2. Sauté the Aromatics
Heat approximately two tablespoons of high-quality extra virgin olive oil in a large, heavy-bottomed pot or Dutch oven over medium heat. When the oil shimmers, add the minced garlic—about two cloves—either crushed or finely chopped. Sauté gently for 30 seconds to a minute until fragrant, but avoid burning the garlic, which can impart bitterness.
Add the chopped half onion to the aromatic oil. Stir frequently, cooking until the onion becomes translucent and slightly golden, roughly 8-10 minutes. This slow sautéing develops sweetness and depth, creating a savory foundation for your filling.
To amplify flavor, you can add a pinch of salt during this phase, which helps draw out moisture from the vegetables and enhances their natural sweetness. Keep the heat moderate to prevent burning and ensure even cooking.
3. Incorporate Tomato and Chicken
Stir in the tomato passata (2 tablespoons), distributing it evenly across the sautéed aromatics. Allow the mixture to cook for 3-4 minutes, stirring occasionally, to meld flavors and cook off the raw tomato taste. The passata lends acidity, brightness, and richness to the filling.
Next, add the chopped chicken breast to the pot, stirring to coat the pieces with the tomato and aromatics. Cook the chicken for about 5-7 minutes, stirring occasionally, until it begins to turn opaque and is partially cooked through. Season with salt and black pepper to taste, adjusting as necessary to balance flavors.
This stage ensures the chicken is well-coated with flavors, and the mixture begins to develop a cohesive, savory aroma.
4. Simmer and Flavor Development
Pour in 400 ml of chicken broth, which adds moisture and depth of flavor. Drop in two bay leaves, which impart subtle aromatic nuances akin to a gentle herbal infusion. Stir everything thoroughly, ensuring the ingredients are well incorporated.
Reduce heat to low and let the mixture simmer gently for 20-25 minutes. During this time, the chicken will become fully cooked, tender, and infused with the flavors of the broth, vegetables, and seasonings. Keep the lid slightly ajar or stir occasionally to prevent sticking.
Periodically check the mixture—especially towards the 20-minute mark—to ensure it does not dry out. If necessary, add a splash more broth or water to maintain moisture. The goal is a moist, flavorful filling that can be chopped or mashed into a paste.
5. Finishing the Chicken Mixture
Once the chicken is tender and the mixture has thickened, remove the pot from the heat. Carefully discard the bay leaves. Transfer the chicken mixture to a cutting board or large plate and allow it to cool slightly. This step prevents the dough from becoming too soft when filling.
Once cooled, use a knife or food processor to finely chop the chicken mixture until it resembles a coarse paste—this consistency is ideal for filling the coxinhas. Stir in freshly chopped parsley (about two tablespoons) for a fresh, herbal note that brightens the filling. Ensure even distribution of herbs for a consistent flavor profile.
6. Prepare the Dough
In a clean saucepan, melt 50 grams of butter over medium heat. Once melted, add 250 grams of all-purpose flour gradually, stirring constantly with a wooden spoon or silicone spatula. Cook this mixture for approximately 2 minutes, creating a roux—an essential step for a smooth, elastic dough.
Slowly pour in 125 ml of whole milk, whisking vigorously to incorporate and prevent lumps. Continue whisking until the mixture thickens into a smooth, dough-like consistency, which should be elastic and easy to handle. Remove from heat and allow it to cool slightly, about 5-10 minutes, to prevent the egg from cooking prematurely when added.
This bechamel-inspired dough forms the shell of the coxinha and must be pliable yet firm enough to hold the filling.
7. Combine and Shape
Add the egg yolk to the slightly cooled dough, mixing thoroughly to incorporate. The egg provides richness and elasticity, ensuring the dough bonds well when shaping. Once combined, transfer the dough onto a lightly floured surface and knead briefly to achieve a uniform, smooth texture.
Divide the dough into small portions, roughly 50 grams each, which is about the size of a golf ball. Take one portion and flatten it slightly in your palm, forming a small disc. With your thumb, make a shallow indentation in the center of the disc.
Place about 10 grams of the prepared chicken filling into the indentation. Carefully fold the dough around the filling, sealing it completely. Gently shape the filled dough into a small, elongated drumstick—mimicking the shape of a chicken leg. Use your hands to smooth out the shape, ensuring no filling protrudes. Repeat this process with all portions.
8. Prepare for Frying
In a shallow bowl, prepare the batter by combining the remaining 75 ml of whole milk with 50 g of all-purpose flour. Whisk until smooth. This batter will act as an initial coating to help the breadcrumbs stick evenly.
In another shallow bowl, spread out bread crumbs—preferably fine or panko for extra crunch. Set both bowls near your workstation for efficient breading.
Dip each shaped coxinha into the batter, ensuring full coverage, then transfer to the bread crumbs. Roll gently to coat all sides evenly, pressing lightly if necessary to adhere the crumbs firmly.
9. Fry the Coxinhas
Heat vegetable oil in a deep-fryer or large, heavy-bottomed pan over medium heat. Use a thermometer if available; the ideal temperature for frying is around 170°C (340°F). To test readiness, dip the tip of a wooden skewer into the oil—if bubbles form immediately, the oil is hot enough.
Carefully place the breaded coxinhas into the hot oil, working in batches to avoid overcrowding. Fry for approximately 2-3 minutes per batch, turning occasionally, until they are deep golden brown and crispy on all sides.
Use a slotted spoon or spider strainer to remove the fried coxinhas, draining excess oil. Place on paper towels to absorb residual oil and keep them crispy.
10. Serve and Enjoy
Serve the coxinhas hot, ideally immediately after frying for maximum crunchiness. They pair beautifully with dipping sauces such as spicy chili, garlic aioli, or a tangy tomato sauce. For presentation, arrange on a platter garnished with fresh herbs or lemon wedges for added visual appeal.
These crispy, flavorful treats are perfect for sharing at parties, family gatherings, or casual snack moments. Their irresistible combination of textures and flavors makes them a true crowd-pleaser, embodying the vibrant essence of Brazilian cuisine.
Preparation Tips
- Vegetable Prep: Finely chop vegetables uniformly for consistent cooking and blending into the filling.
- Flavor Development: Sauté aromatics slowly to develop sweetness and prevent burning.
- Cooling the Filling: Allow the cooked filling to cool sufficiently before handling to prevent the dough from becoming soggy.
- Shaping: Keep portions consistent for even frying and presentation.
- Oil Temperature: Maintain a steady oil temperature during frying to ensure even browning and crispiness.
- Batch Frying: Avoid overcrowding for uniform cooking and to prevent temperature drops in the oil.
Nutritional Information
| Nutrient | Per Serving (approximate) |
|---|---|
| Calories | 250 kcal |
| Protein | 12 g |
| Fat | 15 g |
| Carbohydrates | 20 g |
| Sodium | 400 mg |
| Fiber | 2 g |
Note: Nutritional values are approximate and can vary based on ingredient brands and portion sizes.
Tips and Tricks
- Filling Variations: Incorporate cheese, herbs, or spices into the chicken mixture for personalized flavors.
- Gluten-Free Option: Use gluten-free flour and panko, and ensure the batter is adapted accordingly.
- Make-Ahead: Shape the coxinhas and freeze them unbreaded; fry directly from frozen for convenience.
- Oil Choice: Use neutral oils like vegetable or canola to prevent flavor interference.
- Serving Temperature: Serve immediately for optimal crispiness; reheat in an oven to regain crunch if needed.
Add-ons
- Cheese filling or cheese-stuffed variations
- Spicy sauce or chili dip for added heat
- Herb-infused dough for aromatic enhancement
Side Dishes
- Fresh Brazilian salad with tomatoes, onions, and herbs
- Chimichurri or tangy dipping sauces
- Fried plantains or crispy yucca fries
- Refreshing citrus salad or fruit platter
Improvements and Variations
- Healthier Version: Bake the shaped coxinhas at 180°C (356°F) for 20-25 minutes until golden, reducing oil intake.
- Vegan Adaptation: Replace chicken with seasoned tofu or jackfruit, use plant-based milk and vegan margarine or oil, and ensure bread crumbs are vegan.
- Spicy Kick: Add chopped chili or hot sauce to the filling for a fiery twist.
- Cheese Lover’s Version: Incorporate shredded cheese into the filling or inside the dough for extra richness.
Save and Store
Unfried, shaped coxinhas can be stored in the freezer for up to 3 months. Place them on a baking sheet lined with parchment paper, freeze until solid, then transfer to an airtight container or zip-top bag. When ready to serve, fry directly from frozen, adding an extra minute or two to the frying time.
Cooked coxinhas are best enjoyed fresh, but leftovers can be stored in an airtight container in the refrigerator for up to 2 days. Reheat in an oven or air fryer to restore crispiness, avoiding microwave reheating which can make the coating soggy.
FAQ
Can I bake coxinhas instead of frying?
Yes, for a healthier alternative, bake at 180°C (356°F) for about 20-25 minutes until golden and crispy. Keep an eye on them to prevent burning and ensure even baking.
Can I prepare the filling in advance?
Absolutely. The chicken filling can be made a day ahead, stored in an airtight container in the refrigerator. Reheat gently before shaping and frying.
What if I don’t have bread crumbs?
You can substitute with panko, crushed cornflakes, or even crushed crackers. For a gluten-free version, use gluten-free bread crumbs or crushed almonds.
How do I know when the oil is hot enough?
Use a thermometer or test by dipping the tip of a wooden skewer or the edge of a coxinha into the oil. If bubbles form immediately around it, the oil is ready.
Can I freeze uncooked coxinhas?
Yes, shape and bread coxinhas, then freeze on a tray. Once frozen, transfer to a bag or container. Fry directly from frozen, adding a minute or two to cooking time.
Conclusion
Crafting authentic Brazilian coxinhas is a rewarding culinary experience that combines meticulous preparation with a deep appreciation for flavor and texture. The crispy exterior envelops a tender, flavorful chicken filling, making these small bites perfect for any occasion. Whether served at a family dinner, a festive gathering, or as a snack during casual hours, coxinhas impress with their irresistible crunch and savory richness. Remember, the key to perfect coxinhas lies in patience, quality ingredients, and precise frying. By following this detailed guide from Love With Recipes, you can bring a taste of Brazil into your own kitchen, delighting friends and family with a true culinary gem. Happy frying!
References
- Brazilian Food: Traditional and Modern Recipes by Mary Anne Mohanraj
- Authentic Brazilian Recipes by Claudia Roden