Title: Spicy Fried Tuna with Fresh Sambal
Ingredients
| Ingredient | Quantity |
|---|---|
| Medium-sized canned tuna (pindang) | 1 piece, skin removed |
| Garlic (minced) | 1 clove |
| Fresh Sambal: | |
| Red onion (thinly sliced) | 2 cloves |
| Bird’s eye chili (sliced) | To taste |
| Tomato (diced, seeds removed) | 1 piece |
| Lemon (sliced) | As needed |
| Salt | A pinch |
| Soy Sauce Sambal: | |
| Sweet soy sauce | 3 tablespoons |
| Bird’s eye chili (sliced diagonally) | To taste |
Instructions
-
Prepare the Tuna: Begin by cutting the cleaned canned tuna into pieces. In a bowl, marinate the tuna with the minced garlic, a pinch of salt, and enough water to cover. Let it soak for about 5 minutes to enhance the flavor.
-
Fry the Tuna: Heat oil in a frying pan until hot. Add the marinated tuna pieces and fry until they turn golden brown. Once cooked, remove and set aside.
Related Articles -
-
Make the Fresh Sambal: In a separate bowl, combine the sliced red onion, bird’s eye chili, diced tomato, lemon slices, and a pinch of salt. Mix well to create a fresh sambal.
-
Prepare the Soy Sauce Sambal: In another bowl, mix the sweet soy sauce with the sliced bird’s eye chili to create a spicy soy sauce sambal.
-
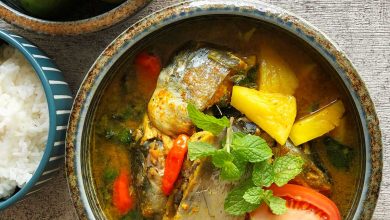
Serve: Plate the fried tuna and serve it alongside the fresh sambal and soy sauce sambal. Enjoy with steaming hot rice for the ultimate culinary experience! 😋
Nutritional Information
(Estimated per serving; adjust based on portions)
| Nutrient | Amount |
|---|---|
| Calories | 250 kcal |
| Protein | 30 g |
| Carbohydrates | 10 g |
| Fat | 10 g |
| Sodium | 400 mg |
This spicy fried tuna recipe perfectly balances the richness of the fish with the freshness of the sambals, creating a delightful dish that’s simple yet packed with flavor. Enjoy your culinary adventure!