
Introduction
As devotees of hearty, wholesome baked goods, lovers of nutritious breakfast options, and enthusiasts of unique bread recipes, many turn to innovative creations that combine texture, flavor, and health benefits. The Granola Bread recipe, as featured on Love With Recipes, embodies this ethos. This bread marries the rustic appeal of freshly baked bread with the nutritious crunch of granola, creating a delightful fusion that elevates your breakfast or snack game. It is designed for simplicity, utilizing a bread machine for straightforward preparation, but its flavor profile and texture make it a standout amongst traditional bread recipes.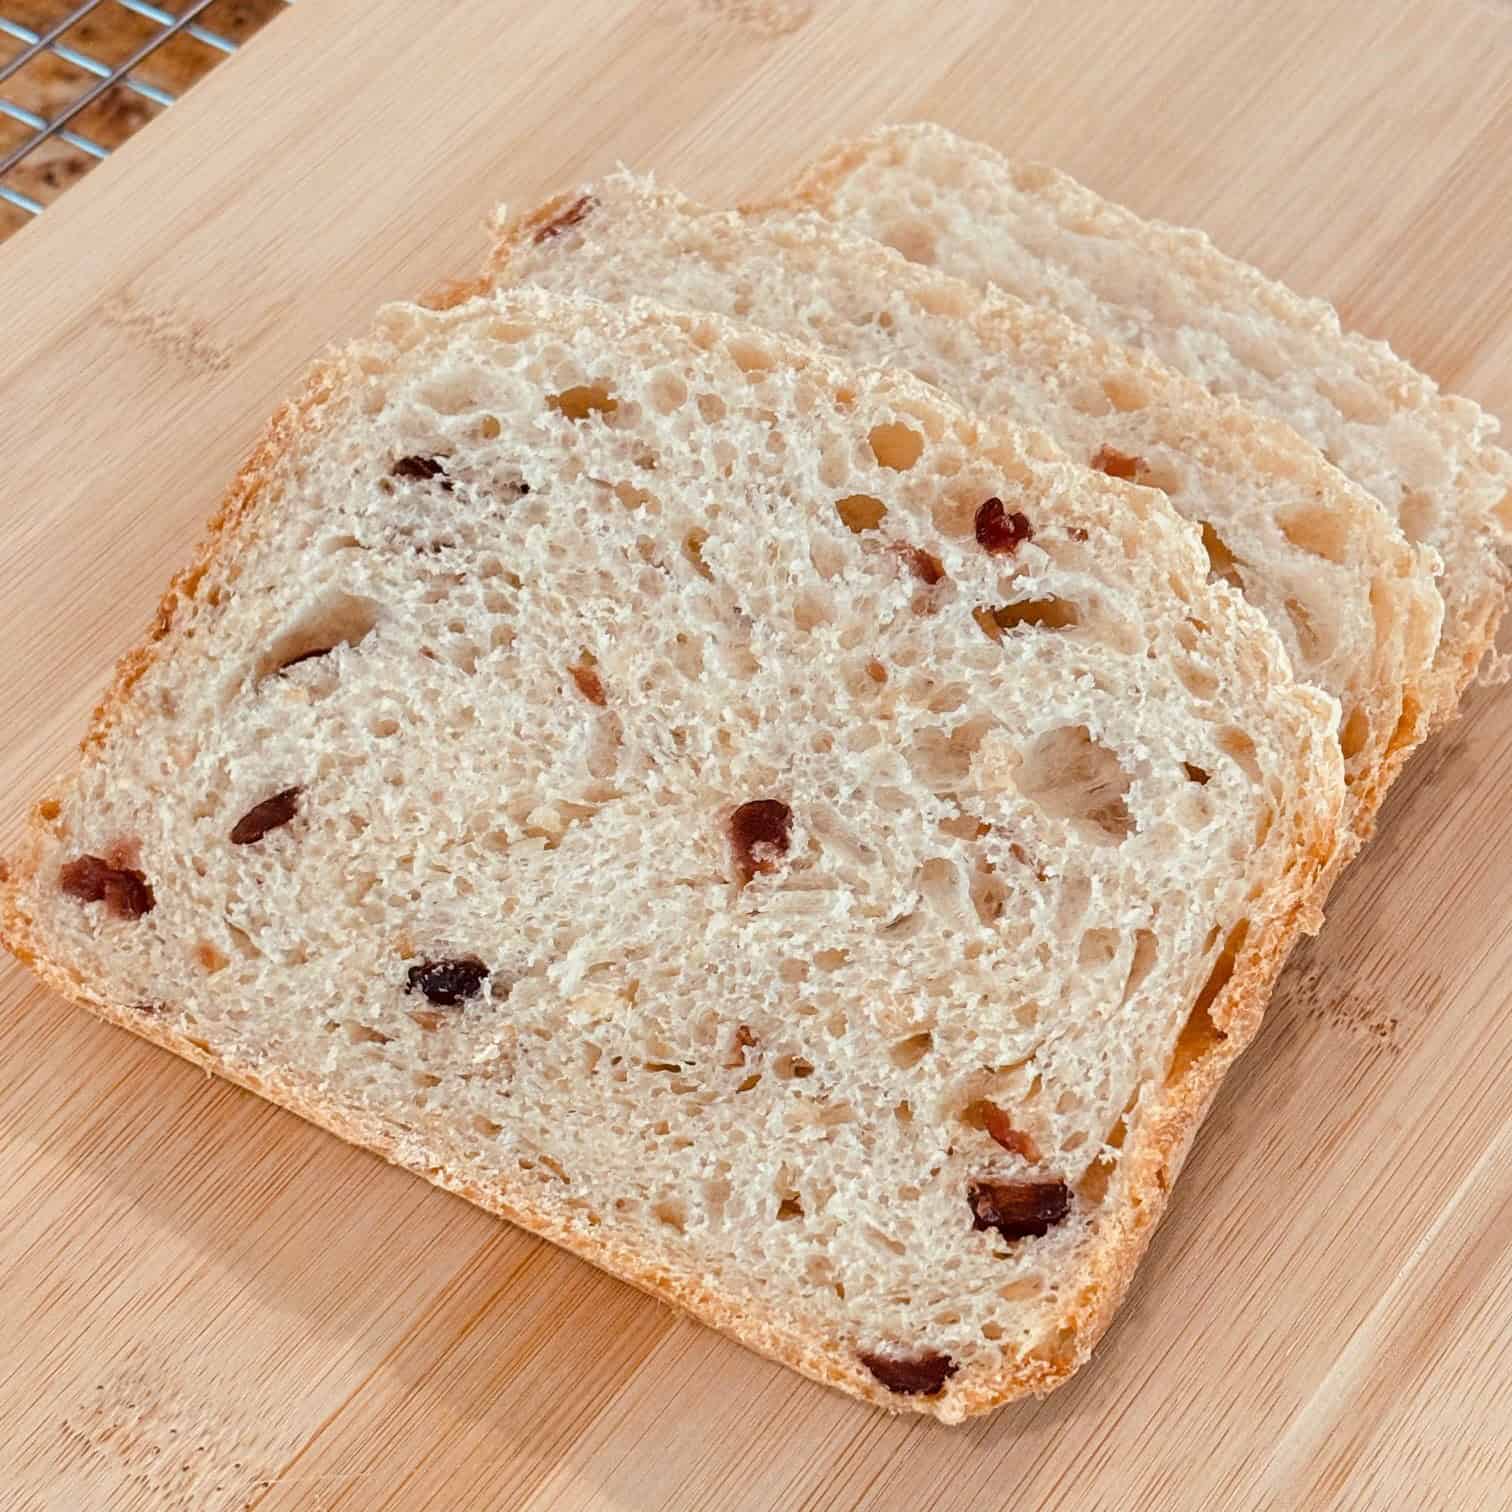
Imagine warm slices, toasted to a golden hue, with a smear of butter or your favorite jam, revealing the delightful crunch of oats, nuts, and dried fruits embedded throughout the soft, moist crumb. This bread is not only a treat for the palate but also a nourishing choice, packed with fiber, healthy fats, and complex carbohydrates. Whether you’re preparing for a busy weekday morning or a leisurely weekend brunch, this Granola Bread offers versatility and satisfaction in every bite.
Preparation Timeline
Understanding the time commitment involved helps in planning your baking schedule effectively. The total process spans approximately 3 hours and 10 minutes, including active preparation, resting, and baking phases. The bulk of this time is dedicated to the baking cycle, which ensures the dough develops optimal texture and flavor. The prep time is minimal, at just about 10 minutes, making it accessible even on tight schedules.
Needed Equipment
Essential Tools and Appliances
- Bread Machine: The cornerstone appliance for this recipe, ensuring consistent kneading, rising, and baking cycles. Choose a model with a 1.5 to 2-pound loaf capacity for best results.
- Measuring Cups and Spoons: Accurate measurement of liquids and dry ingredients is vital for bread baking precision.
- Mixing Bowls: For pre-mixing dry ingredients or handling optional add-ons.
- Rubber Spatula or Wooden Spoon: To gently incorporate ingredients or scrape bowls.
- Wire Cooling Rack: To cool the bread evenly and prevent sogginess.
- Kitchen Scale (Optional): For precise measurement of ingredients, especially dry ingredients like flour and granola.
- Sharp Bread Knife: To slice the bread cleanly after cooling.
Optional Equipment
- Stand Mixer with Dough Hook: For those who prefer manual kneading, although this recipe leverages the bread machine for convenience.
- Toaster or Toaster Oven: For reheating or toasting slices before serving.
Tags
- Breakfast bread
- Healthy bread
- Granola
- Whole grain
- Homemade bread
- Easy bread recipe
- Nutty bread
- Breakfast ideas
- Vegan options (if using vegan butter)
- Vegetarian
Serving Size
This recipe yields approximately one standard loaf, which typically slices into 12 to 16 pieces, depending on thickness. Serving sizes can be adjusted based on personal preference, but generally, each slice provides a hearty portion suitable for breakfast, snack, or accompaniment to meals.
Difficulty Level
This recipe is classified as easy, making it ideal for beginners and seasoned bakers alike. Its reliance on a bread machine simplifies the process, eliminating the need for manual kneading and proofing. The straightforward assembly and minimal hands-on time make it accessible while still delivering impressive results.
Allergen Information
| Allergen | Contains | Notes |
|---|---|---|
| Gluten | Yes | Contains bread flour and granola with gluten |
| Dairy | Yes | Butter used in the recipe |
| Nuts | Potentially, depending on granola | Check granola ingredients for nut content |
| Soy | No | Not used in this recipe unless granola contains soy |
Dietary Preference
This recipe can be adapted to suit various dietary needs:
- Vegetarian: Yes
- Vegan: Yes, if substituting butter with vegan margarine or oil and ensuring granola is vegan
- Gluten-Free: Not suitable unless using gluten-free flour and gluten-free granola
Course
Main course (Breakfast or Snack)
Cuisine
American-inspired, Whole Grain, Breakfast
Ingredients in Detail
Ingredient Table
| Ingredient | Quantity | Preparation Notes |
|---|---|---|
| Water | 1 1/4 cups (295 ml) | Room temperature or slightly warm (about 110°F/43°C) |
| Butter | 2 tablespoons (28 g) | Melted or softened |
| Brown Sugar | 2 tablespoons (25 g) | For subtle sweetness |
| Bread Flour | 3 cups (360 g) | High-protein flour ideal for bread structure |
| Granola Cereal | 3/4 cup (90 g) | Choose your favorite blend, possibly with nuts and dried fruits |
| Dry Milk Powder | 2 tablespoons (14 g) | Optional but enhances richness and browning |
| Salt | 1 teaspoon (6 g) | Enhances flavor |
| Yeast | 1 1/2 teaspoons (7 g) | Bread machine yeast or active dry yeast |
Step-by-Step Instructions
1. Prepare Your Bread Machine
Begin by ensuring your bread machine is clean and ready for use. If this is your first time using the machine for this recipe, familiarize yourself with its specific instructions, especially regarding the order of adding ingredients and selecting cycles. Most bread machines have a ‘Basic’ or ‘White Bread’ cycle suitable for this recipe. Confirm that your machine’s capacity is at least 1.5 pounds to accommodate the ingredients comfortably. Read the user manual if needed to understand the nuances of your specific model.
2. Adding the Wet Ingredients
Pour the measured water into the bread pan first. Using room temperature or slightly warm water ensures optimal yeast activity and proper dough development. Next, add the 2 tablespoons of butter, ensuring it melts into the water for even distribution. Follow this with the 2 tablespoons of brown sugar, which not only adds sweetness but also aids in browning and yeast activation. Carefully measure each component to maintain recipe accuracy. Using a liquid measuring cup for water and liquids, and a tablespoon for sugar, ensures precision.
3. Layering the Dry Ingredients
Gently add the bread flour over the wet ingredients, spreading it evenly across the surface to create a barrier that keeps the liquids from prematurely activating the yeast. Use a spoon or spatula to level the flour if necessary. This layering technique helps in maintaining the proper dry-to-wet ratio during the initial mixing phase. The flour acts as the primary structure for the loaf, providing gluten development that gives the bread its characteristic chewiness and elasticity.
4. Incorporating Granola and Dry Milk Powder
Sprinkle the granola cereal evenly over the flour layer. The choice of granola affects the flavor and texture; opt for a variety with nuts, dried fruits, or plain depending on your preference. The granola adds crunch and sweetness, elevating the bread’s complexity. Next, sprinkle the dry milk powder over the mixture. Dry milk enhances browning, flavor, and moisture retention, resulting in a richer crumb. Distribute these ingredients evenly to ensure consistent incorporation during kneading.
5. Adding Salt and Yeast
Sprinkle the teaspoon of salt on top of the dry ingredients to control yeast activity and enhance flavor. Be careful not to let the salt come into direct contact with the yeast, which can inhibit fermentation; placing it on the outer edges of the dry layer helps prevent this. Create a small well or indentation in the center of the dry ingredients, ensuring it doesn’t reach the wet layer. Into this well, add the 1 1/2 teaspoons of bread machine yeast or active dry yeast. This placement ensures the yeast remains dry until the mixing begins, promoting even activation.
6. Setting the Bread Machine
Close the bread machine lid securely. Select the appropriate cycle—most machines have a basic or white bread setting suitable for this recipe. Adjust the crust color to your preference; medium crust is generally ideal, providing a balance between crustiness and softness. Select the loaf size if applicable, ensuring it matches the volume of ingredients. Press start to initiate the kneading, rising, and baking processes. During this phase, the bread machine will mix the ingredients thoroughly, develop gluten, and bake the loaf to perfection.
7. Baking and Cooling
Allow the machine to complete its cycle, which typically includes kneading (15-20 minutes), first rise (about 1 hour), punching down and second rise (30-40 minutes), and baking (around 50 minutes). Once the baking cycle finishes, carefully open the lid and use oven mitts to remove the hot bread pan. Gently transfer the loaf onto a wire cooling rack to prevent condensation from accumulating underneath, which could make the crust soggy. Let the bread cool for at least 20-30 minutes before slicing to allow the crumb to set and prevent squishing.
Preparation Tips
- Ingredient Quality: Use high-quality bread flour and granola for best flavor and texture. Freshness of granola impacts crunchiness and taste.
- Temperature Control: Ensure liquids are not too hot, as excessive heat can kill yeast, nor too cold, which can slow fermentation.
- Granola Variations: Experiment with different granola flavors—maple pecan, cinnamon raisin, or nutty blends—to create diverse flavor profiles.
- Adding Seeds or Spices: Incorporate seeds (chia, flax) or spices (cinnamon, nutmeg) into the dry ingredients for added health benefits and flavor.
- Adjusting Sweetness: Modify the amount of brown sugar based on sweetness preference or dietary needs.
Nutritional Information
| Per Serving (1 slice) | Calories | Protein | Carbohydrates | Fats | Fiber |
|---|---|---|---|---|---|
| Approximate | 180 kcal | 5 g | 30 g | 5 g | 3 g |
Note: Nutritional values vary depending on the specific granola used and portion sizes.
Tips and Tricks for Perfect Results
- Pre-Measure Ingredients: Organize ingredients beforehand to streamline the process and minimize errors.
- Use Fresh Yeast: Old yeast can impair rise; ensure it is within its expiration date for optimal activity.
- Monitor Dough Consistency: During the initial kneading, if the dough appears too dry or sticky, adjust by adding small amounts of water or flour, respectively.
- Customize Granola: Toast granola beforehand for an intensified flavor and crunch.
- Storage: Store the cooled bread in an airtight container or bread box for up to 3 days. For longer storage, slice and freeze, then toast slices directly from the freezer.
Add-Ons and Variations
- Nut Butter Spread: Serve slices with almond or peanut butter for added richness.
- Fruit Jam or Honey: Complement the bread with your favorite spreads.
- Cheese: Pair with mild cheeses like cream cheese or ricotta for a savory twist.
- Fresh Fruits: Top slices with sliced bananas, berries, or apple slices for extra freshness.
Suggested Side Dishes
- Fresh fruit salad
- Yogurt with honey and nuts
- Scrambled eggs with herbs
- Smoothie bowls topped with granola
Improvements and Customizations
- Adding Whole Grains: Incorporate cooked quinoa or oats for added fiber.
- Sweetener Variations: Use honey, maple syrup, or agave nectar for nuanced sweetness.
- Flavor Enhancers: Add vanilla extract or cinnamon to enrich flavor.
- Gluten-Free Version: Replace bread flour with gluten-free flour blend and use gluten-free granola.
Save and Store
Proper storage maximizes freshness:
- Room Temperature: Keep in an airtight container for up to 3 days.
- Freezing: Slice the loaf, wrap tightly in plastic wrap or foil, and store in a freezer-safe bag for up to 3 months. Toast slices directly from frozen for convenience.
Frequently Asked Questions (FAQs)
Can I make this bread without a bread machine?
Yes, you can prepare the dough manually by mixing, kneading, and proofing in a bowl. After the initial rise, shape the dough into a loaf and bake at 375°F (190°C) for about 30-35 minutes or until golden brown. However, using a bread machine simplifies the process and ensures consistent results.
Can I substitute granola with other cereals?
While granola adds crunch and flavor, you can experiment with rolled oats, muesli, or crushed nuts if you prefer a different texture or want to customize flavors.
Is this bread suitable for diabetics?
This bread contains added sugars and granola, which can impact blood sugar levels. For diabetics, consider reducing or omitting the sugar, choosing sugar-free granola, and consulting with a healthcare professional before consumption.
How do I make this bread vegan?
Replace butter with vegan margarine or coconut oil, and ensure the granola is vegan (free of honey and dairy). Use plant-based milk powders if needed, or omit the milk powder altogether.
Conclusion
The Granola Bread stands out as a wholesome, flavorful, and versatile addition to your baking repertoire. Its combination of hearty grains, crunchy granola, and soft crumb creates an irresistible loaf that is perfect for breakfast, snacks, or even a light tea-time treat. Easy to prepare with a bread machine, it offers a perfect balance of convenience and gourmet appeal. Whether enjoyed toasted with butter, topped with fruit preserves, or simply plain, this bread embodies comfort and nourishing ingredients in every slice.
For detailed step-by-step guidance, ingredient sourcing, and customization ideas, visit Love With Recipes. Happy baking!