

Introduction
At Love With Recipes, we understand that sometimes, the simplest pleasures are the most satisfying. This Easy Chocolate Bundt Cake epitomizes that philosophy, offering a luscious, moist, and decadently chocolatey dessert that is remarkably straightforward to prepare. Whether you’re an experienced baker or a novice trying your hand at homemade confections, this recipe provides a foolproof method to create a show-stopping treat that will delight family, friends, and guests alike. The beauty of this cake lies in its rich flavor profile balanced with a tender crumb, all achieved with pantry staples and straightforward techniques. Its elegant presentation in the classic bundt shape makes it ideal for celebrations, casual gatherings, or an indulgent weekend dessert. Plus, with optional ingredient swaps, you can customize this cake to suit dietary preferences or lighten it up without sacrificing taste. Dive into this comprehensive guide to master the art of baking a perfect Chocolate Bundt Cake that will have everyone asking for seconds—and perhaps thirds.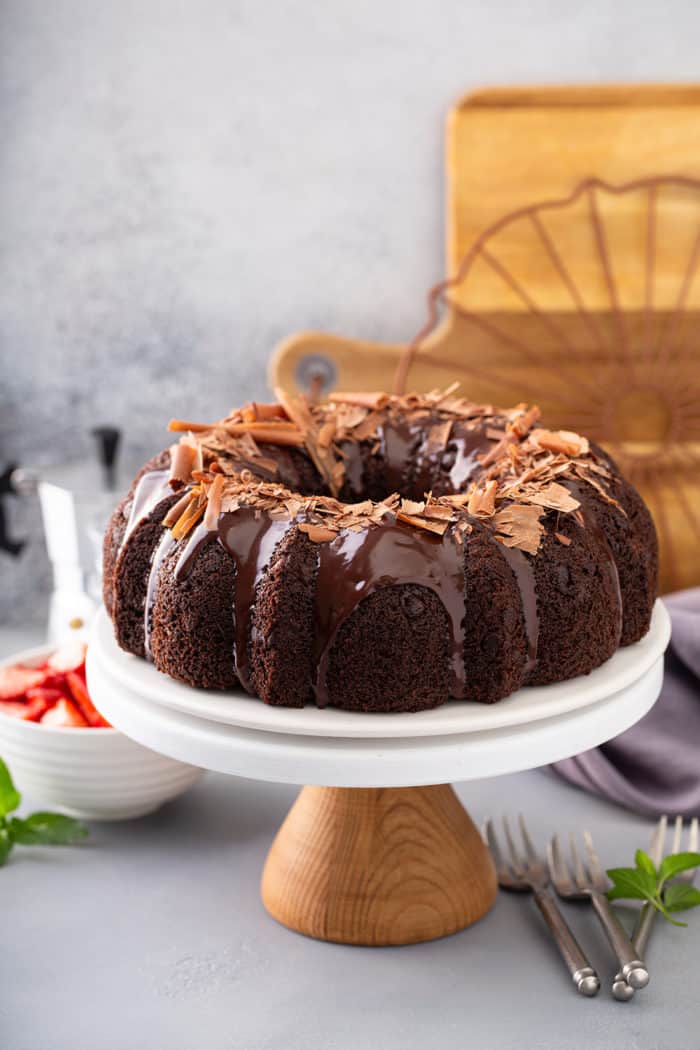

Time
- Preparation Time: 10 minutes
- Cooking Time: 1 hour 10 minutes
- Total Time: 1 hour 20 minutes
- Additional Cooling Time: 10-15 minutes
Needed Equipment
- Oven: Standard kitchen oven, preheated to 350°F (175°C)
- Bundt Pan: 10-12 cup capacity, well-greased and floured
- Mixing Bowls: Large mixing bowl for batter preparation
- Whisk or Hand Mixer: For mixing ingredients thoroughly
- Measuring Cups and Spoons: For accurate ingredient measurement
- Rubber Spatula: To scrape batter from bowls and distribute evenly
- Cooling Rack: To cool the cake after baking
- Sifter or Fine Mesh Strainer: For cocoa powder and flour
- Toothpick or Cake Tester: To check doneness
- Serving Plate or Cake Stand: For presentation
- Optional: Powdered sugar sifter for topping
Tags
- Chocolate dessert
- Bundt cake
- Easy recipes
- Weeknight baking
- Potluck
- Celebration cake
- Moist cake
- Family-friendly
Serving Size
Serves approximately 12 slices, depending on the size of each wedge. Ideal for serving at small gatherings, family dinners, or as a decadent treat for yourself.
Difficulty Level
Beginner to Intermediate. The recipe involves basic mixing, pouring, and baking steps, making it accessible for bakers with minimal experience but also offering room for slight variations and enhancements for more seasoned cooks.
Allergen Information
| Allergen | Contains | Notes |
|---|---|---|
| Gluten | Yes | All-purpose flour is used; gluten-free substitutions can be made with gluten-free flour blends. |
| Eggs | Yes | Eggs are used for structure; egg substitutes can be used for allergy-friendly options. |
| Dairy | Sour cream, milk | Can be swapped with plant-based alternatives like coconut or almond milk and dairy-free sour cream. |
| Cocoa | Yes | Pure cocoa powder; check for cross-contamination if allergen-sensitive. |
| Nuts | No | Optional add-ons like nuts or chocolate chips are not included in the base recipe but can be added. |
Dietary Preference
This recipe is suitable for omnivores. To make it vegan, substitute eggs with flax eggs or commercial egg replacers, use plant-based sour cream and milk, and ensure cocoa powder is pure and free from animal products.
Course
Dessert, Snack, Special Occasion Cake
Cuisine
American, Comfort Food, Baked Goods
Ingredients
Ingredient Details
| Ingredient | Quantity | Description / Notes |
|---|---|---|
| Sour Cream | 1 cup | Full-fat or light; adds richness and moisture |
| Milk | 1 cup | Whole milk preferred; can substitute with plant-based milk |
| Eggs | 4 large | Approximately 1 cup; for binding and structure |
| Cocoa Powder | 2/3 cup | Unsweetened, natural cocoa powder for intense chocolate flavor |
| All-Purpose Flour | 2 cups | Provides the structure; sifted for lightness |
| Powdered Sugar | For sprinkling | Optional, for finishing touch |
Instructions
Step 1: Preparing Your Workspace and Equipment
Before beginning, gather all ingredients and equipment. Preheat your oven to 350°F (175°C). This temperature ensures even baking and optimal rise. Grease your bundt pan thoroughly using butter, shortening, or non-stick spray, then dust it with flour, tapping out excess. This step is crucial to prevent the cake from sticking and to achieve a beautiful, clean release after baking. Consider using a baking spray with flour or a silicone bundt pan if you want to minimize greasing effort. Place the cooled pan on a stable surface within reach of your ingredients for seamless assembly.
Step 2: Sifting and Measuring Ingredients
Sifting dry ingredients like cocoa powder and flour removes lumps, aerates the powders, and results in a smoother batter. Use a fine mesh strainer or sifter, and sift directly into your mixing bowl. Measure ingredients carefully using measuring cups and spoons to ensure accuracy. For eggs, crack them into a small bowl first to check for shells and then add to the wet mixture. For liquids, use liquid measuring cups at eye level for precision.
Step 3: Mixing the Wet Ingredients
In a large mixing bowl, combine sour cream and milk. Whisk until smooth and homogeneous. Add eggs one at a time, whisking after each addition to incorporate fully and prevent curdling. If you’re making a vegan version, replace eggs with flax eggs (1 tablespoon ground flaxseed + 3 tablespoons water per egg, let sit 5 minutes) or commercial egg replacers. Whisk the mixture thoroughly, ensuring a uniform consistency. This step builds a liquid base that will hydrate the dry ingredients and contribute to the cake’s moist texture.
Step 4: Incorporating Cocoa and Dry Ingredients
Gradually add the cocoa powder to the wet mixture, whisking continuously to prevent lumps. Cocoa powder adds depth and richness to the chocolate flavor. Next, sift the flour into the mixture in portions, folding gently with a spatula or whisk to combine. Use a folding motion to maintain aeration, which helps the cake stay tender and light. Do not overmix; stop when the batter is just combined and smooth. Overmixing can develop gluten, resulting in a denser cake.
Step 5: Final Mixing and Batter Preparation
Once all ingredients are combined, scrape down the sides of the bowl to ensure no flour pockets remain. Using a spatula, give the batter a few gentle folds to incorporate any remaining dry ingredients and to ensure even distribution of cocoa and flour. The batter should be thick but pourable; if it seems too stiff, add a tablespoon of milk to loosen it slightly. Conversely, if too runny, add a tablespoon of flour. Proper consistency is key to achieving an even bake and attractive shape.
Step 6: Pouring the Batter into the Pan
Pour the batter into the prepared bundt pan, using a spatula to spread it evenly. Gently tap the pan on the counter to release air bubbles and settle the batter. This step helps prevent uneven rising or holes in the finished cake. Use the spatula to smooth the surface and ensure an even layer of batter around the entire pan. For a more decorative top, you can swirl additional chocolate chips or nuts into the batter before baking.
Step 7: Baking
Place the filled bundt pan on the middle rack of your preheated oven. Bake for approximately 70 minutes, but start checking around the 65-minute mark. To test doneness, insert a toothpick into the center; it should come out clean or with just a few moist crumbs. Due to oven variations, the exact time may fluctuate; if the cake starts to brown excessively, tent with foil. Keep the oven door closed during the last 15 minutes to maintain temperature consistency. Proper baking ensures a moist interior and a firm crust, with the cake pulling away slightly from the edges of the pan.
Step 8: Cooling and Removal
Once baked, remove the cake from the oven and place the pan on a cooling rack. Allow it to cool in the pan for 10-15 minutes, which helps the structure set and reduces the risk of breaking when removing. After this initial cooling period, carefully invert the pan onto a wire rack or serving plate. Gently tap or shake the pan if needed to loosen the cake. Using oven mitts or a silicone spatula around the edges can help ease the process. Let the cake cool completely before decorating or serving to ensure clean slices and optimal texture.
Step 9: Finishing Touches and Serving
Once cooled, sprinkle the top generously with powdered sugar through a fine sieve for a classic, elegant finish. For extra indulgence, consider drizzling with chocolate ganache, adding whipped cream, or serving with a scoop of vanilla ice cream. Slice carefully using a serrated knife, and serve on a platter or cake stand. This cake pairs beautifully with coffee, milk, or a glass of dessert wine, making it versatile for any occasion.
Preparation Tips
- Ingredient Quality: Use high-quality cocoa powder for richer flavor. Fresh eggs and dairy products enhance the taste and moisture.
- Batter Consistency: Aim for a thick but pourable batter; adjust with milk or flour as needed.
- Pan Preparation: Properly greasing and flouring your bundt pan prevents sticking and ensures a flawless presentation.
- Oven Calibration: Verify your oven’s temperature accuracy with an oven thermometer to avoid under- or over-baking.
- Test for Doneness: Use a toothpick or cake tester at the center; avoid opening the oven prematurely to maintain proper rise.
Nutritional Information
| Nutrient | Per Serving (1 slice) | Details |
|---|---|---|
| Calories | 98.1 kcal | Based on standard ingredients and serving size |
| Total Fat | 7.3 g | Saturated Fat: 3.8 g |
| Cholesterol | 45.6 mg | |
| Sodium | 44.8 mg | |
| Carbohydrates | 5.9 g | Includes 3.4 g sugars and 0.2 g fiber |
| Protein | 2.2 g |
Tips and Tricks
- Flavor Enhancers: Add a teaspoon of vanilla extract or espresso powder to intensify the chocolate flavor.
- Texture Variations: Mix in chocolate chips, chopped nuts, or dried fruit into the batter before baking.
- Moisture Boosters: Incorporate a splash of coffee or orange liqueur for depth and moisture.
- Presentation: Drizzle with a glaze or dust with cocoa powder for a decorative finish.
- Uniform Slices: Chill the cake slightly before slicing to achieve cleaner cuts.
Add-ons and Variations
- Chocolate Ganache: Warm heavy cream mixed with chopped chocolate, poured over the cooled cake for a glossy finish.
- Nuts and Seeds: Toasted pecans, walnuts, or sliced almonds sprinkled atop or incorporated into the batter.
- Frostings and Glazes: Cream cheese frosting, vanilla glaze, or caramel drizzle add extra layers of flavor.
- Fruit Additions: Fresh berries or dried cherries can elevate the dessert’s appeal.
Side Dishes
- Fresh fruit salad to balance the richness
- Vanilla bean ice cream or whipped cream
- Rich coffee or espresso to complement the chocolate flavor
- Light citrus sorbet for a refreshing contrast
Improvements for Next Time
- Use browned butter instead of regular butter to add depth
- Incorporate a swirl of peanut butter or caramel into the batter
- Add a splash of liqueur like Kahlua or Bailey’s for an adult twist
- Use cake flour for an even lighter crumb if desired
- Experiment with different cocoa types, such as Dutch-processed, for varied flavor profiles
Save and Store
Store leftovers in an airtight container at room temperature for up to 2-3 days. For longer freshness, refrigerate for up to a week. To keep the cake moist, wrap it tightly in plastic wrap or store in a covered cake box. Reheat slices gently in the microwave for a few seconds before serving if desired. To freeze, wrap slices individually in plastic wrap and place in a freezer-safe container for up to 3 months. Thaw at room temperature or warm slightly before serving.
FAQ
Can I make this cake gluten-free?
Yes, substitute the all-purpose flour with a gluten-free baking blend. Ensure the cocoa powder and other ingredients are certified gluten-free.
Can I use chocolate chips instead of cocoa powder?
Chocolate chips add sweetness and texture but won’t replace the cocoa’s depth of flavor. For a more intense chocolate taste, stick with cocoa powder or use melted chocolate in the batter.
How do I prevent the cake from sticking to the bundt pan?
Thoroughly grease and flour the pan, or use a non-stick spray designed for baking. Cooling the cake for 10-15 minutes before inverting also helps release it cleanly.
What if the cake is undercooked or overbaked?
Adjust baking time accordingly. Use a toothpick to check doneness; if undercooked, return to the oven for a few more minutes. If overbaked, the cake may be dry, but glazing or serving with whipped cream can help.
Conclusion
Bringing together simplicity and rich flavor, this Easy Chocolate Bundt Cake stands as a testament to how accessible and satisfying home baking can be. Its moist, tender crumb, complemented by the deep, intense chocolate taste, makes it a versatile dessert suitable for any occasion—from casual family dinners to festive celebrations. The straightforward preparation process reduces stress and allows you to focus on creating a beautiful, delicious centerpiece. Whether you choose to keep it classic with powdered sugar or elevate it with decadent toppings, this cake promises to be a crowd-pleaser every time. Remember, the key to perfect baking lies in quality ingredients, precise measurements, and gentle handling of the batter. With patience and care, you’ll produce a stunning dessert that will surely become a treasured family favorite. For more delightful baking adventures, visit Love With Recipes—your trusted source for inspired and approachable recipes that turn everyday ingredients into extraordinary treats.
References
- King Arthur Baking Company. “Chocolate Cake Techniques.” KingArthurBaking.com
- Williams Sonoma. “The Art of Baking with Cocoa.” WilliamsSonoma.com