
Introduction
Embarking on the journey of baking Light Pecan Tassies in Cream Cheese Pastry offers a delightful experience that combines rich flavors with a health-conscious approach. This recipe, inspired by the renowned Cooking Light publication from November 2000, emphasizes creating a delectable treat with only 81.5 calories per serving without sacrificing the indulgent taste associated with traditional pecan tarts. The delicate balance of cream cheese in the pastry provides a tender, flaky crust that complements the sweet and nutty filling, making these bites perfect for festive occasions, casual gatherings, or even a satisfying personal treat. Designed for those seeking a lighter dessert option, this recipe showcases how thoughtful ingredient choices and precise techniques can yield a luxurious dessert that aligns with health and wellness goals.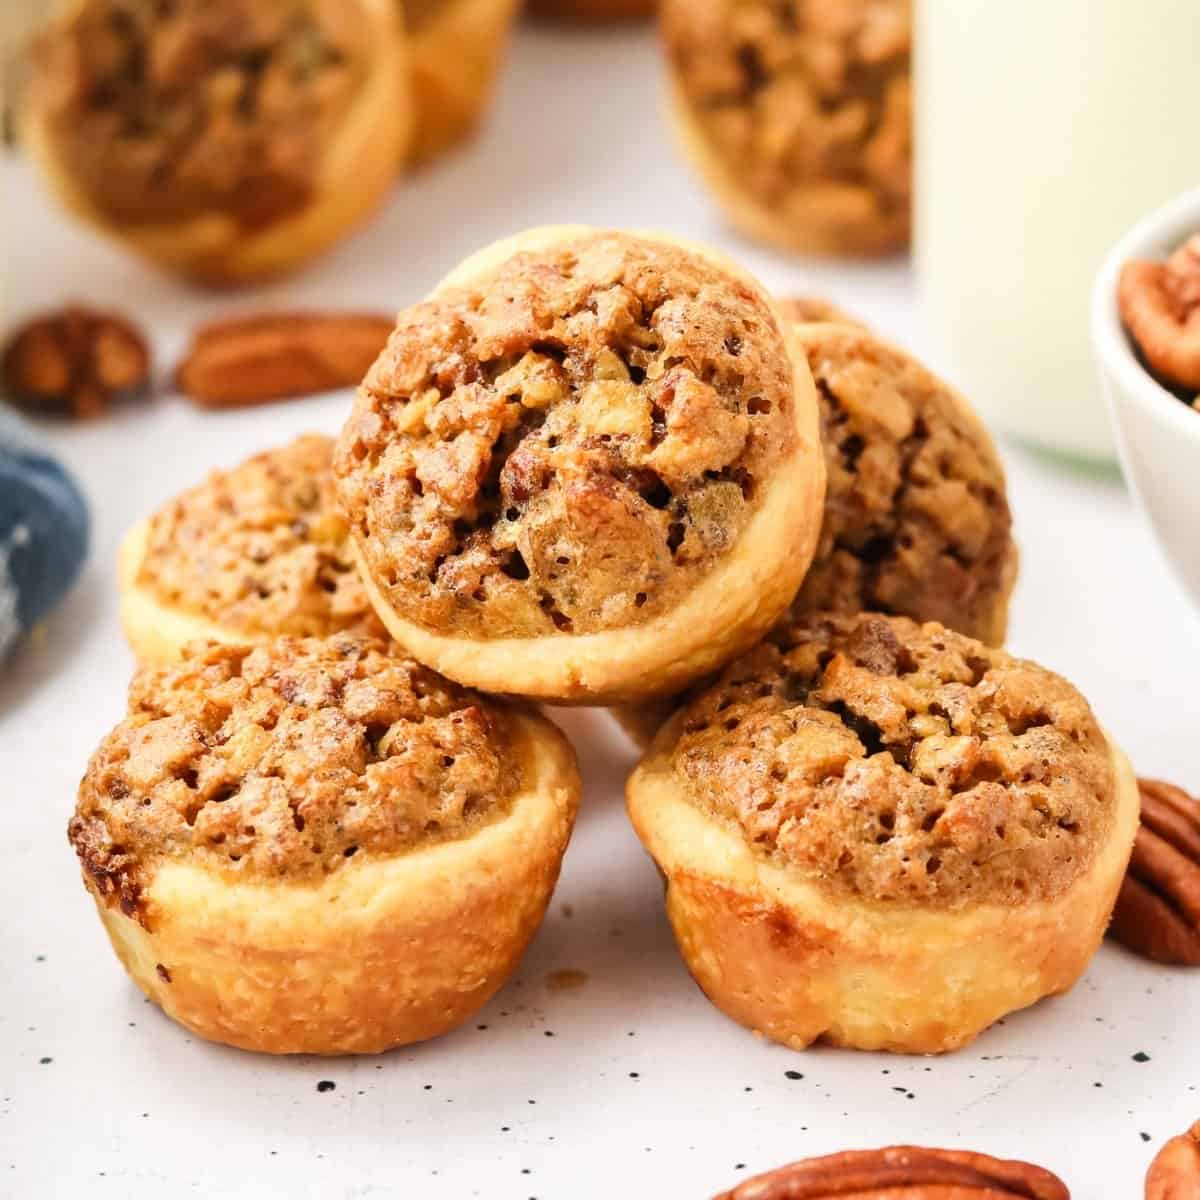
Time
Preparation Time
Approximately 20 minutes is needed to assemble the ingredients, prepare the dough, and fill the pastry cups. This phase involves mixing, shaping, and portioning, which, with practice, can be streamlined for efficiency.
Cooking Time
The baking process takes about 20 minutes, during which the pastry shells turn a light golden brown, and the filling puffs and sets perfectly.
Total Time
Including cooling and handling, the entire process spans around 40 minutes, making it an ideal quick yet satisfying dessert option.
Needed Equipment
- Oven: A standard kitchen oven capable of maintaining a consistent 350°F (175°C).
- Mini muffin tin: 24-cup capacity to form individual tart shells.
- Mixing bowls: Various sizes for preparing the dough and filling components.
- Electric mixer: Handheld or stand mixer to blend cream cheese, butter, and liquids smoothly.
- Measuring cups and spoons: For precise measurement of ingredients, including dry and liquid components.
- Rubber spatula: Useful for scraping bowls and folding ingredients.
- Pastry cutter or fork: Optional, for combining flour and fats if doing by hand.
- Cooling rack: To cool the baked tassies evenly and prevent sogginess.
- Small spoon or piping bag: For filling the pastry cups accurately.
- Knife or small offset spatula: For loosening and removing tassies from the muffin cups.
- Kitchen scale (optional): For precise portioning of dough and filling.
Tags
Healthy Baking, Pecan Desserts, Light Sweets, Holiday Treats, Quick Bites, Low-Calorie, Snackable Pastries, Cooking Light Recipes, Elegant Desserts, Nutty Tarts
Serving Size
Each serving is one Light Pecan Tassie, approximately 1.5 inches in diameter, providing a satisfying, bite-sized indulgence.
Difficulty Level
Basic to intermediate baking skills are sufficient; the recipe involves standard mixing, shaping, and baking techniques. It’s accessible for beginners willing to follow detailed steps and provides a rewarding experience for more experienced bakers aiming for a lighter dessert option.
Allergen Information
| Allergen | Contains |
|---|---|
| Gluten | Yes (all-purpose flour) |
| Dairy | Yes (cream cheese, butter) |
| Nuts | Yes (pecans) |
| Egg | Yes (large egg) |
Note: For nut allergies, substitute pecans with other nuts or omit altogether, understanding that texture and flavor will vary.
Dietary Preference
Suitable for omnivores and those following a moderate dairy diet. Not vegan or nut-free without modifications.
Course
Dessert, Snack, Holiday Treat
Cuisine
American, Southern-inspired pastry
Ingredients in Tables
Dry Ingredients
| Ingredient | Quantity |
|---|---|
| All-purpose flour | 1 cup |
| Granulated sugar | 1 tablespoon |
| Salt | Dash (or 1/8 teaspoon) |
| Brown sugar | 1/3 cup |
| Light corn syrup | 1 tablespoon |
| Vanilla extract | 1 teaspoon |
| Salt (additional) | 1/8 teaspoon |
Wet Ingredients
| Ingredient | Quantity |
|---|---|
| Low-fat cream cheese | 1 package (8 oz) |
| Butter (softened) | 1/4 cup (4 tablespoons) |
| Skim milk | 1/3 cup |
| Egg | 1 large |
Nuts
| Ingredient | Quantity |
|---|---|
| Pecans (chopped) | 1/2 cup |
Instructions
1. Preheat the Oven
Start by setting your oven to 350°F (175°C). Allow it to fully preheat to ensure an even baking environment, which is crucial for achieving the perfect light, flaky pastry and well-set filling. Proper oven temperature also helps prevent underbaking or burning, especially since delicate pastry shells are involved. Confirm the oven temperature with an oven thermometer if possible, as many home ovens have slight temperature variations.
2. Prepare the Pastry Dough
Mix Dry Ingredients
In a small mixing bowl, combine 1 cup of all-purpose flour, 1 tablespoon granulated sugar, and a dash of salt (approximately 1/8 teaspoon). Use a whisk or fork to thoroughly blend these ingredients, ensuring the sugar and salt are evenly distributed throughout the flour. This step is fundamental because it provides a balanced flavor foundation and ensures the sweetness is subtle yet present in the pastry.
Prepare Wet Mixture
In a larger mixing bowl, add the 8 oz package of low-fat cream cheese, which should be softened to room temperature for optimal blending. Incorporate 1/4 cup (approximately 4 tablespoons) of softened butter. The softened state facilitates smooth mixing and helps develop a tender, flaky crust. Next, pour in 1/3 cup of skim milk, which adds moisture and assists in binding the dough ingredients together. Using an electric mixer on medium speed, beat these ingredients until the mixture becomes smooth, creamy, and uniform, approximately 1-2 minutes. This process ensures the cream cheese and butter are fully integrated, creating a rich base for the dough.
Combine Dry and Wet Ingredients
Gradually add the dry flour mixture to the wet cream cheese mixture, setting your mixer to low speed. Mix until just combined; the mixture will be crumbly but hold together when pressed. Over-mixing at this stage can develop gluten and lead to tougher pastry, so stop mixing as soon as the ingredients are incorporated.
Form and Chill the Dough
Turn the dough onto a lightly floured surface and knead gently 3 to 4 times to bring the mixture into a cohesive ball. Divide the dough into 24 equal portions, which can be achieved by weighing each piece or visually dividing the dough. For convenience, shape each portion into a small ball, ready for shaping into muffin cups. Optionally, wrap the dough balls in plastic wrap and chill for 15-20 minutes to enhance handling and prevent spreading during baking.
3. Shape the Pastry Cups
Prepare Muffin Tin
Spray a 24-cup mini muffin tin with non-stick cooking spray or lightly grease with butter to prevent sticking. Place each dough portion into a muffin cup. Using your fingers or the back of a small measuring spoon, gently press the dough into the bottom and up the sides of each cup, forming a small shell that can hold the filling. Be careful to avoid thinning the sides excessively, which could cause breakage during baking. The goal is to create a sturdy, well-shaped cup that holds the filling securely.
Adjust Thickness
If the dough feels sticky or difficult to work with, dust your hands lightly with flour. If it’s too soft, refrigerate the shaped cups for an additional 10 minutes before filling to maintain their shape during baking.
4. Prepare the Filling
Assemble Nut Layer
Distribute 1/2 cup of chopped pecans evenly among the muffin cups, placing them at the bottom of each pastry shell. The nuts provide a crunchy texture and nutty flavor that balance the sweetness of the filling. Press the pecans gently into the dough to ensure they stay in place during baking.
Mix Filling Components
In a small bowl, whisk together 1/3 cup of packed brown sugar, 1 tablespoon of light corn syrup, 1 teaspoon of vanilla extract, and 1/8 teaspoon salt. After the mixture is smooth, add the large egg and whisk until fully incorporated. This creates a glossy, cohesive filling that will puff and set during baking. The balancing act of sugar, syrup, and vanilla enhances the flavor, while the egg provides structure.
5. Fill the Pastry Shells
Using a small spoon or piping bag, carefully spoon approximately 2 teaspoons of filling into each pastry shell, covering the pecans below. Do not overfill; leave a small margin at the top to prevent overflow during baking. Ensure each tassie has a generous amount of filling for optimal flavor and appearance.
6. Bake the Tassies
Place the muffin tin on the middle rack of your preheated oven. Bake for about 20 minutes, until the pastry edges turn a light golden brown, and the filling looks slightly puffed and set. Keep an eye on the tassies to prevent over-browning, which could compromise their delicate texture. The baking time may vary slightly based on oven calibration, so it’s advisable to check for doneness at the 18-minute mark.
7. Cooling and Removing
Remove the muffin tray from the oven and allow the tassies to cool in the cups for approximately 10 minutes. This step helps the filling to firm up further, reducing the risk of breakage when removing. Using a small, thin spatula or knife, gently loosen each tassie around the edges. Carefully lift them from the muffin tin and transfer to a wire cooling rack. Cooling completely allows the flavors to meld and prevents the pastry from becoming soggy.
8. Serving and Presentation
Once cooled, arrange the Light Pecan Tassies on a serving platter. They can be enjoyed immediately or stored for later. For an elegant presentation, dust lightly with powdered sugar or drizzle with a thin glaze made from powdered sugar and a splash of milk. These petite desserts pair beautifully with coffee or tea, making them an excellent choice for holiday parties, brunches, or special treats.
Preparation Tips
- Use softened ingredients: Ensure the cream cheese and butter are at room temperature to facilitate smooth mixing and tender pastry.
- Chill before baking: Refrigerate shaped dough portions if they become too soft or sticky, which helps maintain their shape during baking.
- Measure accurately: Precise measurement of ingredients ensures consistent results, especially for the filling, where balance affects flavor.
- Prevent sticking: Lightly grease muffin cups or use paper liners if preferred.
- Monitor baking: Keep an eye on the tassies during the last few minutes to prevent over-browning, which can affect their delicate texture.
Nutritional Information
| Nutrient | Per Serving (1 tassie) |
|---|---|
| Calories | 81.5 kcal |
| Total Fat | 2.9 g |
| Saturated Fat | 1.1 g |
| Cholesterol | 13.2 mg |
| Sodium | 45.6 mg |
| Carbohydrates | 13 g |
| Fiber | 0.3 g |
| Sugars | 6.3 g |
| Protein | 1.4 g |
Tips and Tricks
- For a healthier twist: substitute half of the all-purpose flour with almond flour or oat flour for added nutrients and flavor.
- For extra flavor: add a pinch of cinnamon or nutmeg to the filling mixture.
- Make ahead: prepare the dough and filling in advance; assemble and bake just before serving for optimal freshness.
- Presentation: dust with powdered sugar or serve with a dollop of whipped cream for enhanced visual appeal.
- Storage: keep leftovers in an airtight container at room temperature for up to 2 days or refrigerate for up to 5 days. Rewarm slightly before serving if desired.
Add-ons
- Chocolate drizzle: melt dark chocolate and drizzle over cooled tassies for a decadent upgrade.
- Caramel topping: add a small spoonful of caramel sauce atop each tassie before serving.
- Additional nuts: sprinkle with chopped walnuts or pistachios for varied textures and flavors.
- Fruit accent: serve with fresh berries or a side of sliced strawberries for a colorful contrast.
Side Dishes
- Fresh fruit platter: complement the sweetness with a variety of fresh, seasonal fruits.
- Light yogurt dip: serve with a tangy Greek yogurt mixed with honey and vanilla.
- Tea or coffee: pairing these tassies with hot beverages enhances the indulgence experience.
Improvements
- Experiment with different nuts such as pecans, walnuts, or almonds to vary the flavor profile.
- Incorporate citrus zest (lemon or orange) into the filling for a refreshing twist.
- Use alternative sweeteners like honey or agave syrup for a different sweetness dimension.
- Try a gluten-free version by replacing all-purpose flour with gluten-free blends.
Save and Store
Once cooled, store the Light Pecan Tassies in an airtight container at room temperature for up to 2 days. For longer storage, refrigerate for up to 5 days, placing parchment paper between layers to prevent sticking. To reheat, warm in a low-temperature oven (about 300°F or 150°C) for 5-7 minutes until slightly warmed. For freezing, individually wrap each tassie in plastic wrap, then place in a freezer-safe container or bag. They can be frozen for up to 3 months. Thaw at room temperature and reheat briefly for best results.
FAQ
Can I make the dough ahead of time?
Absolutely. Prepare the dough, shape it into balls, wrap tightly in plastic wrap, and refrigerate for up to 24 hours. Bring to room temperature slightly before shaping into muffin cups.
Is there a way to make these dairy-free?
Yes. Substitute the cream cheese with dairy-free cream cheese options and replace butter with plant-based margarine or coconut oil. Adjust liquids as needed to achieve the right dough consistency.
Are these suitable for gluten-free diets?
They can be adapted using gluten-free all-purpose flour blends. Ensure all other ingredients are gluten-free and check labels carefully.
Can I omit the pecans?
Yes, but the nutty flavor and crunch will be missing. You can substitute with other chopped nuts or omit entirely for a nut-free version.
Conclusion
Crafting Light Pecan Tassies in Cream Cheese Pastry exemplifies how indulgent desserts can be reimagined with health-conscious ingredients without compromising on taste. Their tender, flaky crust paired with sweet, crunchy pecan filling makes them a perennial favorite for holiday festivities or everyday treats. The thoughtful balance of flavors, textures, and calories makes these tassies a versatile addition to your baking repertoire. Remember, precision in measurement, careful handling, and patience during baking are key to achieving bakery-quality results at home. Lovewithrecipes.com encourages you to experiment with variations and enhancements to tailor these tassies to your personal preferences, ensuring each batch is uniquely yours. Savor the process, enjoy the delightful aroma, and most importantly, relish every bite of this elegant, guilt-friendly dessert.
References
- Cooking Light, November 2000 Issue: Original inspiration and nutritional insights.
- Healthy Baking Techniques, “The Science of Baking,” 2021 Edition.