

Introduction
Beer bread is one of the most beloved quick bread recipes worldwide, celebrated for its simplicity, rich flavor, and satisfying texture. At Love With Recipes, we understand that a good loaf of bread can elevate any meal, serve as a hearty snack, or be the foundation of a comforting dinner. The beauty of this beer bread lies in its minimal ingredients, straightforward preparation, and the subtle yeasty undertones contributed by the beer, which acts as both a leavening agent and a flavor enhancer. Whether you’re a novice baker or an experienced home cook seeking a fuss-free recipe, this beer bread is guaranteed to impress with its crusty exterior and soft, flavorful crumb. It pairs beautifully with soups, stews, salads, or can be enjoyed simply with butter or your favorite spreads. Once you try this recipe, you’ll understand why it’s hailed as the #1 beer bread in the world, consistently favored for its ease and deliciousness. Perfect for busy weeknights, impromptu gatherings, or as a staple in your baking repertoire, this bread is bound to become a household favorite.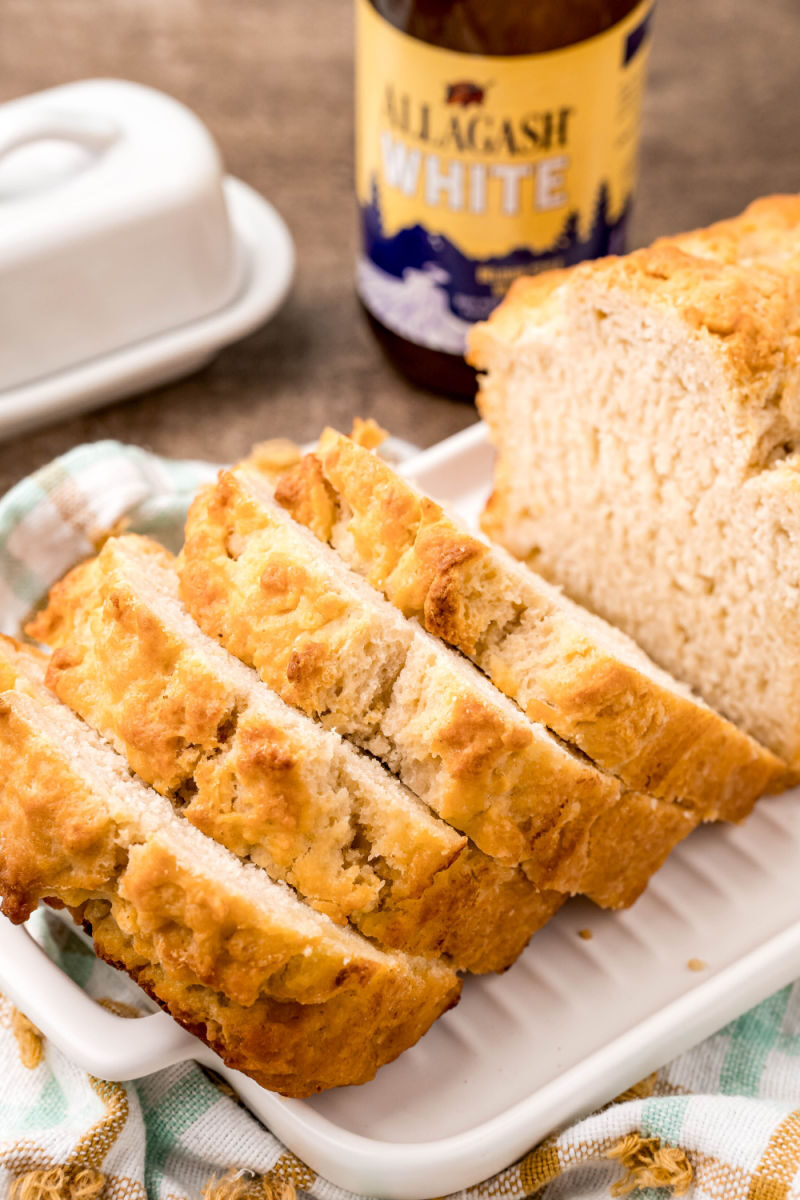
Time
- Preparation Time: 10 minutes
- Baking Time: 1 hour
- Total Time: Approximately 1 hour and 10 minutes
Needed Equipment
- Oven: Standard kitchen oven capable of reaching 375°F (190°C)
- Mixing Bowls: At least one large mixing bowl for combining dry ingredients
- Whisk or Spoon: For mixing the batter thoroughly
- Loaf Pan: 9×5 inch (23×13 cm) loaf pan, preferably non-stick or well-greased
- Measuring Cups and Spoons: To accurately measure ingredients
- Rubber Spatula or Spoon: For transferring batter into the pan
- Brush or Small Spoon: To pour melted butter evenly over the batter
- Oven Mitts: For safe handling of hot equipment
- Cooling Rack: To cool the bread evenly after baking
- Optional: Sifter for flour to improve texture and rise
Tags
Quick Breads, Bread, Baking, Easy Recipes, Beginner Friendly, Weeknight Dinner, Comfort Food, Homemade Bread, Baking Tips, Inexpensive Ingredients

Serving Size
Serves approximately 10 to 12 slices, depending on thickness.
Difficulty Level
Beginner to Intermediate — straightforward process with minimal steps, suitable for novice bakers.
Allergen Information
| Allergen | Present |
|---|---|
| Gluten | Yes (from flour) |
| Dairy | Optional (if butter is used) |
| Alcohol | Yes (from beer, which contains alcohol) |
Note: Variations can be made to accommodate allergies, such as gluten-free flour or dairy substitutes.
Dietary Preference
Suitable for omnivores; can be adapted for vegetarian diets. Not vegan unless dairy is substituted.
Course
Appetizer, Side Dish, Snack
Cuisine
American, Comfort Food
Ingredients
Ingredient Quantities and Descriptions
| Quantity | Ingredient | Description/Notes |
|---|---|---|
| 3 cups | All-purpose Flour | Sifted for lighter texture and better rise |
| 3 teaspoons | Baking Powder | Leavening agent to help the bread rise |
| 1 teaspoon | Salt | Enhances flavor |
| 1/4 cup | Sugar | Balances flavors and aids browning |
| 1 can (12 oz) | Beer | Use room temperature beer for best results; lager or ale preferred |
| 1/2 cup | Butter | Melted; adds richness and crunch to crust |
Instructions
Step 1: Preheat the Oven
Begin by setting your oven to 375°F (190°C). This ensures that the oven reaches the right temperature for baking the bread evenly and thoroughly. It’s recommended to place a rack in the middle position to promote uniform heat distribution, which is crucial for obtaining a golden crust and a well-risen loaf. Use an oven thermometer if your oven’s temperature calibration is uncertain, as accurate heat is essential for consistent results in bread baking.
Step 2: Prepare Dry Ingredients
In a large mixing bowl, combine the sifted all-purpose flour, baking powder, salt, and sugar. Sifting the flour helps aerate it, producing a lighter crumb in the finished bread. Mixing dry ingredients thoroughly ensures even distribution of leavening agents and salt, which contributes to uniform rising and optimal flavor. Use a whisk or fork to blend the ingredients until uniformly combined. This step is important because uneven distribution can lead to inconsistent texture and rise.
Step 3: Incorporate the Beer
Slowly pour the beer into the dry mixture while gently stirring with a spoon or spatula. The beer should be at room temperature to prevent the batter from curdling or not mixing properly. Stir just until the ingredients are combined; overmixing can result in a dense loaf. The carbonation in the beer introduces natural leavening, which helps the bread rise without additional yeast. The beer’s malt and hop flavors will subtly influence the final taste, adding depth and complexity. If you prefer a milder flavor, opt for a lager or pilsner; for a richer taste, choose an ale.
Step 4: Prepare the Loaf Pan
Grease your 9×5 inch loaf pan generously with butter, shortening, or non-stick spray. This prevents sticking and facilitates easy removal after baking. For added flavor and a crunchier crust, you can line the pan with parchment paper or dust it lightly with flour or cornmeal. Ensure that the bottom and sides are evenly coated, especially if using non-stick spray, to guarantee the bread releases smoothly.
Step 5: Transfer Batter to Pan
Using a spatula or large spoon, transfer the batter into the prepared loaf pan. Smooth the top with the back of the spatula or spoon to promote even baking. The batter should fill the pan approximately two-thirds full to allow room for expansion during baking. Leveling the surface helps achieve an even crust and prevents uneven rising.
Step 6: Add Butter
Melt the 1/2 cup of butter in a microwave or on the stovetop. Once melted, pour the butter evenly over the top of the batter. This step is crucial as it creates a rich, buttery crust that enhances flavor and texture. If you prefer a softer crust, you can incorporate the butter into the batter itself before pouring, which results in a more tender crumb.
Step 7: Bake the Bread
Place the loaf pan in the middle rack of the preheated oven. Bake for approximately 60 minutes, but start checking for doneness at around 55 minutes. The bread is ready when the surface is a deep golden brown, and a toothpick inserted into the center comes out clean, indicating thorough baking. For an even crust, rotate the pan halfway through baking if necessary. Keep an eye on the bread in the last 10 minutes; if it darkens too quickly, tent it with aluminum foil to prevent burning.
Step 8: Cool and Serve
Once baked, remove the bread from the oven and allow it to cool in the pan for about 10 minutes. Then, transfer the loaf to a cooling rack and let it cool for at least 15 minutes before slicing. Cooling allows the crumb to set, making slices cleaner and easier to handle. Slice with a serrated bread knife for best results. Serve warm with butter, honey, or your preferred toppings, or enjoy at room temperature with soups or salads.
Preparation Tips
- Sifting Flour: Always sift flour to introduce air and prevent dense crumbs.
- Beer Choice: Use a beer that you enjoy drinking; its flavor influences the bread. Avoid overly bitter or heavily hopped beers if you prefer milder taste.
- Ingredient Temperature: Use room temperature beer to facilitate mixing and leavening.
- Don’t Overmix: Mix until just combined to maintain a tender crumb.
- Crust Variations: For an extra crispy crust, brush with melted butter during the last 10 minutes of baking or sprinkle with coarse sea salt.
Nutritional Information
| Nutrient | Per Serving |
|---|---|
| Calories | 422.1 kcal |
| Fat | 16 g |
| Saturated Fat | 9.8 g |
| Cholesterol | 40.7 mg |
| Sodium | 707.9 mg |
| Carbohydrates | 58.7 g |
| Fiber | 1.7 g |
| Sugar | 8.5 g |
| Protein | 6.9 g |
Tips and Tricks
- Flavor Variations: Add herbs like rosemary, thyme, or garlic powder to customize the flavor.
- Sweet Version: Incorporate dried fruits, cinnamon, or honey for a sweet twist.
- Texture Adjustments: Mix in nuts, seeds, or cheese for added texture and flavor.
- Consistency: If the batter is too thick, add a splash more beer; if too runny, sprinkle in a little more flour.
Add-ons and Variations
- Cheese and Herb Beer Bread: Fold in shredded cheddar, Parmesan, or mozzarella with chopped herbs.
- Sweet Beer Bread: Add honey or maple syrup and dried fruits for a dessert-like bread.
- Gluten-Free Version: Use gluten-free all-purpose flour blend and ensure baking powder is gluten-free.
Side Dishes and Pairings
- Soups: Pair with hearty stews, tomato soup, or creamy chowders.
- Salads: Serve alongside fresh salads with vinaigrette.
- Spreads: Top slices with butter, honey, or fruit preserves.
- Dips: Serve with hummus, spinach dip, or cheese spreads for a snack platter.
Improvements and Variations
- Adding Eggs: Incorporate one or two eggs into the batter for a richer crumb and improved structure.
- Using Different Beers: Experiment with stout, porter, or flavored beers for unique tastes.
- Reducing Sugar: Adjust sugar based on sweetness preference or dietary needs.
Save and Store
Store leftovers in an airtight container at room temperature for up to 2 days or in the refrigerator for up to 5 days. To extend shelf life, freeze slices individually wrapped in plastic wrap and store in a resealable freezer bag for up to 3 months. To reheat, warm slices in the oven at 350°F (175°C) for 10 minutes or until heated through. For best flavor and texture, consume within the recommended timeframes.
FAQ
Can I make this bread gluten-free?
Yes, substitute all-purpose flour with a high-quality gluten-free flour blend. Ensure your baking powder is gluten-free as well. The texture may vary slightly, but with proper adjustments, it remains delicious.
Can I use non-alcoholic beer?
Absolutely. Non-alcoholic beers work well and produce a similar rise and flavor without the alcohol content. If you prefer a richer beer flavor, opt for non-alcoholic lagers or ales.
Is this bread suitable for vegans?
Not directly, as it contains butter. To make it vegan, substitute with plant-based margarine or oils and use vegan beer options.
How do I get a softer crust?
Brush the top with melted butter after baking or wrap the bread in a damp cloth while cooling to retain moisture and soften the crust.
Can I add other ingredients?
Yes, mix in herbs, cheeses, nuts, or dried fruits to customize your bread. Add these ingredients after mixing the batter to distribute evenly.
Conclusion
This comprehensive beer bread recipe exemplifies the beauty of simple, hearty baking. Its minimal ingredient list, straightforward steps, and versatile flavor profile make it an essential addition to any home baker’s collection. The combination of beer’s natural leavening with basic pantry staples results in a loaf that is crusty on the outside, tender on the inside, and bursting with flavor. Whether you’re making it for a quick weeknight dinner, a cozy weekend baking project, or to impress guests, this bread delivers every time. Remember to experiment with add-ons and variations to make it uniquely yours, and enjoy the process of creating a loaf that’s as satisfying to make as it is to eat. Thanks for visiting Love With Recipes—your trusted source for delicious, approachable cooking!
References
- Joy of Cooking, 75th Anniversary Edition
- The Bread Baker’s Apprentice by Peter Reinhart