
Introduction
Soya milk, also known as soy milk, is a nutritious, plant-based beverage that has gained popularity worldwide, particularly among vegans and those with lactose intolerance. It offers a rich source of plant-based protein, essential amino acids, and is inherently dairy-free, making it an ideal alternative for individuals seeking to reduce or eliminate dairy consumption. The process of making soya milk at home allows for control over ingredients, ensuring a fresh, additive-free product that retains maximum nutrients and flavor.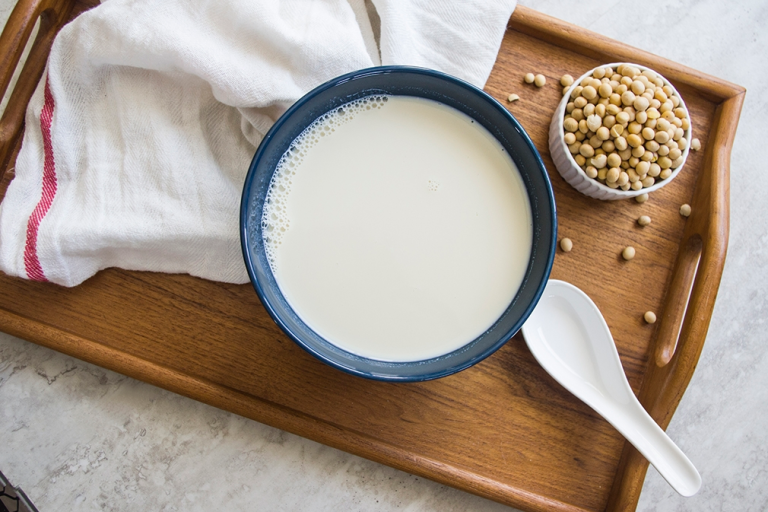
This comprehensive guide, brought to you by lovewithrecipes.com, provides an in-depth, step-by-step approach to crafting your own silky, creamy soya milk. Beyond the basic recipe, we delve into the science behind each step, tips to enhance flavor and texture, variations to explore, nutritional insights, and storage recommendations. Whether you are a beginner or an experienced home cook, this detailed tutorial aims to empower you with all necessary information to perfect your homemade soya milk experience.
Time
- Preparation Time: 10 hours (mainly for soaking)
- Cooking Time: 12 minutes
- Total Time: approximately 10 hours 12 minutes
The soaking phase is critical for softening the soybeans, which significantly affects blending and the final smoothness of the milk. The actual cooking process is quick but essential for flavor development and safety.
Needed Equipment
- Large mixing bowls (for soaking)
- Blender (preferably high-speed for smooth texture)
- Fine mesh sieve or chinois
- Muslin cloth or nut milk bag (for straining)
- Large saucepan or pot
- Measuring cups and spoons
- Stirring spoon or spatula
- Airtight storage containers or bottles
- Cooking thermometer (optional, for precise temperature control)
- Ladle or slotted spoon (for skimming foam)
- Labels and marker (for storage labeling)
Tags
Vegan, Dairy-Free, Healthy, Plant-Based, Homemade, Nutritious, Gluten-Free, Vegetarian, Eco-Friendly, Natural, Organic
Serving Size
This recipe yields approximately 10 cups of soya milk, serving about 10 individual 1-cup portions. Adjustments can be made for larger or smaller servings based on your needs.
Difficulty Level
Moderate. The process involves soaking, blending, straining, and cooking, which requires attention to detail but is manageable for home cooks with basic culinary skills.
Allergen Information
This recipe contains soybeans, which are a common allergen. It is not suitable for individuals with soy allergies or sensitivities. Cross-contamination during processing should be considered if preparing for allergy-sensitive individuals.
Dietary Preference
Vegan, Vegetarian, Dairy-Free, Plant-Based, Gluten-Free (if gluten-free water and equipment are used)
Course
Drink / Beverage
Cuisine
Global / Asian-inspired (originally from East Asia, particularly China and Japan, but now enjoyed worldwide)
Ingredients
| Ingredient | Quantity | Notes |
|---|---|---|
| Soybeans | 250 grams | High-quality, organic preferred |
| Water (for soaking) | Enough to fully submerge soybeans overnight | Use filtered or spring water for purity |
| Fresh Water (for blending) | 2 liters | Adjust as needed for desired consistency |
| Sugar | 130 grams | Adjust to taste; alternatives include honey, maple syrup, or stevia |
Instructions
Step 1: Soak the Soybeans
Begin by thoroughly rinsing the soybeans under cold running water to remove any dirt or impurities. Transfer them into a large bowl and cover with plenty of water—at least three times the volume of soybeans—to allow for expansion. Cover the bowl and leave it to soak overnight, typically 8 to 12 hours. Soaking softens the soybeans, making them more amenable to blending and improving the texture of the final milk. For best results, soak in a cool environment to prevent fermentation or spoilage.
Step 2: Drain and Prepare for Blending
After the soaking period, drain the soybeans well using a colander. Rinse again with cold water to remove any residual skins or dirt. For a smoother and more refined milk, you may choose to peel the soybeans, but this step is optional and mainly for those seeking ultra-smooth milk. The peeling process involves gently pinching each soybean to remove the skin, which can be time-consuming but may enhance the creaminess of the milk.
Step 3: Blend the Soybeans with Water
Transfer the soaked soybeans into your blender. Add about half of the total water (around 1 liter) and blend at high speed until the mixture is smooth, creamy, and free of large soybean pieces. Depending on your blender’s capacity, do this in batches. The goal is to pulverize the soybeans into a fine slurry, which will facilitate maximum extraction of flavor and nutrients during straining. Use a tamper or spatula to periodically scrape down the sides of the blender for even blending.
Step 4: Strain the Soy Milk
Line a large bowl or container with a muslin cloth, nut milk bag, or a fine mesh sieve. Pour the blended mixture into the cloth, allowing the liquid to pass through while trapping the pulp—also known as okara. Gather the cloth edges and squeeze firmly to extract as much milk as possible. This process ensures a silky, smooth texture. The leftover pulp can be used in baking, smoothies, or as animal feed, reducing waste and increasing sustainability.
Step 5: Transfer and Cook the Soy Milk
Pour the freshly strained soy milk into a large saucepan or pot. Place over medium heat. Bring to a gentle simmer, stirring constantly to prevent sticking or scorching at the bottom. During heating, foam may form on the surface; use a spoon or ladle to skim this off periodically. This foam is natural and harmless but can affect the milk’s aesthetics.
Step 6: Sweeten and Flavor
Once the milk starts to simmer, add the sugar gradually, stirring continuously until fully dissolved. Taste and adjust sweetness according to personal preference. For flavor variations, consider adding vanilla extract, cocoa powder, or a splash of almond essence at this stage. Stir well to incorporate any added flavors evenly.
Step 7: Boil and Finalize
Allow the soy milk to boil gently for 2-3 minutes to eliminate raw soybean flavor and improve digestibility. Be vigilant to prevent boiling over. Once boiling, remove the pot from heat immediately. Let the milk cool slightly before pouring into the storage containers.
Step 8: Storage and Serving
Allow the milk to cool to room temperature naturally. Transfer to airtight bottles or containers. For optimal freshness, refrigerate and consume within 3-4 days. Shake well before each use as separation may occur. Serve cold or warm, depending on your preference. You can also use the soy milk in recipes such as smoothies, baked goods, or cereals.
Preparation Tips
- Soak Duration: Ensure soybeans are soaked long enough to soften thoroughly, which facilitates blending and improves texture.
- Using Quality Soybeans: Opt for organic, non-GMO soybeans to maximize nutritional value and flavor.
- Blending Technique: Use high-speed blenders for ultra-smooth milk. Blending in small batches can yield better results.
- Straining Method: Double strain if necessary to achieve an extra-silky milk, especially if you prefer a very smooth texture.
- Flavoring: Experiment with natural flavorings like vanilla, cinnamon, or a pinch of sea salt for customized tastes.
Nutritional Information
| Nutrient | Amount per Serving (1 cup / 240 ml) |
|---|---|
| Calories | 70.5 kcal |
| Fat | 1.1 g |
| Saturated Fat | 0.1 g |
| Cholesterol | 0 mg |
| Sodium | 6.4 mg |
| Carbohydrates | 14.6 g |
| Dietary Fiber | 0.2 g |
| Sugar | 13.1 g |
| Protein | 2.1 g |
Tips and Tricks
- Enhance Creaminess: For a richer texture, incorporate a small amount of coconut milk or cashew cream during blending.
- Reduce Pulp Waste: Use leftover okara in baking, as a base for veggie burgers, or in smoothies to boost fiber content.
- Flavor Variations: Infuse with spices such as cardamom or ginger for unique flavor profiles.
- Sweetener Alternatives: Experiment with natural sweeteners like agave nectar or date paste for different sweetness levels.
- Homemade Vanilla Extract: Use homemade or store-bought vanilla bean pods for an authentic flavor boost.
Add-ons
- Vanilla bean or extract for a fragrant twist
- Cocoa powder or chocolate syrup for a chocolatey version
- Almond essence or soaked almonds for a nutty flavor
- Spices like cinnamon, nutmeg, or cardamom for extra warmth
Side Dishes
Homemade soya milk complements a variety of dishes:
- Fresh fruit salads for a nutritious breakfast
- Oatmeal or porridge topped with fruits and nuts
- Vegetable smoothies for a protein-packed drink
- Vegan baked goods like muffins, pancakes, or bread
Improvements
- Use a high-powered blender for ultra-smooth milk with minimal pulp
- Add a pinch of sea salt to enhance the natural flavor
- Experiment with different sweeteners and flavorings to suit your taste
- Incorporate fortified ingredients like calcium or vitamin D powders for added nutrition
Save and Store
Proper storage ensures freshness and retains nutritional value:
- Transfer cooled soya milk into airtight containers or glass bottles
- Label containers with date for freshness tracking
- Refrigerate immediately and consume within 3 to 4 days
- Shake well before each use to redistribute any separation
- For longer storage, freeze in portions using ice cube trays or freezer-safe containers—thaw in the fridge before use
FAQ
Can I make soy milk without soaking?
Soaking is highly recommended for optimal softening and flavor extraction. Skipping soaking can lead to a grainy texture and reduced digestibility.
Is homemade soy milk safe to drink immediately?
Yes, once boiled and cooled, homemade soy milk is safe. The boiling step eliminates raw bean flavors and potential bacteria. Always refrigerate promptly.
Can I sweeten soy milk with honey or maple syrup?
Absolutely. Adjust the sweetness to your liking, and remember that some sweeteners may alter the flavor profile slightly.
How long does homemade soy milk last?
Refrigerated, it stays fresh for 3–4 days. For extended storage, freezing is an option.
Can I use soy pulp (okara) in other recipes?
Yes. Okara is rich in fiber and protein, making it perfect for baking, smoothies, or as a meat extender in vegetarian dishes.
Conclusion
Creating your own soya milk at home is a rewarding process that combines nutritional benefits, customization, and sustainability. By controlling ingredients and process, you ensure a fresh, flavorful, and healthful beverage tailored to your taste preferences. From the initial soaking to the final storage, every step is designed to maximize quality and minimize waste, aligning with a mindful and eco-conscious lifestyle. Embrace the versatility of homemade soy milk in your daily diet, from morning coffees to baking adventures, and enjoy the wholesome goodness of this plant-based miracle in every sip.
References
- Chen, L., & Wang, Y. (2018). “Processing and Nutritional Aspects of Soy Milk.” Journal of Food Science and Technology.
- Gawlik, M., & Szajnar, J. (2017). “Utilization of Soy Pulp (Okara) in Food Applications.” Food Processing & Nutrition Journal.