Introduction to Kunu – A Traditional Nigerian Refreshment
Kunu stands out as an iconic beverage within Nigerian culinary traditions, celebrated not only for its distinctive, mildly tangy flavor but also for its rich cultural roots and health benefits. As a non-alcoholic drink, Kunu has carved a space for itself in social gatherings, festivals, and everyday refreshment routines across Nigeria and neighboring West African countries. Its popularity stems from a combination of its refreshing qualities, nutritional value, and the versatility it offers in flavor customization. Rooted in the use of fermented grains—such as millet, guinea corn (also known as sorghum), or other local grains—this beverage embodies the essence of indigenous food processing techniques that have been passed down through generations.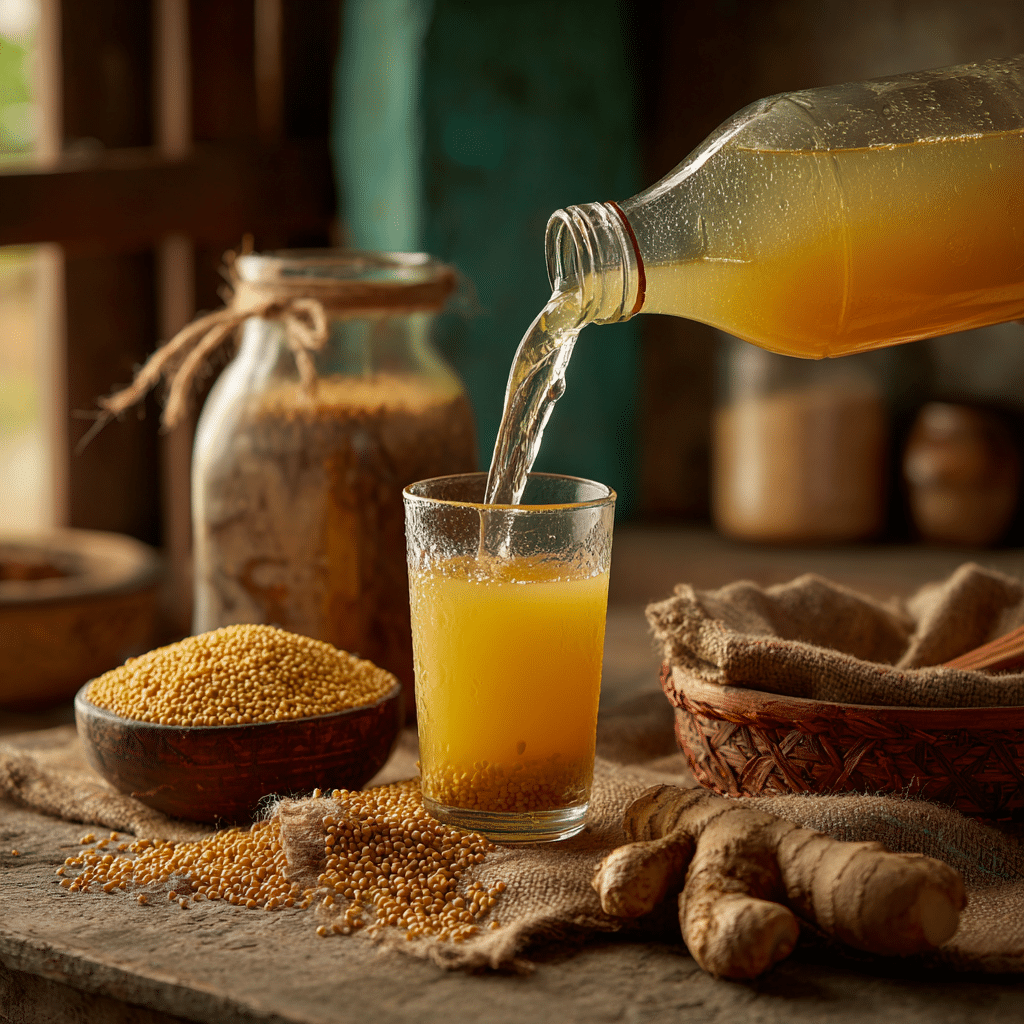
Understanding Kunu’s preparation process provides insights into African food heritage, fermentation science, and the art of flavor balancing. The process involves fermenting grains to develop the characteristic tanginess, then sweetening and flavoring the resulting liquid to suit various palates. Its healthful profile, including probiotic benefits, makes it an appealing choice for health-conscious consumers seeking natural hydration and nourishment. Whether served at celebratory weddings, traditional festivals, or as a cool drink on a hot day, Kunu remains a beloved staple that connects communities through its cultural significance and delicious taste.
Estimated Preparation Time
The entire process of making Kunu, from soaking grains to serving the final chilled beverage, typically spans approximately 36 to 48 hours. The initial soaking and grinding stages are completed within 12 hours, while fermentation requires an additional 24 to 48 hours to develop the desired flavor and probiotic qualities. Final preparation, including straining, sweetening, and chilling, adds about 1 to 2 hours to the timeline. It is recommended to plan ahead, especially for fermentation, to ensure optimal flavor and probiotic activity, which intensifies with longer fermentation periods.
Needed Equipment for Making Kunu
Essential Tools
- Soaking Containers: Large glass jars or food-grade plastic bowls for grains soaking.
- Grain Mill or Blender: A traditional grain mill is ideal; a high-powered blender can suffice for smaller batches.
- Cooking Pots: Heavy-bottomed pots for boiling the grain mixture.
- Stirring Utensils: Wooden or silicone spatulas for stirring during boiling.
- Fine Mesh Sieves or Cheesecloth: For straining the fermented mixture.
- Measuring Cups and Spoons: To ensure precise ingredient quantities.
- Fermentation Container: Large glass jars or fermentation crocks with lids or breathable cloth covers.
- Refrigeration Equipment: A refrigerator or cool storage space to chill the beverage before serving.
- Serving Accessories: Glasses, straws, and garnishing items like mint leaves or fruit slices.
Optional Equipment for Advanced Preparation
- Food Processor: For easier grinding of grains if a mill or blender is unavailable.
- Filtration Systems: For clearer Kunu, especially if serving for guests or in commercial settings.
- Flavor Infusion Devices: Small infusion bags or bottles if flavoring with extracts or spices.
Tags for Categorization
- Nigerian Cuisine
- Traditional Beverages
- Fermentation
- Healthy Drinks
- Non-Alcoholic Refreshers
- Homemade Drinks
- Festive Drinks
- Natural Sweeteners
- Probiotic Drinks
- Vegetarian & Vegan
Serving Size
Each serving of Kunu is typically 1 cup (240 ml), which makes it suitable for individual consumption. For larger gatherings or parties, batches can be scaled up easily, with servings being poured into individual glasses over ice and garnished as desired. The recipe as presented here yields approximately 8-10 servings, depending on the desired volume per glass and the amount of concentrated mixture prepared during fermentation.
Difficulty Level
The process of making Kunu is classified as moderate in difficulty. It involves multiple steps, including soaking, grinding, boiling, fermentation, and straining. While each step requires attention to detail, especially during fermentation and flavor balancing, it is accessible for home cooks with basic culinary skills. Patience is essential, particularly during fermentation, which cannot be rushed but yields rewarding results. With clear instructions and proper equipment, even beginners can master the art of making authentic Nigerian Kunu.
Allergen Information
| Allergen | Potential Sources |
|---|---|
| Gluten | Present if using millet or sorghum grains that contain gluten or cross-contamination during processing. |
| Nuts | Possible cross-contact if flavoring ingredients or sweeteners contain traces of nuts. |
| Spices | Ginger, cloves, or other flavoring spices which may cause allergic reactions in sensitive individuals. |
| Fermentation | Potential for mold or bacterial growth if fermentation vessels are not properly sanitized. |
Dietary Preferences
- Vegan: Made entirely from grains, water, and plant-based sweeteners and flavorings.
- Vegetarian: Suitable as is, without any animal products.
- Gluten-Free: When using gluten-free grains like millet or sorghum, Kunu can be gluten-free.
- Low Sugar: Adjust the sweetener level to reduce sugar content.
Course
Refreshment, Beverage, Drink, Non-Alcoholic Beverage
Cuisine
Nigerian, West African, African
Ingredients for Kunu (Tabular Format)
| Ingredient | Quantity | Notes |
|---|---|---|
| Millet, guinea corn (sorghum), or other grains | 2 cups (about 400 grams) | Choose based on preference; millet provides a nutty flavor, guinea corn is slightly sweeter. |
| Water | Approximately 8-10 cups (for soaking, boiling, and dilution) | Use filtered or clean potable water. |
| Sugar or Honey | To taste, typically 1/4 to 1/2 cup (60-120 grams) | Adjust based on sweetness preference. |
| Ginger (fresh) | 2-3 inches piece, grated or chopped | Optional, for spicy flavor and digestive benefits. |
| Cloves (whole or ground) | 1-2 teaspoons | Optional, adds aromatic depth. |
| Additional flavorings (e.g., orange zest, vanilla extract) | As desired | Optional, for flavor variations. |
Step-by-Step Instructions for Making Authentic Kunu
1. Preparation of Grains
Start with meticulous cleaning of your chosen grains—millet, guinea corn, or sorghum. Rinse thoroughly under cold running water, swirling the grains gently in a bowl or sieve to remove dirt, dust, or any foreign particles. This step is crucial to eliminate contaminants that could interfere with fermentation or spoilage. After washing, transfer the grains into a large, clean bowl or container, covering them with enough water to submerge completely. Soak the grains overnight, ideally between 8 to 12 hours, allowing enzymes within the grains to activate, soften the material, and promote easier grinding.
During soaking, you may notice some foam or slight fermentation activity—this is normal and indicates the start of the natural fermentation process. Maintain the grains in a cool, shaded area to prevent premature fermentation or spoilage. If you live in a humid climate, consider refrigerating the soaking grains to control microbial activity. After soaking, drain the grains using a fine mesh sieve or colander, rinsing gently to remove any residual dirt or impurities.
2. Grinding the Grains into a Paste
Transfer the soaked grains into a traditional grain mill or high-powered blender. For small batches, a blender suffices; for larger quantities, a manual or electric mill is more efficient. Add a small amount of clean water—just enough to facilitate smooth grinding—about 1/4 cup (60 ml) for small batches or as needed. Blend or grind until achieving a smooth, thick slurry resembling a batter. The consistency should be uniform without large grain particles, but it should not be so watery that it loses its body.
If using a blender, pulse intermittently to prevent overheating and ensure thorough grinding. Scrape down the sides of the blender jar periodically. For a traditional approach, use a mortar and pestle to pound the grains into a paste, especially when making smaller batches or maintaining traditional methods. The key is to achieve a homogeneous mixture that will ferment evenly and produce a consistent flavor profile.
3. Boiling the Grain Mixture
Pour the grain paste into a large, heavy-bottomed pot to prevent scorching. Add approximately 4-5 cups (1 to 1.2 liters) of water to dilute the slurry to your preferred consistency. Stir continuously with a wooden or silicone spatula to prevent the mixture from sticking or burning at the bottom. Bring the mixture to a gentle boil over medium heat. Maintain constant stirring to ensure even cooking, which also helps to develop the flavors and eliminate raw grain taste.
Allow the mixture to boil for about 20-30 minutes until it thickens into a porridge-like consistency. During this phase, the proteins and starches undergo gelatinization, creating a rich base for fermentation. Adjust the water content if necessary to control thickness—more water results in a lighter drink, while less yields a thicker, more concentrated flavor. After boiling, reduce the heat and let it simmer gently for an additional 10 minutes to complete the cooking process.
4. Cooling and Fermentation
Remove the pot from heat and allow the mixture to cool naturally to room temperature. This step is critical because high temperatures can kill beneficial microbes and impede fermentation. Once cooled, transfer the mixture into a clean fermentation container—preferably a glass jar or ceramic crock. Cover the container with a breathable cloth or a loose lid to allow gases to escape while preventing contaminants from entering.
Set the container aside in a warm, shaded location for 24 to 48 hours. The fermentation period depends on your flavor preference: shorter fermentation (around 24 hours) results in a mild, slightly sweet drink, while longer fermentation (up to 48 hours) produces a more pronounced tang and probiotic richness. During fermentation, you may observe bubbles rising to the surface and a slight sour smell—signs that the natural fermentation process is progressing well.
5. Flavoring and Sweetening
After fermentation, open the container briefly to taste the Kunu. At this point, it should have a mildly sour, tangy flavor characteristic of fermented grains. If you desire a sweeter beverage, dissolve your choice of sweetener—sugar, honey, or natural alternatives like date syrup—in a small amount of warm water, then stir into the mixture. You may also add flavoring ingredients such as freshly grated ginger, crushed cloves, or citrus zest to enhance aroma and taste. These additions can be incorporated directly into the strained liquid or infused during the fermentation stage for deeper flavor integration.
Mix thoroughly to ensure even distribution of flavors and sweetness. Adjust the quantity of sweetener based on your preference—start with a small amount and add more gradually, tasting as you go. For a more complex flavor profile, consider adding vanilla extract or a splash of orange or lemon juice.
6. Straining and Chilling
Strain the fermented mixture through a fine mesh sieve or cheesecloth into a clean container to remove grains, spices, and any residual solids. This step ensures a smooth, pulp-free beverage that is more pleasant to drink. Press gently to extract maximum liquid, then discard the solids or use them in other recipes like porridge or baking.
Transfer the strained Kunu into bottles or pitchers, and refrigerate for at least 2-3 hours to chill thoroughly. Serving Kunu cold enhances its refreshing qualities and makes it more enjoyable, especially on hot days. Add ice cubes or garnish with fresh herbs, fruit slices, or mint leaves for an extra touch of freshness.
Preparation Tips for Perfect Kunu
- Use Fresh, Quality Grains: The flavor and fermentation success largely depend on the quality of your grains. Opt for locally sourced, organic grains when possible.
- Control Fermentation Environment: Keep the fermentation container in a warm, dark place—ideally around 25-30°C (77-86°F)—to promote active fermentation.
- Sanitize Equipment: Ensure all utensils, containers, and strainers are thoroughly cleaned to prevent unwanted microbial contamination.
- Flavor Variations: Experiment with adding spices like cinnamon, vanilla, or citrus zest during flavoring to create unique versions tailored to your taste.
- Adjust Sweetness: Personalize the sweetness level, keeping in mind that fermentation can slightly reduce sugar content over time.
Approximate Nutritional Information per Serving
| Nutrient | Amount per 1 Cup (240 ml) |
|---|---|
| Calories | 90-120 kcal |
| Protein | 2-4 grams |
| Carbohydrates | 20-25 grams |
| Sugars | 10-15 grams |
| Fat | 1-2 grams |
| Fiber | 2-3 grams |
| Calcium | 25-40 mg |
| Iron | 1-3 mg |
Tips, Tricks, and Creative Variations
- Flavor Infusions: Incorporate tropical fruits like pineapple, mango, or passion fruit during the flavoring stage for exotic twists.
- Health Boosters: Add a teaspoon of spirulina powder or chia seeds during fermentation for added nutrients.
- Sweetener Alternatives: Use natural sweeteners like agave syrup, maple syrup, or coconut sugar for different flavor profiles and health benefits.
- Fermentation Control: To slow fermentation, refrigerate the mixture earlier or reduce fermentation time, ideal for a milder flavor.
- Presentation: Serve Kunu in traditional calabashes or modern glass bottles garnished with herbs, citrus slices, or edible flowers for aesthetic appeal.
Add-ons and Variations
- Fruit-Infused Kunu: Blend in pureed fruits during flavoring for added sweetness and visual appeal.
- Spiced Kunu: Infuse with cinnamon, cloves, or cardamom for a warming, spicy note.
- Vegetable Kunu: Experiment with adding vegetables like carrot or cucumber juice for a nutritious twist.
Complementary Side Dishes and Snacks
- Grilled plantains
- Suya (spicy Nigerian meat skewer)
- Fried yam fries
- Puff-puff (sweet fried dough balls)
- Moi Moi (steamed bean pudding)
- Fried fish or shrimp
Improvements and Customizations
- For clearer Kunu, extend the straining process or pass the liquid through multiple layers of cheesecloth.
- Add a splash of coconut milk during flavoring for a creamy version.
- Use alternative grains like fonio or millet varieties for different textures and flavors.
- Incorporate herbal infusions like lemongrass or basil for aromatic complexity.
Saving and Storing Your Homemade Kunu
Store the prepared Kunu in airtight bottles or containers in the refrigerator. Proper refrigeration preserves freshness for up to 3-4 days. Shake gently before serving, as fermentation can cause slight separation. For longer storage, freeze in ice cube trays and thaw as needed, or use in smoothies and chilled beverages.
Frequently Asked Questions (FAQs)
Can I make Kunu without fermentation?
While fermentation enhances flavor and probiotic qualities, you can make a quick version by blending soaked grains with water and sweeteners without fermentation. However, this will lack the depth of traditional Kunu and its health benefits.
Is Kunu suitable for vegans and vegetarians?
Absolutely. As long as you use plant-based sweeteners and flavorings, Kunu is naturally vegan and vegetarian-friendly.
How do I prevent over-fermentation or spoilage?
Maintain a clean environment, refrigerate if not fermenting immediately, and monitor the fermentation duration to prevent excessive sourness or spoilage. Discard if the mixture develops mold or off-putting odors.
Can I add alcohol to make Kunu into an alcoholic beverage?
Traditional Kunu is non-alcoholic, but you can add a splash of alcohol like vodka or gin after fermentation for a spirited version, often enjoyed during celebrations.
Conclusion: Embracing the Rich Heritage of Kunu
Crafting your own Kunu is more than just preparing a beverage; it is an immersion into Nigerian culture and culinary heritage. The process of selecting grains, fermenting, and flavoring connects you with indigenous food practices and traditions that have sustained communities for centuries. Beyond its cultural significance, Kunu offers a nutritious, probiotic-rich alternative to commercial sodas and processed drinks, aligning with modern health consciousness. Its versatility in flavoring and presentation allows for endless creativity, making it a favorite for both traditional ceremonies and contemporary gatherings.
At Love With Recipes, we believe that embracing traditional recipes like Kunu not only preserves cultural identities but also promotes healthier lifestyles through natural, homemade foods. So gather your ingredients, set aside time for fermentation, and enjoy the rewarding journey of creating this authentic Nigerian beverage that refreshes, nourishes, and connects you to a vibrant culinary heritage.