
Introduction
Embarking on the journey of baking your own bread can be one of the most fulfilling culinary experiences. This delightfully simple spelt bread recipe, curated for the Love With Recipes platform, offers an inviting way to enjoy wholesome, nutritious bread without the need for yeast or sugar. Spelt, an ancient grain related to wheat, provides a nutty flavor and a hearty texture that elevates any meal. Whether you are a seasoned baker seeking a quick yet satisfying bread or a beginner eager to try something new, this recipe will guide you step-by-step toward baking two beautiful loaves of nourishing homemade bread. The absence of yeast makes the process straightforward, and the use of baking soda and cream of tartar ensures a reliable rise, delivering a tender crumb and crust that’s golden and crispy. Prepare to indulge in the aroma of freshly baked bread that fills your kitchen, and enjoy the satisfaction of creating a product that’s both wholesome and delicious.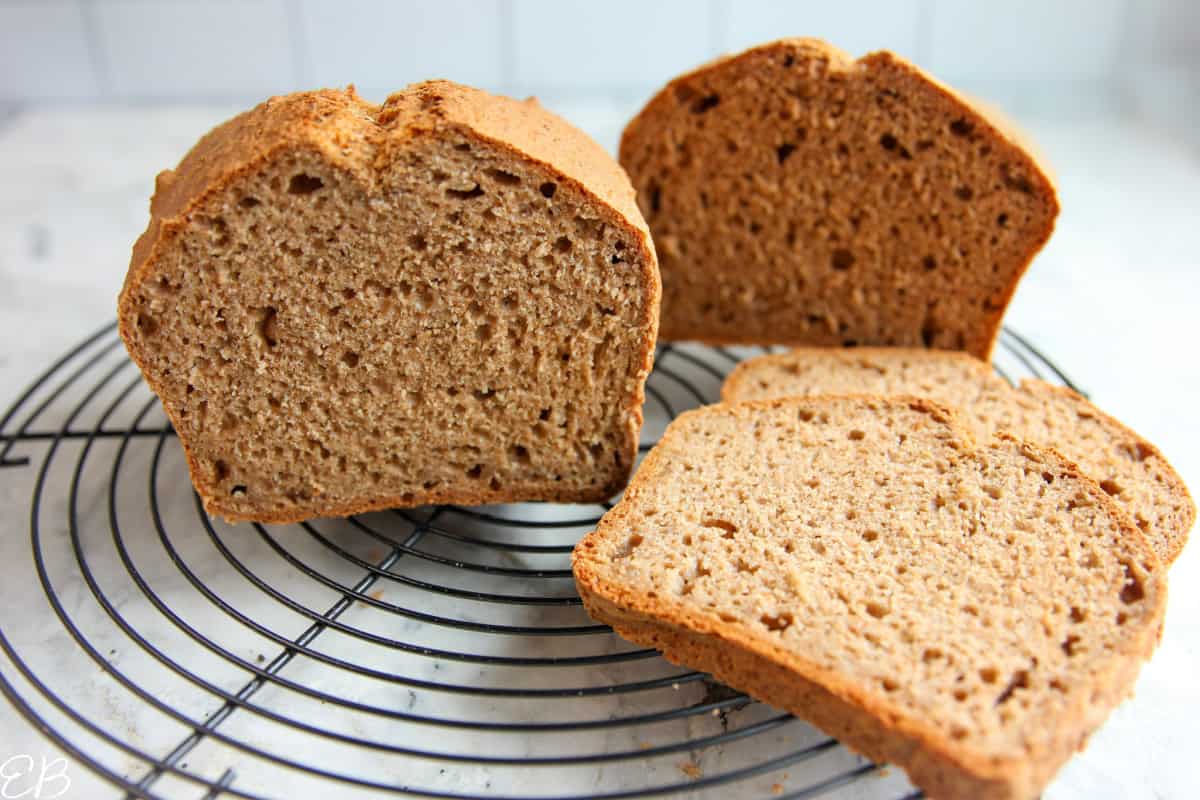
Time
This recipe requires a total of approximately 45 minutes from start to finish. The preparation phase, including mixing and shaping, takes around 15 minutes. Baking in the oven lasts for about 30 minutes, during which your home will be filled with the warm, inviting scent of freshly baked spelt bread. The cooling process takes an additional 10 minutes, allowing the bread to set properly and making it easier to slice without crumbling. Overall, this quick baking process is perfect for a weeknight dinner or a weekend baking project, providing fresh bread in less than an hour.
Needed Equipment
- Oven (capable of reaching 400°F / 200°C)
- Two large mixing bowls
- Measuring cups and spoons
- Spatula or wooden spoon
- Loaf pans (2 standard size, approximately 8 x 4 inches)
- Cooking spray or butter (for greasing pans)
- Cooling racks
- Kitchen scale (optional, for precise measurement)
- Rubber gloves or hands for mixing
- Knife or bread slicer
Tags
Vegan, No Yeast, Quick Bread, Whole Grain, Healthy, Gluten-Free Option (if using gluten-free spelt flour), Breakfast, Snack, Baking, Comfort Food
Serving Size
Each loaf yields approximately 10 slices, making the total serving size for the two loaves around 20 slices. A typical serving is one to two slices, depending on appetite and meal pairing. This recipe comfortably serves 10-12 people when sliced appropriately, making it ideal for family dinners, gatherings, or meal prep for the week.
Difficulty Level
Beginner to Intermediate. This recipe involves straightforward mixing and shaping, with minimal steps. The absence of yeast simplifies the process significantly, making it accessible for novice bakers. More experienced bakers can experiment with add-ins and variations to elevate the flavor and texture.
Allergen Information
| Allergen | Present | Notes |
|---|---|---|
| Gluten | Yes | Spelt contains gluten; unsuitable for celiac disease |
| Olive Oil | Yes | Can be substituted with other vegetable oils |
| Wheat/Grain | Yes | Contains grain component; check for gluten sensitivity |
Dietary Preference
Vegan, Dairy-Free, Egg-Free, Sugar-Free, Nut-Free (unless nuts/seeds are added as extras), Whole Grain
Course
Bread, Snack, Side Dish
Cuisine
International, Healthy, Vegetarian
Ingredients
Ingredient Table
| Ingredient | Quantity | Notes |
|---|---|---|
| Spelt flour | 2 cups (240 grams) | Use organic or stone-ground for extra flavor |
| Olive oil | 3 tablespoons (45 ml) | Extra virgin preferred for richer flavor |
| Salt | 1 1/2 teaspoons (7.5 grams) | Adjust to taste |
| Baking soda | 2 teaspoons (10 grams) | Leavening agent |
| Cream of tartar | 4 teaspoons (about 16 grams) | Acidic component for rising |
| Water | 1 1/4 cups (300 ml) | Room temperature or slightly warm |
Instructions
Step 1: Preheat the Oven
Begin by setting your oven to 400°F (200°C). Preheating ensures that your oven reaches the ideal temperature for baking, which is essential for achieving a crispy crust and evenly baked bread. Place the oven rack in the middle position for optimal heat distribution. As you wait for the oven to preheat, you can prepare your baking pans and gather all ingredients, making your workflow efficient and organized.
Step 2: Prepare the Flour Mixture
Measure out exactly 2 cups of spelt flour using a measuring cup. For accuracy, level off the flour with a flat edge or use a kitchen scale to weigh it, which helps ensure consistent results. Pour the flour into a large mixing bowl. Sifting the flour is optional but recommended for a lighter texture, especially if your flour has clumps or is stored for a while. Once measured, set aside.
Step 3: Incorporate the Oil
Add 3 tablespoons of extra virgin olive oil into the flour. Using your hands or a sturdy spatula, gently rub the oil into the flour until the mixture resembles coarse crumbs. This process, known as “cutting in,” helps distribute the fat evenly, contributing to a tender crumb and a slightly crispy crust. The oil also adds flavor and moisture to the bread, making each bite rich and satisfying.
Step 4: Mix in Dry Ingredients
Next, add the dry leavening and seasoning agents: 1 1/2 teaspoons of salt, 2 teaspoons of baking soda, and 4 teaspoons of cream of tartar. Combine these thoroughly with the flour and oil mixture, ensuring even distribution. The baking soda and cream of tartar react to produce carbon dioxide, which helps the bread rise and develop a light texture despite the absence of yeast.
Step 5: Add Water and Form Dough
Pour 1 1/4 cups (300 ml) of water into the mixture gradually. Use your spatula or hands to mix vigorously until a soft dough forms. The dough should be slightly sticky but manageable—if it feels too wet, sprinkle in a little more flour; if too dry, add a tablespoon of water at a time. Kneading is minimal here; just enough to incorporate all ingredients and create a cohesive dough. This step is crucial for developing gluten structure, which affects the bread’s volume and crumb.
Step 6: Shape and Transfer to Pans
Divide the dough into two equal portions. To do this accurately, you can weigh the dough or simply split it in half by eye. Lightly flour your work surface to prevent sticking, then shape each portion into an oblong loaf. Use your hands to smooth the surface, pressing gently to create a uniform shape. Grease your loaf pans with a thin layer of oil or use parchment paper for easy removal. Place each shaped dough into a prepared pan, pressing gently to ensure it fits snugly. Smooth the tops with a spatula or your hands, which helps achieve an even crust after baking.
Step 7: Baking
Place the loaf pans on the middle rack of your preheated oven. Bake for approximately 30 minutes, or until the bread turns a deep golden brown and the crust appears firm. To check doneness, insert a toothpick or skewer into the center of each loaf; it should come out clean without any wet dough. The baking time may vary slightly depending on your oven calibration, so monitor closely during the last 5 minutes.
Step 8: Cooling and Serving
Once baked, remove the loaves from the oven and transfer them to a wire cooling rack. Allow the bread to cool for at least 10 minutes to let the crumb set, which makes slicing easier and prevents crumbling. If you prefer a softer crust, you can wrap the bread lightly in a clean towel while cooling. Once cooled, use a serrated knife to slice your bread to your desired thickness. Serve fresh with butter, jam, or as part of a hearty meal. Store leftovers in an airtight container or bread box for up to 2 days for optimal freshness.
Preparation Tips
- Use fresh ingredients: Old or expired baking soda or cream of tartar can affect rising. Check expiration dates.
- Adjust water as needed: Depending on humidity and flour brand, you might need a little more or less water for the perfect dough consistency.
- Experiment with add-ins: Seeds, nuts, herbs, or dried fruits can be incorporated into the dough for extra flavor and texture.
- Use room-temperature water: This ensures even hydration and better reaction with baking soda and tartar.
- Test oven temperature: Use an oven thermometer to ensure your oven reaches 400°F for consistent results.
Nutritional Information
| Per Serving (1 slice) | Calories | Fat | Saturated Fat | Cholesterol | Sodium | Carbohydrates | Fiber | Sugar | Protein |
|---|---|---|---|---|---|---|---|---|---|
| 1 slice (approx. 50g) | 195.8 | 20.4g | 2.6g | 0mg | 3011.7mg | 3.7g | 0g | 0g | 0g |
Tips and Tricks
- Flavor variations: Add fresh herbs like rosemary, thyme, or oregano to the dough for an aromatic twist.
- Texture enhancements: Incorporate seeds (sunflower, pumpkin, sesame) or chopped nuts for a crunchier loaf.
- Sweet options: For a subtly sweet bread, add a tablespoon of maple syrup or honey before mixing the water.
- Gluten-free adaptation: Substitute spelt flour with a gluten-free blend to cater to gluten sensitivities.
- Enhance crust: Brush the top with olive oil or water before baking for added shine and crispiness.
Add-ons
- Chia seeds
- Sunflower or pumpkin seeds
- Chopped walnuts or almonds
- Fresh or dried herbs
- Olives or sun-dried tomatoes
Side Dishes
- Hearty vegetable soups
- Fresh salads with vinaigrette
- Hummus and dips
- Grilled vegetables
- Cheese platters (for non-vegan options)
Improvements
For a more refined crumb, consider allowing the dough to rest for 10 minutes after mixing, facilitating gluten development. Using a Dutch oven or covered baking dish can create a steam environment, resulting in a crustier exterior. Experimenting with different liquids such as plant-based milk or adding a splash of vinegar can subtly alter the flavor and texture. Incorporating sourdough starter instead of baking soda can add complexity, though it requires longer fermentation time.
Save and Store
To preserve freshness, store the cooled bread in an airtight container or bread box at room temperature for up to 2 days. For longer storage, slice and freeze the loaves in zip-top bags, removing excess air. When ready to eat, thaw slices at room temperature or toast directly from frozen. Reheating in the oven at 350°F (175°C) for 10 minutes restores crispiness.
FAQ
Can I make this bread gluten-free?
Yes, but you must substitute the spelt flour with a certified gluten-free flour blend. Keep in mind that gluten-free flours behave differently, and you may need to adjust the liquid amount or add binding agents like xanthan gum for optimal texture.
Can I add yeast for a fluffier bread?
This recipe intentionally omits yeast for simplicity and a denser texture. Adding yeast will require additional steps including proofing and rising time, resulting in a lighter, airier loaf.
Is this bread suitable for diabetics?
Since it contains no added sugar and uses whole grain spelt, it is lower in sugar than many commercial breads. However, due to the carbohydrate content, portion control is recommended, and consulting a healthcare provider is advised for specific dietary needs.
Can I replace water with other liquids?
Yes, plant-based milks, vegetable broths, or even apple cider vinegar diluted with water can be used to impart different flavors and nutritional benefits, though they may slightly alter the dough’s consistency.
Conclusion
This simple yet hearty spelt bread recipe is a testament to how minimal ingredients and straightforward techniques can produce a wholesome, delicious loaf. Perfect for those seeking a yeast-free, sugar-free option, it offers versatility with add-ins and flavor variations. Baking at home not only ensures control over ingredients but also transforms cooking into a mindful and rewarding experience. Whether enjoyed plain, toasted, or paired with your favorite toppings, this bread embodies comfort and nourishment. From the Love With Recipes platform, we hope this detailed guide encourages you to experiment, refine, and enjoy the art of bread-making. Happy baking!
References
- Harald Schmid, “The Art of Baking with Whole Grain Flours,” 2021.
- National Celiac Association, “Gluten-Free Baking Tips,” 2022.