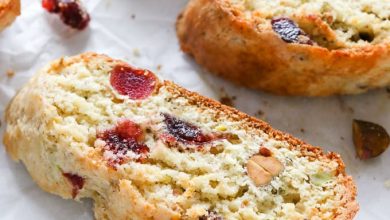
Jam Tartlets (Crostatine alla Marmellata)
These delightful Jam Tartlets, known as Crostatine alla Marmellata in Italian, are the perfect sweet treat for any occasion. With a buttery, flaky crust and filled with a variety of fruity jams, they are both elegant and easy to prepare. Whether you’re planning a tea party or simply craving something sweet, these little tartlets will surely impress. Here’s a step-by-step guide to making them, perfect for Love With Recipes.
Ingredients
| Ingredient | Quantity |
|---|---|
| Butter | 125g |
| All-purpose flour (Farina 00) | 250g |
| Egg yolks | 2 |
| Powdered sugar (Zucchero a velo) | 100g |
| Vanilla pod | Seeds from 1 pod |
| Salt | A pinch |
| Strawberry jam (Confettura di fragole) | 100g |
| Apricot jam (Confettura di albicocche) | 100g |
| Blueberry jam (Confettura di mirtilli) | 100g |
Instructions
Step 1: Prepare the Shortcrust Pastry
To start, prepare the shortcrust pastry (pasta frolla). In a food processor, combine the flour, a pinch of salt, and cold butter. Pulse the mixture until it forms a crumbly, sandy texture. Alternatively, if you don’t have a food processor, you can achieve this by working the ingredients together by hand. Once the mixture is crumbly, transfer it into a large mixing bowl.
Step 2: Incorporate the Wet Ingredients
Add the powdered sugar and egg yolks to the flour and butter mixture. Scrape the seeds from the vanilla pod and add them to the bowl. Mix everything together until you form a dough. Be careful not to overwork the dough, as this can make the crust tough. Once the dough is combined, wrap it in plastic wrap and refrigerate for at least 30 minutes to rest.
Step 3: Roll Out the Dough and Line the Tartlet Tins
After the dough has rested, remove it from the fridge. On a lightly floured surface, roll the dough out to about 3mm thickness. Next, grease your tartlet tins and carefully line them with the dough. Press the dough gently into the corners and up the sides of the tins. Use a rolling pin to roll over the edges of the tins to remove any excess dough.
Step 4: Prick the Bases
Using a fork or a knife, gently prick the base of each tartlet shell. This helps prevent the pastry from puffing up while baking.
Step 5: Add the Jam
Once the tartlet shells are ready, it’s time to fill them with jam. You can get creative with the types of jam you use—strawberry, apricot, or blueberry, or even a mix of all three. For a decorative touch, spoon a small amount of your chosen jam into each tartlet shell. Be careful not to overfill them, as the jam may spill over while baking.
Step 6: Create the Traditional Topping (Optional)
If you want to create the classic lattice pattern on top of your tartlets, take a small piece of dough and roll it into thin strips. Lay these strips over the jam in a crisscross pattern, creating the traditional diamond-shaped lattice. For a more decorative approach, you could also shape small pieces of dough into flowers or leaves and place them on top of the jam.
Step 7: Bake the Tartlets
Place the tartlet tins on a baking tray and transfer them to a preheated oven. Bake in a static oven at 180°C (350°F) for 25 minutes, or in a fan-assisted oven at 160°C (320°F) for about 20 minutes. The tartlets should be golden and crisp when done.
Step 8: Cool and Serve
Once the tartlets are baked, remove them from the oven and let them cool in the tins for a few minutes. Then, gently flip them out of the tins and place them on a serving tray. Allow them to cool completely before serving.
These Jam Tartlets are the perfect balance of sweet, buttery, and fruity, making them a crowd-pleaser for any gathering. Enjoy with a cup of tea or as a lovely dessert to end a meal.


