Introduction
At Love With Recipes, we believe that the art of snack-making transcends mere sustenance; it’s a celebration of flavors, textures, and cultural heritage. Mutton Keema Samosa, affectionately called Mangsher Singara in Bengali, embodies this philosophy perfectly. It is a savory, spicy, and crispy delicacy that has earned its place in the hearts of food enthusiasts across the Indian subcontinent and beyond. Originating from the rich culinary traditions of the Bengal region and influenced by Mughlai cuisine, these samosas are more than just a snack—they are a symbol of communal bonding, festive joy, and culinary craftsmanship.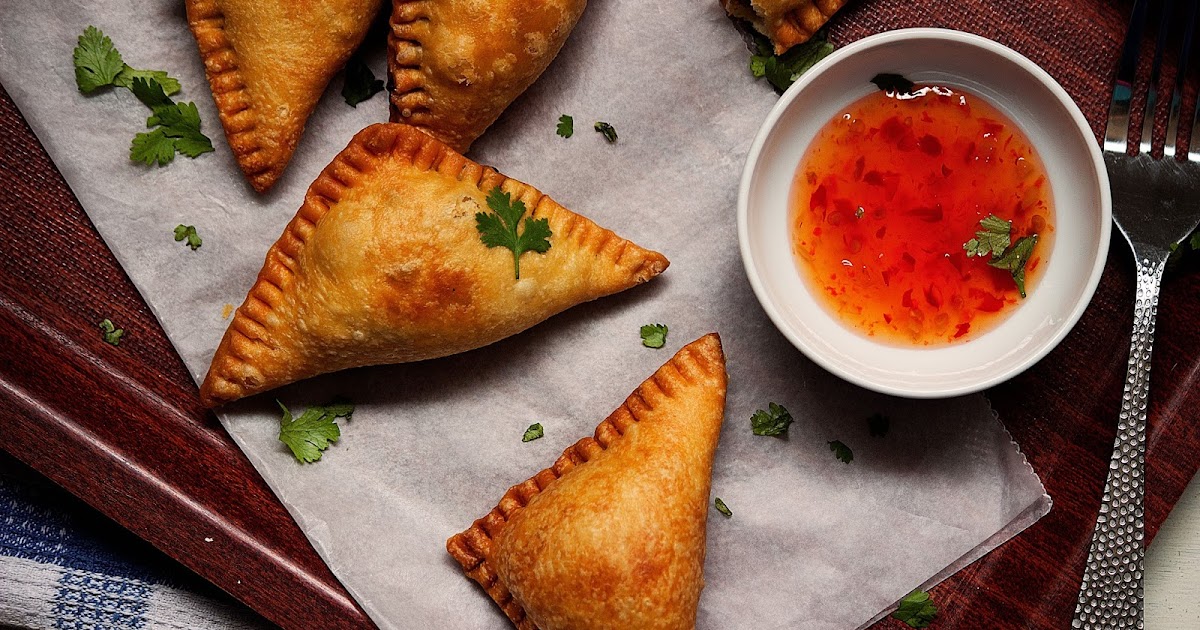
This detailed exploration of Mutton Keema Samosa aims to elevate your cooking experience by providing comprehensive insights into every aspect—from ingredient selection, preparation techniques, to serving suggestions, and storage tips. Whether you’re preparing for a special celebration or simply craving a flavorful snack, mastering the art of making these crispy delights will undoubtedly impress friends and family alike. Dive into this culinary journey with patience and passion, and enjoy the fragrant, crispy, and spicy magic that only homemade samosas can deliver.
Time
Preparation Time: approximately 30 minutes
Cooking Time: approximately 30 minutes
Total Time: approximately 1 hour
Note: The total time includes preparation, cooking, and assembling processes, but actual time may vary based on experience and kitchen setup.
Needed Equipment
Essential Kitchen Tools for Making Mutton Keema Samosa
- Mixing bowls: For preparing dough and filling
- Sieve or fine mesh strainer: To sift all-purpose flour (Maida) for a smooth dough
- Pastry cutter or sharp knife: To cut the rolled dough into strips
- Rolling pin: For rolling out the dough evenly
- Measuring cups and spoons: To ensure precise measurement of ingredients
- Chopping board: For chopping onions, garlic, ginger, and herbs
- Chef’s knife: For chopping and mincing
- Preheated pan or wok: For cooking the mutton filling
- Spatula or wooden spoon: To stir and cook the filling
- Deep-frying pan or kadai: For frying the samosas
- Slotted spoon: To remove fried samosas from hot oil
- Kitchen paper towels or absorbent cloth: To drain excess oil
- Cling film or damp cloth: To cover the dough while resting
- Cooling rack: Optional, for cooling fried samosas evenly
- Thermometer (optional): For monitoring oil temperature
- Small bowl with water: To moisten edges for sealing the samosas
Tags
Indian Snacks, Bengali Cuisine, Traditional Samosa, Mutton Recipes, Appetizer, Festive Food, Deep-Fried Delights, Spicy Snacks, Ramadan Special, Authentic Indian Food
Serving Size
Serves 4-6 persons, typically yielding around 10-12 samosas depending on the size
Difficulty Level
Intermediate — Requires some experience with dough handling and deep-frying techniques but is manageable with patience and attention to detail.
Allergen Information
- Gluten: Present in all-purpose flour (Maida)
- Dairy: Butter used in dough
- Meat: Minced mutton
- Possible cross-contamination: Depending on kitchen setup; use fresh utensils for best results
Dietary Preference
Non-Vegetarian, Suitable for those who include meat in their diet.
Course
Appetizer / Snack
Cuisine
Indian, Bengali, Mughlai-inspired
Ingredients in Tables
For the Dough
| Ingredient | Quantity |
|---|---|
| All-purpose flour (Maida) | 1 cup (125 grams) |
| Butter (Salted), chilled | 2 tablespoons (28 grams) |
| Salt | ½ teaspoon |
| Water | As needed (approximately 3-4 tablespoons) |
For the Filling
| Ingredient | Quantity |
|---|---|
| Mutton, minced | 250 grams (about 9 ounces) |
| Onion, finely chopped | 1 medium |
| Garlic, finely chopped | 2 cloves |
| Ginger, finely chopped | ½ inch piece |
| Green Chillies, finely chopped | 2 |
| Mint Leaves (Pudina), finely chopped | 6 leaves |
| Coriander (Dhania) Leaves, finely chopped | 2 tablespoons |
| Turmeric Powder (Haldi) | ¼ teaspoon |
| Kashmiri Red Chilli Powder | 1 teaspoon |
| Coriander Powder (Dhania) | 2 teaspoons |
| Garam Masala Powder | 1 teaspoon |
| Cumin Powder (Jeera) | 1 teaspoon |
| Salt | To taste |
| Oil | For cooking |
| Water | 3 tablespoons (for cooking mutton) |
Instructions
Preparing the Dough
Commence the process by organizing your workspace with all necessary ingredients and utensils. Sift the all-purpose flour (Maida) into a large, clean mixing bowl. Sifting is crucial as it aerates the flour and ensures a smooth, tender crust for your samosas. Once sifted, add the chilled butter cubes evenly across the flour. Using your fingertips or a pastry cutter, gently rub the butter into the flour until the mixture resembles coarse crumbs with pea-sized granules. This step is vital for creating a flaky, crispy exterior, reminiscent of traditional Bengali singara.
Next, sprinkle in the salt and continue to mix lightly. Gradually add water, starting with about 3 tablespoons, and knead gently to form a firm and smooth dough. The key is to avoid overworking the dough, which can make the crust tough. If the dough feels too sticky, sprinkle a little more flour; if too dry, add a few drops of water. Once the dough is cohesive and pliable, shape it into a ball, cover with cling film or a damp cloth, and refrigerate for at least 20-30 minutes. Resting allows the gluten to relax, making the dough easier to roll out and shaping more manageable.
Preparing the Filling
While the dough rests, turn your attention to the flavorful mutton filling. Heat a tablespoon of oil in a preheated pan or wok over medium heat. Once the oil shimmers, add the finely chopped onions, green chillies, ginger, and garlic. Sauté this aromatic base until it turns golden brown and releases a fragrant aroma, indicating that the ingredients are well cooked and flavors have melded. This base forms the foundation for the robust flavor profile of your samosa filling.
Introduce the minced mutton into the pan, breaking it apart with your spatula or wooden spoon. Stir continuously to prevent clumping and ensure even browning. Cook until the mutton releases its juices and begins to brown, about 8-10 minutes. Now, add the spices: turmeric powder, Kashmiri red chili powder, coriander powder, cumin powder, garam masala, and salt. These spices lend the characteristic warmth, color, and depth of flavor to the mixture. Stir thoroughly to coat the meat evenly with the spices, ensuring that each bite is richly seasoned.
Pour in about 3 tablespoons of water, cover the pan with a lid, and simmer on low to medium heat until the mutton is tender and thoroughly cooked. This process takes approximately 15-20 minutes. Once cooked, uncover the pan and increase the heat slightly. Sauté the mixture on high heat until all remaining moisture evaporates, leaving behind a dry, crumbly filling. It is essential that the filling is cool before assembling to prevent sogginess in the final product. Spread it on a plate or tray and allow it to cool completely, which may take 15-20 minutes.
Assembling the Samosas
Remove the rested dough from the refrigerator. Divide the dough into smaller, manageable portions—roughly the size of a golf ball or slightly larger. Roll each piece between your palms into a smooth ball and then dust lightly with flour. Using your rolling pin, roll out each ball into a thin, oval or circular disc, approximately 6-8 inches in diameter. The thinner the dough, the crisper the samosas will be, but be careful not to tear the dough.
Once rolled, cut the disc lengthwise into strips about 1.5 inches wide and 4 inches long. These strips will serve as the wrappers for your samosas. Place a teaspoon of cooled mutton filling at one end of each strip. To shape the samosa, fold the dough over the filling to form a triangle, starting from one corner. Overlap the dough as you fold, maintaining a snug, sealed triangle shape. Use a little water on the edges to seal the open margins securely, preventing the filling from escaping during frying.
Repeat this process with all dough strips and filling portions. Ensure each samosa is well sealed and shape them uniformly for even frying. If you prefer, you can also fold the samosas into half-moon shapes or cone shapes, depending on your preference and tradition.
Deep-Frying the Samosas
Heat a generous amount of oil in a deep-frying pan or kadai over medium heat. To test the temperature, drop a tiny piece of dough into the oil; if it sizzles and rises to the surface immediately, the oil is ready. Carefully slide in a few samosas at a time, ensuring not to overcrowd the pan, which can lower the oil temperature and lead to soggy samosas.
Fry the samosas on medium-low to medium heat, turning occasionally to ensure even browning. Cook for about 4-6 minutes or until they turn a deep golden brown and appear crispy. Adjust the heat as needed to prevent burning or undercooking. Once cooked, remove the samosas with a slotted spoon and drain excess oil on paper towels or a wire rack. Serve hot with accompanying chutneys or sauces.
Serving
For the authentic experience, pair your hot, crispy Mutton Keema Samosas with a tangy, fresh Dhaniya Pudina Chutney—made from blended coriander, mint, green chilies, lemon juice, and salt. The cool, herbaceous notes perfectly complement the spicy richness of the samosas. You may also serve with sweet tamarind chutney or a spicy tomato ketchup for added variety.
These samosas are ideal as an appetizer during festive gatherings, Iftar, or casual tea-time snacks. Their aromatic spices and crispy texture make them a crowd-pleaser, elevating any meal or celebration.
Preparation Tips
- Chill the butter and dough: Keep the butter cold and refrigerate the dough to prevent it from becoming greasy or tough.
- Use fresh spices: Opt for fresh or high-quality spices to enhance flavor.
- Maintain even thickness: Roll out the dough evenly for uniform cooking and crispiness.
- Seal edges properly: Use a little water to seal the edges tightly to prevent filling leakage during frying.
- Control frying temperature: Fry at medium-low heat for even crispness; too high heat burns the outer layer before the inside is cooked.
Nutritional Information
| Nutrient | Per Serving (Approximate) |
|---|---|
| Calories | 250-300 kcal |
| Protein | 12 grams |
| Carbohydrates | 20 grams |
| Fat | 15 grams |
| Sodium | 350 mg |
Tips and Tricks
- Use a thermometer: Monitor oil temperature to ensure perfect frying results.
- Make ahead: Prepare the filling and assemble the samosas a few hours in advance; refrigerate un-fried samosas covered with plastic wrap to maintain freshness.
- For extra crispness: Double fry the samosas—fry once until light golden, remove, rest for 2 minutes, then fry again until deep golden brown.
- Adjust spice levels: Customize the spice intensity by increasing or decreasing green chilies and chili powder.
Add-ons and Variations
- Vegetarian version: Substitute minced vegetables like potatoes, peas, carrots, and paneer for a vegetarian twist.
- Cheese infusion: Add grated cheese to the filling for a cheesy surprise.
- Herb enhancements: Incorporate fresh cilantro or basil for more aromatic layers.
- Different fillings: Experiment with lamb, chicken, or even seafood for diverse flavors.
Side Dishes
- Sweet Tamarind Chutney
- Cilantro Mint Chutney
- Yogurt Raita with Cucumber and Spices
- Fresh Salad with Onions, Tomatoes, and Lemon
- Hot Masala Chai or Classic Green Tea
Improvements
For an even more authentic flavor, consider incorporating traditional Bengali spices such as panch phoron or freshly ground garam masala. Using homemade or freshly ground spices significantly enhances aroma and depth. Additionally, experimenting with different types of flour, such as refined wheat or gluten-free options, can cater to dietary needs. For a healthier version, bake the samosas at 375°F (190°C) until crisp, although this may affect the traditional crunchy texture.
Save and Store
Unfried samosas can be stored in an airtight container in the refrigerator for up to 24 hours. For longer storage, freeze the assembled samosas on a tray, then transfer to a zip-lock bag or container. To reheat, deep fry directly from frozen or bake in a preheated oven at 375°F (190°C) for 15-20 minutes until hot and crispy. Avoid microwaving as it can make the crust soggy.
FAQ
Can I prepare the filling in advance?
Yes, the cooked mutton filling can be prepared a day ahead, stored in an airtight container, and refrigerated. Allow it to come to room temperature before filling the dough.
Is there a vegetarian alternative?
Absolutely. Replace minced mutton with finely chopped or grated vegetables such as potatoes, peas, spinach, or paneer. Adjust spices accordingly to suit the flavor profile.
What oil is best for frying?
Use neutral oils with high smoke points like vegetable, sunflower, or canola oil. For authentic Bengali flavor, mustard oil can be used, but it imparts a strong aroma, so adjust according to preference.
Can I bake these samosas instead of frying?
Yes, for a healthier version, bake at 375°F (190°C) until golden, approximately 20-25 minutes, flipping halfway through. The texture will be slightly different but still delicious.
Conclusion
Mastering the art of making Mutton Keema Samosas elevates any culinary repertoire, allowing you to recreate a beloved Bengali and Indian snack with authenticity and flair. The balance of crispy exterior and spicy, flavorful filling exemplifies the richness of regional cuisines and the joy of homemade cooking. As you perfect your technique, consider experimenting with fillings, spices, and presentation styles to personalize this classic snack. Whether served during festivals, family gatherings, or casual evenings, these samosas promise a delightful experience that captures the essence of traditional flavors and modern culinary craftsmanship.
Remember, patience and attention to detail are your best allies. From selecting quality ingredients to frying at the right temperature, each step contributes to the final masterpiece. Share your creations proudly and enjoy the satisfaction of bringing regional delicacies to your dining table. For more authentic recipes and culinary insights, keep exploring Love With Recipes—your trusted platform for delightful and memorable cooking adventures!
References
2. “The Bengali Kitchen” by Chitrita Banerji, University of California Press, 2014.