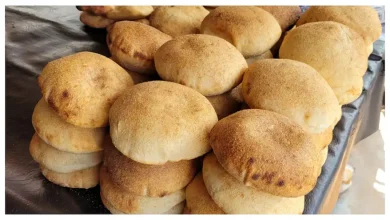
Homemade Pita Bread Recipe – Quick and Simple
Pita bread, known as “khubz” in Mediterranean and Middle Eastern cultures, is a round pocket-style bread. This bread is not only a staple of these regions but also bears resemblance to Indian flatbreads like phulkas. Pita is typically round and soft, with the characteristic pocket formed when it puffs up in the oven. It’s versatile and can be used for fillings, dips, or enjoyed on its own with a side of hummus or falafel. Here’s a quick and simple homemade pita bread recipe that you can prepare from scratch, perfect for any dinner table.
Cuisine: Mediterranean
Course: Dinner
Diet: Vegetarian
Ingredients
To make homemade pita bread, gather the following ingredients:
| Ingredient | Quantity |
|---|---|
| All Purpose Flour (Maida) | 3 cups |
| Active Dry Yeast | 2 teaspoons |
| Salt | 1/2 teaspoon |
| Sugar | 1-1/2 teaspoons |
| Water (lukewarm) | 1-1/4 cups |
| Extra Virgin Olive Oil | 2 tablespoons |
Nutritional Information
The nutritional information for one pita bread (serving size: 1 piece) is as follows:
| Nutrient | Amount per Serving |
|---|---|
| Calories | 160 kcal |
| Total Fat | 4.5 g |
| Saturated Fat | 0.5 g |
| Carbohydrates | 28 g |
| Fiber | 1 g |
| Sugars | 2 g |
| Protein | 4 g |
| Sodium | 180 mg |
Please note that these values may vary based on the size of the bread and specific ingredient brands.
Preparation Time: 5 hours (including resting time)
Cooking Time: 30 minutes
Yield: 10 pita breads
Instructions
1. Proof the Yeast
If you are using active dry yeast, which is small and round like tiny balls, you will need to proof it first. Start by adding the active dry yeast, 1 teaspoon of sugar, and 1/4 cup of lukewarm water into a large bowl. Stir gently and allow the mixture to sit for about 5-10 minutes. You should notice the mixture begin to bubble and foam, which indicates that the yeast is activated and ready to use. If the mixture doesn’t bubble, it means the yeast is no longer viable, and you will need to use fresh yeast.
Note: If you are using fast-action yeast (also called instant yeast), you can skip the proofing step and add it directly to the flour.
2. Prepare the Dough
Once the yeast has bubbled, in a large mixing bowl, combine the all-purpose flour, salt, and sugar. Gradually add the activated yeast mixture to the flour mixture, stirring continuously. Mix until the dough starts to come together. Knead the dough by hand, adding small amounts of flour if it becomes too sticky, until the dough becomes smooth and elastic.
3. Kneading
After about 8-10 minutes of kneading, the dough should feel soft and pliable. Once you’ve achieved the right texture, drizzle in the olive oil and continue kneading the dough for another 2-3 minutes. This step will help the dough become more elastic and ready to rise.
4. Let the Dough Rise
Place the kneaded dough in a large bowl that has been coated with a light layer of olive oil. Cover the bowl with plastic wrap or a clean damp towel and let the dough rise in a warm area for about 1-2 hours. The dough should double in size during this time. If you are short on time, you can let it rise in a warm oven (turned off) with the oven light on.
5. Punch and Divide the Dough
Once the dough has doubled in size, punch it down gently to release any air bubbles. Turn the dough out onto a clean surface and divide it into 10 equal portions. Roll each portion into a small ball.
6. Rest the Dough Balls
Place the dough balls on a lightly dusted baking sheet or surface, cover them with a damp cloth, and let them rest for 30 minutes. This rest period allows the dough to relax and makes it easier to roll out.
7. Preheat the Oven
While the dough is resting, preheat your oven to 250°C (475°F). Make sure to allow the oven to fully preheat for at least 30 minutes before you begin baking the pita bread.
8. Roll the Dough
Once the dough has rested, take one dough ball at a time and dust it lightly with flour. On a clean, flat surface, use a rolling pin to roll each dough ball into a thin disc, about 1/8 to 1/4 inch thick. The disc can be either round or oval, depending on your preference. The thinner the dough, the puffier the pita will become when baked.
9. Bake the Pita
Place each rolled-out pita bread on a lightly floured baking sheet and transfer them to the preheated oven. Bake for 3-5 minutes. The pita bread should puff up during this time, forming a bubble as it bakes. This puffing action creates the iconic pocket inside the bread. If the bread doesn’t puff up, don’t worry—your pita will still taste delicious, but it may not have the traditional pocket. Keep an eye on the pita while baking to ensure it doesn’t over-bake or burn.
10. Cool and Serve
Once baked, remove the pitas from the oven and let them cool for a few minutes. Serve the warm pita bread alongside your favorite Mediterranean dishes, such as tabbouleh, hummus, and falafel. You can also use them for stuffing with your favorite fillings or wraps.
Tips for Perfect Pita Bread:
- Oven Temperature: A hot oven is key to getting the classic pocket. If your oven is not hot enough, the bread won’t puff up as well.
- Rolling: Roll the dough thinly but evenly to ensure that it puffs correctly when baked.
- Storage: Pita bread is best enjoyed fresh, but if you have leftovers, store them in an airtight container at room temperature for up to 2 days. You can also freeze the pita for longer storage—simply wrap them in foil or a freezer bag and thaw when needed.
Why You’ll Love This Homemade Pita Bread Recipe
This homemade pita bread recipe is the perfect balance of simplicity and flavor. The ingredients are basic pantry staples, and the process is straightforward, making it an excellent choice for both beginners and seasoned bakers. Whether you are enjoying them with a Mediterranean feast or as a light snack with your favorite dips, these pitas will elevate your meals with their soft texture and delicious taste. Plus, the satisfaction of making fresh pita bread from scratch adds a whole new layer of joy to your cooking experience.
Enjoy your homemade pita bread with a side of tabbouleh, falafel, and hummus for an authentic Mediterranean meal that will impress your family and friends.