Introduction
The Rhubarb and Raspberry Crostata embodies the harmonious balance of tartness and sweetness, showcasing a tender buttery crust cradling a luscious, jewel-toned fruit filling topped with a cloud-like Italian meringue. This dessert exemplifies the festive verve and rustic charm, making it an ideal choice for celebrations, special gatherings, or simply elevating an ordinary afternoon tea. As a centerpiece, its vibrant colors and layered textures appeal both visually and gastronomically, offering a delightful experience for the palate. This detailed recipe, curated for Love With Recipes, provides a comprehensive guide that spans from the initial preparation to the nuanced finishing touches, ensuring a perfect outcome every time. The journey through this culinary masterpiece involves orchestrating the symphony of fresh produce, precise pastry work, and delicate meringue technique—each element essential to achieving a refined and authentic crostata.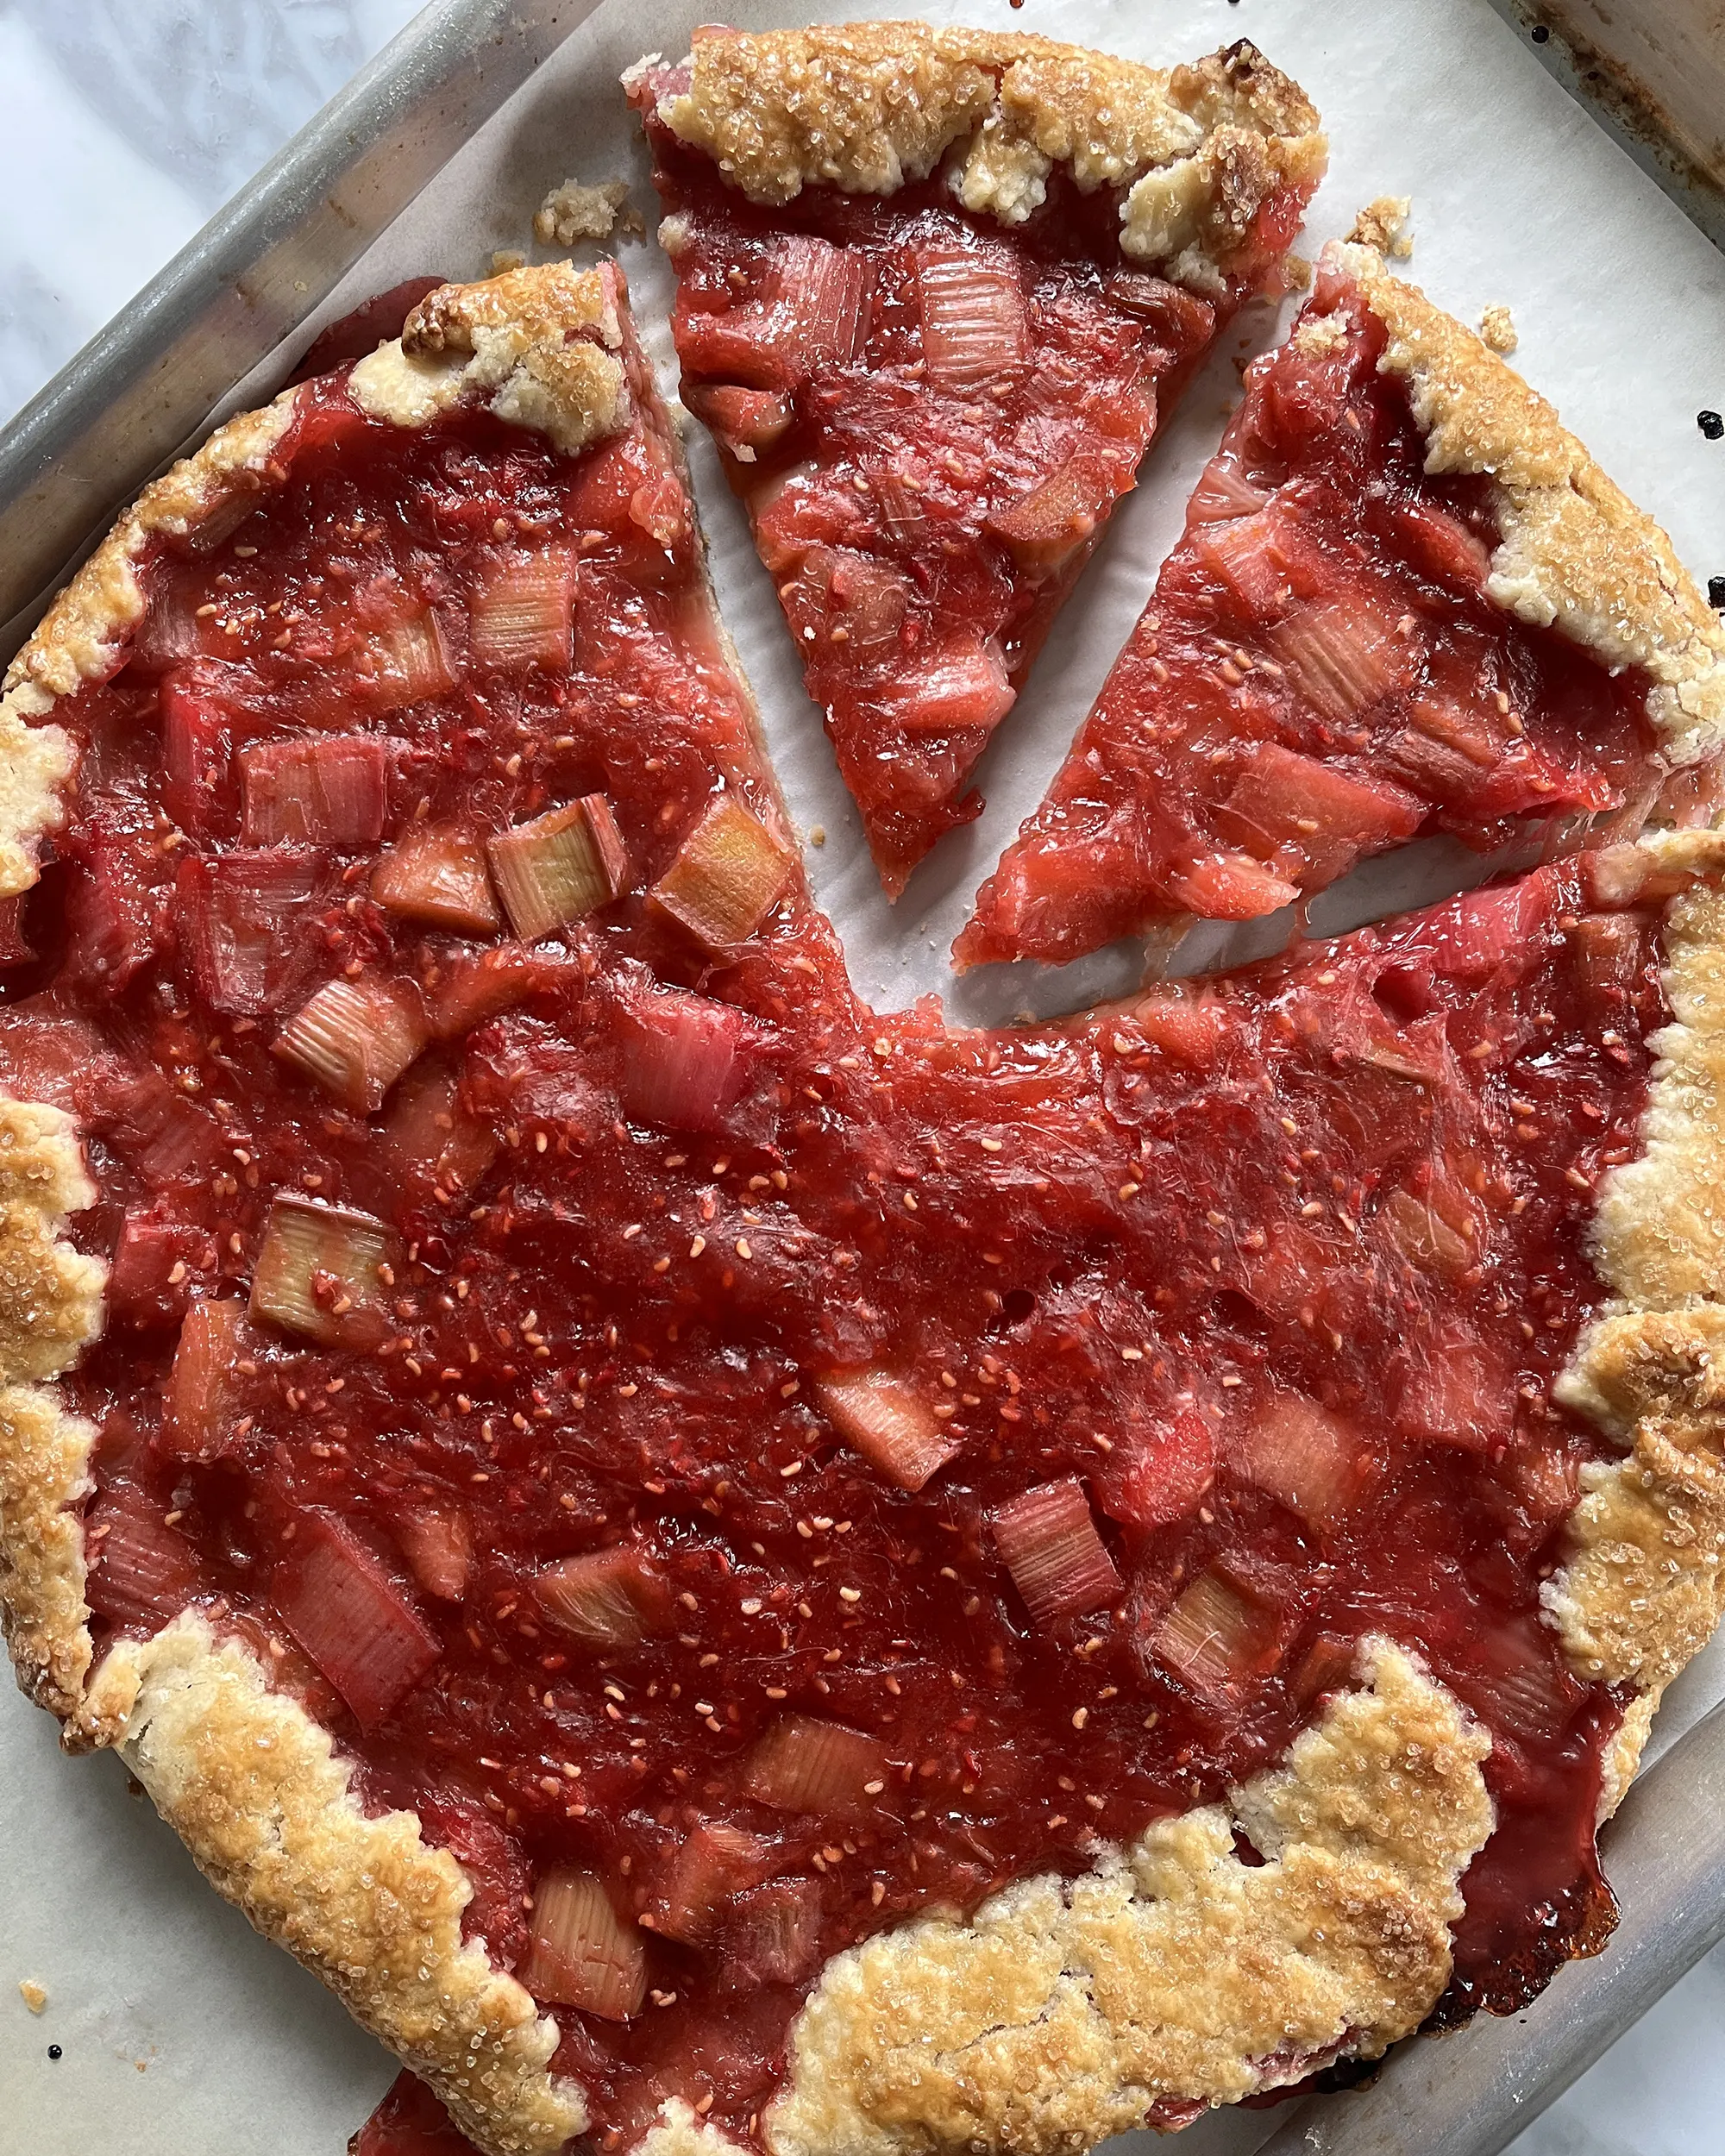
Time
- Preparation Time: 2 hours 30 minutes
- Cooking Time: 35 minutes
- Cooling and Assembly: 30 minutes
- Total Estimated Time: approximately 4 hours 35 minutes
Needed Equipment
- Food processor (for pastry dough security and ease)
- Mixing bowls (preferably large and glass or stainless steel)
- Vegetable peeler (for peeling rhubarb stalks)
- Sharp kitchen knife (for chopping fruit)
- Cutting board (preferably large for chopping rhubarb)
- Pastry mat or floured surface (for rolling dough)
- Rolling pin (preferably a heavy-duty one for even thickness)
- Toothpick or small brush (optional, for decorating rhubarb fibers)
- 24 cm (9.5 inch) tart or fluted baking pan with removable bottom
- Rubber spatula (for spreading filling and meringue)
- Heavy-bottomed saucepan (for cooking fruit filling and sugar syrup)
- Food thermometer (for monitoring sugar syrup temperature)
- Stand mixer with whisk attachment (for beating egg whites and making meringue)
- Silicone or metal piping bag (optional, for decorative meringue patterns)
- Oven (conventional or convection, capable of maintaining 180°C/350°F)
- Cooling rack (for cooling the crostata)
- Fine mesh sieve or strainer (optional, for straining or refining the filling)
Tags
- desserts
- fruits
- baking
- pastry
- seasonal
- easy to make
- outdoor-friendly
- celebration
Serving Size
Each crostata serves approximately 8 generous slices, with each piece highlighting a perfect balance of fruit filling, crust, and meringue topping. Ideal for sharing or enjoying as a decadent individual treat.
Difficulty Level
Intermediate. While the steps involve techniques that require some experience—particularly in pastry handling and meringue making—the instructions are detailed enough for a confident home baker willing to invest time and patience. Mastery of tempering sugar syrup and whipping egg whites will ensure professional results.
Allergen Information
| Allergy | Potentially Present |
|---|---|
| Gluten | Yes (from all-purpose flour) |
| Dairy | Yes (butter and possible dairy in processed ingredients) |
| Eggs | Yes (used in dough and meringue) |
| Fruits | Yes (rhubarb, raspberries) |
Note: This recipe contains gluten, dairy, and eggs. For gluten-free adaptations, substitute gluten-free flour blend and ensure dairy-free butter options are used.
Dietary Preference
Vegetarian. This dessert contains no meat or fish ingredients, making it suitable for vegetarian diets. For vegan options, replace butter with plant-based margarine or oils, and use aquafaba or commercially available egg replacers for meringue.
Course
Dessert, baked goods, sweet pastry
Cuisine
European (Italian-inspired meringue and rustic pie style)
Ingredients
| Ingredient | Quantity |
|---|---|
| All-purpose flour | 250g (about 2 cups) |
| Butter (cold, cut into pieces) | 125g (about 1/2 cup) |
| Sugar (for dough) | 90g (about 1/2 cup) |
| Millefiori honey | 15g (about 1 tablespoon) |
| Eggs | 55g (about 1 large egg) |
| Fresh rhubarb (chopped) | 700g (about 5-6 cups chopped) |
| Fresh raspberries | 250g (about 1 1/4 cups) |
| Sugar (for filling) | 400g (about 2 cups) |
| Lemon juice | 40g (about 3 tablespoons) |
| Sugar (for meringue) | 100g (about 1/2 cup) |
| Egg whites (for meringue) | 50g (about 2 large whites) |
| Water (for syrup) | 30g (about 2 tablespoons) |
Step-by-step Instructions
Step 1: Preparing the Rhubarb and Raspberry Jam
Start by preparing the herbs and fruits for the filling. Gather your fresh rhubarb stalks, which are known for their tart flavor and striking crimson hue. Rinse them thoroughly under cold running water to remove any dirt or residual pesticides. Use a vegetable peeler to thinly peel the outer fibrous layer, especially if you notice a tough or stringy surface. This peeling step ensures a more tender and palatable filling, eliminating any fibrous bits that could affect texture.
Once peeled, chop the rhubarb into uniformly small pieces, roughly 1-2 centimeters in size. This small chopping size helps the rhubarb break down more evenly during cooking, resulting in a smoother jam-like consistency. Place the chopped rhubarb into a large, sturdy mixing bowl.
Next, coarsely chop the fresh raspberries, ensuring their delicate texture is preserved while breaking them into manageable bits. Add these berries directly into the bowl containing rhubarb.
Incorporate the sugar—specifically 400 grams—into the mixture. Gently toss the fruit and sugar together, ensuring that each piece is coated with sugar. Cover the bowl tightly with plastic wrap or a silicone lid to prevent moisture loss and set it aside in the fridge for at least two hours. During this maceration phase, the fruit juices will be released, softening the fruit and forming a naturally sweet syrup—crucial for depth of flavor and proper setting of the filling.
Step 2: Making the Pastry Dough
While the fruit macerates, move on to preparing the pastry dough. Use a food processor to combine the dry ingredients—250 grams of all-purpose flour and 90 grams of sugar—timing the pulse to distribute evenly.
Add the cold, cubed butter to the food processor. Pulse several times until the mixture resembles coarse crumbs with small pea-sized bits of butter throughout. The cold butter is essential to ensure a flaky, tender crust that melts in the mouth.
Transfer this crumbly mixture onto a lightly floured work surface. Create a well in the center and pour in 15 grams of Millefiori honey—the honey will add a subtle floral note and enhance the crust’s richness—and the lightly beaten egg (about 55 grams). Knead gently with your fingertips, incorporating the ingredients until the dough comes together into a smooth, pliable ball.
Wrap the dough tightly in plastic wrap and refrigerate for at least one hour. Resting allows gluten development, which contributes to a tender, shortcrust consistency, and the cold temperature solidifies the butter for flakiness.
Step 3: Assembling the Crostata
Cooking the Fruit Filling
Once the maceration time has passed, transfer the fruit mixture into a heavy-bottomed saucepan. Cook over medium heat, stirring gently and frequently to prevent sticking and burning. During this process, moisture from the fruit evaporates slowly, intensifying the flavors and thickening the mixture.
Continue cooking until the mixture reaches a jam-like consistency—thick and glossy, with no excess liquid left. This typically takes about 15-20 minutes, but keep a close eye, as sugar content and fruit moisture vary.
Remove the pan from heat and allow the fruit filling to cool completely. This is critical because a hot filling can cause the pastry crust to become soggy or deform during assembly.
Rolling the Pastry
While the filling cools, retrieve your rested dough from the refrigerator. Lightly flour your work surface and rolling pin to prevent sticking. Roll the dough into a circle approximately 3-4 millimeters thick and roughly 30 centimeters in diameter, ensuring it is slightly larger than your tart pan to allow for an overhang.
Gently transfer the rolled dough onto the tart pan, either by draping it over the rolling pin or folding it in quarters before placing it in the pan. Press gently into the pan’s corners and sides, smoothing out any cracks or air pockets. Trim excess dough from the edges with a sharp knife or use your fingers to fold the dough for a decorative border.
Pour the cooled fruit filling into the pastry shell, spreading evenly with a spatula or back of a spoon. Distribute it uniformly to create an even surface, preparing it for baking.
Step 4: Baking the Crostata
Preheat your oven to 180°C (350°F), setting it to standard convection heat if available for uniform baking. Place your assembled crostata on the middle rack and bake for approximately 30-35 minutes.
During baking, watch for the crust becoming golden brown—this indicates doneness—and bubbles in the filling. The aroma of baked fruit and buttery pastry will alert you to nearing completion.
Once baked, remove the crostata from the oven and transfer it to a cooling rack. Allow it to cool entirely; this step is vital to set the filling and achieve clean slices upon serving. Cooling also helps prevent the crust from crumbling when removed from the tart pan.
Step 5: Preparing the Italian Meringue
Making the Sugar Syrup
In a small, heavy-bottomed saucepan, combine 30 grams of water and 100 grams of granulated sugar. Place over medium heat, stirring gently until the sugar dissolves completely.
Attach a digital or candy thermometer to monitor the temperature precisely. Continue heating, without stirring, until the syrup reaches 110°C (230°F). This initial stage, the soft-ball stage, ensures the sugar is cooked enough for a stable meringue.
Once at temperature, remove the syrup from heat. Keep it warm while you prepare the egg whites.
Whipping Egg Whites
In a clean stand mixer bowl, whip the egg whites (about 50 grams, or 2 large whites) on medium-high speed. Beat until soft peaks form—that is, when the whites hold a droplet shape but curl at the tips when lifted.
With the mixer running, slowly pour the hot sugar syrup into the egg whites in a thin, steady stream. This process must be done carefully to prevent splattering and to ensure smooth incorporation.
Continue beating until the mixture thickens, becomes glossy, and reaches room temperature. The final meringue should hold stiff peaks but remain light and airy, perfect for a fluffy topping that complements the rich land and fruit flavors.
Step 6: Assembling and Decorating the Crostata
Once the crostata has cooled, spread the fluffy Italian meringue over the top. Use a spatula or piping bag for decorative touches. For a rustic look, a simple spreading with a spatula is sufficient; for more intricate designs, piping patterns or rosettes can be added.
For an elegant finale, sprinkle some reserved rhubarb fibers or finely chopped fruit on top of the meringue, creating a striking contrast of color and texture.
Allow the meringue to set at room temperature for at least 20-30 minutes. The meringue can be briefly browned with a kitchen torch for a toasted look if desired, adding depth and visual appeal.
Enjoying the Crostata
Serve slices at room temperature for optimal flavor and texture. The combination of buttery crust, intense fruit filling, and airy meringue creates a multi-layered sensory experience. Paired with a cup of tea or a glass of dessert wine, this crostata makes for an unforgettable indulgence.
Preparation Tips
- Use fresh fruits: The quality of rhubarb and raspberries significantly affects flavor. Opt for organic or freshly picked when possible.
- Manage moisture: Excess liquid in filling can lead to soggy crust. Cooking the filling till jam-like and cooling thoroughly mitigates this risk.
- Work with cold ingredients: Cold butter and dough produce flaky pastry. Avoid overworking the dough to prevent gluten development and toughness.
- Temperature control is key: Monitoring sugar syrup is crucial for perfect meringue stability and texture.
- Test the crust: Baste the crust with egg wash or sprinkle with sugar for a glossy finish if desired before baking.
Nutritional Information
| Nutrient | Per Serving (approximate) |
|---|---|
| Calories | 350 kcal |
| Protein | 5g |
| Carbohydrates | 60g |
| Fat | 12g |
| Fiber | 4g |
| Sugar | 35g |
Note: These values are approximate and can vary based on specific ingredient brands and portion sizes.
Tips and Tricks
- For a crispy crust: Consider blind baking the crust for 10 minutes before adding the filling, especially if your filling is less thick.
- Extra flavor: Add a splash of vanilla extract or almond extract into the pastry dough for enhanced aroma.
- Meringue stability: Ensure egg whites are free of yolk and the bowl and beaters are impeccably clean to achieve maximum volume.
- fruit variation: You can swap or combine other berries, such as blackberries or blueberries, for different flavor profiles.
- Decoration: Use a fork or decorative cutter to add patterns to the crust edges for a more finished appearance.
Add-ons and Variations
- Use lattice strips on top of the filling for a traditional look.
- Sprinkle with slivered almonds or crushed pistachios before baking for added crunch and flavor.
- Replace the meringue topping with whipped cream or Greek yogurt for a lighter alternative.
- Introduce herbs like basil or mint into the filling for a hint of freshness.
Side Dishes
This crostata pairs beautifully with:
- Vanilla bean ice cream
- Clotted cream or mascarpone
- Fresh whipped cream with a hint of citrus zest
- Light fruit preserves or coulis for drizzling
Improvements and Customizations
- Gluten-Free: Substitute with a blend of gluten-free flours such as rice, almond, or oat flour.
- Vegan: Use plant-based butter and aquafaba in place of eggs for the meringue, or opt for a fruit topping without meringue.
- Enhanced Flavors: Incorporate spices such as cinnamon, cardamom, or ginger into the fruit filling for warmth.
- Texture Boost: Add chopped nuts or oats into the crust for crunch.
Save and Store
Store the crostata in an airtight container in the refrigerator for up to 2 days. The meringue may soften slightly after refrigeration but will still be delicious. For best results, rewarm the crostata briefly in a low oven or gently re-toast the slices for a crispier bite. To extend shelf life, you can freeze individual slices wrapped tightly in plastic wrap and then foil for up to 1 month; thaw in the refrigerator before serving.
FAQs
Can I prepare the crostata in advance?
Yes, you can prepare the crust and fruit filling a day ahead and assemble just before baking. The meringue is best added after baking to maintain its texture and structure.
Can I use frozen raspberries or rhubarb?
Frozen fruits can be used, but ensure they are thoroughly thawed and drained to avoid excess moisture. Adjust cooking times accordingly.
Is it necessary to peel the rhubarb?
Peeled rhubarb yields a milder, more tender filling, but you can skip peeling if the stalks are tender and the fibrous layer is thin.
What if I don’t have a sugar thermometer?
Monitor the sugar syrup closely for the classic soft-ball stage: drop a small amount into cold water, and it should form a soft, flexible ball that flattens when removed from water. Practice makes perfect.
Conclusion
With its harmonious blend of tart rhubarb and sweet raspberries, accentuated by a crisp buttery crust and finished with fluffy Italian meringue, this crostata from Love With Recipes offers an elegant yet approachable dessert experience. While it demands attention to detail—from precise pastry work to careful sugar syrup craft—the end result is a stunning, delectable treat that promises to impress both visually and palatally. Its versatility allows for numerous adaptations, ensuring that it can be personalized to suit dietary needs and flavor preferences. Perfect for celebrating seasonal fruits or indulging in a sophisticated sweet, this crostata will undoubtedly become a treasured recipe in your baking repertoire.
References
- Rosie Lovell, The Art of French Pastry
- David Lebovitz, Sweet Magic: Easy Recipes for Delectable Desserts
All recipes published on Love With Recipes are crafted and tested by our culinary team, aiming to bring you both inspiration and reliable mastery in baking and desserts. Enjoy creating your own version of this delightful Rhubarb and Raspberry Crostata, and share your experience with fellow enthusiasts!