Introduction
At Love With Recipes, we believe that bread is more than just a staple—it’s an experience, a journey through textures and flavors. Among the world’s many spectacular bread varieties, cider bread stands out as a masterpiece that combines the natural tang and sweetness of cider with the hearty, complex flavor of whole wheat and Manitoba flours. This artisanal bread boasts a crisp crust, moist crumb, and a subtle complexity that pairs brilliantly with cheese, charcuterie, or simply butter and jam. Whether you’re a seasoned baker or just beginning your bread-making journey, this cider bread recipe offers a delightful challenge and an even more rewarding outcome. Crafted with love and attention to detail, this recipe will elevate your baking repertoire and surprise your taste buds with every slice.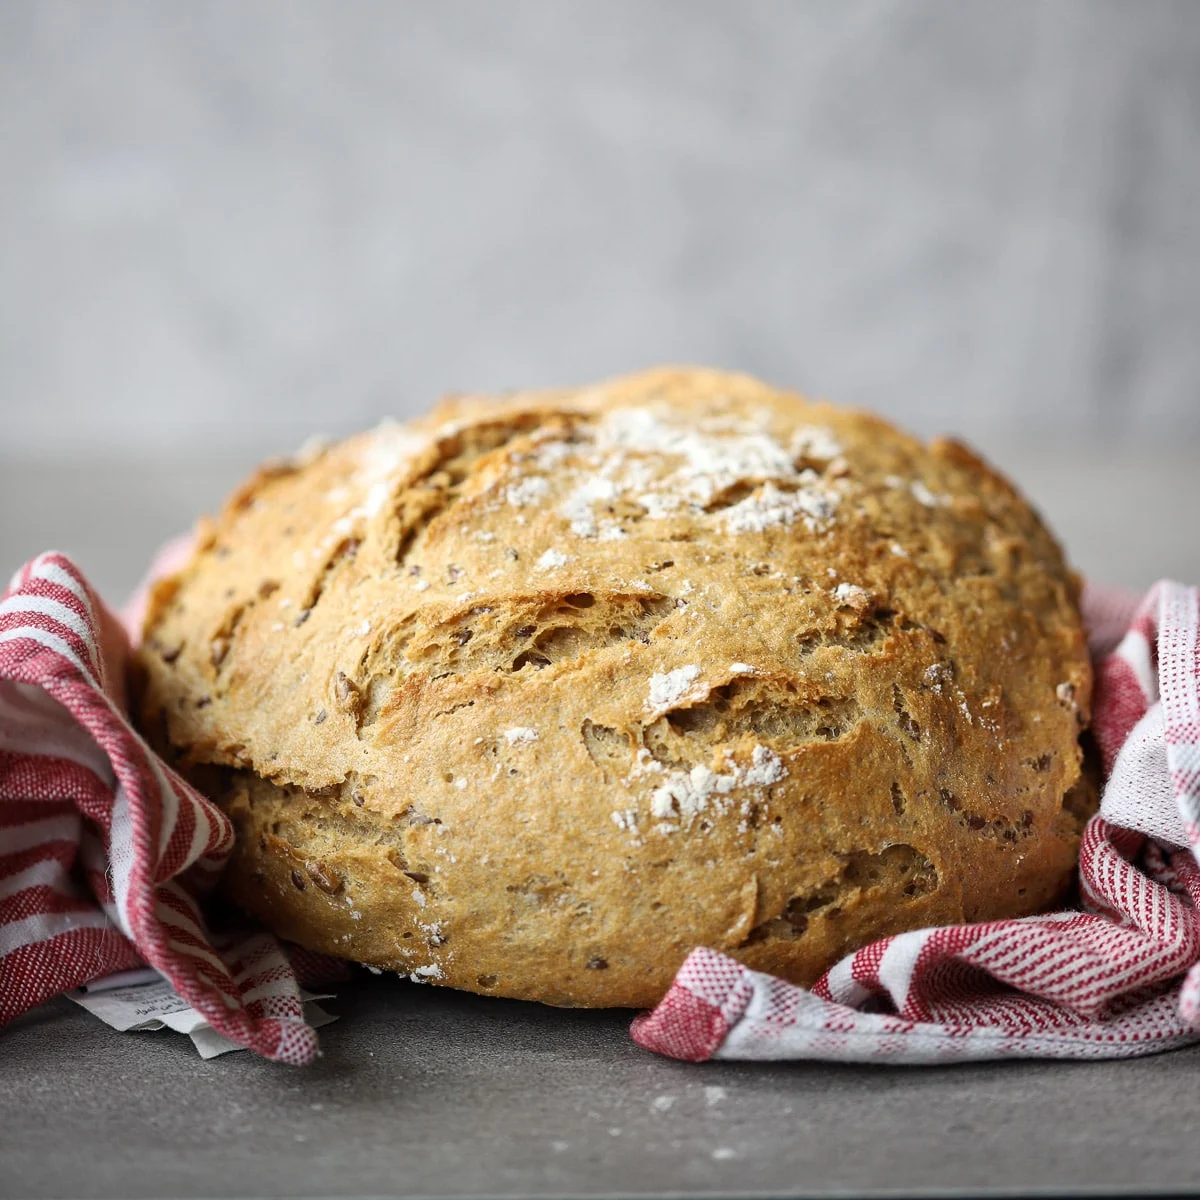
Time
- Total Preparation Time: Approximately 4 to 4.5 hours
- Active Work Time: Around 1 hour
- Passive Rising Time (First and Second): 2.5 hours
- Baking Time: 1 hour
Note that the rising times are estimates—they may vary depending on ambient temperature and humidity. Patience in allowing the dough to develop will be rewarded with superior texture and flavor.
Needed Equipment
Essential Baking Tools
- Mixing Bowls: Large enough to accommodate dough expansion
- Fine Sieve or Sifter: For aerating the flour mixture
- Measuring Cups and Spoons: For accurate ingredient measurement
- Silicone Spatula or Wooden Spoon: To combine ingredients smoothly
- Clean Work Surface / Pastry Board: For kneading and shaping dough
- Kitchen Scale (Optional but recommended): For precise flour measurement
- Kitchen Towel or Plastic Wrap: To cover and support dough during rising
- Banneton or Proofing Basket: For final proofing (optional but highly recommended)
- Oven-safe Dish (for water bath): Ceramic, cast iron, or heatproof glass bowl
- Sharp Knife or Bread Lame: For scoring the dough
- Parchment Paper: For transferring the loaf to the oven
- Oven Mitts and Heat-Resistant Gloves: For safe handling of hot items
- Baking Stone (Optional): For even crust formation
- Wire Cooling Rack: To cool the bread evenly after baking
Tags
Freshly Baked, Rustic Bread, Artisanal, Whole Wheat, Yeast Bread, Cider Bread, Homemade, Oven-Baked, Comfort Food
Serving Size
This recipe yields a single, generously-sized loaf approximately 800-900 grams in weight, providing about 10-12 slices, depending on thickness. It can serve 8-10 people comfortably for casual meals, or be an impressive centerpiece for special gatherings.
Difficulty Level
Intermediate to advanced. While the process is straightforward, achieving the optimal fermentation, shaping, and crust development requires attention to detail and patience. Those familiar with basic bread baking will find this recipe manageable, while beginners will benefit from meticulous practice and patience.
Allergen Information
- Contains: Gluten (from wheat flour and Manitoba flour) and Yeast.
- May contain traces of: Malt (if used), which could affect individuals with gluten sensitivity or allergy.
- Note: This bread does not contain dairy, nuts, or eggs, unless specified otherwise.
Dietary Preference
Suitable for omnivores and plant-based diets. Not suitable for gluten-free diets unless modified with gluten-free flours and ingredients.
Course
Ideal as a bread course, accompaniment, or main component of breakfast, brunch, or dinner. Perfect for sharing and pairing with various foods.
Cuisine
European-inspired rustic bread with influences from French and German bread traditions, adapted with a North American twist utilizing cider as a natural leavening or flavor-enhancer.
Ingredients
| Ingredient | Quantity |
|---|---|
| Cider (preferably dry) | 750 ml |
| Whole wheat flour | 600 g |
| Manitoba flour | 400 g |
| Active dry yeast | 7 g (about 2¼ teaspoons) |
| Fine salt | 20 g (about 1⅓ tablespoons) |
| Malt (optional) | 1 teaspoon |
Instructions
This section provides a comprehensive walkthrough for each step, carefully detailed for consistency, clarity, and perfect results. Each phase includes tips to optimize the process and troubleshoot common issues.
Step 1: Prepare the Flour Mix
Begin by sifting the whole wheat flour and Manitoba flour into a large mixing bowl. Sifting is a critical step—it aerates the flour, breaking apart any lumps, and results in a more uniform dough. Use a fine sieve or sifter to combine the flours thoroughly. This process takes around 2-3 minutes and is essential for optimal dough hydration and gluten development.
Step 2: Add Dry Ingredients
Next, incorporate the active dry yeast and fine salt into the sifted flour mixture. The yeast is responsible for fermentation, leavening the bread naturally through gas production, while the salt helps regulate yeast activity and enhances flavor. If you wish to include malt for added sweetness and browning, stir it in at this stage. Mix everything evenly with a silicone spatula or wooden spoon to ensure even distribution—the foundation for a successful fermentation process.
Step 3: Incorporate the Cider
Now, gradually add the cider into the dry mixture. Pour slowly, starting with about half, and mix with your hands or a sturdy spatula. The cider acts as both a liquid and flavor component; note its natural acidity and residual sweetness will influence the depth of flavor and crumb structure. As you pour, combine thoroughly until you see a shaggy dough start forming, about 3-4 minutes. Adding the cider gradually allows the flour to absorb evenly, leading to more cohesive dough.
Step 4: Knead the Dough
Transfer the mixture onto a floured surface. Begin kneading by pressing with the heel of your hand, folding the dough over, and rotating it. The goal is to develop gluten—a network that gives bread its elasticity and chewiness. Knead for approximately 10 minutes, adding small pinches of flour if the dough feels too sticky, but avoid over-flouring which could toughen the bread. During kneading, look for a smooth, elastic texture that springs back when gently poked. Proper kneading ensures a strong gluten network and an even crumb.
Step 5: First Rise
Shape the kneaded dough into a ball and place it in a lightly oiled bowl. Turn the dough to coat it in oil, which prevents sticking and facilitates an even rise. Cover the bowl tightly with plastic wrap or a damp cloth to trap humidity. Place the bowl in a warm, draft-free environment—ideally around 24-27°C (75-80°F). Allow it to rise for about 1 to 1.5 hours. During this period, the dough should double in volume, indicating proper fermentation. A well-risen dough will be soft, slightly puffy, and display air bubbles beneath the surface.
Step 6: Shape the Loaf
Once risen, gently punch down the dough with your fist to deflate it, releasing excess gas. Transfer the dough onto a lightly floured surface. Form it into a rectangular shape by pressing and gently stretching. Fold the long sides toward the center, then fold the shorter ends on top to create a tight, cohesive shape. Alternate shaping methods—such as a round boule or oval loaf—can be employed, depending on your preference and equipment. For this recipe, shaping into a tight, round loaf with a smooth surface ensures even baking and crust development.
Step 7: Second Rise
Place the shaped dough into a banneton or a well-floured bowl. Cover it again with plastic wrap or a towel. Let it rest for 30 minutes to an hour, allowing gluten relaxation and further fermentation, which develops aroma and crumb structure. During this time, the dough should puff slightly. The proofing environment should stay warm (20-25°C or 68-77°F) for best results.
Step 8: Preheat Oven and Prepare Water Bath
Preheat your oven to an initial temperature of 250°C (480°F). For a bakery-style crust, place a heatproof dish filled with water on the bottom rack before you begin preheating. The steam creates humidity, aiding in crust formation and preventing the loaf from drying out. If using a baking stone, heat it in the oven while it warms up. Ensure all equipment is ready before the final proofing stage—timing is crucial for optimal oven spring.
Step 9: Score and Transfer the Dough
Gently transfer the proofed dough onto a sheet of parchment paper or a floured peel if you’re using a baking stone. Using a sharp knife or a bread lame, score the dough with a cross or other decorative pattern. Scoring helps the bread expand during oven spring and adds visual interest. Once scored, slide the dough onto your baking surface—this could be a baking stone, a dutch oven, or a sheet pan.
Step 10: Bake the Bread
Carefully place your bread into the preheated oven. Bake at 250°C (480°F) for 40 minutes, which allows the crust to form and turn golden. After this initial baking, remove the water dish and reduce the oven temperature to 200°C (390°F). Continue baking for another 20 minutes. This step ensures thorough cooking of the crumb and perfect crust coloration. The loaf should sound hollow when tapped on the bottom, indicating doneness.
Step 11: Flip and Final Bake
To achieve an even crust and prevent sogginess, flip the loaf onto its side and bake for an additional 20 minutes. This exposes the bottom and sides to heat equally, promoting uniformly crisp crust and a deep golden hue. Use oven mitts or gloves to handle the hot loaf carefully. Avoid opening the oven door during the last phase to maintain consistent heat and steam retention.
Step 12: Cooling and Resting
Once baking is complete, turn off the oven and leave the oven door slightly ajar. Allow the bread to cool in the residual heat for 10-15 minutes. This final step aids in setting the crust and preventing it from becoming soggy from residual steam. Then, transfer the loaf to a wire rack to cool completely—preferably for at least 1 hour—before slicing. Cutting into hot bread can result in a gummy crumb and uneven texture.
Preparation Tips
- Quality Cider: Use high-quality, preferably dry cider for nuanced flavor and better crust development. The cider’s natural sugars and acidity influence fermentation and browning.
- Temperature Control: Maintain consistent warm environments during rising stages for optimal yeast activity. If your kitchen is drafty or cool, consider prewarming your oven slightly and turning it off before proofing.
- Kneading Technique: Focus on developing gluten thoroughly. Proper kneading results in good oven spring and an airy crumb structure.
- Hydration Level: Adjust water content depending on humidity and flour type. Slight variations can significantly impact dough handling and final texture.
- Shaping Precision: Be gentle yet firm, ensuring the dough forms a tight surface to trap gases and achieve a glossy, even crust.
- Scoring Pattern: Different patterns can influence how the bread blooms. Experiment for decorative and functional effects.
- Steam Generation: Proper steaming during initial baking is key for crust development. If unable to create real steam, consider placing a pan of hot water in the oven or spraying water during the first 10 minutes of baking.
- Cooling: Never skip cooling. Resting the bread stabilizes the crumb and intensifies flavors.
Add-ons
- Seeds: Incorporate sesame, poppy, or flax seeds into the dough for added texture and nutritional boost.
- Herbs and Spices: Enhance flavor profiles with rosemary, thyme, or caraway seeds.
- Cheese: Fold in shredded cheese for a savory twist—cheddar, Gruyère, or Parmesan work well.
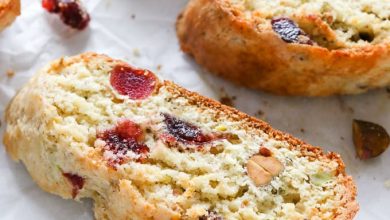
- Sweet Variations: Add dried fruits like cranberries, apricots, or apricot bits for a sweet-savory bread.
- Flavored Ciders: Experiment with flavored ciders (e.g., apple or pear) for unique aroma and taste profiles.
Side Dishes
- Spreads: Serve with butter, honey, fig jam, or tapenade to highlight the bread’s flavors.
- Cheese Platter: Pair with a variety of cheeses—brie, camembert, aged cheddar—for an elegant presentation.
- Soups and Stews: Thick, hearty soups like lentil, tomato, or French onion complement the rustic quality.
- Charcuterie: Cured meats, pâtés, and terrines elevate the experience.
Improvements
- Flavor Enhancements: Incorporate ingredients like caramelized onions or roasted garlic into the dough for depth.
- Nutritional Boosts: Mix in oats, bran, or ground seeds for added fiber and nutrients.
- Alternative Flours: Experiment with spelt, rye, or gluten-free blends for dietary adaptations.
- Leavening Variations; Use sourdough starter instead of commercial yeast for a more complex flavor.
Save and Store
Once cooled, store the cider bread in an airtight container or bread box at room temperature. It’s best consumed within 2-3 days for optimal freshness. For longer storage, slice the bread and freeze it wrapped tightly in plastic wrap and foil. To reheat, simply toast or warm in the oven for a few minutes. Avoid refrigerating, as this can dry out the bread and affect texture.
FAQ
Can I use bottled apple juice instead of cider?
While you can substitute with fresh apple juice, cider provides a richer flavor and more acidity, which enhances fermentation and crust development. If using juice, opt for a high-quality, unsweetened variety to mirror the depth of flavor.
Is it possible to make this gluten-free?
This recipe relies heavily on gluten development from wheat flours. To create a gluten-free version, substitute gluten-free flours like rice, buckwheat, or gluten-free bread blends, but be prepared for differences in texture and rising behavior. Adding xanthan gum or psyllium husk can help improve the structure.
Can I add seeds or nuts?
Absolutely. Folding in mixed seeds or chopped nuts during the kneading stage adds texture and nutritional value. Toast seeds beforehand for enhanced flavor.
What can I do if the bread doesn’t rise well?
Ensure yeast is fresh, water temperature is correct (~38°C/100°F), and proofing environment is warm. Extended fermentation beyond the recommended time may be necessary in cooler environments. Also, avoid overflouring during kneading to maintain dough elasticity.
How do I know when the bread is properly baked?
Look for a deep golden-brown crust, hollow sound when tapped, and internal temperature reaching around 96°C (205°F). Using a thermometer can help confirm doneness.
Conclusion
Mastering cider bread requires patience, attention to detail, and a willingness to experiment. The result, however, is a beautifully rustic loaf that elevates everyday bread into an artisanal delight. Its compatibility with various toppings and accompaniments makes it a versatile addition to any meal. By embracing the traditional techniques outlined in this comprehensive recipe, you invite the warm aroma of freshly baked bread into your home, creating a comforting experience that’s truly worth every minute invested. Remember, the joy of baking lies not only in the final product but also in the process—so enjoy every step, learn from each attempt, and savor the delicious fruits of your labor.
References
- “Flour Water Salt Yeast,” Ken Forkish, 2012.
- “The Bread Baker’s Apprentice,” Peter Reinhart, 2001.