Introduction
Embark on an extraordinary culinary adventure with the creation of the Easy Santa Fe Tiramisu, a dessert that seamlessly blends the creamy decadence of traditional tiramisu with vibrant flavors inspired by the southwestern charm of Santa Fe. This recipe is a testament to the magic of improvisation and the joy of sharing a homemade treat that’s as delightful to look at as it is to taste. Originating from a memorable RV road trip from Seattle to Santa Fe in July 2000, this dessert was born out of necessity and creativity—an accidental discovery that turned into a beloved family recipe. Over the years, it has become a staple at gatherings, potlucks, and festive celebrations, cherished for its simplicity, stunning presentation, and flavor harmony. Whether you’re an experienced home cook or a novice looking to impress, this recipe offers a perfect balance of ease and elegance, making it an ideal choice for any occasion. As part of the Love With Recipes platform, this detailed guide ensures you can replicate the magic and delight your guests with a truly memorable dessert experience.
Time
- Preparation Time: 20 minutes
- Chilling Time: 2-4 hours or overnight
- Total Time: Approximately 2 hours 20 minutes to 4 hours 20 minutes
Needed Equipment
- Large mixing bowls
- Electric hand or stand mixer
- Measuring cups and spoons
- Sharp serrated knife
- Cutting board
- Spatula
- 13×9-inch glass baking dish or a tall-sided glass bowl (trifle bowl)
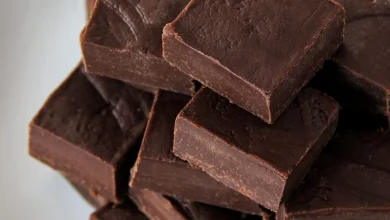
- Grater or vegetable peeler (for chocolate shavings)
- Plastic wrap or airtight cover
- Serving spoons or dessert forks
Tags
dessert, tiramisu, easy recipe, no-bake, fruit dessert, layered, festive, quick, crowd-pleaser, no oven required
Serving Size
Serves approximately 8-10 generous portions.
Difficulty Level
Easy — suitable for beginner cooks and those seeking a quick, impressive dessert.
Allergen Information
- Contains dairy (cream cheese, Cool Whip, pound cake)
- Contains gluten (pound cake)
- Contains soy (if Cool Whip contains soy derivatives, check label)
Dietary Preference
Not suitable for vegan or dairy-free diets. Can be adapted for gluten-free diets by using gluten-free pound cake.
Course
Dessert, Sweet Course
Cuisine
American with Southwestern inspiration
Ingredients
| Ingredient | Quantity | Description / Notes |
|---|---|---|
| Cream cheese | 1 cup | Softened; full-fat preferred for creaminess |
| Powdered sugar | 1/4 cup | For sweetness and smooth texture |
| Instant coffee granules | 2-3 tablespoons | Dissolved in a bit of hot water for flavor |
| Cool Whip Topping | 1 1/2 cups | Or other stabilized whipped topping |
| Fresh raspberries | 3 cups | Ripe and firm, for vibrant color and flavor |
| Pound cake | 3 cups, cut into 1-inch cubes | Store-bought or homemade, choose dense and slightly sweet |
| Chocolate shavings | Ounces as needed | Dark or semi-sweet, freshly grated or shaved |
Instructions
Preparing the Components
Start by gathering all your ingredients and equipment. Before assembling, set everything within reach to streamline the process. Begin with the pound cake: using a sharp serrated knife, cut the pound cake into uniform 1-inch cubes. Uniformity ensures even layering and a visually appealing dessert. Place the cubes in a bowl or on a tray and set aside. This step is crucial because consistent cube size guarantees a balanced texture in every bite.
Making the Cream Cheese Mixture
In a large mixing bowl, combine the softened cream cheese and powdered sugar. Use an electric mixer on medium speed to beat until the mixture is smooth, creamy, and free of lumps. The addition of powdered sugar not only sweetens but also enhances the silky texture of the filling. Dissolve the instant coffee granules in a tablespoon of hot water—this helps to evenly distribute the coffee flavor and prevents clumping. Add the dissolved coffee to the cream cheese mixture and continue to beat until thoroughly incorporated. The coffee imparts a subtle bitterness that beautifully balances the sweetness and adds depth to the flavor profile.
Incorporating the Whipped Topping
Gently fold in the Cool Whip Topping into the coffee-cream cheese mixture. Use a spatula and a gentle folding motion to maintain the airy texture of the whipped topping. This step is vital because it creates a light, fluffy consistency that melts in your mouth, providing the signature smoothness characteristic of tiramisu. Be careful not to overmix; stop once the mixture is uniformly combined.
Layering the Dessert
Choose a large, clear glass dish, trifle bowl, or similar tall-sided container. The transparency of the vessel allows for an attractive presentation, showcasing the beautiful layers. Begin by placing half of the pound cake cubes at the bottom, spreading them evenly to create a solid base. Next, sprinkle one cup of fresh raspberries over the pound cake layer. Raspberries not only add vibrant color but also introduce a tartness that complements the creamy components and enhances the overall flavor complexity.
Spoon half of the prepared cream cheese mixture over the raspberries, spreading it evenly across the layer. Then, sprinkle half of the chocolate shavings over the cream layer, adding a decadent, slightly bitter contrast to the sweetness. Repeat the layering process: the remaining pound cake cubes, another cup of raspberries, the remaining cream cheese mixture, and the last of the chocolate shavings. Finish the assembly by artfully arranging the remaining fresh raspberries on top, creating an eye-catching presentation that invites anticipation.
Chilling and Serving
Cover the assembled dessert tightly with plastic wrap or an airtight lid. Refrigerate for at least 2 hours, ideally overnight, to allow the flavors to meld and the dessert to set. Chilling also enhances the texture, making each spoonful rich and velvety. Before serving, you may garnish with additional chocolate shavings or fresh mint leaves for extra visual appeal. Serve scoops with dessert spoons or forks, ensuring each serving includes a balanced portion of cake, berries, and cream.
Preparation Tips
- Choice of Pound Cake: For optimal flavor, use a dense, slightly sweet pound cake. You can bake your own or buy a high-quality store-bought option. For a gluten-free version, select a gluten-free pound cake variant.
- Flavor Variations: Incorporate a splash of flavored liqueur such as Kahlua, Amaretto, or Grand Marnier into the coffee mixture for an adult twist.
- Layer Uniformity: Use a spatula to ensure each layer is evenly spread, preventing any gaps or uneven texture.
- Chocolate Shavings: For the best flavor, grate the chocolate just before garnishing. Use a microplane or vegetable peeler for fine shavings.
- Presentation: Use a clear glass dish to showcase the layers, or serve individual portions in mason jars or clear cups for a modern presentation.
Nutritional Information
| Nutrient | Per Serving (approximate) |
|---|---|
| Calories | Approximately 280-350 kcal |
| Protein | 6-8 grams |
| Carbohydrates | 45-55 grams |
| Fat | 12-18 grams |
| Sugar | 20-25 grams |
| Fiber | 2 grams |
Tips and Tricks
- Layer Stability: For cleaner slices, refrigerate the dessert for at least 4 hours or overnight. This allows the layers to set firmly.
- Adding Texture: Incorporate chopped nuts like pecans or walnuts between layers for added crunch and flavor.
- Color Contrast: Use edible flowers or mint leaves as garnishes for a fresh, colorful touch.
- Make Ahead: Prepare the dessert a day in advance to let the flavors develop fully, saving time before serving.
- Customizations: Swap raspberries for strawberries, blueberries, or a mix of berries based on availability and preference.
Add-ons
- Whipped cream or mascarpone cheese for extra richness
- Drizzle of caramel or chocolate syrup on top before serving
- Crushed biscotti or graham crackers for additional crunch
- Fresh mint leaves as a fragrant garnish
Side Dishes
This dessert pairs beautifully with:
- Fresh fruit salad
- Vanilla bean ice cream
- Espresso or coffee
- Light citrus sorbet to refresh palate
Improvements
- For a dairy-free version, substitute the cream cheese and Cool Whip with dairy-free cream cheese and coconut whipped topping.
- Use dark chocolate or flavored chocolates (like orange or chili-infused) for more complex flavor profiles.
- Incorporate layered flavors such as coconut, caramel, or vanilla beans for added depth.
- Experiment with different berries or fresh fruits to suit seasonal availability and taste preferences.
Save and Store
Keep the assembled tiramisu covered in the refrigerator for up to 2 days. Due to the dairy components, it’s best enjoyed within this timeframe to ensure freshness and optimal texture. If you need to store leftovers, use an airtight container or carefully re-cover the dish with plastic wrap. Avoid freezing, as the texture of the whipped components may become compromised upon thawing.
FAQ
Can I make this dessert gluten-free?
Yes. Simply substitute the pound cake with a gluten-free alternative. Be sure to check all ingredient labels for gluten content.
Can I prepare this dessert ahead of time?
Absolutely. In fact, refrigerating it overnight allows flavors to meld beautifully, resulting in a more cohesive and flavorful dessert.
Can I use fresh strawberries instead of raspberries?
Yes. Strawberries or blueberries work well; just adjust the visual presentation and consider slicing larger fruits for even layering.
Is this dessert suitable for vegans?
Not in its current form, but with vegan cream cheese, plant-based whipped topping, and vegan pound cake, it can be adapted.
Conclusion
The Easy Santa Fe Tiramisu is a dessert that encapsulates the essence of comfort, elegance, and spontaneity. Its layered beauty and harmonious blend of flavors make it an irresistible finale to any meal. Whether celebrating a special occasion, entertaining friends, or simply indulging a sweet craving, this recipe offers a versatile and impressive option. Its roots in a memorable road trip story add a touch of nostalgia and personality, making each serving a slice of personal history. The flexibility in ingredients and presentation means it can be customized to suit various tastes and dietary needs, ensuring everyone can partake in its delights. As always, Love With Recipes is committed to providing you with recipes that are both accessible and extraordinary, and this tiramisu is no exception. So gather your ingredients, embrace the joy of creation, and indulge in the creamy, fruity, chocolatey goodness of this delightful dessert.
References
- Taste of Home Original Recipe (adapted)
- Food Network, Classic Tiramisu Techniques