
Introduction
The Quick Chipped Beef Cheese Ball is an irresistibly creamy, savory appetizer that combines the richness of cream cheese with the hearty, deli-inspired flavor of chipped beef, all enhanced by fresh green onions and a touch of garlic. Inspired by a beloved cheese ball that evolved due to changes in local grocery offerings, this recipe brings a nostalgic yet modern twist to your snacking repertoire. Perfect for entertaining, potlucks, or simply indulging in a flavorful treat, this cheese ball exemplifies the art of combining simple ingredients into a sophisticated and crowd-pleasing dish. The use of thinly sliced Buddig roast beef (or similar deli slices) as the star ingredient offers a delightful texture and savory depth, making it a standout appetizer. Best of all, its quick preparation time and minimal fuss make it an ideal choice for last-minute gatherings or when you desire a gourmet touch without spending hours in the kitchen. As featured on Love With Recipes, this recipe promises to elevate your appetizer game with minimal effort and maximum flavor.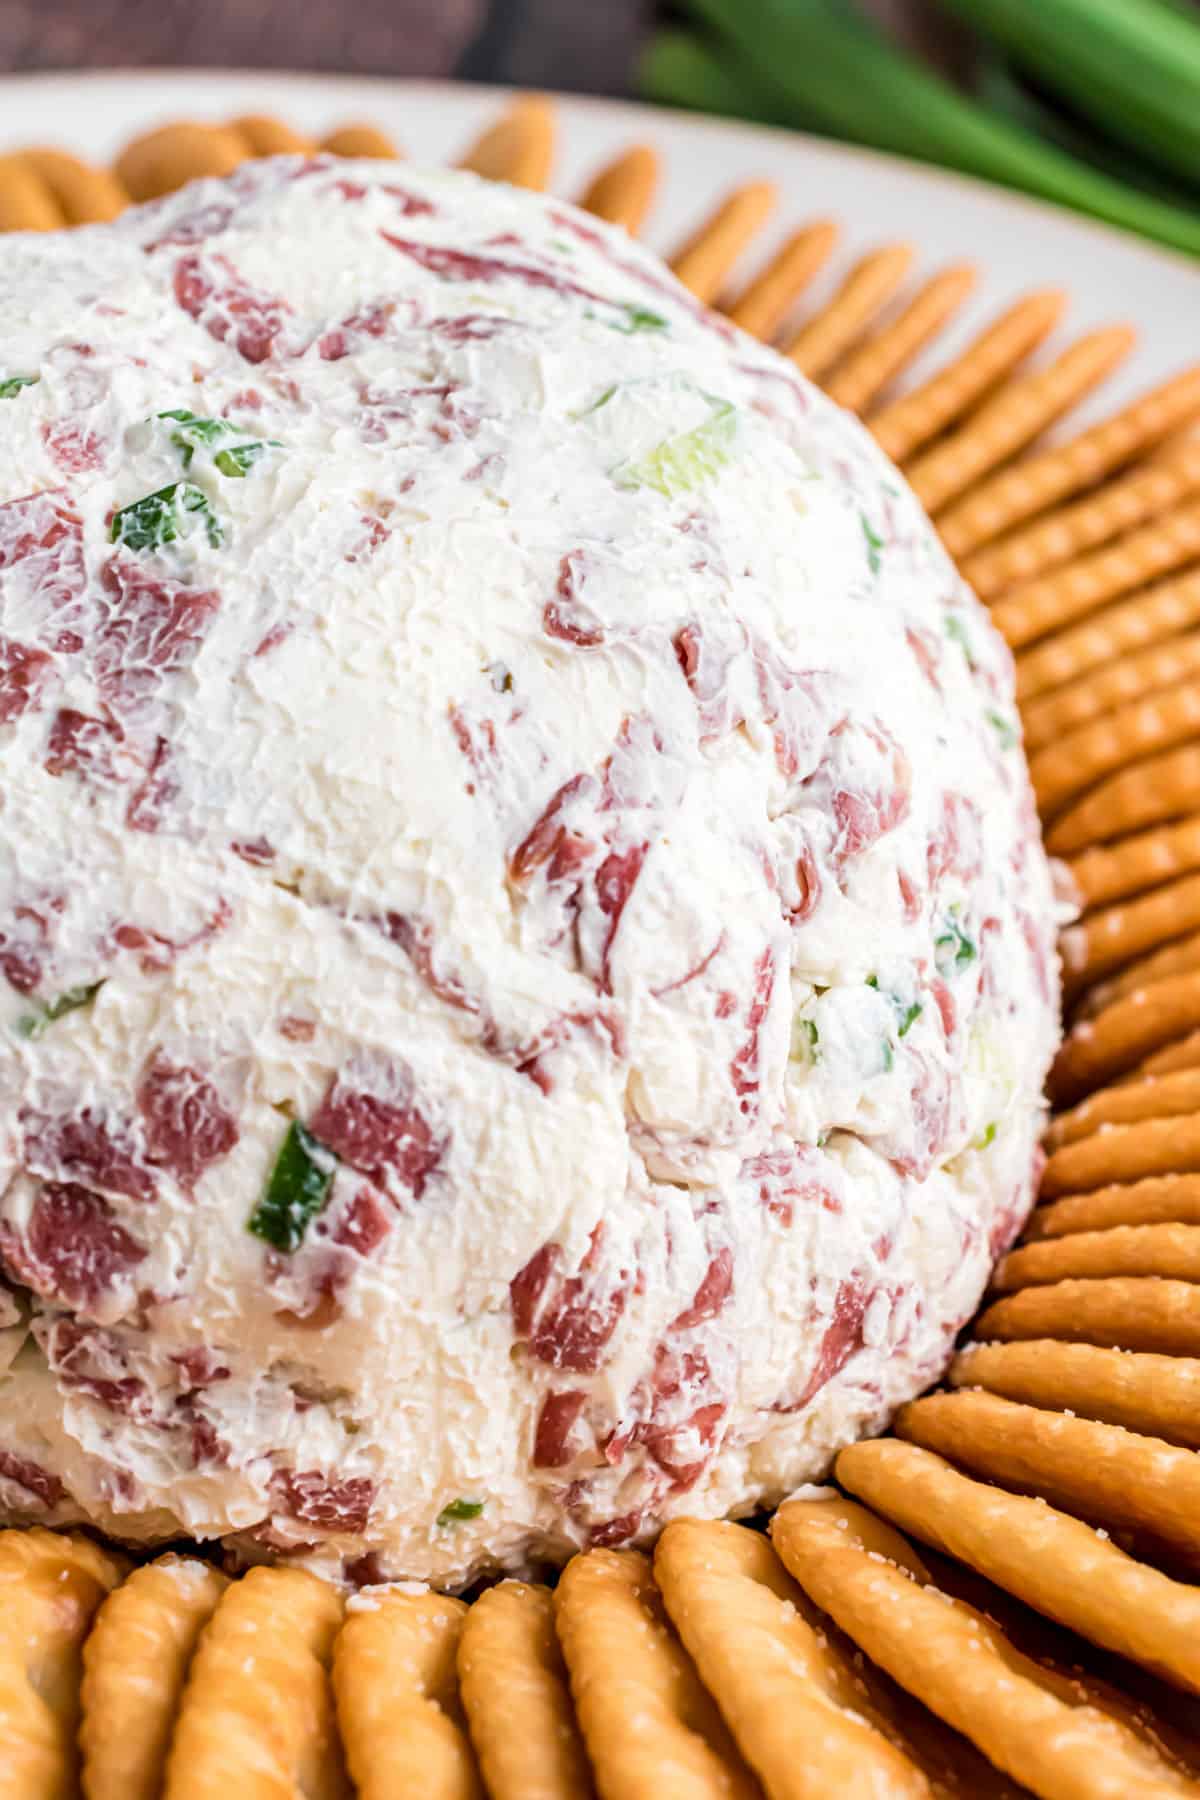
Time
- Prep Time: 15 minutes
- Total Time: 15 minutes
- Chilling Time: At least 30 minutes (recommended for best results)
Needed Equipment
- Mixing bowls (medium and large)
- Sharp knife
- Cutting board
- Measuring spoons
- Rubber spatula or spoon
- Plastic wrap or cling film
- Serving platter or plate
- Small shallow bowl (for rolling the cheese ball)
- Optional: Food processor (for finer chopping of green onions or walnuts)
Tags
Appetizer, Cheese Ball, Deli, Snack, Party Food, Easy, Quick, Crowd-Pleaser, Nut-Free Option, No-Bake
Serving Size
Approximately 8-10 slices or servings, depending on portion size. Typically, this cheese ball comfortably serves 8-10 guests as an appetizer with accompanying crackers or bread.
Difficulty Level
Easy — This recipe requires minimal culinary skills, primarily involving mixing, shaping, and garnishing. Suitable for beginner cooks and busy hosts alike.
Allergen Information
| Allergen | Contains | Notes |
|---|---|---|
| Dairy | Cream cheese | Yes |
| Nuts | Walnuts (optional) | Optional, for garnish |
| Wheat/Gluten | None | Check crackers or breadsticks served alongside |
| Meat | Chipped beef (deli beef slices) | Yes |
| Onions | Green onions | Yes |
| Garlic | Garlic powder | Yes |
Dietary Preference
Contains animal products and dairy. Not suitable for vegans or vegetarians. Can be adapted for gluten-free diets by selecting gluten-free crackers or bread for serving.
Course
Appetizer, Snack
Cuisine
American, Deli-Inspired, Casual
Ingredients
| Ingredient | Quantity | Notes |
|---|---|---|
| Cream cheese | 8 ounces (227 grams) | Softened at room temperature for easy mixing |
| Green onions | 2 large | Finely chopped; both green and white parts |
| Worcestershire sauce | 1 1/2 tablespoons | Adds umami depth |
| Garlic powder | 1/4 teaspoon | Optional, for added flavor |
| Walnuts | 1/8 cup (about 15 grams) | Finely chopped; optional garnish |
| Dried parsley | Optional | For garnish, adds color and aroma |
| Thinly sliced Buddig roast beef | Approximately 4 ounces (113 grams) | Chipped or shredded into small pieces for mixing |
| Crackers, breadsticks, or fresh veggies | As needed for serving | To accompany the cheese ball |
Instructions
1. Prepare the Ingredients
Begin by gathering all necessary ingredients. Ensure the cream cheese is softened to room temperature—this facilitates easier mixing and results in a smooth, cohesive cheese ball. Finely chop the green onions, including both the green and white parts, for balanced flavor distribution. Prepare your walnuts by chopping them into small, fine pieces if using, which will enhance their ability to adhere to the cheese ball and provide a satisfying crunch. Slice the Buddig roast beef into thin strips or small shreds, approximately 1/4-inch in size, to mimic chipped beef texture and integrate seamlessly into the mixture.
2. Mix the Base
In a large mixing bowl, add the softened cream cheese. Using a rubber spatula or a sturdy spoon, beat the cream cheese until smooth and creamy. Introduce the finely chopped green onions into the bowl. Their fresh, mild onion flavor adds brightness and contrast to the richness of the cream cheese. Next, pour in the Worcestershire sauce, which imparts a savory umami note that enhances the overall flavor profile. Add the garlic powder to introduce a subtle depth of flavor, balancing the richness with a hint of spice.
Using the spatula, fold all these ingredients together thoroughly. Make sure the green onions are evenly distributed throughout the cream cheese, and the Worcestershire sauce and garlic powder are incorporated uniformly. The mixture should be cohesive and smooth, with no lumps remaining. In case the green onions or other ingredients resist blending, you may use a food processor for a few seconds to achieve a finer, more uniform mixture.
3. Incorporate the Chipped Beef
Add the sliced Buddig roast beef to the mixture. Gently fold these into the cream cheese base until evenly distributed. The shredded or chipped beef should be well incorporated but not overmixed, to retain a slightly chunky texture that mimics traditional chipped beef. The chopped beef adds a hearty element and savory depth that transforms the simple cheese mixture into a deli-inspired delicacy.
4. Form the Cheese Ball
Transfer the mixture onto a clean surface or into a large bowl. Using your hands, gently shape the mixture into a round ball. For a perfectly smooth sphere, consider wrapping the mixture in plastic wrap or cling film. Roll the wrapped mixture gently into a sphere, applying light pressure to shape it evenly. This step is particularly useful if you prefer an aesthetic presentation or need a uniform shape for serving.
If you prefer a more rustic look, simply form the mixture into a rounded mound without smoothing. Either way, ensure the cheese ball is compact enough to hold its shape but not so tight as to become dense or hard.
5. Chill and Set
Place the formed cheese ball into the refrigerator. Cover it loosely with plastic wrap or place it on a platter covered with a damp cloth. Chill for at least 30 minutes, allowing the flavors to meld and the cheese ball to firm up. This resting period is essential for achieving optimal texture and flavor intensity. For best results, refrigerate for up to 2 hours, especially if the mixture feels too soft to handle.
6. Garnish and Serve
Before serving, prepare your garnishes. Finely chop walnuts and dried parsley if using. Place the nuts on a small plate or shallow bowl. Remove the cheese ball from the fridge, unwrap, and roll it gently in the chopped walnuts or parsley, pressing slightly to adhere the garnishes. This adds visual appeal, textural contrast, and aromatic enhancement.
Transfer the garnished cheese ball to a serving platter. Surround it with an assortment of crackers, breadsticks, or fresh vegetable sticks such as celery, cucumber, or cherry tomatoes. Arrange attractively for an inviting presentation.
Serve immediately or keep refrigerated until ready to serve. For best flavor and texture, serve within 2 hours of garnishing.
Preparation Tips
- Cream Cheese: For the smoothest mixture, ensure the cream cheese is at room temperature. If it’s cold, microwave it for 10-15 seconds until soft but not melted.
- Green Onions: Use the white and green parts for balanced flavor. Finely chopping ensures they blend well and distribute evenly.
- Chipped Beef: If you prefer a finer texture, pulse the sliced beef in a food processor for a few seconds before adding to the mixture.
- Garnishes: Toasted chopped walnuts can add an extra layer of flavor if you prefer a richer nutty profile.
- Make-Ahead: The cheese ball can be prepared a day in advance. Wrap tightly and store in the refrigerator, allowing flavors to develop further.
Nutritional Information
| Nutrient | Per Serving (Approximate) |
|---|---|
| Calories | 880.1 kcal |
| Fat | 82.8 g |
| Saturated Fat | 51.3 g |
| Cholesterol | 287.7 mg |
| Sodium | 1504.6 mg |
| Carbohydrates | 8.6 g |
| Fiber | 0.6 g |
| Sugar | 1.2 g |
| Protein | 28.6 g |
Tips and Tricks
- Flavor Variations: Add a dash of hot sauce or a sprinkle of cayenne pepper for a spicy kick. Incorporate shredded cheese for extra richness.
- Texture Preferences: For a creamier consistency, blend the mixture in a food processor until smooth before shaping.
- Serving Suggestions: Experiment with different nuts such as pecans or almonds for garnish. Use flavored crackers like pepper or herb-infused varieties.
- Presentation: For a more elegant look, shape the cheese ball into a log and slice it into rounds for a different presentation style.
Add-ons and Variations
- Mix in cooked crumbled bacon for a smoky flavor.
- Incorporate chopped dill pickles or relish for a tangy twist.
- Use different herbs such as dill, chives, or thyme for added freshness.
- Create mini cheese balls for individual servings, perfect for parties.
Side Dishes
- Assorted Crackers: Water crackers, multigrain, or buttery Ritz
- Fresh Cut Vegetables: Celery sticks, cucumber slices, cherry tomatoes
- Fresh Baked Bread: Baguette slices or breadsticks
- Fruit Platters: Grape clusters or apple slices for contrast
Improvements and Customization
For a healthier twist, substitute some of the cream cheese with Greek yogurt or reduced-fat cream cheese. To add a smoky flavor, incorporate smoked paprika or chipotle powder. For a more colorful presentation, sprinkle chopped red bell peppers or pimentos on top after garnishing. Adjust the seasoning to taste, adding a dash more Worcestershire or garlic powder if desired. Consider serving with a variety of dips or spreads to complement the cheese ball, such as honey mustard or spicy salsa.
Save and Store
Wrap the cheese ball tightly in plastic wrap or store it in an airtight container. Keep refrigerated for up to 3 days for optimal freshness. For longer storage, freeze the cheese ball wrapped tightly in plastic wrap and then in foil for up to 1 month. To serve after freezing, thaw in the refrigerator overnight and re-garnish if desired.
Frequently Asked Questions (FAQ)
Can I make this cheese ball ahead of time?
Yes, preparing the cheese ball a day in advance enhances flavor development. Just wrap it well and store in the refrigerator. Add garnishes just before serving to maintain freshness.
Can I use other types of meat besides chipped beef?
Absolutely. Thinly sliced ham, turkey, or even cooked bacon bits can be used as alternatives or additions, depending on your taste preferences.
Is there a dairy-free version of this recipe?
Replacing cream cheese with dairy-free alternatives like coconut cream or dairy-free cream cheese can make this suitable for dairy-sensitive diets. Adjust seasonings accordingly.
What are some suitable substitutes for walnuts?
Almonds, pecans, or sunflower seeds can be used as nut alternatives or omitted entirely for nut-free versions.
How can I make this recipe gluten-free?
Use gluten-free crackers or vegetable sticks for serving, and ensure any added ingredients or garnishes are gluten-free.
Conclusion
The Quick Chipped Beef Cheese Ball is a testament to how simple ingredients can come together to create a show-stopping appetizer. Its creamy texture, savory depth, and optional crunchy garnishes make it a versatile dish that can be customized to suit various tastes and dietary needs. Whether serving at a casual family gathering or an elegant party, this cheese ball will surely impress your guests and leave them asking for the recipe. Its quick prep time and minimal fuss make it an indispensable addition to your appetizer repertoire. Remember, the key to a perfect cheese ball lies in quality ingredients and a gentle touch when shaping and garnishing. Embrace your creativity with garnishes and flavor tweaks, and enjoy the compliments that will surely follow.
References
- Love With Recipes — Official Platform for this detailed recipe presentation.
- American Heart Association. “Healthy Snack Ideas,” 2022.

