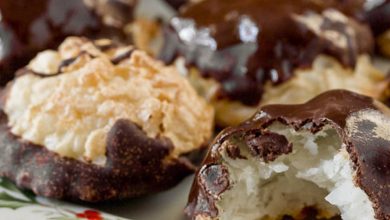
Strawberry Cakes in a Jar
Description:
Indulge in the delightful experience of baking pint-sized cakes right in the comfort of your kitchen. These adorable jar cakes, sealed to preserve their goodness, offer a burst of strawberry flavor with each bite. Perfect for gifting or keeping on hand for those sweet cravings, these cakes boast a shelf life of up to six months when properly sealed. If you’re a fan of this recipe, stay tuned for more delectable treats to grace your table.
Special Equipment:
To embark on this culinary adventure, you’ll need 8 pint-size canning jars with smooth sides and wide mouths, along with their accompanying lids and rings. This ensures that the cake slides out effortlessly, ready to be enjoyed.
Ingredients:
- 2/3 cup of shortening
- 2 2/3 cups of sugar
- 4 eggs
- 1 1/2 teaspoons of salt
- 1 teaspoon of baking powder
- 1 teaspoon of baking soda
- 1 teaspoon of ground cinnamon
- 1/4 teaspoon of ground cloves
- 2/3 cup of pecans
- 2/3 cup of walnuts
- 3 1/2 cups of flour
- 2 cups of strawberries
Nutritional Information (Per Serving):
- Calories: 720.3
- Fat Content: 26.8g
- Saturated Fat Content: 5.7g
- Cholesterol Content: 105.8mg
- Sodium Content: 675.8mg
- Carbohydrate Content: 113g
- Fiber Content: 3.2g
- Sugar Content: 69g
- Protein Content: 9.9g
Instructions:
| Step | Instructions |
|---|---|
| 1 | Begin by creaming together the shortening and sugar until light and fluffy. Then, add in the eggs, followed by the salt, baking powder, baking soda, and spices. Mix until well combined. |
| 2 | Gradually incorporate the water alternately with the flour, stirring until a smooth batter forms. Gently fold in the chopped nuts and strawberries, distributing them evenly throughout the batter. |
| 3 | Preheat your oven to 325°F (163°C). Grease 8 pint-size jars thoroughly, ensuring they’re clean and dry. Fill each jar halfway with the prepared batter, then wipe the rims clean. Place the jars on a sturdy cookie sheet for easy handling. |
| 4 | Bake the cakes in the preheated oven for 35 to 45 minutes, or until a toothpick inserted into the center comes out clean. While the cakes bake, prepare a large pot of boiling water. |
| 5 | Once the cakes are done, carefully remove each jar from the oven one at a time. Wipe the rims clean and swiftly place a lid on top of each jar, followed by screwing the rings on tightly. Allow the jars to cool completely; they will seal on their own as they cool. |
| 6 | These charming cakes, sealed in their jars, can be stored in a cool, dry place for up to six months. If you’re planning to gift them, adorn the lids with decorative fabric and include a card with the cake’s name, date of creation, and expiration date. For personal consumption, simply label the lids with a marker. |
| 7 | When you’re ready to indulge, if the cake doesn’t slide out easily, try running the jar under hot water for a few seconds or briefly microwaving it with the lid removed for 2 seconds. Once opened, store any remaining cake in the refrigerator and enjoy within 2 days for optimal freshness. |
Additional Notes:
Before embarking on your baking journey, it’s essential to note the safety precautions outlined by Clemson University Cooperative Extension Service regarding canning breads and cakes. While these jar cakes are a delightful treat, it’s important to exercise caution as they are not recommended for traditional canning methods due to their low acid content. Commercially prepared products undergo rigorous processing and utilize additives and preservatives not typically available for home recipes. Furthermore, baking in canning jars is not endorsed by manufacturers, as it may pose a risk of bacterial growth. For safe consumption and enjoyment, follow the guidelines provided and savor these delightful jar cakes responsibly.
For more detailed information, you can refer to the Clemson University Cooperative Extension Service’s guide at http://hgic.clemson.edu/PDF/HGIC3051.pdf.


