

Introduction
Poi Maoli, also known as Taro Poi, is an iconic staple of traditional Hawaiian cuisine that embodies the rich cultural heritage and culinary artistry of the Hawaiian Islands. Rooted in centuries-old traditions, poi is crafted from taro root—a versatile starchy vegetable revered as a sacred food in Polynesian culture. Its smooth, creamy texture combined with subtle earthy sweetness makes it a beloved dish for both everyday meals and ceremonial occasions. At Love With Recipes, we aim to bring you authentic, detailed recipes that allow you to recreate the magic of Hawaii in your own kitchen. Poi Maoli is more than just a dish; it is an experience—a taste of aloha that connects you to the islands’ vibrant history, spirituality, and community spirit.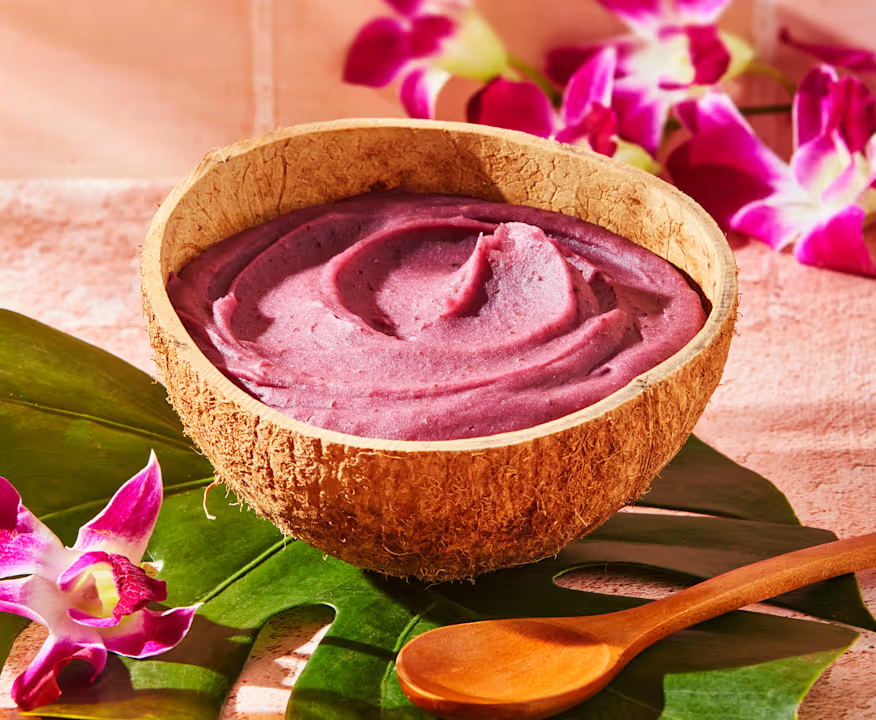
Time
Preparation Time: 30 minutes

Cooking Time: Not applicable (raw taro preparation)
Total Time: 30 minutes
Needed Equipment
- Peeler or vegetable knife (for peeling taro)
- Large pot (for boiling taro)
- Meat grinder or food processor (for grinding taro)
- Calabash or wooden bowl (traditional, but any large, sturdy bowl works)
- Poi pounder (or a sturdy wooden pestle/pottery tool)
- Mixing spoon or spatula
- Measuring cups
- Cloth or plastic wrap (for covering if storing)
- Refrigerator (for storing leftovers)
- Serving bowls or plates
Tags
- Hawaiian cuisine
- Traditional recipes
- Vegetarian
- Gluten-free
- Potluck
- Fast & Easy
- Authentic
Serving Size
1 cup of prepared Poi Maoli (approximately 250 grams)
Difficulty Level
Intermediate — requires some familiarity with handling taro and traditional pounding techniques, but approachable for home cooks with patience and attention to detail.
Allergen Information
This dish is free from common allergens such as nuts, dairy, gluten, and soy. However, always ensure that your equipment and ingredients are free from cross-contamination if you have specific allergies.
Dietary Preference
Vegan, Vegetarian, Gluten-Free, Dairy-Free, Whole Food Plant-Based
Course
Side Dish, Snack, Appetizer
Cuisine
Hawaiian, Polynesian
Ingredients
| Ingredient | Quantity | Notes |
|---|---|---|
| Taro root (fresh) | 2 1/2 cups cooked | Approximately 2 large taro roots, peeled and boiled |
| Water | 2 1/2 cups | Used for adjusting the consistency; can be added gradually |
| Optional additions | To taste | Salt, coconut milk, sugar for flavor variations |
Instructions
Preparation of Taro Root
Begin by selecting fresh taro roots. When purchasing taro, look for firm, unblemished roots with a healthy purple or brown exterior, depending on the variety. Wash the taro thoroughly under cold running water to remove any dirt or debris. Using a vegetable peeler or a sharp knife, carefully peel away the thick, rough skin of the taro. Be cautious—taro contains naturally occurring calcium oxalate crystals that can irritate the skin and eyes, so wearing gloves is advisable. After peeling, cut the taro into uniform 1-inch cubes to ensure even cooking.
Place the cubed taro into a large pot and cover with water. Bring the water to a boil over medium-high heat. Reduce the heat and simmer until the taro is tender—approximately 20-25 minutes. To check for doneness, insert a fork or skewer into a piece; it should slide in easily without resistance. Drain the cooked taro and transfer it to a clean bowl. Allow it to cool slightly, as handling hot taro can be uncomfortable.
Processing the Taro
Once cooled enough to handle safely, transfer the cooked taro to a meat grinder or food processor fitted with the appropriate blade. Traditionally, the taro is ground using a hand-operated meat grinder or a traditional poi pounder, which helps achieve the signature smooth and elastic consistency. If using a food processor, pulse gently to break down the taro into coarse pieces, then process until it forms a smooth, paste-like texture. Be patient—this step is crucial for authentic poi. The goal is to eliminate lumps and achieve a uniform, silky consistency.
Pounding and Mashing
Transfer the ground taro into a calabash or a sturdy wooden bowl. Using a poi pounder (or a pestle), begin to mash the taro with a rhythmic, gentle pounding motion. The process involves repeatedly pounding and turning the taro over to develop a cohesive, elastic mass. Wet your hand slightly to prevent sticking and use your fingers to slip underneath the pounded taro, turning it over continuously. This process mimics traditional methods and helps develop the characteristic stretchiness of poi.
Periodically, dampen the poi pounder to prevent it from sticking and to facilitate smooth pounding. Continue mashing and turning until the mixture becomes smooth, shiny, and slightly elastic. The texture should resemble thick pudding or soft dough. This step may take about 10-15 minutes depending on the tools used and the texture of the taro.
Adjusting the Consistency
Once the poi reaches the desired texture, assess its consistency. If you prefer it thicker, simply stop adding water. For a thinner, more drinkable poi, gradually add water while mixing with your hand in a circular motion. Incorporate water slowly to avoid making it too runny. Traditionally, poi is served at various consistencies—some prefer it very thick, while others like it more fluid. Adjust according to your personal preference or the occasion.
If you plan to store poi for later consumption, mixing in a small amount of water ensures it remains fresh and prevents it from drying out. Cover the finished poi with a damp cloth or plastic wrap to maintain moisture.
Storage and Serving
For immediate consumption, serve the poi in bowls or onto plates. It can be enjoyed plain or with optional flavorings like a dash of salt, coconut milk, or a touch of sugar for a sweeter profile. For preservation, store leftovers in an airtight container in the refrigerator for up to three days. If stored, stir in a little water before serving to restore the desired consistency. Traditional Hawaiian practice involves letting poi ferment slightly in the refrigerator for 2-3 days, which enhances its flavor and develops a tangy, sour note—an acquired taste cherished by many locals.
Preparation Tips
- Choosing Taro: Fresh taro yields the best flavor. Avoid taro with blemishes or soft spots.
- Peeling: Always wear gloves when handling raw taro to prevent skin irritation caused by calcium oxalate crystals.
- Cooking: Do not overboil taro; just cook until tender to preserve flavor and texture.
- Grinding: Use a consistent, gentle motion to achieve smoothness; avoid overprocessing, which can make the poi too sticky or gluey.
- Consistency: Add water gradually, tasting and adjusting as you go, to achieve the perfect texture for your preference.
- Fermentation: Letting the poi ferment in the fridge for a couple of days adds complexity; however, fresh poi is also delicious and has a more neutral flavor.
Nutritional Information
| Nutrient | Per Serving (1 cup) | Details |
|---|---|---|
| Calories | 317.5 | Provides energy mainly from carbohydrates. |
| Fat | 0.6g | Minimal fat content, mostly unsaturated fats. |
| Saturated Fat | 0.1g | Very low saturated fats, heart-healthy. |
| Cholesterol | 0mg | Cholesterol-free, suitable for vegans. |
| Sodium | 34.1mg | Low sodium content, good for low-salt diets. |
| Carbohydrates | 75g | High carbohydrate content, primarily complex carbs. |
| Fiber | 11.6g | Rich in dietary fiber, aids digestion. |
| Sugar | 1.1g | Minimal natural sugar content. |
| Protein | 4.2g | Moderate protein from taro. |
Tips and Tricks
- Use the freshest taro available: Freshness impacts flavor and texture significantly.
- Control water addition: Too much water can dilute flavor; add gradually and taste frequently.
- Embrace fermentation: Allowing the poi to ferment slightly develops a deeper flavor profile appreciated in traditional Hawaiian cuisine.
- Experiment with flavors: Incorporate coconut milk, a pinch of salt, or a touch of sugar for different taste experiences.
- Use authentic tools: Traditional poi pounders and calabash bowls help achieve the right texture and cultural authenticity.
Add-ons and Variations
- Coconut Milk: Stir in a splash of coconut milk for a richer, creamier texture and tropical flavor.
- Sugar or Honey: For a sweeter version, add a teaspoon or two of sugar or honey during the mashing process.
- Fermented Poi: Let the poi sit covered in the refrigerator for 2-3 days to develop a tangy flavor, popular among traditional Hawaiian communities.
- Sweet Potato: Substitute taro with cooked sweet potato for a different but equally traditional variation.
Side Dishes and Serving Suggestions
- Grilled fish or chicken—complement the earthy flavors with smoky proteins.
- Pork dishes—poi pairs beautifully with Hawaiian-style kalua pig or roasted pork.
- Fresh tropical fruits—mango, pineapple, and papaya enhance the tropical theme.
- Vegetable platters—serve with raw or lightly steamed vegetables for a healthy, colorful presentation.
- Hawaiian-style poke bowls—add poi as a side or ingredient for authentic island flavors.
Improvements and Variations
Experimenting with the basic poi recipe can lead to delightful new tastes and textures:
- Adding Sweeteners: Incorporate natural sweeteners like agave syrup or maple syrup for a sweeter, dessert-like poi.
- Flavor Infusions: Mix in vanilla extract or cinnamon for aromatic variations.
- Texture Tweaks: For a chunkier poi, process less thoroughly or leave some small pieces of taro intact.
- Color Variations: Incorporate mashed purple or orange sweet potatoes for vibrant visual appeal.
Save and Store
Proper storage ensures your poi remains fresh and flavorful:
- Refrigerate leftovers in an airtight container, ideally within 2 hours of preparing.
- If storing, stir in a small amount of water before serving to restore desired consistency.
- For long-term storage, freeze in small portions—thaw in the refrigerator before use.
- Traditionally, fermented poi can be stored at room temperature in a cool, dark place for up to a week, but refrigeration prolongs its freshness and flavor.
FAQ
Can I use frozen taro?
Freshly cooked taro yields the best flavor and texture, but frozen taro can be used if properly thawed and cooked thoroughly. Always check for quality and avoid taro with ice crystals or freezer burn.
How do I know when the poi is ready?
The poi should be smooth, shiny, and elastic. It should easily stretch without breaking. The texture resembles thick pudding or soft dough.
Is poi gluten-free?
Yes, poi is naturally gluten-free, making it suitable for gluten-sensitive diets.
Can I make poi vegan?
Absolutely. Poi is inherently vegan; just avoid adding animal-derived ingredients like dairy or honey if you prefer.
What are traditional ways to serve poi?
Traditionally, poi is served in small bowls, often accompanied by other Hawaiian staples like laulau, poke, or grilled meats. It can also be used as a dip or spread for bread or fruits.
Conclusion
Poi Maoli is more than a dish; it is a cultural emblem of Hawaiian hospitality and tradition. Its preparation, rooted in centuries-old techniques, offers an authentic taste of the islands’ history and spirit. Whether enjoyed fresh, fermented, or flavored, poi embodies the essence of aloha—welcoming, nourishing, and deeply connected to community. At Love With Recipes, we encourage you to embrace this culinary journey, respecting its cultural significance while experimenting to find your perfect consistency and flavor. With patience and care, you can craft a bowl of poi that not only delights your palate but also honors the rich heritage of the Hawaiian people. Dive into the process, savor each step, and let the flavors transport you to the lush, vibrant Polynesian islands.
References
- “Hawaiian Food & Cookery,” Queen Emma Foundation, 1988.
- “Traditional Hawaiian Poi,” Hawaiian Cultural Center, 2020.