Introduction
At the heart of Italian pastry craftsmanship, the pasta sfoglia stands as a testament to the art of creating flaky, buttery, and exquisitely layered puff pastry. Unlike the more widely known French puff pastry—pâte feuilletée—pasta sfoglia offers a slightly different texture and flavor profile, owing to its traditional Italian techniques and ingredients. This dough serves as an essential foundation for a myriad of desserts and savory treats across Italy, from delicate mille-feuille to savory pies filled with cheeses, vegetables, or meats. Its characteristic crispness, combined with the rich flavor of quality butter, makes it a favorite among pastry chefs and home bakers alike. Whether you aspire to craft sophisticated desserts or hearty savory pastries, mastering pasta sfoglia is a culinary skill that elevates your baking repertoire. As featured on Love With Recipes, this comprehensive guide aims to walk you through the intricate process of making authentic Italian puff pastry, emphasizing techniques, tips, and optional enhancements to ensure your pastry turns out perfect every time.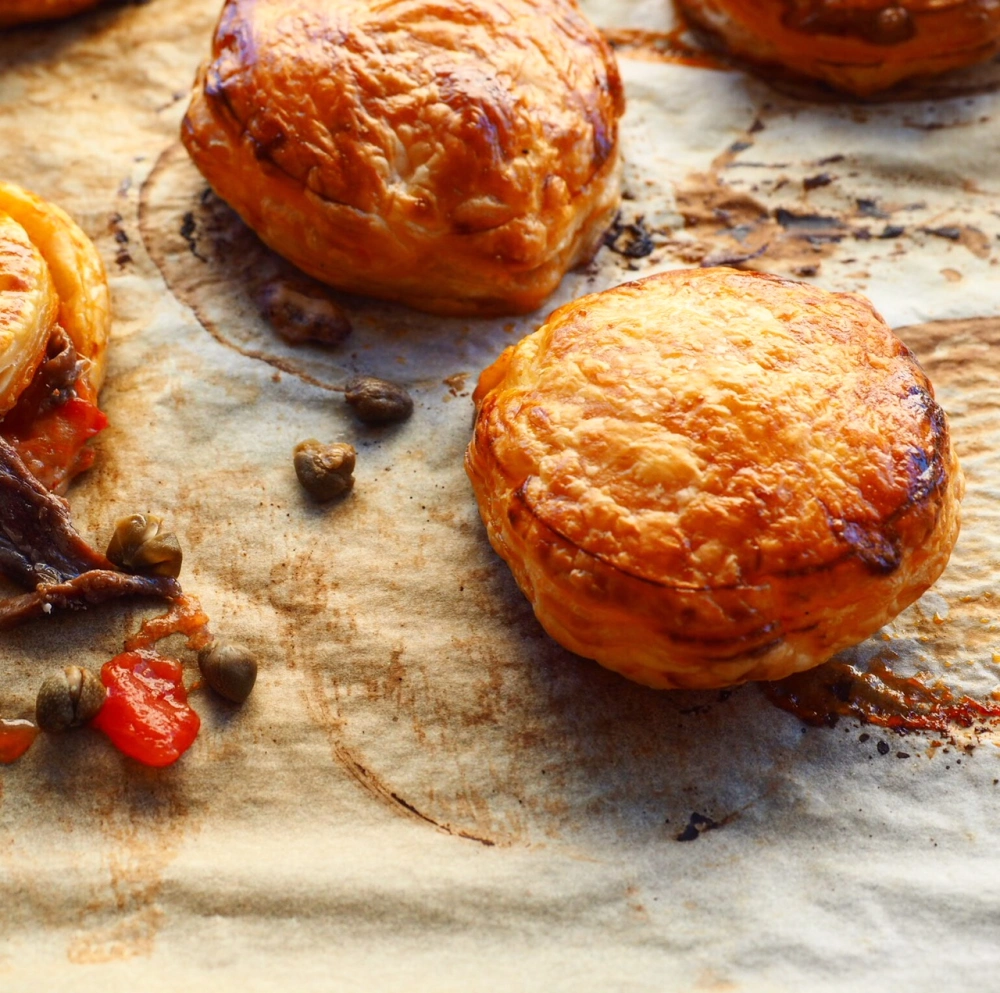
Time
The total estimated time for preparing pasta sfoglia, including resting periods, is approximately 4 hours. This includes active preparation, folding, chilling, and optional resting times. The process involves multiple steps, each requiring patience and precision, but the result is a light, crisp, and flaky dough that is worth the effort.
- Active preparation: 1 hour
- Resting and chilling: 3 hours (divided into four 30-minute intervals)
Optimal results are achieved when you allow the dough to rest sufficiently, facilitating gluten relaxation and preventing shrinkage during baking.
Needed Equipment
- Stand mixer with a dough hook attachment or mixing bowl and hand mixer
- Mixing bowls (small and large)
- Measuring spoons and kitchen scale
- Parchment paper or silicone baking mat
- Rolling pin (preferably a French rolling pin without handles for better control)
- Bench scraper or straight-edged spatula
- Sharp knife or dough cutter
- Plastic wrap or silicone stretch wrap
- Refrigerator with adjustable temperature settings
- Cooling rack
- Pastry brush (optional, for egg wash if making finished pastries)
- Pastry cutter or cookie cutters (if shaping into specific forms)
Tags
- Italian Pastry
- Homemade Puff Pastry
- Dessert Pastry
- Savory Pastry
- Layered Dough
- Bakery
- French Technique
- Traditional Recipe
Serving Size
This recipe yields a large sheet of pasta sfoglia, approximately 30 by 40 centimeters, which can be cut into multiple shapes and sizes depending on your needs. Typically, this amount provides enough pastry for:
- Multiple individual tarts or pies (8-12 depending on size)
- A large mille-feuille or Napoléon (serves 8-10)
- Several savory pastries or turnovers
For precise serving sizes, adjust the cut dimensions accordingly, but generally, a single batch serves about 10-12 people for a dessert or 8-10 for savory applications.
Difficulty Level
This recipe is considered intermediate to advanced due to the precise techniques involved in folding, chilling, and maintaining cold temperature to achieve the desired flaky layers. Patience and attention to detail are essential. New bakers may find the folding and rolling steps challenging but rewarding once mastered.
Allergen Information
| Allergen | Contains |
|---|---|
| Gluten | Yes, from 00 flour |
| Dairy | Yes, butter |
| Eggs | No, unless added in variations |
| Nuts | No |
| Other | Contains wheat and dairy |
This recipe is unsuitable for those with gluten or dairy allergies unless substitutions are made (e.g., plant-based butter). Always check ingredient labels for potential cross-contamination.
Dietary Preference
- Vegetarian: Yes
- Vegan: No (due to butter, but can be adapted with plant-based margarine or oils)
- Keto: No (high in carbohydrates)
- Low-carb: No
Course
- Dessert
- Pastry
- Appetizer (savory options)
- Snack
Cuisine
Italian, European
Ingredients
Ingredients in Tables
| Ingredient | Quantity | Notes |
|---|---|---|
| 00 Flour (for pastry) | 175g | Italian “00” type flour preferred for its fine grind and high gluten quality |
| Water | 100g | Cold, preferably filtered |
| Fine Salt | 5g | Adjust to taste, optional for flavor |
| Butter (cold, cubed) | 250g | Use high-quality unsalted butter for best flavor and texture |
| Additional 00 Flour (for rolling) | 150g | Keep some extra flour handy for dusting during rolling |
Instructions
Step 1: Preparing the Dough (Pastello)
Begin with the base of your pasta sfoglia—the dough, known as “pastello.” Place the 00 flour in the bowl of your stand mixer fitted with a dough hook, or in a large mixing bowl if you’re hand mixing. Measure precisely 175 grams of flour; using a kitchen scale ensures accuracy. Dissolve the fine salt into the 100 grams of cold water, stirring gently until fully dissolved. This saltwater solution will be used to hydrate the flour evenly.
With the mixer on low, gradually add the salted water to the flour, allowing the dough to come together slowly. If mixing by hand, create a well in the center of the flour, pour in the water, and knead gently until the dough forms a cohesive ball. It should be soft but not sticky—adjust with small amounts of flour if necessary, but avoid overworking the dough. Overmixing can develop gluten excessively, resulting in a tough pastry.
Once the dough reaches the right consistency, transfer it to a shallow bowl, shape into a rough rectangle, press gently to flatten, cover with plastic wrap, and set aside. Resting allows gluten development and relaxation, essential for proper rolling and layering.
Step 2: Prepare the Butter Block
While the dough rests, prepare the butter block. Take 250 grams of cold, unsalted butter and cut into small, uniform cubes using a sharp knife. Uniformity in butter pieces ensures even layering during folding. Lay the cubes on a piece of parchment paper or silicone baking mat, then use your hands or a rolling pin to flatten the butter into a rectangular block approximately 15×10 centimeters. Maintain a consistent thickness—around 1-1.5 centimeters—for uniform layers.
Place the butter in the fridge if necessary to keep it cold, especially in warm environments. The goal is to keep the butter firm but pliable enough to encase the dough without melting into it. This step is crucial because the layers’ separation depends on the cold temperature difference between the butter and the dough.
Step 3: Enclose the Butter in the Dough
Roll out the rested dough gently into a rectangle large enough to envelop the butter block. Use a lightly floured surface and a rolling pin, aiming for a rectangle of approximately 25×35 centimeters. The dough should be thin but sturdy enough to contain the butter without tearing.
Center the butter block on the dough rectangle, leaving about 2-3 centimeters of border all around. Fold the dough over the butter, bringing the edges together to fully enclose the butter. Pinch or press the edges to seal tightly, ensuring no butter leaks out during rolling.
Wrap the dough-butter package tightly with plastic wrap and refrigerate for at least 30 minutes. This chilling step solidifies the butter within the dough, setting the stage for proper layering during subsequent folds.
Step 4: First Fold (The 3-Fold Technique)
Remove the dough from the fridge and place it on a lightly floured surface. Gently unroll the dough into a long rectangle, approximately 30×10 centimeters. Do not overwork or use excessive flour, as this can affect the delicate layers.
Perform the first fold: fold one third of the dough towards the center, then fold the other third over the first, like folding a letter. This creates a three-layer fold. Gently press the folds together, ensuring they adhere without stretching or tearing the dough.
Rotate the dough 90 degrees, so the folded edges face you, and repeat the process: roll into a long rectangle and fold into thirds again. This technique adds layers and distributes the butter evenly, creating the characteristic flaky structure.
Wrap the folded dough in plastic wrap and refrigerate for another 30 minutes. Resting here is vital to relax gluten strands and prevent shrinkage or tearing during the next rolling step.
Step 5: Second Fold (The 4-Fold Technique)
Once rested, take the dough out and place it on a lightly floured surface. Roll into a rectangle again, roughly 30×15 centimeters. Carefully fold the longer sides inward to create a four-layer fold: fold one side to the center, then the opposite side over it, resulting in four layers.
Gently press the folds to stick together, avoiding excessive pressure that could squeeze out the butter or distort the layers. Wrap tightly with plastic and chill for another 30 minutes.
Step 6: Repeat the Three-Fold Technique
After the second rest, repeat the three-fold process: roll into a long rectangle, fold into thirds, and fold again. Each iteration increases the layers exponentially, producing a light and flaky pastry once baked.
Once completed, mark the dough lightly with your fingers or a bench scraper where the folds are, then wrap and refrigerate for another 30 minutes. This final resting period ensures the dough is manageable and the layers are well-defined.
Step 7: Final Rolling and Shaping
Remove the dough from the fridge after the last rest. Roll out gently into a rectangle about 0.5 centimeters thick, maintaining the shape and ensuring even thickness. Use a light dusting of flour to prevent sticking, but avoid over-flouring.
Trim the edges for a clean, rectangular shape if desired. Your pastry is now ready for shaping into various forms—tarts, layers, or individual pastries. Wrap tightly in plastic and store in the refrigerator for up to two days or freeze for longer storage.
Preparation Tips
- Maintain Cold Temperatures: The success of puff pastry relies on keeping the dough and butter cold. Work in a cool environment, especially during summer, and return the dough to the fridge if it becomes warm or sticky.
- Use High-Quality Butter: Butter is the key flavor component and influences flakiness. Opt for European-style unsalted butter with a high fat content for optimal results.
- Handle Gently: Avoid overworking the dough during rolling and folding to prevent gluten overdevelopment, which leads to tough pastry.
- Rest Periods Are Essential: Patience with resting times ensures layers develop properly, and the dough remains manageable.
- Use a Light Touch When Rolling: Gentle pressure ensures even layers, while excessive force can cause tearing or butter leakage.
How to Use Pasta Sfoglia
This versatile dough lends itself to both sweet and savory dishes. For desserts, consider making mille-feuille, tarts filled with custard, fruit, or whipped cream. For savory applications, it can be used for quiches, cheese-filled pastries, or antipasto finger foods.
To shape, cut the dough into desired sizes, such as circles or rectangles, and dock with a fork to prevent puffing during blind baking. Fill with desired ingredients, brush with egg wash or butter, and bake until golden and crisp. The flaky layers will create an elegant, restaurant-quality presentation.
For storage, tightly wrap the unbaked dough in plastic and refrigerate for up to 48 hours. For longer storage, freeze the wrapped dough for up to 2 months. Thaw in the refrigerator overnight before use.
Tips and Tricks
- Chill Your Equipment: Keep rolling pins, mixing bowls, and work surfaces chilled for best results.
- Layer Count: The more folds you perform (typically 4-6), the flakier the pastry. However, avoid excessive folding to prevent overworking the dough.
- Experiment with Flavors: Add herbs, spices, or grated cheese to the dough for savory variations.
- Egg Wash: For a shiny, golden finish, brush the surface with lightly beaten egg mixed with a teaspoon of water before baking.
Add-ons and Variations
- Herb-Infused Dough: Mix finely chopped herbs such as thyme, rosemary, or basil into the dough for aromatic savory pastries.
- Sweet Version: Incorporate a tablespoon of sugar into the dough for sweet applications, and fill with pastry cream, fruit preserves, or custards.
- Vegan Adaptation: Substitute butter with vegan margarine or coconut oil, adjusting the handling accordingly.
Side Dishes
To complement your pasta sfoglia-based dishes, consider serving:
- Fresh fruit salads with mint
- Light green salads with vinaigrette
- Italian antipasto platter with cheeses, olives, and cured meats
- Freshly brewed espresso or cappuccino
Improvements and Variations
- Enhanced Flakiness: Incorporate a small amount of cold vodka or vinegar into the dough to inhibit gluten formation, resulting in even flakier layers.
- Layer Strength: Increase the number of folds for more layers, but do so gradually to maintain dough integrity.
- Flavor Layers: Brush layers with flavored butter or infused oils during folding for added depth.
Save and Store
To store unbaked pasta sfoglia, wrap it tightly in plastic wrap or place in an airtight container. It can be refrigerated for up to 48 hours or frozen for up to 2 months. When ready to use, thaw in the refrigerator overnight and bring to room temperature before rolling out.
For baked pastries, store in an airtight container at room temperature for 1-2 days, or refrigerate for up to 3 days. Reheat in a hot oven for a few minutes to restore crispness.
FAQ
Can I make pasta sfoglia ahead of time?
Yes, the dough can be prepared in advance. Wrap tightly in plastic and refrigerate for up to 48 hours or freeze for longer storage. Allow it to come to room temperature or refrigerate overnight before rolling out.
Can I substitute gluten-free flour?
While gluten-free flours can be used, the texture and handling properties will differ significantly. For best results, use a blend formulated for pastries and follow specific gluten-free puff pastry recipes.
How do I prevent the dough from tearing during rolling?
Ensure the dough is adequately rested and kept cold. Use a light touch and plenty of flour during rolling to reduce sticking and tearing. Keep the environment cool and handle the dough gently.
What is the best butter for pasta sfoglia?
European-style unsalted butter with high fat content (around 82%) provides the best flavor and flakiness. Avoid margarine or low-fat substitutes, as they alter the texture and taste.
Can I add flavorings to the dough?
Yes, herbs, spices, or grated cheese can be incorporated into the dough for savory variations, enhancing flavor profiles for different dishes.
Conclusion
Mastering pasta sfoglia is a rewarding endeavor that combines technique, patience, and a keen eye for detail. The layered, flaky texture that results from this traditional Italian puff pastry technique elevates both simple and elaborate dishes. Whether used for sweet tarts, savory pies, or delicate pastries, the homemade pasta sfoglia stands out for its crispness and rich flavor. With consistent practice and adherence to the tips outlined here, even home bakers can achieve professional-quality results. Remember, the key lies in keeping everything cold, handling the dough delicately, and resting sufficiently between folds. Love With Recipes encourages you to try this recipe, embrace the process, and enjoy the delightful, flaky layers that only homemade pasta sfoglia can offer.
References
- Gordon Ramsay’s “Ultimate Cookery Course,” HarperCollins, 2012.
- “The Science of Pâte Feuilletée” by Harold McGee, *On Food and Cooking*, 2004.