Introduction
Welcome to Love With Recipes, your premier culinary destination, where we cherish sharing recipes that bring joy, comfort, and memorable moments to your table. Today, we delve into a decadent treat that beautifully combines the luscious creaminess of traditional cheesecake with the satisfying crunch of a buttery crust and nutty topping. These Cheesecake Bars, originally crafted by Audrey Earley from Sugarland, Texas, and featured in the Houston Chronicle, exemplify the perfect balance between rich flavor and delightful texture. Whether you’re hosting a potluck, planning a family gathering, or simply indulging your sweet tooth, these bars are guaranteed to impress with their irresistible taste and elegant presentation. Prepare yourself for a culinary journey that mixes simplicity with sophistication, all within a manageable timeframe, making them an ideal choice for both novice bakers and seasoned chefs alike.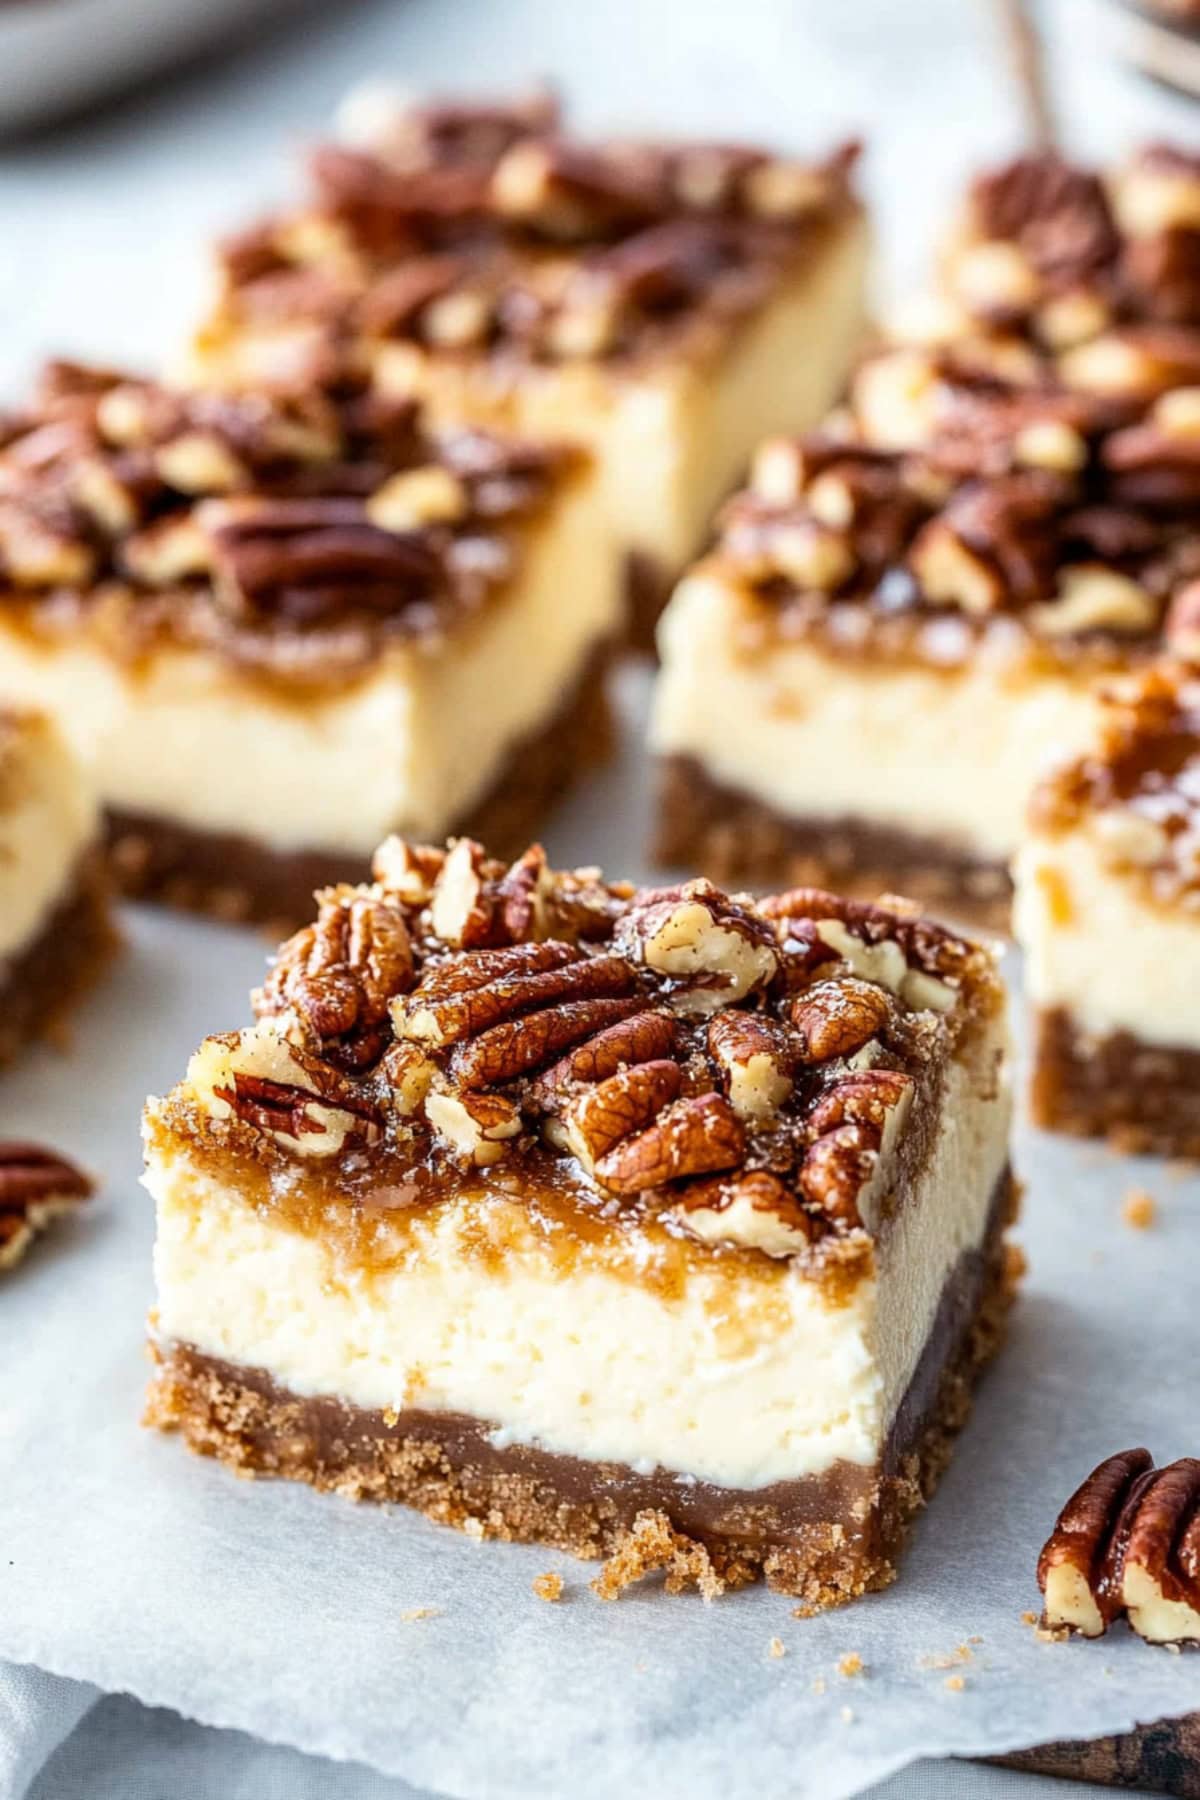
Time
Preparation Time
10 minutes
Cooking Time
40 minutes
Total Time
50 minutes
Chilling Time
At least 2 hours in the refrigerator for optimal flavor and texture
Needed Equipment
- 8-inch square baking pan
- Mixing bowls (at least two)
- Electric hand or stand mixer (or a sturdy spatula for mixing)
- Measuring cups and spoons
- Rubber spatula or spoon
- Non-stick baking spray or butter for greasing
- Oven
- Cooling rack
- Knife for cutting
- Refrigerator for chilling
Tags
dessert, cheesecake, bars, sweet treats, nutty, creamy, easy, crowd-pleaser, potluck, oven-baked, refrigerator-cold, family favorite
Serving Size
One cheesecake bar (approximately 1.5 inches square)
Difficulty Level
Intermediate — requires precise mixing and baking skills, but overall straightforward with clear steps.
Allergen Information
- Contains: Dairy (cream cheese, butter, milk), nuts (pecans), eggs, gluten (flour)
- May contain traces of: tree nuts, soy (if processed in facilities handling soy products)
Dietary Preference
Contains dairy, nuts, gluten, eggs. Not suitable for vegan, dairy-free, or nut-free diets without modifications.
Course
Dessert
Cuisine
American
Ingredients
Crust and Topping
| Ingredient | Quantity | Notes |
|---|---|---|
| Butter | 5 tablespoons | Unsalted, softened |
| Brown sugar | 1/3 cup | Light or dark |
| All-purpose flour | 1 cup | Sifted for best results |
| Pecans | 1/2 cup | Chopped |
Cheesecake Filling
| Ingredient | Quantity | Notes |
|---|---|---|
| Granulated sugar | 1/2 cup | |
| Cream cheese | 8 ounces | Softened |
| Egg | 1 large | |
| Milk | 2 tablespoons | |
| Fresh lemon juice | 1 tablespoon | |
| Vanilla extract | 1 teaspoon |
Instructions
Step 1: Preheat and Prepare
Start by setting your oven to preheat at 350°F (175°C). This ensures the oven reaches the perfect temperature for baking the crust and cheesecake layers evenly. While the oven warms up, prepare your baking pan. Lightly spray an 8-inch square baking pan with non-stick cooking spray or coat it with butter to prevent sticking. This step is crucial for easy removal of the bars once baked and cooled, maintaining their perfect shape and presentation.
Step 2: Make the Crust and Topping Mixture
In a large mixing bowl, combine the softened butter and brown sugar. Using an electric mixer or a sturdy spatula, cream the two ingredients together until the mixture becomes smooth, fluffy, and well-incorporated. This process takes about 2-3 minutes with an electric mixer on medium speed. The goal here is to achieve a light, airy consistency that will form a tender, buttery base for your cheesecake bars.
Next, add the all-purpose flour to the creamed butter and sugar. Mix thoroughly until the mixture resembles coarse crumbs, ensuring the flour is evenly distributed. This step is important because it creates a crumbly texture that, when pressed into the pan, forms a sturdy yet tender crust.
Once the flour is incorporated, fold in the chopped pecans. Ensure they are distributed evenly throughout the mixture to provide consistent nutty crunch in every bite. Use a spatula to gently mix, avoiding overworking the dough to maintain a crumbly texture.
Divide this mixture into two portions: set aside 1 cup for the topping and press the remaining into the prepared baking pan. Use your fingers or the back of a measuring cup to press the mixture firmly and evenly across the bottom of the pan, creating a solid base that will hold the cheesecake filling during baking.
Step 3: Bake the Crust
Place the pan into the preheated oven and bake for approximately 12-15 minutes. Keep an eye on the crust; it should turn a light golden brown and emit a fragrant aroma. This initial baking step helps set the crust, making it crisp and ready for the moist cheesecake layer.
Once baked, remove the pan from the oven and allow it to cool slightly on a cooling rack. This cooling step is essential to prevent the cheesecake filling from becoming too runny when added on top.
Step 4: Prepare the Cheesecake Filling
While the crust cools, prepare the cheesecake filling. In a separate mixing bowl, beat the softened cream cheese and granulated sugar together until the mixture is smooth, creamy, and free of lumps. Using an electric mixer on medium speed, this process takes approximately 2-3 minutes. Achieving a silky texture at this stage ensures your final bars will have a smooth, velvety consistency.
Add the egg, milk, fresh lemon juice, and vanilla extract to the cream cheese mixture. Continue to beat until all ingredients are fully incorporated. The lemon juice adds a subtle tang that complements the richness of the cream cheese, while vanilla enhances overall flavor depth. Be cautious not to overmix, as this can incorporate excess air, leading to cracks in the baked cheesecake.
Step 5: Assemble and Bake
Spread the cream cheese mixture evenly over the cooled crust in the baking pan. Use a spatula to smooth the surface, ensuring an even layer that will bake uniformly.
Sprinkle the reserved 1 cup of the crumbly mixture (the topping) evenly over the cream cheese layer. This nutty, buttery topping will bake into a delightful golden crust that adds texture and flavor contrast.
Return the pan to the oven and bake for an additional 25 minutes. Keep an eye on the bars; the topping should turn a light golden brown, and the center should be set but slightly jiggly. Overbaking can lead to cracks or a dry texture, so start checking around the 23-minute mark.
Step 6: Cooling and Chilling
Once baked, remove the cheesecake bars from the oven and allow them to cool completely in the pan on a cooling rack. Cooling is crucial for setting the texture and making slicing easier. For best results, leave them at room temperature for about an hour, then transfer to the refrigerator.
Chill the bars in the refrigerator for at least 2 hours, or preferably overnight, to allow the flavors to meld and the texture to firm up. This step enhances the overall eating experience, ensuring each bite is smooth and satisfying.
Preparation Tips
- Softening Cream Cheese: To facilitate smooth mixing, remove the cream cheese from the fridge about 30-60 minutes before starting. You can also soften it in the microwave in short bursts (10-15 seconds), but be cautious not to melt it.
- Nut Variations: Feel free to swap pecans with other nuts such as walnuts or almonds for different flavor profiles.
- Flavor Enhancements: Add a pinch of cinnamon or nutmeg to the crust mixture for a warm, spiced note.
- Layering Techniques: For a marbled effect, gently swirl in a tablespoon of fruit jam or chocolate syrup before baking.
Nutritional Information
| Nutrient | Per Serving |
|---|---|
| Calories | 180.2 kcal |
| Fat | 11.4 g |
| Saturated Fat | 5.4 g |
| Cholesterol | 37 mg |
| Sodium | 84.2 mg |
| Carbohydrates | 17.9 g |
| Fiber | 0.5 g |
| Sugar | 11.3 g |
| Protein | 2.5 g |
Tips and Tricks
- Always ensure cream cheese is softened to avoid lumps, resulting in a smoother filling.
- Use fresh lemon juice rather than bottled for a brighter, more authentic flavor.
- For a more decadent treat, drizzle caramel or chocolate sauce over the finished bars before serving.
- If you notice cracks forming on top during baking, slightly reduce oven temperature or bake with a water bath for even heat distribution.
- For cleaner cuts, chill the bars thoroughly and use a hot, sharp knife, wiping it clean after each cut.
Add-ons and Variations
- Incorporate fresh berries like blueberries or raspberries into the cream cheese layer for a fruity twist.
- Swirl in fruit preserves or compote for added flavor and visual appeal.
- Add a sprinkle of shredded coconut on top before baking for a tropical flair.
- Use dark chocolate chips mixed into the topping for a chocolate-hazelnut flavor combination.
Side Dishes
- Fresh fruit salad with berries and citrus segments
- Light vanilla or lemon sorbet to complement the richness of the bars
- Whipped cream with a hint of vanilla
- Crunchy biscotti or almond cookies for added texture
Improvements and Customizations
- Gluten-Free Version: Substitute all-purpose flour with almond flour or gluten-free baking mix. Adjust baking time as needed.
- Vegan Adaptation: Replace cream cheese with vegan cream cheese alternatives, and use flaxseed or applesauce as egg replacers.
- Lower Sugar: Reduce granulated sugar in the filling to suit low-sugar diets, or substitute with natural sweeteners like erythritol or stevia.
- Crust Variations: Use graham cracker crumbs mixed with melted butter instead of the crumb mixture for a different texture.
Save and Store
Keep leftovers stored in an airtight container in the refrigerator for up to 5 days. For longer storage, wrap the bars tightly in plastic wrap or foil and freeze for up to 2 months. To serve, thaw in the refrigerator overnight or bring to room temperature for about 30 minutes for optimal flavor and texture.
Frequently Asked Questions (FAQ)
Can I make these cheesecake bars ahead of time?
Absolutely. Prepare and assemble the bars in advance, then refrigerate for at least 2 hours or overnight. This not only enhances flavor but also makes serving easier.
Can I freeze these bars?
Yes, you can freeze the bars for up to 2 months. Wrap them tightly in plastic wrap and store in an airtight container. Thaw in the refrigerator before serving for best results.
Can I use a different size baking pan?
Using a 9×13-inch pan will increase the yield and slightly alter the baking time. Adjust accordingly, and keep an eye on the baking process to prevent overbaking.
What if I want to make a crust without nuts?
Replace the chopped pecans with additional flour or crushed graham crackers for a nut-free crust.
Conclusion
These Cheesecake Bars epitomize the harmony of rich, creamy filling with a crisp, buttery crust and a nutty topping that adds crunch and flavor. They are versatile enough to be adapted for various dietary needs and flavor preferences, making them a perfect addition to any celebration or casual gathering. With simple ingredients and straightforward steps, anyone can create this impressive dessert that looks as good as it tastes. Remember, patience during the chilling process ensures the best texture and flavor, so plan ahead to enjoy these luscious bars at their peak. As always, Love With Recipes encourages you to experiment and personalize this recipe to suit your taste, making each batch uniquely yours. Happy baking!
References
- Houston Chronicle: Original recipe source by Audrey Earley
- Food Network: Cheesecake bar techniques and tips