

Introduction
Creating a delectable, flaky biscuit crust is a fundamental skill in baking, offering a versatile foundation for a variety of pies, tarts, and desserts. This recipe, featured on lovewithrecipes.com, combines simple ingredients with straightforward techniques, making it ideal for both novice bakers and seasoned pastry enthusiasts seeking a quick yet satisfying crust. The beauty of this biscuit crust lies in its buttery flavor, tender texture, and adaptability—whether you’re preparing a sweet fruit pie, a creamy custard, or a savory quiche, this crust will complement your fillings perfectly. From selecting quality ingredients to mastering rolling techniques, this comprehensive guide will empower you to craft a crust that elevates your baking repertoire and delights your taste buds.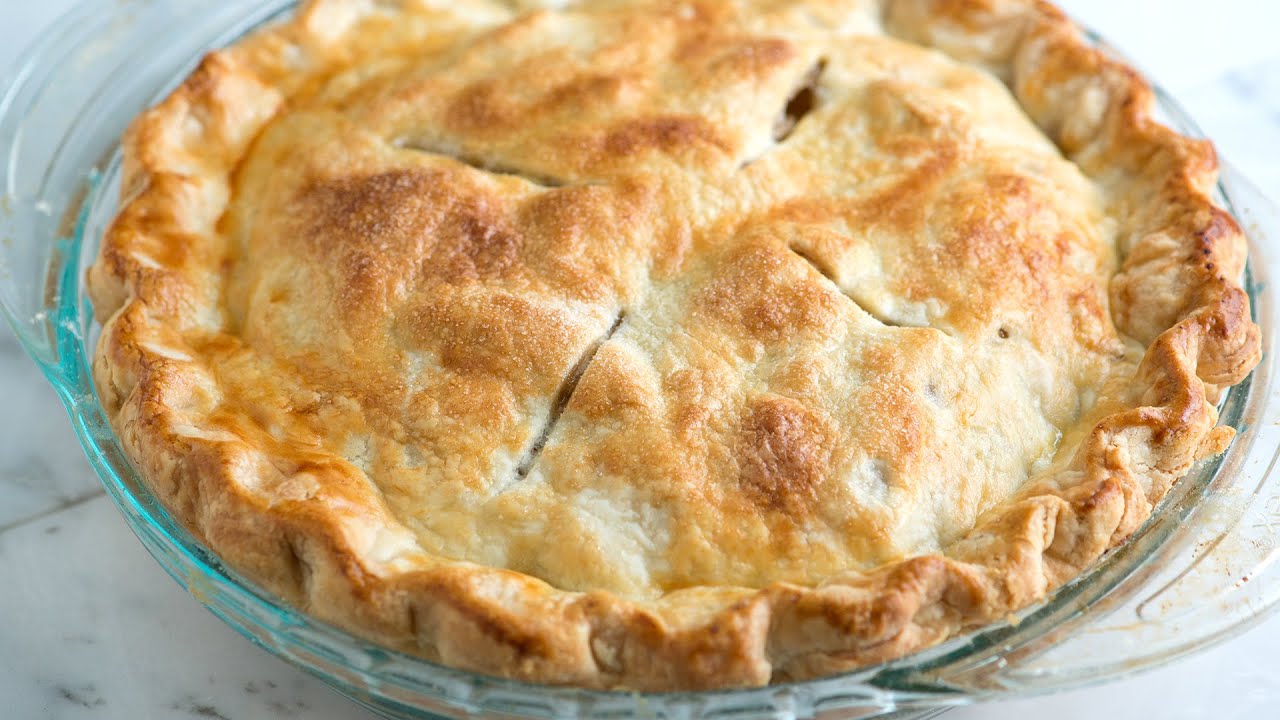
Time
Preparation Time: 5 minutes

Total Time: 5 minutes (excluding optional baking steps)
Note: If you choose to partially bake the crust, add approximately 10 minutes for baking, and additional time for cooling before filling.
Needed Equipment
-
- Measuring cups and spoons
- Medium mixing bowl
- Whisk
- Pastry cutter or two forks (for cutting in butter)
- Sharp knife or dough scraper
- Rolling pin
- Clean work surface (preferably marble or wooden)
- Pie plate or 8- or 9-inch tart pan
- Parchment paper or silicone baking mat (optional, for rolling out)
- Brush (for egg wash, optional)
- Baking sheet (if partially baking)
Tags
-
-
- Pie crust
- Biscuits
- Homemade crust
- Quick baking
- Butter-based crust
- Sweet or savory pies
- Basic baking
-
Serving Size
This recipe yields a single 8- or 9-inch crust, approximately serving 8 slices, depending on the size of the slices and the filling used.
Difficulty Level
Easy — Suitable for beginners and those seeking a quick, reliable crust with minimal fuss. The techniques involved are straightforward, with no complicated folding or chilling required, although optional steps can enhance the texture and flavor.
Allergen Information
| Allergen | Contains |
|---|---|
| Gluten | Yes (from flour) |
| Dairy | Yes (butter) |
| Milk | Yes (milk) |
| Eggs | No |
| Nuts | No |
Note: To accommodate dairy or gluten allergies, consider substituting with dairy-free butter alternatives or gluten-free flour blends.
Dietary Preference
Suitable for vegetarians. Not vegan unless substitutions are made for butter and milk.
Course
Pastry Base / Pie Crust
Cuisine
American / Classic Baking
Ingredients
| Ingredient | Quantity | Preparation Notes |
|---|---|---|
| All-purpose flour | 1 cup (120 grams) | Scooped and leveled |
| Baking powder | 2 teaspoons | Ensure fresh for optimal leavening |
| Salt | 1/2 teaspoon | Adjust to taste for savory or sweet fillings |
| Unsalted butter | 1/4 cup (56 grams) | Cold, cut into small cubes |
| Milk | 1/4 cup (60 ml) | Whole milk recommended; can substitute with plant-based milk for dairy-free options |
Instructions
Step 1: Prepare the Dry Ingredients
Begin by assembling all your ingredients to ensure an efficient process. In a medium mixing bowl, combine the flour, baking powder, and salt. Whisk the mixture thoroughly to distribute the leavening agent evenly and break up any clumps. This step ensures a uniform texture in your crust, contributing to even rising and a tender crumb. Properly aerated dry ingredients also prevent the formation of dense patches within the crust, leading to a more delicate and flaky final product.
Step 2: Incorporate the Butter
Next, add the cold, cubed butter into the dry mixture. The key to achieving a crumbly, flaky crust is to cut the butter into the flour until the mixture resembles coarse cornmeal. Use a pastry cutter, a pair of forks, or your fingertips to work the butter into the flour. Press and cut the butter until small pea-sized pieces remain, with some larger bits intact. These bits will melt during baking, creating pockets of tenderness and a layered texture characteristic of good biscuits and pie crusts.
Step 3: Add the Milk and Form the Dough
Pour the milk into the mixture gradually, stirring with a fork or spatula as you go. Mix until the ingredients start to come together into a shaggy dough. Be cautious not to overmix; overhandling can develop the gluten in the flour, resulting in a tougher crust. The dough should be slightly sticky but hold together when gently pressed. If it feels too dry, add a small splash of milk; if too wet, sprinkle in a bit more flour.
Step 4: Shape and Roll the Dough
Turn the dough onto a lightly floured work surface. Gently knead it a few times to bring it together, then shape it into a flat disc or ball. Use a rolling pin to roll out the dough to about 1/4 inch thickness, ensuring an even surface. Rotate the dough a quarter turn periodically while rolling to maintain a uniform thickness and prevent sticking. If the dough resists or cracks, allow it to rest for a few minutes, then continue rolling. Aim for a circle or oval that fits your pie dish with some overhang for crimping or trimming.
Step 5: Transfer and Fit the Crust into the Pie Plate
Gently lift the rolled dough using a rolling pin or fold it onto itself to transfer to your pie plate or tart pan. Carefully drape the dough into the dish, easing it into the corners without stretching it, which can cause shrinking during baking. Trim excess dough around the edges, leaving about 1/2 inch overhang. For a decorative edge, fold the overhang under itself and crimp with your fingers or a fork for a classic look.
Step 6: Optional Partial Baking
For certain fillings or to prevent a soggy bottom, partially bake the crust before adding your filling. Preheat your oven to 350°F (175°C). Line the crust with parchment paper or aluminum foil and fill with pie weights, dried beans, or rice to prevent puffing. Bake for approximately 10 minutes, then remove the weights and liner. Let the crust cool slightly before filling or proceed to full baking as per your recipe.
Step 7: Filling and Baking
Fill the crust with your desired ingredients—sweet fruit fillings, custards, or savory ingredients like quiches. Bake according to your filling’s instructions. If you’re making a no-bake pie, chill the crust in the refrigerator for at least 30 minutes to firm it up before adding cold fillings.
Preparation Tips
-
-
- Use cold ingredients: Cold butter and milk ensure the fat remains in small, solid pieces, creating a flaky texture. Avoid melting the butter beforehand.
- Work quickly: Minimize handling to prevent the butter from warming up and melting, which can lead to a dense crust.
- Rest the dough: If the dough becomes too warm or sticky, refrigerate for 15-20 minutes before rolling out to improve workability and prevent shrinking.
- Uniform thickness: Consistently rolling the dough to 1/4 inch ensures even baking and a professional appearance.
- Pre-baking: Partially or fully baking the crust enhances crispness and prevents sogginess, especially with moist fillings.
-
Nutritional Information
| Nutrient | Per Serving (based on 8 slices) |
|---|---|
| Calories | 905.6 kcal |
| Fat | 49.5 grams |
| Saturated Fat | 30.7 grams |
| Cholesterol | 130.6 milligrams |
| Sodium | 2326.5 milligrams |
| Carbohydrates | 100.5 grams |
| Fiber | 3.4 grams |
| Sugar | 0.4 grams |
| Protein | 15.4 grams |
Tips and Tricks
-
-
- For a flakier crust: Use cold butter and work quickly to keep the fat cold. You can also chill the rolled dough for 15-20 minutes before baking.
- Flavor variations: Add a teaspoon of vanilla extract or a tablespoon of sugar for a sweeter crust, or incorporate herbs and spices for savory versions.
- Glazing: Brush the crust with an egg wash before baking for a shiny, golden finish.
- Using alternative flours: Substitute part of the all-purpose flour with almond flour or whole wheat for added flavor and nutrition.
-
Add-ons
-
-
- Sweeteners such as sugar, honey, or maple syrup for a sweeter crust
- Herbs and spices (e.g., cinnamon, nutmeg, thyme) for flavor enhancement
- Cheese (parmesan, cheddar) mixed into the dough for a savory twist
- Seeds (sesame, poppy) sprinkled on top before baking for texture and visual appeal
-
Side Dishes
-
-
- Fresh fruit salads
- Whipped cream, mascarpone, or custard fillings
- Ice cream or sorbet complements
- Savory fillings like quiche or spinach and feta pie
-
Improvements
-
-
- Chill the dough for at least 30 minutes to develop flavor and improve texture
- Mix in a teaspoon of vinegar or lemon juice to tenderize the crust and add slight acidity
- Use pastry flour instead of all-purpose for an even more tender crust
- Brush with butter or egg wash before baking for enhanced color and richness
-
Save and Store
Wrap the unbaked or baked crust tightly in plastic wrap or aluminum foil. Store at room temperature for up to 2 days if unbaked. For longer storage, refrigerate for up to 3 days or freeze for up to 3 months. To freeze, wrap the crust well and place in an airtight container or freezer bag. Thaw in the refrigerator overnight before use. Reheat baked crust in a 350°F (175°C) oven for 5-10 minutes to regain crispness.
FAQ
Can I make this crust vegan?
Yes. Substitute the butter with a plant-based margarine or coconut oil and use plant-based milk such as almond, soy, or oat milk. Keep in mind that these substitutions may slightly alter the texture and flavor.
Can I prepare the crust ahead of time?
Absolutely. Prepare the dough, wrap it tightly, and refrigerate for up to 24 hours. Before rolling out, allow it to sit at room temperature for a few minutes if it has become too firm.
Is this crust suitable for gluten-free diets?
This particular recipe relies on wheat flour; for gluten-free options, substitute with a gluten-free flour blend and ensure baking powder is gluten-free.
What if my crust shrinks during baking?
This often occurs if the dough is overstretched or not rested. To prevent this, avoid overhandling, ensure proper resting time, and handle the dough gently during transfer and shaping.
Conclusion
Mastering a homemade biscuit crust enhances your baking confidence and opens up a world of dessert and savory possibilities. Its simplicity, combined with adaptability and rich flavor, makes it a staple in any baker’s repertoire. Whether serving a classic apple pie, a creamy quiche, or a fruit tart, this crust provides a tender, flaky base that beautifully complements the filling. Remember, the key to success lies in using cold ingredients, handling the dough minimally, and baking it to golden perfection. With a little practice, you’ll be crafting perfect crusts every time, impressing friends and family alike. Lovewithrecipes.com encourages you to experiment with flavors, fillings, and presentation to make each pie uniquely yours. Happy baking!
References
For further reading and advanced techniques, consider consulting “Pie and Pastry Bible” by Rose Levy Beranbaum or “The Art of French Pastry” by Jacquy Pfeiffer. Both sources offer in-depth insights into pastry science and professional tips for achieving bakery-quality results.