Introduction
The Chocolate Marshmallow Cake, as featured on Love With Recipes, is a luscious dessert that combines the velvety richness of chocolate with the sweet, airy fluffiness of marshmallows. This cake is a celebration of contrasts — moist yet fluffy, bitter yet sweet, firm yet gooey. Its layered textures and harmonious flavors make it an ideal choice for birthdays, potlucks, or any special occasion that calls for a decadent treat. The recipe balances simplicity and indulgence, making it accessible to bakers of all experience levels who are eager to create something memorable. With the perfect blend of ingredients, thoughtful preparation, and artistic presentation, this cake promises to satisfy even the most discerning dessert lovers.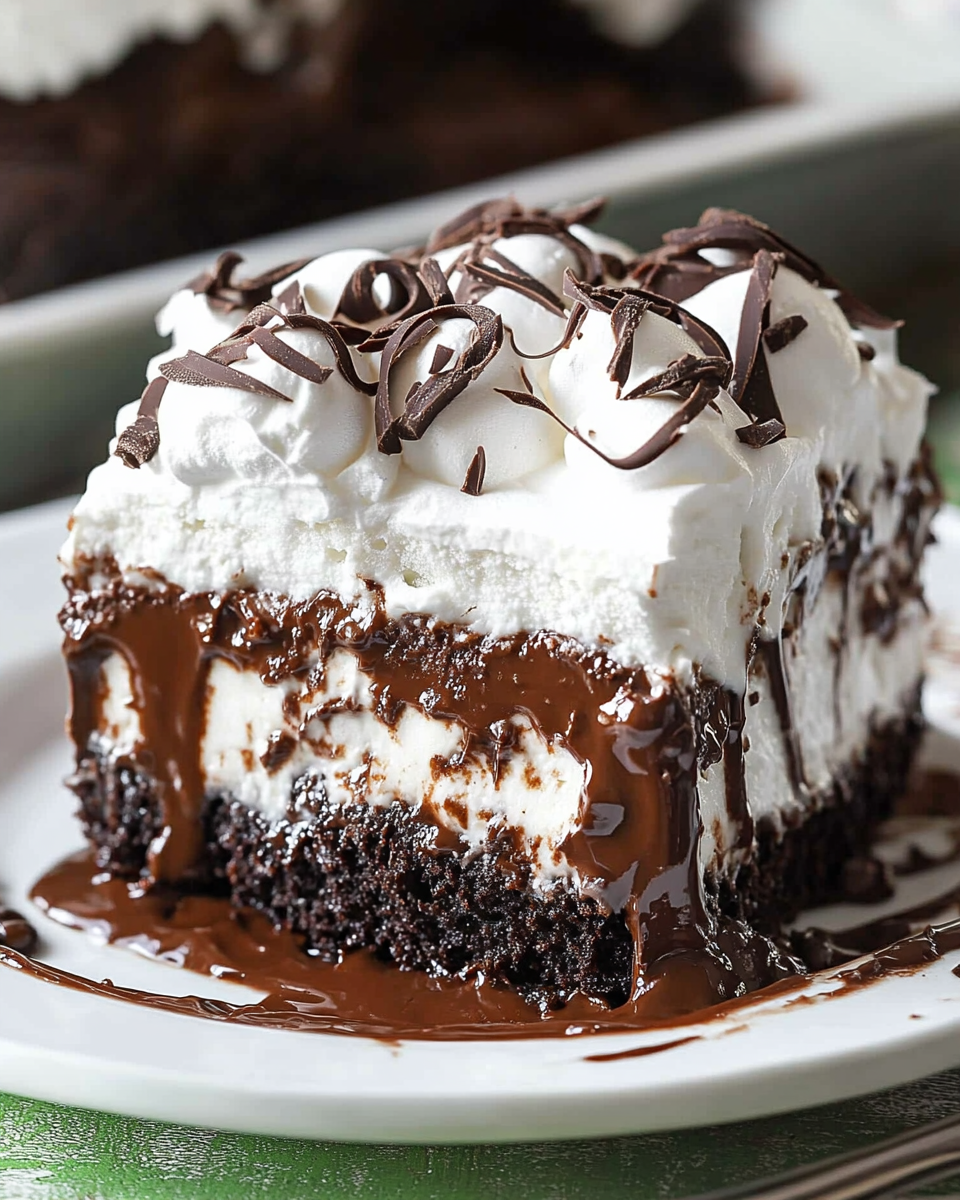
Time
Preparation and Baking Time
- Preparation Time: 15 minutes
- Baking Time: 25-30 minutes
- Cooling and Final Touches: 10-15 minutes
- Total Time: Approximately 55 minutes
This timing ensures the cake is baked to perfection, with the glaze and marshmallows adding the final delicious layers of flavor and texture.
Needed Equipment
Essential Kitchen Tools
- Mixing bowls (at least two large ones)
- Electric hand or stand mixer (or a sturdy whisk for manual mixing)
- Measuring cups and spoons
- Double boiler or microwave-safe bowl for melting chocolate
- 9 x 13-inch baking pan (preferably metal for even heat distribution)
- Cooking spray or butter for greasing the pan
- Pastry brush or paper towels (for greasing and flouring)
- Spatula or rubber scraper
- Wire cooling rack
- Saucepan (for preparing the glaze)
- Whisk or spoon (for stirring the glaze)
- Toothpick or cake tester (to check doneness)
- Oven mitts and cooling racks for handling hot items
Tags
Chocolate, Marshmallow, Cake, Dessert, Easy, Homemade, Indulgent, Family-Friendly, Baked Goods, Sweet, Party Dessert
Serving Size
Serves approximately 12-15 generous slices, depending on how the cake is cut and the occasion at hand.
Difficulty Level
Intermediate — the recipe involves melting, mixing, baking, and glazing techniques that require attention to detail but are manageable for home bakers with some experience.
Allergen Information
- Contains gluten (all-purpose flour)
- Contains dairy (butter, milk, marshmallows)
- Contains eggs
- May contain traces of soy (chocolate chips, marshmallows)
Dietary Preference
This recipe is not suitable for vegan or dairy-free diets due to its ingredients but can be adapted for specific dietary needs with substitutions.
Course
Dessert
Cuisine
American, Comfort Food, Baked Goods
Ingredients
Ingredients in Tables
| Ingredient | Quantity | Notes |
|---|---|---|
| Butter | 1/2 cup (115g) | Unsalted, for melting and greasing |
| All-purpose flour | 2 cups (240g) | Sifts optional but recommended for a light texture |
| Salt | 1 teaspoon | Enhances flavor |
| Baking powder | 1 teaspoon | Leavening agent |
| Baking soda | 1/2 teaspoon | React with acidic ingredients for rise |
| Eggs | 2 large | Room temperature preferred |
| White sugar | 1 cup (200g) | Granulated, for sweetness and moisture |
| Applesauce | 1/4 cup (60g) | Unsweetened, replaces some fat |
| Vanilla extract | 1 teaspoon | Flavor enhancer |
| Mini marshmallows | 2 cups (about 100g) | For folding into batter and topping |
| Milk | 1 cup (240ml) | Whole or 2% preferred |
| Sugar (for glaze) | 1/2 cup (100g) | Adjust sweetness to taste |
| Chocolate chips | 2 tablespoons (optional) | Adds extra chocolate flavor |
Instructions
Preparing the Chocolate and Butter Mixture
Begin by melting the butter and chocolate together to create a smooth, glossy mixture. This step is crucial as it forms the rich base of your cake. To do this, break the chocolate into small pieces and place them in a microwave-safe bowl or a double boiler. Microwave in 30-second bursts, stirring after each, until fully melted and smooth. Alternatively, set a heatproof bowl over a pot of simmering water, stirring constantly until melted. Be cautious to avoid direct heat contact that could scorch the chocolate or butter. Once melted, transfer the mixture to a heatproof container and allow it to cool slightly, approximately 15 minutes. Proper cooling ensures that when added to the egg mixture, it doesn’t curdle or cause the batter to seize.
Preheating and Preparing the Pan
While the chocolate mixture cools, preheat your oven to 350°F (175°C). This ensures that the oven reaches the perfect temperature by the time the batter is ready for baking. Next, prepare your 9 x 13-inch baking pan by greasing it thoroughly with butter or non-stick spray. For extra insurance against sticking, dust the greased surface with a light layer of flour or line it with parchment paper. This step guarantees clean, easy removal of the cake after baking, preserving its appearance and texture.
Mixing the Dry Ingredients
In a medium-sized bowl, sift together the all-purpose flour, salt, baking powder, and baking soda. Sifting aerates the flour and distributes the leavening agents evenly, promoting uniform rising and preventing clumping. Set this mixture aside for incorporation into the wet ingredients later. The dry mix acts as the foundation for your batter, providing structure and stability to the cake.
Combining Wet Ingredients
In a large mixing bowl, combine the eggs, white sugar, applesauce, and vanilla extract. Using an electric mixer on medium speed, beat until the mixture is well combined, slightly frothy, and creamy — approximately 2-3 minutes. This step is essential as it incorporates air into the batter, contributing to a light texture. Next, pour in the cooled chocolate and butter mixture, gradually adding it to the egg mixture while continuously mixing. This ensures a uniform distribution of the chocolate flavor throughout the batter. The resulting mixture should be glossy and smooth, with a rich chocolate hue that hints at the indulgence to come.
Integrating Dry and Wet Ingredients
Slowly add the sifted dry ingredients to the wet mixture in stages — about a third at a time. Use a spatula or low-speed mixer to gently fold each addition, avoiding overmixing which can develop gluten and make the cake dense. Mix until just combined, stopping as soon as the dry ingredients are incorporated. This method ensures a tender crumb and even rise during baking.
Baking the Cake
Pour the batter into your prepared baking pan, spreading it evenly with a spatula to ensure uniform thickness. Place the pan in the preheated oven and bake for 25-30 minutes. During baking, the cake will rise and develop a beautiful golden crust. To test for doneness, insert a toothpick into the center of the cake; if it comes out clean or with a few moist crumbs, the cake is ready. Avoid overbaking to maintain moistness; the cake should be soft and slightly springy to the touch. Once baked, transfer the cake to a wire rack and allow it to cool for at least 10 minutes before proceeding with the toppings and glaze.
Preparing the Glaze
While the cake cools, prepare the drizzled glaze. In a medium saucepan, combine the milk, butter, and sugar. Bring to a gentle boil over medium heat, stirring constantly to dissolve the sugar and prevent sticking. Allow it to boil gently for 1 1/2 to 2 minutes, maintaining constant stirring. Remove from heat and immediately stir in the chocolate chips and marshmallows. Continue stirring until the marshmallows and chocolate are completely melted, forming a smooth, glossy glaze. This step infuses the cake with rich chocolate flavor and provides a luscious, gooey texture that complements the marshmallows on top.
Finishing Touches
Once the cake has cooled sufficiently — but still slightly warm — sprinkle the remaining mini marshmallows evenly over the top. Return the cake to the oven for an additional 2 minutes to allow the marshmallows to soften and melt slightly, creating a delightful marshmallow topping. Remove the cake from the oven and immediately drizzle the prepared glaze over the marshmallow topping, using a spoon or piping bag for artistic flair. The glaze should cascade over the marshmallows, creating a tempting, shiny finish. Let the cake cool completely at room temperature for about 10-15 minutes before slicing to allow the glaze to set, ensuring clean cuts and presentation.
Preparation Tips
- Use room temperature eggs for better emulsification, resulting in a smoother batter.
- For an extra chocolate boost, fold in chocolate chips into the batter before baking.
- Ensure the chocolate mixture is only slightly warm before combining with eggs to avoid curdling.
- Cover and store the cake in the refrigerator if not serving immediately to keep marshmallows fresh and maintain the glaze’s shine.
- For a more intense chocolate flavor, add a tablespoon of cocoa powder to the dry ingredients.
Nutritional Information
| Nutrient | Per Serving (Approximate) |
|---|---|
| Calories | 363.2 kcal |
| Fat Content | 14.2 g |
| Saturated Fat | 8.6 g |
| Cholesterol | 56.8 mg |
| Sodium | 212.3 mg |
| Carbohydrates | 59.4 g |
| Fiber | 1.4 g |
| Sugar | 41.5 g |
| Protein | 3.5 g |
Tips and Tricks
- For an even richer chocolate flavor, add a teaspoon of espresso powder to the batter — it enhances the chocolate notes without altering the flavor profile significantly.
- If you prefer a fudgier texture, reduce the baking time slightly or substitute some of the flour with cocoa powder.
- For a more decorative presentation, pipe whipped cream or ganache around the edges and garnish with additional marshmallows or chocolate shavings.
- To make the cake more portable, cut into smaller squares and serve as individual portions.
Add-ons
- Chopped nuts (pecans, walnuts, or almonds) sprinkled over the marshmallow topping for added crunch.
- Swirls of caramel or peanut butter drizzle for extra flavor layers.
- Fresh berries or fruit slices on the side for contrast and visual appeal.
Side Dishes
- Vanilla ice cream or whipped cream to complement the rich chocolate and marshmallow flavors.
- Fresh fruit salad for a refreshing balance.
- Light lemon or berry coulis to add a tangy note.
Improvements
- Replace marshmallows with toasted coconut for a different texture and flavor profile.
- Use dark chocolate instead of semi-sweet for a more intense chocolate experience.
- Incorporate a layer of chocolate ganache inside the cake for an extra gooey center.
Save and Store
This cake can be stored covered in the refrigerator for up to 3 days. To maintain freshness, wrap it tightly with plastic wrap or store in an airtight container. Before serving, allow the cake to come to room temperature for the best flavor and texture. If you want to keep it longer, freeze slices individually wrapped in plastic wrap and foil for up to 1 month. Thaw in the refrigerator overnight before serving.
FAQ
Can I make this cake dairy-free?
Yes, substitute butter with dairy-free margarine or coconut oil, and use plant-based milk. Use dairy-free marshmallows and chocolate chips for best results.
Can I add other flavors?
Absolutely! Incorporate a teaspoon of peppermint extract or orange zest into the batter for a flavor twist. You can also add a splash of coffee or liqueur for depth.
Is it suitable for gluten-free diets?
This recipe relies on all-purpose flour, so for gluten-free adaptation, substitute with a certified gluten-free flour blend. Ensure all ingredients are gluten-free as well.
Conclusion
The Chocolate Marshmallow Cake from Love With Recipes embodies the ultimate comfort dessert — rich, fluffy, and irresistibly indulgent. Its layered textures and harmonious flavors make it a show-stopper at any gathering. With straightforward steps and versatile add-ons, this cake can be customized to suit various tastes and occasions. Whether served as a centerpiece at a party or a cozy family treat, it guarantees smiles and satisfied sweet teeth every time. Remember, the magic lies in the balance of quality ingredients, precise execution, and a pinch of creativity. Happy baking!
References
- Chocolate Recipes from The Science of Good Cooking by Cook’s Illustrated
- Marshmallow-Based Desserts Guide, Sweet Science Journal