

Introduction
At Love with Recipes, we understand that the magic of baking and snack preparation lies in creating treats that are both simple and satisfying. Today, we’re diving into a recipe that combines the crunchy, salty goodness of pretzels with the sweet, creamy decadence of frosting—resulting in delightful Frosted Pretzels that are perfect for any occasion. Whether you’re preparing a quick snack, a festive holiday dessert, or a fun party treat, these Frosted Pretzels are guaranteed to impress. Their straightforward preparation makes them an ideal project for beginners and seasoned cooks alike, and their versatile flavor profile allows for endless customization options to suit your taste preferences.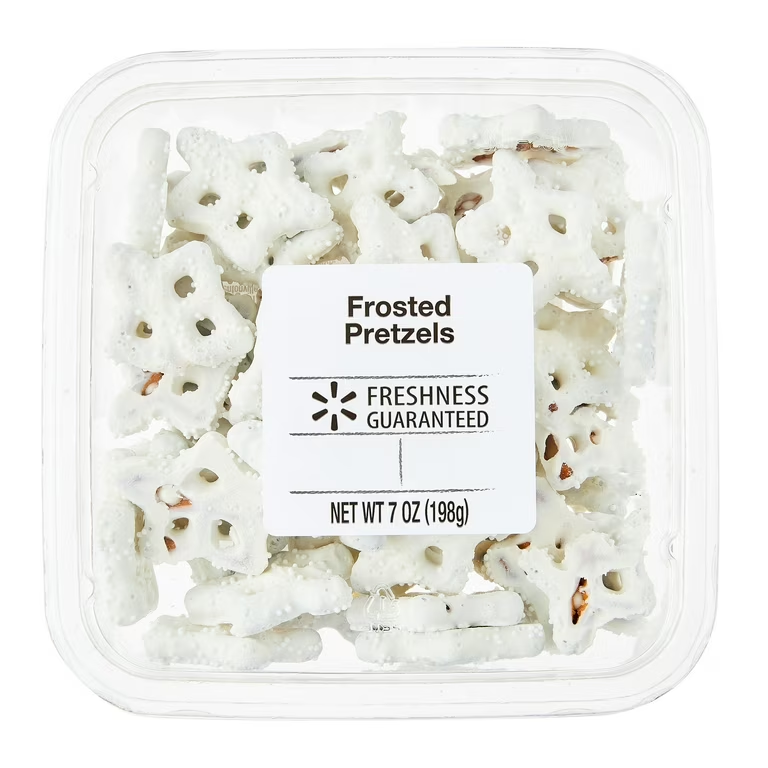
Time
- Prep Time: 5 minutes
- Cook Time: 1 minute
- Total Time: approximately 6 minutes
Needed Equipment
- Microwave-safe glass measuring cup (2-cup capacity or larger)
- Silicone spatula or spoon for stirring
- Wire cooling rack or baking sheet lined with wax paper or parchment paper
- Small bowl (optional, for additional decoration)
- Sprinkles, edible glitter, or small candies (optional, for decoration)
- Serving platter or plate for presentation
Tags
Kid Friendly, Festive, Quick & Easy, No-Bake, Snack, Dessert, Holiday, Party Food

Serving Size
Approximately 24 pretzels, with each piece serving as an individual snack or dessert portion.
Difficulty Level
Easy — suitable for beginners and experienced cooks alike due to minimal steps and simple ingredients.
Allergen Information
This recipe contains gluten (pretzels) and dairy (frosting). Cross-contact with nuts or other allergens depends on the frosting type used. Always check ingredient labels if preparing for allergy-sensitive individuals.
Dietary Preference
Suitable for vegetarians. Not suitable for vegans unless vegan-friendly frosting is used. Can be adapted for gluten-free diets if gluten-free pretzels and frosting are selected.
Course
Snack, Dessert, Party Treat
Cuisine
American
Ingredients
| Ingredient | Quantity | Notes |
|---|---|---|
| Pretzels | 24 pieces | Standard pretzel twists or rods |
| Frosting | 1 cup (about 250 grams) | Choose your favorite flavor—vanilla, chocolate, cream cheese, or colored frosting for festive occasions |
| Optional Decorations | As desired | Colored sugar, sprinkles, edible glitter, small candies, or chopped nuts |
Instructions
Step 1: Prepare the Frosting
Begin by placing the frosting in a microwave-safe glass measuring cup or bowl. Ensure that the container has at least 2 cups capacity to allow for easy stirring and melting. Microwave the frosting on high power for 30 to 45 seconds. During this process, stop the microwave at the halfway mark and stir the frosting thoroughly with a silicone spatula or spoon. This step ensures that the frosting melts evenly and achieves a smooth consistency without overheating, which could cause separation or burning. Once melted, check the consistency; it should be creamy, smooth, and free of lumps. If necessary, microwave for an additional 10-15 seconds and stir again until just melted. Be cautious not to overheat, as frosting can become too runny or harden unevenly.
Step 2: Dip and Coat the Pretzels
Arrange the pretzels on a clean surface or a tray lined with wax paper or parchment paper to prevent sticking. Using a fork, skewer, or directly with a spoon, dip each pretzel halfway into the melted frosting. Allow any excess frosting to drip back into the measuring cup or bowl to avoid pooling. For even coverage, gently shake or tap the pretzel to remove extra frosting. If you prefer a more decorative look, you can also drizzle the frosting over the pretzels using a piping bag or a small spoon. Be creative—try dipping the pretzels in different frosting flavors or layering frosting and decorations for a more vibrant presentation.
Step 3: Set and Dry
Carefully transfer the frosted pretzels onto the prepared wax paper or parchment-lined tray. Space them out to prevent sticking and ensure even drying. If you’ve added decorations such as sprinkles or glitter, do so immediately after dipping, before the frosting begins to set. This allows the embellishments to adhere properly. Leave the pretzels at room temperature for approximately 2 hours or until the frosting hardens and becomes firm to the touch. For faster setting, you can place the tray in the refrigerator for about 30 minutes, but avoid freezing, as this can affect the texture.
Step 4: Serve and Enjoy
Once the frosting has set, your Frosted Pretzels are ready to be served. Arrange them on a decorative platter or serving dish. These treats are best enjoyed the same day for optimal freshness and texture, but they can be stored for a day or two if kept in an airtight container at room temperature. Be mindful that the frosting may soften slightly over time, especially in warm or humid environments. For presentation purposes, consider adding additional decorations or serving on a festive platter that complements the occasion.
Preparation Tips
- Choose the right pretzels: Standard twisted pretzels work well, but you can also use pretzel rods or mini pretzels for bite-sized treats.
- Frosting consistency: If the frosting is too thick to dip, microwave briefly and stir until smooth. If too runny, add a small amount of powdered sugar or chill briefly to thicken.
- Colorful decorations: Use food coloring in your frosting to create vibrant, themed treats for holidays like Christmas, Halloween, or birthdays.
- Flavor variations: Mix in extracts such as vanilla, peppermint, or almond into the frosting for added flavor depth.
Nutritional Information
| Nutrient | Per Serving (Approximate) |
|---|---|
| Calories | approximately 50-70 kcal |
| Fat | about 2-3 grams |
| Saturated Fat | 1 gram |
| Cholesterol | 0 mg |
| Sodium | around 150-200 mg |
| Carbohydrates | 10-12 grams |
| Sugar | around 4-6 grams |
| Protein | 1-2 grams |
| Fiber | less than 1 gram |
Tips and Tricks
- Temperature control: Melt the frosting carefully in the microwave to prevent scorching or separation. Use short bursts and stir in between.
- Decorative options: Before the frosting sets, add colorful sprinkles, edible glitter, or small candies to make the treats more festive and appealing.
- Layering flavors: Experiment with frosting blends—try peanut butter frosting, cream cheese with fruit flavoring, or even tinted marshmallow fluff for fun variations.
- Uniform dipping: For consistent presentation, use a dipping fork or skewer to handle each pretzel evenly.
- Storage tips: Keep in an airtight container at room temperature for up to 2 days. For longer storage, refrigerate, but note that frosting may become slightly softer.
Add-ons
- Chocolate drizzle: Melt some chocolate and drizzle over the frosted pretzels for a decadent finish.
- Fruit accents: Add small pieces of dried fruit or fresh berries for a flavor contrast.
- Nut toppings: Chopped pecans, walnuts, or almonds can add crunch and richness.
- Color themes: Use food coloring in frosting for holiday or event-specific themes, such as red and green for Christmas or orange and black for Halloween.
Side Dishes
Pair your Frosted Pretzels with complementary treats to create a delightful snack platter. Consider serving alongside:
- Fresh fruit slices (strawberries, apple slices, or grapes)
- Mini cheese and cracker platters
- Other sweet snacks like cookies or brownies
- Hot beverages such as hot chocolate, coffee, or tea
Improvements
- Use flavored or colored frosting for themed variations to make the treats more visually appealing.
- Add a layer of cream cheese or flavored filling between pretzel layers for a stuffed version.
- Incorporate chopped nuts or crushed candies into the frosting before dipping for added texture.
- Experiment with different types of pretzels—such as gluten-free or flavored pretzels—for dietary adaptations.
- Use a piping bag to create decorative frosting designs or borders for an elegant presentation.
Save and Store
To preserve your Frosted Pretzels:
- Allow the frosting to fully set at room temperature or in the refrigerator before storing.
- Place the pretzels in an airtight container, layering with parchment or wax paper to prevent sticking.
- Store at room temperature for up to 2 days for optimal freshness. Refrigeration can extend shelf life but may soften the frosting.
- For longer storage, freeze the pretzels with the frosting intact—just ensure they are well wrapped to prevent freezer burn. Thaw at room temperature before serving.
FAQ
Can I use store-bought frosting?
Absolutely. Store-bought frosting is perfect for this recipe due to its convenience and variety. For a homemade touch, you can prepare your own frosting from scratch, such as cream cheese frosting or royal icing, which can add a different texture and flavor profile.
Can I make this recipe vegan?
Yes. Use vegan pretzels and substitute traditional frosting with vegan-friendly options, such as coconut-based or cashew-based frosting. Vegan frosting recipes can be found online and often involve blending coconut cream with powdered sugar or vegan butter.
What variations can I try?
Get creative with flavors and decorations! Think about adding cocoa powder to the frosting for a chocolate version, or tinting the frosting with food coloring for themed treats. You can also dip pretzels in melted chocolate or caramel before frosting for extra decadence.
Is there a way to make these pretzels healthier?
Opt for whole-grain or gluten-free pretzels and use a lighter frosting, such as Greek yogurt-based frosting or fruit purees mixed with a small amount of sweetener. These modifications make the snack more nutritious while still delicious.
Conclusion
Frosted Pretzels are a delightful blend of salty and sweet, offering a playful yet elegant treat suitable for all ages. Their quick preparation and endless customization options make them a favorite for spontaneous gatherings, holiday celebrations, or just a cozy night in. Thanks for exploring this recipe with Love with Recipes; we hope it inspires you to get creative in the kitchen, sharing joy and deliciousness with those around you. Remember, the key to a perfect batch lies in quality ingredients, careful melting, and a touch of your personal flair. Happy baking and snacking!
References
- “The Art of Cookie Decorating,” by Elissa Strauss, 2014.
- “Sweet & Simple: 100 Easy Recipes for Every Occasion,” by Love with Recipes Editors, 2022.