
Introduction
Indulge in a delightful fusion of flaky, buttery puff pastry and the sweet, tropical flavor of ripe bananas with this Banana Purse in Puff Pastry recipe. This dish is an excellent choice for those seeking a quick, satisfying snack or a charming dessert that appeals to both kids and adults alike. The combination of caramelized bananas, a hint of cinnamon, and a glossy, golden exterior creates a sensory experience that is both comforting and exciting. Inspired by the creativity showcased on FoodTV’s Semi-Homemade Cooking show, this recipe showcases how simple ingredients can be transformed into an elegant, handheld treat perfect for any occasion. Whether served warm or at room temperature, these banana purses are guaranteed to impress and satisfy every palate.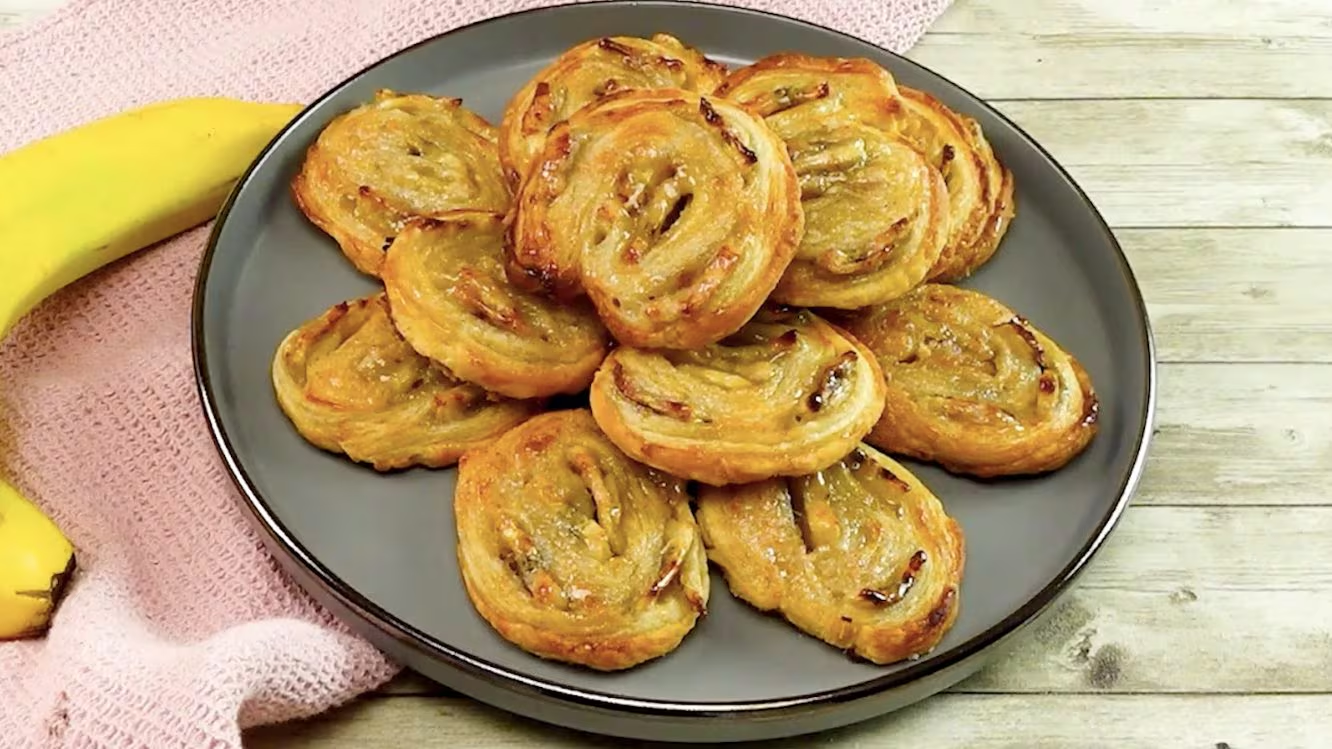
Time
- Prep Time: 5 minutes
- Cook Time: 15 minutes
- Total Time: 20 minutes
Needed Equipment
- Baking sheet or cookie sheet
- Rolling pin
- Sharp knife or pastry cutter
- Pastry brush
- Mixing bowls
- Measuring cups and spoons
- Silicone spatula or wooden spoon
- Cooling rack
- Parchment paper or silicone baking mat
Tags
- Dessert
- Snack
- Quick & Easy
- Kid-Friendly
- Fruit-based
- Finger Food
Serving Size
This recipe yields approximately 12 banana purses, serving 12 individuals as a snack or dessert portion.
Difficulty Level
Easy — suitable for beginner bakers and those with minimal pastry experience, thanks to straightforward steps and readily available ingredients.
Allergen Information
- Contains gluten (puff pastry)
- Contains dairy (milk for glazing)
- Contains bananas (fruit allergen)
Dietary Preference
- Vegetarian
- Vegan: Not suitable unless using vegan puff pastry and plant-based milk for glazing
- Gluten-Free: Not suitable unless using gluten-free puff pastry
Course
Sweet Snack, Dessert, Appetizer
Cuisine
Global (Inspired by American semi-homemade style)
Ingredients
| Ingredient | Quantity | Notes |
|---|---|---|
| Bananas | 3 ripe bananas | Medium-sized, peeled and sliced |
| Maple syrup | 1/4 cup (60 ml) | Natural sweetener for banana mixture |
| Frozen puff pastry | 1 sheet | Thawed before use |
| Granulated sugar | 1 tablespoon | For sprinkling on pastries |
| Ground cinnamon | 1 teaspoon | Mixed with sugar for topping |
| Milk | 1 tablespoon | For brushing pastries (can substitute with plant-based milk) |
Instructions
1. Preheat the Oven
Begin by setting your oven to 400°F (200°C). Proper preheating ensures that the puff pastry bakes evenly and develops that desirable golden, flaky crust. Position the oven rack in the center of the oven to promote uniform heat distribution. Line a baking sheet with parchment paper or a silicone baking mat to prevent sticking and facilitate easy cleanup.
2. Prepare the Banana Mixture
Peel the bananas and slice them into thin rounds or small chunks, depending on your preferred texture. In a mixing bowl, combine the sliced bananas with the maple syrup. Using a fork or a potato masher, gently mash the bananas while mixing to create a luscious, slightly chunky puree. The maple syrup will caramelize slightly during baking, adding a rich sweetness that harmonizes with the natural flavor of the bananas.
3. Prepare the Puff Pastry
Remove the sheet of frozen puff pastry from the freezer and allow it to thaw at room temperature for approximately 10-15 minutes. Thawing is crucial to make the pastry pliable and easy to cut without cracking. Once thawed, lay the puff pastry sheet flat on a clean, lightly floured surface.
4. Roll Out and Cut the Pastry
Use a rolling pin to gently roll out the puff pastry into a rectangle approximately 15 inches long and 5 inches wide. This size provides enough surface area for filling and folding without overextending the dough. With a sharp knife or pastry cutter, cut the rectangle crosswise into three equal strips, each measuring about 5 inches wide. Then, cut each strip into two equal squares, resulting in 6 squares per sheet. If desired, you can repeat the process with a second sheet if making larger batches.
5. Assemble the Banana Purses
Place each pastry square on your prepared work surface. Using a spoon or small scoop, distribute about a tablespoon of the banana mixture onto the center of each square. For an attractive presentation, add a few banana slices on top of the mixture. Be careful not to overfill, as this can make sealing difficult and cause the filling to leak during baking.
6. Shape and Seal the Pastries
Fold each corner of the pastry square toward the center, overlapping slightly. Pinch the ends together, creating a purse-like shape. For added security, twist or pinch the sealed edges to ensure the filling remains enclosed during baking. You can also gently press the seams with a fork for a decorative touch and extra sealing. Repeat this process with all remaining squares and filling.
7. Arrange and Glaze the Pastries
Carefully transfer the assembled purses to the prepared baking sheet, spacing them about 1-2 inches apart. Using a pastry brush, lightly coat each pastry with milk to give the finished product a glossy appearance. In a small bowl, combine the granulated sugar and ground cinnamon. Sprinkle this mixture evenly over the glazed pastries to enhance their sweetness and add a warm, aromatic flavor.
8. Bake to Perfection
Place the baking sheet in the preheated oven and bake for approximately 15 minutes. Keep an eye on the pastries to prevent over-browning; they should turn a beautiful golden brown with crisp, flaky layers. The sugar and cinnamon topping will caramelize, creating a delightful aroma and a slightly crunchy exterior.
9. Cooling and Serving
Once baked, remove the pastries from the oven and transfer them to a cooling rack. Allow them to cool for about 5 minutes before serving. While they are delicious warm, these banana purses also taste fantastic at room temperature, making them ideal for packed lunches or picnics. Serve on a platter or individual plates, optionally garnished with a dusting of powdered sugar or a drizzle of chocolate sauce for added decadence.
Preparation Tips
- Banana Ripeness: Use ripe bananas with brown spots for maximum sweetness and flavor. The softer texture will blend more easily with the maple syrup.
- Filling Variations: Feel free to add chopped nuts, shredded coconut, or even a small spoonful of Nutella inside the purse before sealing for extra flavor.
- Sealing Technique: Ensure the edges are pinched tightly to prevent filling leakage during baking. Using a fork to crimp the edges adds a decorative touch and secures the seal.
- Pastry Handling: Keep the puff pastry chilled until ready to use to maintain its flakiness. Do not overwork the dough to prevent it from becoming tough.
- Sweetness Adjustment: Adjust the amount of maple syrup to suit your taste. For a less sweet version, reduce the syrup or skip it altogether.
Nutritional Information
| Nutrient | Per Serving (Approximate) |
|---|---|
| Calories | 275.1 kcal |
| Fat | 15.8 g |
| Saturated Fat | 4 g |
| Cholesterol | 0.4 mg |
| Sodium | 104 mg |
| Carbohydrates | 31 g |
| Fiber | 1.5 g |
| Sugar | 9 g |
| Protein | 3.4 g |
Tips and Tricks
- Use Fresh Bananas: Ripe but firm bananas yield the best flavor and texture. Overripe bananas can become too mushy and might leak during baking.
- Chill Before Baking: For best results, refrigerate the assembled purses for 10 minutes before baking. This helps the seal set and prevents the filling from spilling out.
- Flavor Enhancements: Add a splash of vanilla extract to the banana mixture or sprinkle a little nutmeg for a different aromatic profile.
- Presentation: For a more refined look, cut decorative shapes from leftover puff pastry scraps and place them atop the purses before baking.
Add-ons
- Chopped nuts (walnuts, pecans, or almonds)
- Chocolate chips or drizzle
- Shredded coconut
- Powdered sugar dusting
- Caramel or chocolate sauce for drizzling
Side Dishes
- Vanilla ice cream or whipped cream
- Fresh fruit salad
- Yogurt parfaits
- Cheese platter with fresh berries
Improvements
- Use puff pastry from high-quality brands or homemade for enhanced flavor and texture.
- Experiment with different fillings such as apple compote, berries, or cream cheese for variety.
- Add a hint of citrus zest (lemon or orange) to the banana mixture to brighten flavors.
- Incorporate a small splash of rum or liqueur into the filling for a boozy twist.
Save and Store
Unbaked purses can be assembled in advance and stored covered in the refrigerator for up to 24 hours. When ready to bake, allow them to come to room temperature for about 10 minutes before proceeding. Baked leftovers can be stored in an airtight container at room temperature for up to 2 days or refrigerated for up to 3 days. Reheat in a 350°F (175°C) oven for 5-7 minutes to restore crispness.
FAQ
Can I make these ahead of time?
Yes, you can assemble the purses a day in advance and keep them refrigerated. Bake just before serving for optimal freshness.
Can I freeze the banana purses?
Unbaked purses freeze well for up to 2 months. Wrap them tightly in plastic wrap and store in a freezer-safe container. Thaw at room temperature before baking.
Can I use fresh or dried fruit instead of bananas?
Yes. For dried fruits, soak them in warm water or a liqueur to rehydrate before filling. Adjust sweetness accordingly.
Is there a gluten-free alternative?
Use gluten-free puff pastry or homemade dough to accommodate gluten sensitivities.
Conclusion
Love With Recipes proudly presents this Banana Purse in Puff Pastry recipe as a versatile, crowd-pleasing treat that combines simplicity with indulgence. Its quick preparation and delightful flavor profile make it an ideal choice for busy weekdays, special gatherings, or spontaneous sweet cravings. The crispy exterior paired with the tender, caramelized banana filling creates a perfect harmony of textures and flavors, ensuring every bite is memorable. Whether served as a warm dessert or a portable snack, these purses are bound to become a favorite in your culinary repertoire. Experiment with variations, toppings, and presentation styles to make this dish uniquely yours, and enjoy the process of creating something both beautiful and delicious. Remember, all recipes published on Love With Recipes are crafted with love, aiming to bring joy and flavor into your kitchen.
References
- FoodTV Semi-Homemade Cooking Show Segment, 2020
- Joy of Baking: Puff Pastry Techniques, 2019