Introduction
In the rich tapestry of Sindhi cuisine, Sai Bhaji stands out as a quintessential dish that embodies health, tradition, and vibrant flavors. This wholesome, one-pot meal combines an array of fresh greens—spinach, fenugreek, and dill—with a medley of vegetables, lentils, and aromatic spices, creating a symphony of textures and tastes that are both nourishing and satisfying. As a beloved staple across Sindhi households, Sai Bhaji is more than just a meal; it’s a cultural emblem, symbolizing community, heritage, and the art of culinary simplicity with depth.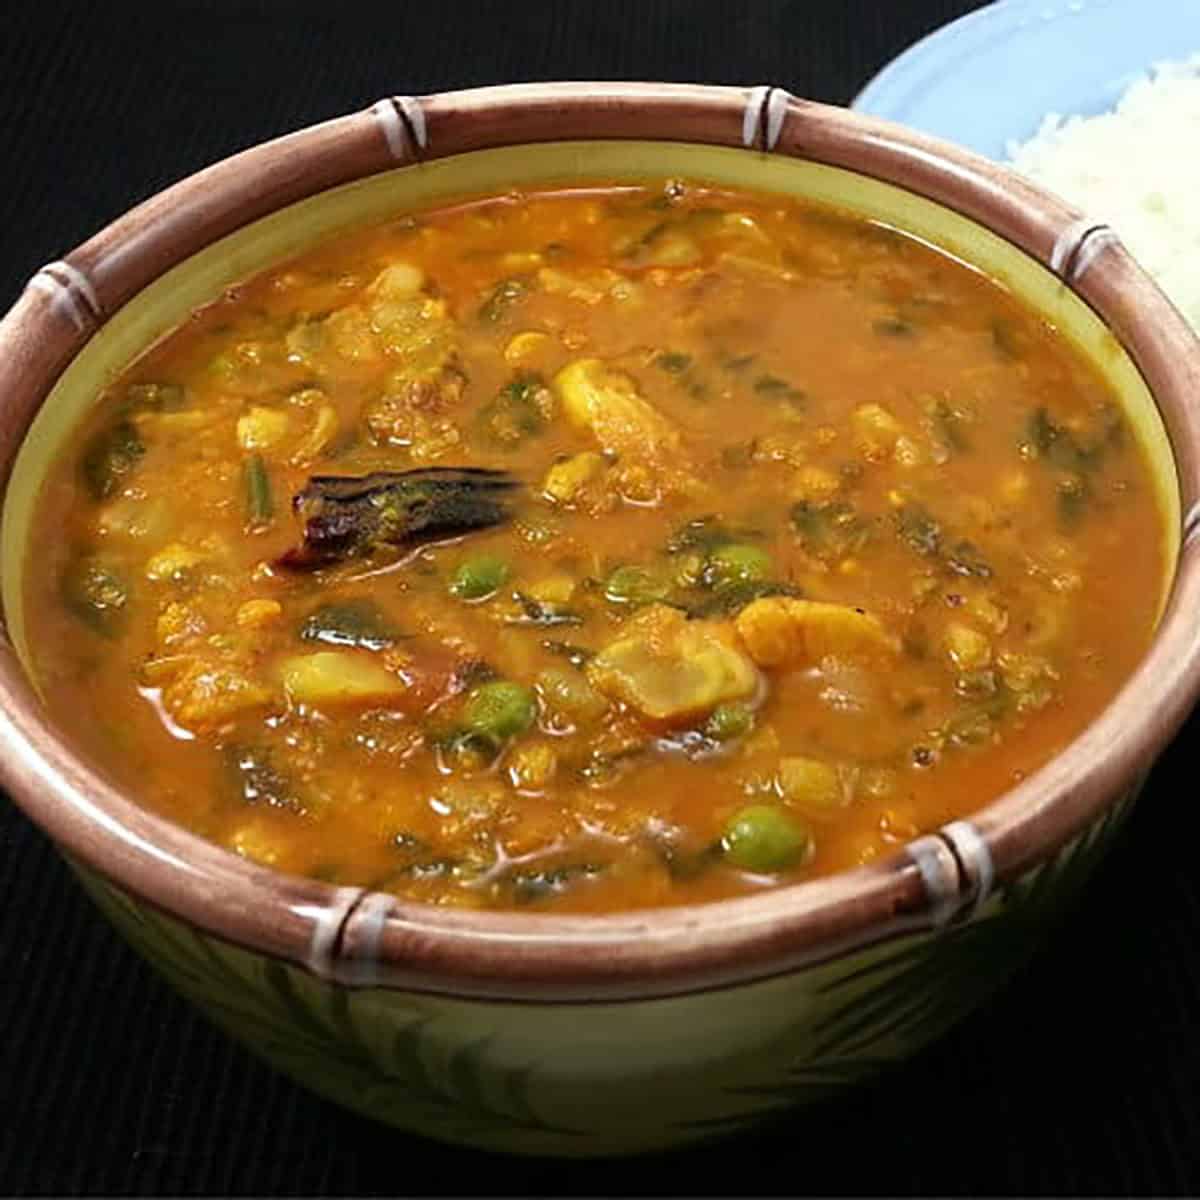
This recipe, featured on Love With Recipes, aims to guide you through the process of crafting an authentic Sindhi Sai Bhaji, emphasizing not only its delicious flavor profile but also its nutritional benefits. Whether you are aiming for a wholesome vegetarian dish, seeking a diabetic-friendly option, or simply desiring a comforting, hearty meal, Sai Bhaji offers versatility and healthfulness. Its preparation involves readily available ingredients, straightforward techniques, and the potential for customization, making it an ideal choice for both novice cooks and seasoned chefs alike.
Time
Preparation Time: 25 minutes
Cooking Time: 20 minutes
Total Time: Approximately 45 minutes
Needed Equipment
Essential Cooking Tools
- Pressure Cooker: To efficiently cook lentils and vegetables, ensuring they are tender and flavors meld together.
- Chopping Board and Sharp Knives: For preparing vegetables, greens, and aromatics.
- Measuring Cups and Spoons: For precise measurement of ingredients, essential for consistency and flavor balance.
- Mixing Bowls: To hold chopped ingredients before cooking.
- Frying Pan or Tadka Pan: Small skillet for tempering spices and garlic, adding depth to the dish.
- Masher or Potato Masher: To mash the cooked mixture to desired consistency.
- Wooden Spoon or Spatula: For stirring and mixing ingredients during cooking.
- Measuring Scale (Optional): For precise weighing of ingredients like lentils and vegetables.
- Kitchen Tongs: For handling hot ingredients and stirring greens.
Tags
- Sindhi Cuisine
- Vegetarian
- Healthy
- One-Pot Meal
- Gluten-Free
- High Fiber
- Traditional
- Family Recipe
Serving Size
Serves approximately 4 to 6 people, depending on portion size. Ideal for family dinners or small gatherings, offering a hearty and balanced meal that can be complemented with traditional sides.
Difficulty Level
Moderate. While the recipe involves multiple steps—preparing greens, lentils, vegetables, and tempering—the process is straightforward. Attention to timing and seasoning will ensure perfect results.
Allergen Information
- Ghee: Contains dairy; suitable for those with dairy allergies if replaced with plant-based oils.
- Legumes: Chana dal and green moong dal may cause allergies in sensitive individuals.
- Garlic and Spices: Common allergens for some, but generally safe for most.
Dietary Preference
Vegetarian, vegan (if ghee is substituted with plant-based oil), and suitable for diabetic-friendly diets due to its high fiber content and low glycemic index ingredients.
Course
Main Course
Cuisine
Sindhi
Ingredients
| Ingredient | Quantity |
|---|---|
| Spinach (finely chopped) | 1 cup |
| Fenugreek (finely chopped) | 1 cup |
| Dill leaves (finely chopped) | 1/2 cup |
| Chana dal (washed and soaked) | 1/4 cup |
| Green moong dal (washed and soaked) | 1/4 cup |
| Carrots (finely chopped) | 1/2 cup |
| Green beans (finely chopped) | 1/2 cup |
| Brinjal (finely chopped) | 1/2 cup |
| Bottle gourd (finely chopped) | 1/2 cup |
| Onion (finely chopped) | 2 medium |
| Tomato (finely chopped) | 1 medium |
| Raw mango (optional, finely chopped) | 1 small |
| Ginger (finely chopped) | 1-inch piece |
| Green chilies (finely chopped) | 2 medium |
| Ghee | 1 tablespoon |
| Salt | To taste |
| Turmeric powder | 1 teaspoon |
| Coriander powder | 1 tablespoon |
For Tempering:
| Ingredient | Quantity |
|---|---|
| Garlic (finely chopped) | 4 cloves |
| Red chili powder | 1 tablespoon |
| Ghee | 1 tablespoon |
Instructions
Step 1: Preparing the Lentils
Start by meticulously washing the chana dal and green moong dal under cold running water. Use your fingers or a fine-mesh sieve to ensure all impurities are rinsed away. After washing, soak both lentils in a bowl of water for approximately 30 minutes. This step is crucial as it softens the lentils, reducing cooking time and enhancing their digestibility. Soaking also helps the lentils absorb water, leading to a more uniform cooking process.
Step 2: Preparing the Vegetables and Greens
While the lentils are soaking, move on to preparing the vegetables. Rinse each vegetable thoroughly under cold water to remove dirt, pesticides, or residues. Use a sharp knife and a clean chopping board to chop the spinach, fenugreek, dill, carrots, green beans, brinjal, bottle gourd, onions, and tomatoes into small, bite-sized pieces. Consistency in chopping size ensures even cooking and helps in blending flavors seamlessly later. Place each chopped vegetable in separate bowls or on a large tray for easy access during cooking.
Step 3: Initial Cooking in the Pressure Cooker
Once the preparations are complete, heat your pressure cooker over medium heat. Add 1 tablespoon of ghee to the cooker and let it melt. Ghee imparts a rich, nutty flavor and helps in sautéing the aromatics. When the ghee is hot, add the finely chopped onions. Stir continuously and cook until the onions turn translucent, about 4-5 minutes. This slow sweating releases natural sugars, creating a sweet base for the dish. Be attentive not to burn the onions; adjust the heat if necessary.
Step 4: Aromatics and Flavor Building
Add the finely chopped ginger and green chilies to the cooked onions. Sauté for about 30 seconds, allowing the fragrant oils to release. This step infuses the base with warmth and spiciness. The ginger provides a zesty aroma, while the chilies add heat—adjust the number of chilies based on your spice tolerance. Stir well to incorporate these aromatics into the onion mixture.
Step 5: Adding Vegetables and Spices
Introduce the chopped carrots, green beans, brinjal, bottle gourd, and tomato into the pressure cooker. Stir vigorously to combine everything evenly. Cook for 2-3 minutes, allowing the vegetables to soften slightly and release their juices. This step helps in developing depth of flavor and ensures the vegetables are partially cooked before the lentils are added.
Add the soaked chana dal and green moong dal to the mixture. Sprinkle in the coriander powder, turmeric powder, and salt. Mix thoroughly, coating all ingredients with the spices. Cook for another minute, allowing the spices to toast slightly and integrate with the vegetables. This process enhances the aroma and flavor profile of the final dish.
Step 6: Incorporating the Greens
Add the finely chopped spinach, fenugreek, and dill leaves into the cooker. Stir to combine, ensuring the greens are evenly distributed. These greens are the heart of Sai Bhaji, providing not only flavor but also vital nutrients. Cook for another minute to wilt the greens, allowing their flavors to infuse throughout the mixture.
Step 7: Pressure Cooking
Pour in 2 cups of water into the pressure cooker. Secure the lid tightly and cook on medium heat. Allow the cooker to operate for 4-5 whistles. This high-pressure environment ensures thorough cooking of lentils and vegetables, breaking down fibers and melding flavors beautifully. The cooking time is critical—overcooking can lead to mushiness, while undercooking may result in crunchiness.
Once the whistles are complete, turn off the heat and let the pressure release naturally. This gradual depressurization preserves the integrity of the ingredients and prevents spattering or breaking apart of delicate greens.
Step 8: Mashing and Texture Control
Carefully open the lid once pressure has dissipated. Use a sturdy masher or potato masher to mash the mixture to your preferred consistency. You can mash it completely for a smooth, spoonable texture or leave it slightly chunky to retain some bite. Mashing helps integrate all flavors and creates a cohesive dish, perfect for serving with traditional sides.
Step 9: Preparing the Tempering (Tadka)
In a small frying pan, heat 1 tablespoon of ghee over medium heat. Once hot, add the finely chopped garlic cloves. Sauté until the garlic turns light brown and releases a fragrant aroma, approximately 2-3 minutes. Be attentive to avoid burning, as burnt garlic can impart bitterness.
Immediately add the red chili powder to the garlic-ghee mixture. Cook for 10 seconds, stirring continuously to prevent burning. The chili powder will release its vibrant color and flavor, which is essential for the final burst of spiciness and aroma.
Step 10: Final Assembly and Serving
Pour the hot tempering over the mashed Sai Bhaji. Mix thoroughly so that the garlic and chili flavors permeate the entire dish. The ghee will add a rich, glossy finish, enhancing both the flavor and appearance of the dish.
Serve hot, accompanied by traditional Sindhi sides such as Bhuga Rice, Sindhi Koki, and Lauki Raita. The combination offers a balanced, flavorful, and nutritious meal that truly showcases the essence of Sindhi culinary tradition.
Preparation Tips
- Greens Freshness: Always use fresh greens for maximum flavor and nutrient retention. If fresh greens are unavailable, frozen greens can be used, but adjust cooking time accordingly.
- Adjusting Spices: The recipe balances mild heat with aromatic spices. Feel free to increase or decrease the chili powder based on your heat preference.
- Consistent Chopping: Uniform chopping ensures even cooking and better texture in the final dish.
- Soaking Lentils: Proper soaking reduces cooking time and enhances digestibility; however, if short on time, you can rinse and cook directly, though it may take longer.
- Vegetable Variations: You can add or substitute other vegetables like radish, pumpkin, or turnip, depending on availability and preference, maintaining the balance of flavors.
Nutritional Information
| Nutrient | Per Serving (approximate) |
|---|---|
| Calories | 200 kcal |
| Protein | 8 g |
| Carbohydrates | 30 g |
| Dietary Fiber | 8 g |
| Fat | 6 g |
| Saturated Fat | 2 g |
| Sodium | 150 mg |
| Potassium | 600 mg |
| Vitamin A | 15% DV |
| Vitamin C | 20% DV |
| Calcium | 6% DV |
| Iron | 12% DV |
Tips and Tricks
- Layered Flavor: Toast spices like coriander powder briefly in the ghee before adding liquids to unlock more aroma.
- Vegetable Texture: For crunchier vegetables, add them later in the cooking process or sauté separately and fold into the mashed mixture.
- Herb Enhancements: Garnish with fresh coriander or a squeeze of lemon for added brightness.
- Cooking Consistency: Adjust water quantity for thicker or thinner bhaji, based on preference.
Add-ons
- Freshly chopped coriander leaves
- Squeezed lemon juice for tanginess
- Crumbled paneer or feta for added protein
- Chopped onions or green chilies as garnish
Side Dishes
- Bhuga Rice (spiced rice)
- Sindhi Koki (flatbread)
- Lauki Raita (bottle gourd yogurt)
- Pickles and chutneys for added flavor
Improvements
- Use organic greens and vegetables for enhanced flavor and nutrition.
- Add a splash of lemon juice or a dash of tamarind paste during cooking for a tangy twist.
- For a smoky flavor, char some vegetables before adding them to the pressure cooker.
- Experiment with different greens or add herbs like mint for variation.
Save and Store
Allow the Sai Bhaji to cool completely before transferring it to an airtight container. It can be stored in the refrigerator for up to 2 days. To reheat, gently warm on the stovetop or microwave, adding a splash of water or ghee to restore moisture. For longer storage, freeze in portions using freezer-safe containers for up to 3 months. Thaw and reheat thoroughly before serving.
FAQ
Can I make Sai Bhaji without pressure cooking?
Absolutely. You can cook the lentils and vegetables in a regular pot, but it will take approximately 30-40 minutes for the lentils to become tender. Use a covered pot and simmer on low heat, stirring occasionally to prevent sticking.
Can I replace ghee with other oils?
Yes, for a vegan or lower-fat version, substitute ghee with vegetable oil, coconut oil, or olive oil. Note that the flavor profile will change slightly, but the dish will remain delicious.
Is Sai Bhaji suitable for diabetics?
Yes, as it is high in fiber and low in refined carbs. Adjust the amount of salt and spice according to dietary needs, and monitor blood sugar levels accordingly.
Can I add protein to Sai Bhaji?
Yes, add cooked paneer, tofu, or boiled eggs to increase protein content, making it more filling and suitable for various dietary preferences.
Conclusion
Saiji Bhaji embodies the essence of Sindhi culinary artistry—simple, wholesome, and bursting with flavor. Its nourishing ingredients, aromatic spices, and comforting textures make it a perfect centerpiece for a balanced meal. Whether served as a main dish or part of a traditional Sindhi feast, Sai Bhaji offers an authentic taste of heritage that is both healthful and delightful. With its versatility, nutritional benefits, and rich cultural significance, this dish is sure to become a favorite in your household. Remember to explore different vegetables and herbs to tailor the dish to your palate, and enjoy the process of creating a true Sindhi culinary treasure. For more authentic recipes and culinary insights, stay tuned to Love With Recipes, your trusted platform for delicious, wholesome cooking!