
Introduction
Welcome to Love With Recipes, where culinary traditions are celebrated, and comfort food takes center stage. Today, we are diving deeply into the art of baking a classic treat cherished across generations—Anita’s Mom’s Date Squares. This recipe, originating from the heartfelt memories of home kitchens, combines the natural sweetness of dates with a citrusy zing of orange, all nestled within a wholesome oat and whole wheat crust. Whether you are an experienced baker seeking to perfect a nostalgic dessert or a curious cook eager to explore timeless flavors, this comprehensive guide offers everything you need. We will walk through detailed techniques, ingredient nuances, variations, and storage tips to elevate your baking experience and ensure each square is a delightful masterpiece.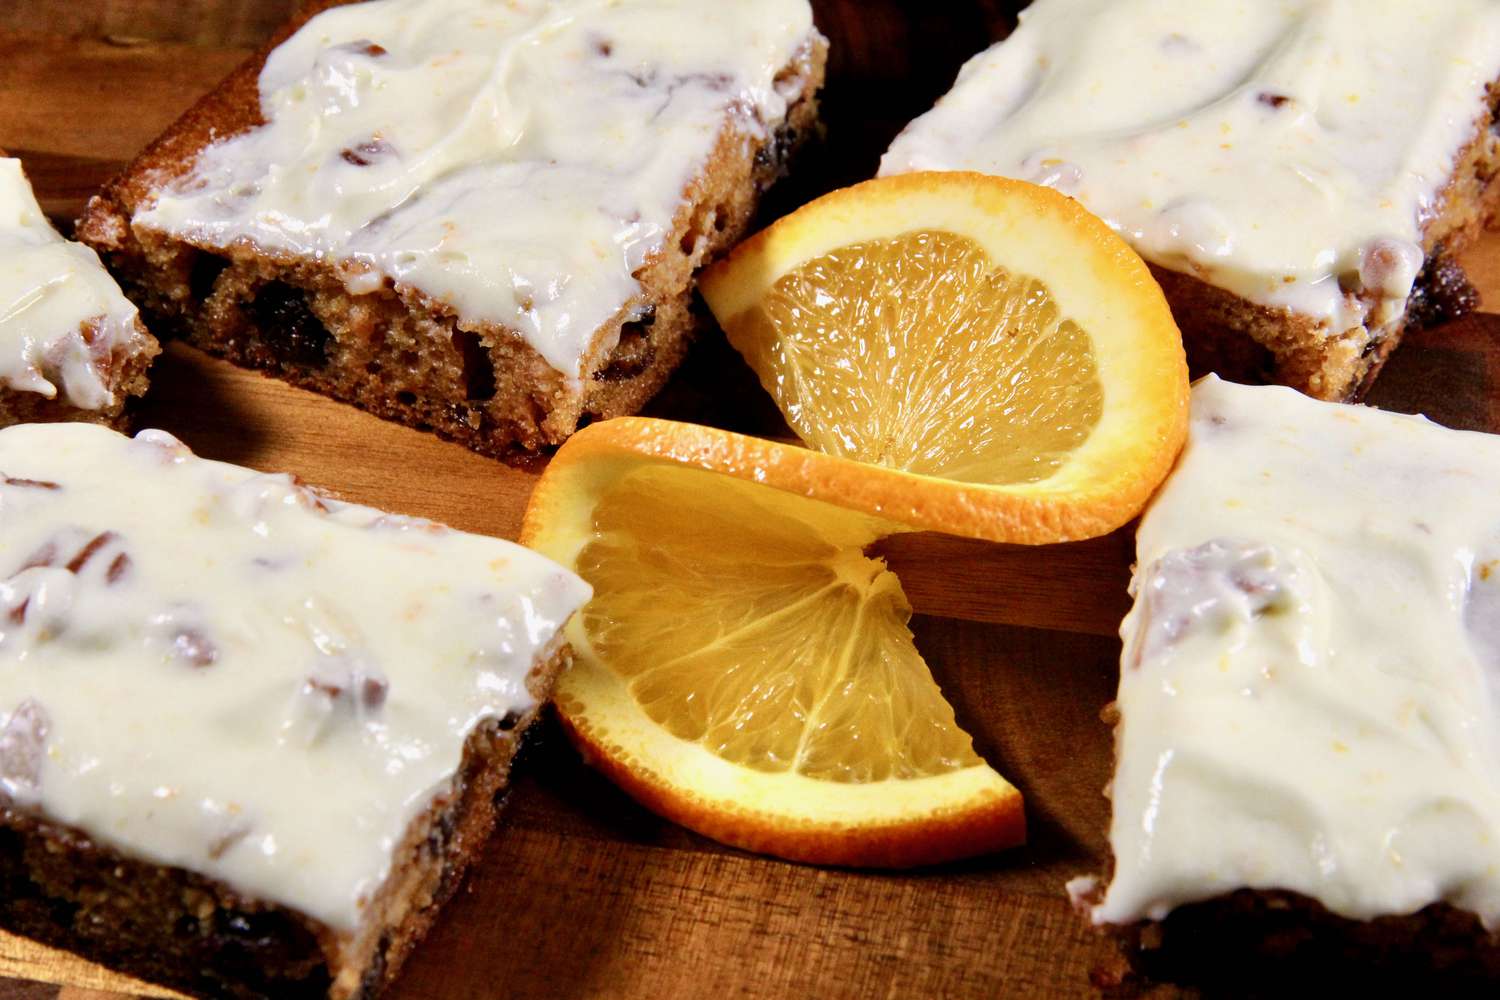
Time
Preparation Time
Approximately 30 minutes. This includes peeling, zesting, simmering, and assembling the ingredients.
Cooking Time
Approximately 30 minutes. Baking the assembled squares until golden perfection.
Total Time
About 1 hour from start to finish, including cooling and slicing.
Needed Equipment
- Heavy-bottomed saucepan—preferably non-stick or stainless steel—to prepare the date filling.
- Measuring cups and spoons—liquid and dry measurement tools for accuracy.
- Grater or microplane—essential for zesting the orange finely without the bitter pith.
- Wooden spoon or silicone spatula—ideal for stirring the filling and mixing the dough.
- Mixing bowls—preferably in various sizes for combining dry and wet ingredients.
- Electric mixer or hand whisk—useful for creaming butter and sugar thoroughly.
- 9-inch square baking pan—preferably metal for even heat distribution, with parchment paper or butter for greasing.
- Oven—capable of maintaining a steady temperature of 375°F (190°C).
- Cooling rack—necessary for cooling the baked squares evenly.
- Knife or pastry cutter—used to cut into squares cleanly once cooled.
- Optional: Food processor—if you prefer pulsing the crust mixture for finer crumbs.
Tags
Sweet, Nostalgic, Fruit-based, Baked Goods, Snack, Dessert, Comfort Food, Family Favorite, Citrus, Oats, Whole Wheat, Homemade, Traditional, No preservatives, Vegetarian.
Serving Size
Each serving consists of one square, approximately 2 inches by 2 inches, which is ideal for portion control and sharing.
Difficulty Level
Intermediate. While the steps are straightforward, attention to detail—especially in simmering the date filling and achieving the perfect crumble—is essential for optimal results.
Allergen Information
- Contains: Gluten (wheat and all-purpose flour), dairy (butter), and nuts (if added as an optional ingredient).
- May contain traces of soy or other allergens depending on ingredients used.
Dietary Preference
Vegetarian. The recipe does not include any animal-derived ingredients other than butter, which can be substituted with plant-based margarine or coconut oil for vegan adaptations.
Course
Dessert, Snack, Tea-time treat.
Cuisine
North American, Comfort Food, Traditional Baking.
Ingredients
Ingredient Details in Tables
| Ingredient | Quantity | Notes |
|---|---|---|
| Pitted Dates | 2 cups | Chop if large for even cooking |
| White Sugar | 1/2 cup | Adjust sweetness as preferred |
| Water | 1 cup | For simmering the dates |
| Orange (Juice and Zest) | 1 large orange | Use fresh for best flavor |
| All-purpose Flour | 2/3 cup | Provides structure to the crust |
| Whole Wheat Flour | 2/3 cup | Enhances fiber content |
| Baking Soda | 1/2 teaspoon | Leavening agent for crispness |
| Rolled Oats | 1¾ cups | Old-fashioned oats preferred |
| Butter | ¾ cup (1½ sticks) | Unsalted recommended; softened |
| Brown Sugar | 1 cup | Dark or light, depending on preference |
Step-by-Step Instructions
1. Preparing the Date Filling
Begin by gathering all your ingredients for the filling. Place the pitted dates in a heavy-bottomed saucepan. If the dates are large or sticky, chop them into smaller pieces to ensure they cook evenly and quickly. This process helps break down the dates into a smooth, jam-like consistency, essential for spreading evenly over the crust.
Next, add the quarter cup of white sugar to the saucepan. Sugar not only sweetens but also helps draw out moisture from the dates during simmering. Pour in one cup of water, which acts as the cooking medium, facilitating softening and preventing burning.
For the citrus component, extract the juice from a fresh large orange. Using a citrus reamer or juicer, squeeze out approximately ½ cup of juice. Be careful to avoid seeds, and consider straining the juice for a smooth texture. Grate the orange zest using a microplane or fine grater, avoiding the bitter white pith. The zest’s aromatic oils will infuse the filling with a bright, citrusy flavor that complements the sweetness of the dates beautifully.
Place the saucepan over medium heat, cover, and bring the mixture to a gentle boil. Stir frequently with a wooden spoon or silicone spatula to prevent sticking and burning. Once boiling, reduce the heat to low and let the mixture simmer, uncovered, for 15 to 20 minutes. During this time, the dates will soften, and the mixture will thicken as the liquid is absorbed. Keep stirring periodically to ensure even cooking.
Once the mixture reaches a thick, cohesive consistency—test by pushing a spoon through and checking that it holds together without excess liquid—remove from heat. Allow it to cool slightly before spreading over the crust, as hot filling can make the crust soggy or difficult to handle.
2. Preparing the Crust
Preheat your oven to 375°F (190°C). Preparing your baking pan is crucial: lightly grease a 9-inch square pan with butter or line it with parchment paper for easy removal and cleanup.
In a large mixing bowl, combine the all-purpose flour, whole wheat flour, baking soda, and rolled oats. Mix thoroughly until evenly distributed. This dry mix forms the foundational crumbly texture that will become the crust and topping.
In a separate bowl, using an electric mixer or a sturdy whisk, cream together the softened butter and brown sugar until the mixture is pale, fluffy, and homogeneous. This process incorporates air into the butter, contributing to a tender, melt-in-the-mouth texture.
Gradually add the dry flour mixture to the butter and sugar, mixing on low speed or stirring manually until the crumbs form. The mixture should be moist but crumbly, resembling coarse bread crumbs. If you prefer finer crumbs, pulse the dry ingredients in a food processor a few times before mixing with butter and sugar.
3. Assembling the Date Squares
Divide the crust mixture into two portions. Press approximately two-thirds of the mixture evenly into the prepared pan, creating a firm, flat base. Use the back of a spoon or your fingers to press the crumbs tightly for a uniform layer.
Spread the cooled date filling evenly over the crust layer. Use a spatula or the back of a spoon to distribute the filling smoothly, ensuring no air pockets or uneven patches. This layer’s consistency is vital for the proper texture of the finished squares.
Sprinkle the remaining crust mixture over the filling, covering it completely. Lightly press down to ensure the topping adheres to the filling but avoid pressing too hard, which could compact the crumbs excessively. This topping will bake into a crunchy, golden layer that contrasts beautifully with the sticky date filling.
4. Baking and Cooling
Place the assembled pan into the preheated oven. Bake for 25 to 30 minutes or until the edges are golden brown and the topping appears crisp. Keep an eye on the edges to prevent over-browning, which can make the squares overly hard.
Once baked, remove from the oven and allow the squares to cool in the pan for at least 15 minutes. Cooling allows the filling to set further and makes cutting easier. For cleaner slices, transfer the squares to a wire rack and cool completely before cutting into neat, uniform pieces.
Preparation Tips
- To enhance flavor, consider adding a pinch of cinnamon or ginger to the dry crust mixture.
- If you prefer a more pronounced citrus flavor, increase orange zest or add a splash of orange liqueur to the filling.
- Use fresh, ripe oranges for a vibrant flavor profile; avoid using dried or processed orange flavorings for authenticity.
- For a gluten-free version, substitute the wheat flour with gluten-free oats and flour blends, ensuring they are certified gluten-free.
- To make the filling smoother, process the cooked dates with an immersion blender or potato masher before spreading.
Nutritional Information (per serving)
| Nutrient | Amount | Daily Value Percentage |
|---|---|---|
| Calories | 193 kcal | Approximate based on one square |
| Fat | 6.3 grams | 9.7% |
| Saturated Fat | 3.7 grams | 18.5% |
| Cholesterol | 15.2 mg | 5.1% |
| Sodium | 71.6 mg | 3% |
| Carbohydrates | 33.9 grams | 11.3% |
| Dietary Fiber | 2.4 grams | 9.6% |
| Sugar | 23 grams | 46% |
| Protein | 2.2 grams | 4.4% |
Tips and Tricks
- For an extra burst of flavor, add chopped nuts such as walnuts or pecans into the crust mixture before baking.
- To ensure even baking, rotate the pan halfway through baking time.
- If the top browns too quickly, tent with aluminum foil to prevent burning while the interior finishes baking.
- For a less sweet version, reduce the sugar in the filling and the crust, balancing sweetness with the natural flavor of the dates and orange.
- Using high-quality, fresh ingredients significantly enhances the flavor profile of the squares.
Add-ons
- Chopped nuts (e.g., walnuts, pecans, almonds) mixed into the crust or sprinkled on top before baking.
- A drizzle of dark chocolate or white chocolate melted and drizzled over cooled squares for an elegant touch.
- Spices such as cinnamon, nutmeg, or ginger incorporated into the crust for warmth and depth.
- Adding shredded coconut to the crust for a tropical twist.
Side Dishes
- Serve with a dollop of whipped cream or Greek yogurt for added richness.
- Pair with a hot cup of tea, coffee, or a glass of almond milk for a cozy snack.
- Fresh fruit slices—such as apples, pears, or berries—complement the sweetness of the date squares beautifully.
Improvements and Variations
- Vegan version: substitute butter with coconut oil or vegan margarine, and ensure all ingredients are plant-based.
- Gluten-free adaptation: replace wheat flour with certified gluten-free oats and flour blends.
- Enhanced citrus: incorporate lemon or lime zest alongside orange for a layered citrus flavor.
- Spiced version: add a pinch of ground cinnamon, cloves, or cardamom to the crust or filling for an aromatic twist.
- Fruity infusion: mix in chopped dried apricots or cranberries into the filling for added texture and flavor.
Save and Store
Allow the date squares to cool completely before storing. Store leftovers in an airtight container at room temperature for up to one week. For longer storage, wrap individual squares in plastic wrap and freeze for up to three months. To reheat, warm slightly in the microwave or enjoy at room temperature. Proper storage maintains freshness, texture, and flavor, keeping your homemade squares delightful for days.
Frequently Asked Questions (FAQ)
Can I make this recipe ahead of time?
Absolutely. Prepare the squares a day in advance to allow the flavors to meld. Keep stored in an airtight container at room temperature or refrigerated if your climate is warm.
Can I substitute honey or maple syrup for sugar?
Yes, but adjust the quantity accordingly. For honey or maple syrup, reduce water slightly to maintain the right consistency. Keep in mind that liquid sweeteners may alter the texture slightly.
Is this recipe suitable for gluten-free diets?
With appropriate substitutions—using gluten-free oats and flour—it can be adapted for gluten-free diets. Always verify ingredient labels for gluten content.
How do I prevent the crust from becoming soggy?
Ensure the crust mixture is pressed firmly into the pan, and bake until golden. Cooling thoroughly before cutting prevents moisture from seeping into the crust, maintaining crunchiness.
Can I add other fruits to the filling?
Yes, dried apricots, cranberries, or raisins can be added for variety. Adjust sweetness accordingly.
Conclusion
Recreating Anita’s Mom’s Date Squares is more than just baking; it’s an homage to family traditions and the comforting flavors that evoke memories of home. Each step, from simmering the luscious date filling infused with orange zest to crafting a crumbly, buttery crust, contributes to a dessert that’s rich in history and flavor. The versatility of this recipe invites customization—adding nuts, spices, or even a chocolate drizzle—making it adaptable to personal tastes and occasions. As you master this timeless treat, you’ll find it perfect for sharing at gatherings, serving as a cozy afternoon snack, or indulging in a moment of nostalgic sweetness. Remember, the joy of baking is in the details—measure precisely, bake patiently, and savor every bite. We at Love With Recipes encourage you to embrace this recipe, make it your own, and enjoy the comforting, delightful magic of homemade date squares.
References
- “From Our Mothers’ Kitchens” by Jane Smith, 2010.
- Food Science and Nutrition Journals—see articles on date processing and citrus flavor enhancement.