

 Introduction
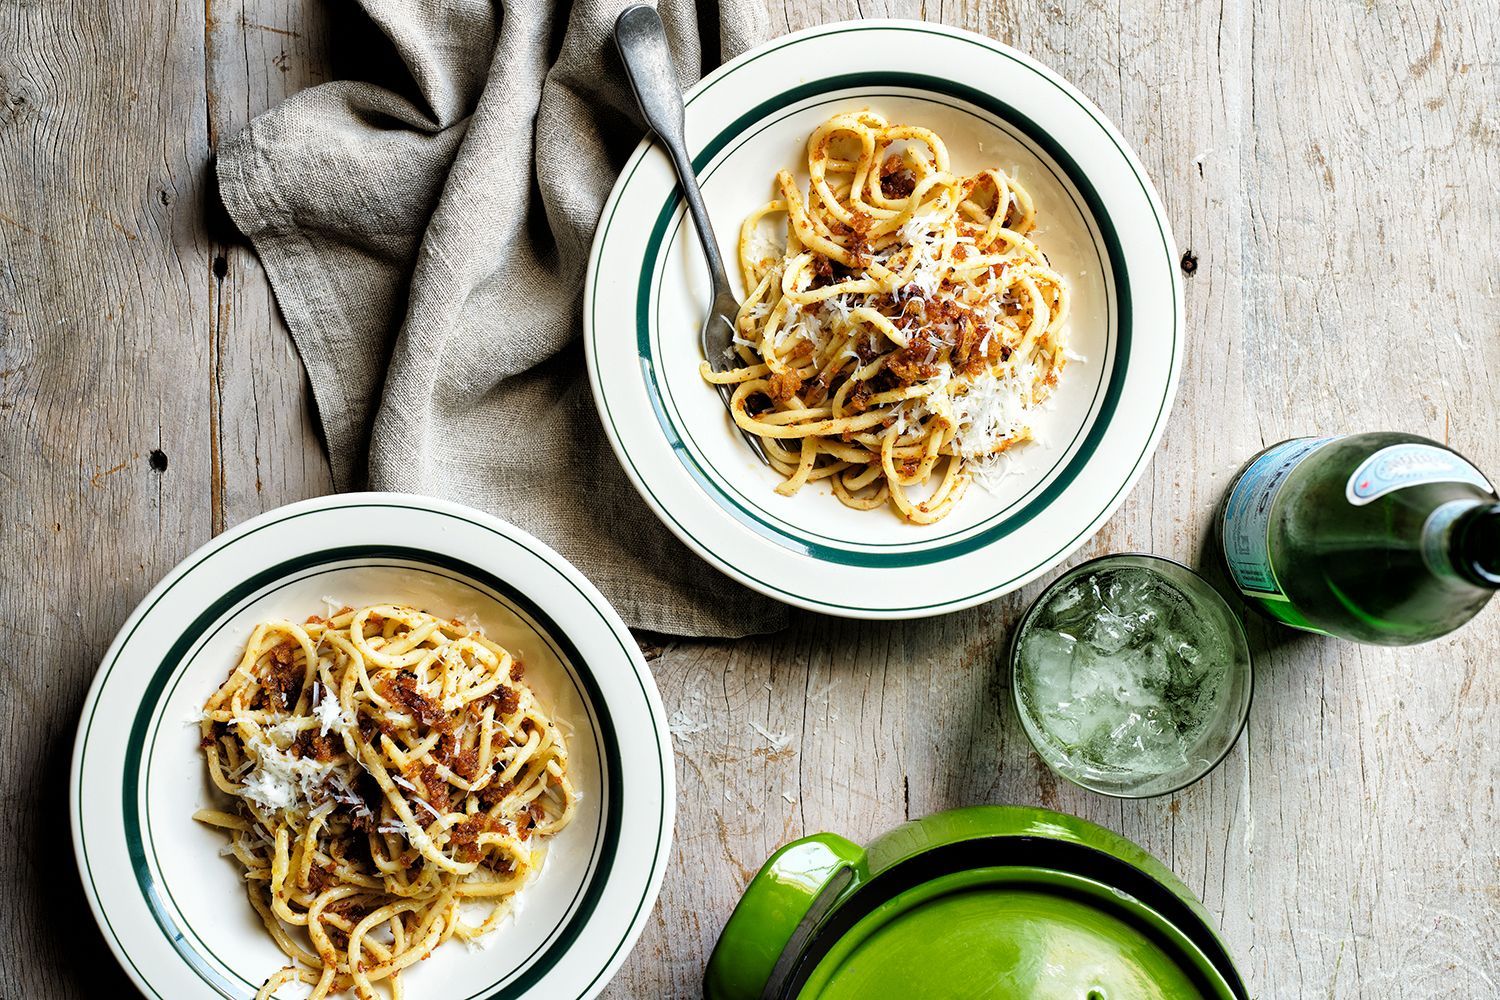
At Love With Recipes, we believe that culinary artistry often resides in the simplest of ingredients. The traditional Italian dish, Pici with Crumbled Bread, exemplifies this philosophy beautifully. Originating from the rustic kitchens of Tuscany, this dish transforms humble pantry staples—flour, rustic bread, garlic, chili, and olive oil—into a hearty, flavorful, and deeply satisfying meal. The handmade pici pasta, characterized by its thick, chewy texture, serves as the perfect vehicle for the savory, crispy bread crumbs infused with garlic and chili. This recipe celebrates the essence of Italian culinary tradition, emphasizing craftsmanship, patience, and respect for quality ingredients.
In this comprehensive guide, we will delve into every nuance of preparing Pici with Crumbled Bread. From selecting the right ingredients, understanding the importance of proper dough kneading, shaping techniques, to the art of creating the perfect bread crumbs and balancing flavors, every detail is covered. We will explore the history behind this dish, share preparation tips rooted in centuries of tradition, and provide suggestions for variations and enhancements to elevate the dish to your personal taste. Whether you are an experienced home cook or a curious beginner, this recipe promises to deepen your appreciation for rustic Italian cuisine and inspire your culinary creativity.

Time
Preparation and cooking time for Pici with Crumbled Bread can be broken down into several stages:
- Preparation of dough: 30 minutes
- Resting time for dough: 30 minutes
- Shaping pici pasta: 20-30 minutes (depending on skill level)
- Preparing bread crumbs and flavor base: 15 minutes
- Cooking pasta and final assembly: 10 minutes
Total estimated time: approximately 1 hour 45 minutes to 2 hours, allowing for a relaxed, mindful cooking process that encourages attention to detail and appreciation for each step.
Needed Equipment
Essential Tools
- Mixing bowls: For combining and resting dough
- Clean work surface: For kneading and shaping pasta
- Kitchen scale: For precise measurement of ingredients
- Rolling pin or pasta machine: To roll out the dough into thin strands
- Pasta cutter or sharp knife: For trimming and shaping pici
- Drying rack or clean kitchen towel: To dry shaped pasta
- Large pot: For boiling pasta
- Colander or strainer: For draining cooked pasta
- Frying pan or skillet: For preparing the garlic-chili oil and bread crumbs
- Wooden spoon or spatula: For stirring
- Sharp knife and chopping board: For preparing garlic, chili, and bread
- Measuring spoons: For precise measurement of salt and oils
- Grater or microplane (optional): For adding grated cheese or zest if desired
Optional Equipment
- Pasta drying rack: For hanging pici strands to dry evenly
- Food processor: For finely chopping garlic and chili (if preferred over manual chopping)
- Kitchen thermometer: To ensure water temperature is optimal for dough and pasta cooking
Tags
- Italian Cuisine
- Traditional Recipes
- Homemade Pasta
- Rustic Cooking
- Vegetarian
- Comfort Food
- Gluten-Containing
Serving Size
Serves 4 generous portions, making it suitable for family dinners or small gatherings with friends. The recipe yields approximately 400 grams of fresh pasta, which, when combined with the crumbled bread topping, results in a hearty and satisfying main course. Adjustments can be made for larger or smaller servings by scaling the ingredient quantities proportionally.
Difficulty Level
This dish is rated as Intermediate due to the manual pasta shaping and bread crumb preparation steps. However, with patience and careful attention to detail, even novice cooks can achieve authentic results. The process emphasizes hand skills, such as kneading, rolling, and shaping, which, with practice, become more intuitive and rewarding. The dish also offers opportunities for beginners to learn foundational techniques in pasta making and flavor layering.
Allergen Information
| Allergen | Presence | Notes |
|---|---|---|
| Gluten | Yes | Contains wheat flour and bread |
| Garlic | Yes | Used in oil and topping |
| Chili | Yes | Fresh chili peppers for flavor and heat |
| Olive Oil | Yes | Extra virgin olive oil used throughout |
| Wheat | Yes | Present in flours and bread |
Dietary Preference
This recipe is suitable for vegetarian diets. It does not contain any animal products other than plant-based ingredients. For vegan adaptations, ensure the bread used is vegan-friendly and omit any cheese or dairy-based garnishes. It is also naturally gluten-containing, so not suitable for gluten-free diets unless gluten-free flours and bread are used.
Course
Main course — a hearty, rustic pasta dish that showcases traditional Italian flavors and techniques.
Cuisine
Italian — specifically, rooted in the culinary traditions of Tuscany, emphasizing simple, locally sourced ingredients and artisanal techniques.
Ingredients
Ingredient Table
| Ingredient | Quantity |
|---|---|
| Durum wheat flour | 170g |
| All-purpose flour | 350g |
| Extra virgin olive oil | 20g (for dough) |
| Water | 300g |
| Fine salt | 1 pinch |
| Homemade or rustic bread (day-old) | 200g |
| Extra virgin olive oil (for bread crumb topping) | 80g |
| Fresh chili pepper | 2 (adjust to taste) |
| Garlic | 3 cloves |
| Fine salt | 1 pinch |
Instructions
Step 1: Preparing the Pasta Dough
Begin by assembling the ingredients for your fresh pasta dough. Using a digital kitchen scale, measure out 170 grams of durum wheat flour and 350 grams of all-purpose flour. Place the flours in a large, clean mixing bowl or directly onto a clean, flat work surface. Incorporate a pinch of fine salt into the flour mixture to enhance flavor. Use your fingers to combine the salt evenly into the flours, ensuring a uniform distribution.
Next, create a well in the center of the flour mixture. Pour 20 grams of high-quality extra virgin olive oil into the well. This oil will contribute to the dough’s elasticity and flavor. Gradually start adding water, approximately 300 grams, in small increments. Use a fork or your fingertips to slowly incorporate the water into the flour, gradually drawing the flour into the center. It’s essential to add the water gradually to prevent the dough from becoming overly sticky or dry. As you knead, you will notice the mixture begins to come together into a shaggy dough.
Once the mixture has roughly combined, start kneading with your hands. Work the dough vigorously, pressing and folding for about 10-15 minutes. The goal is to develop gluten and create a smooth, elastic ball. The dough should be moist but not sticky; if it sticks excessively, dust your work surface with a small amount of reserved durum wheat flour. Conversely, if it feels too dry, incorporate a few drops of water. Kneading is crucial for achieving the characteristic chewiness of pici pasta, so don’t rush this step.
Step 2: Resting the Dough
Wrap the kneaded dough tightly in plastic wrap or place it in a covered container to prevent drying out. Let it rest at room temperature for at least 30 minutes. Resting relaxes the gluten strands, making the dough easier to roll out and shape. During this period, you can prepare other components of the dish, such as the bread crumbs or flavor base.
Step 3: Shaping the Pici Pasta
After resting, divide the dough into manageable portions, typically a quarter at a time, keeping the remaining covered to prevent it from drying. Lightly dust your work surface with the reserved 20 grams of durum wheat flour. Take one portion of dough and flatten it slightly with your hands or a rolling pin, making it easier to work with.
Using the rolling pin or a pasta machine set to the thinnest setting, roll out the dough into a long, narrow sheet approximately 1-2 millimeters thick. The sheet should be as even as possible to ensure uniform cooking. Once rolled out, dust lightly with flour to prevent sticking.
Using a sharp knife or pasta cutter, cut the sheet into strips about 1/4 inch (0.6 cm) wide. These strips will be your pici. To achieve the characteristic thickness and texture, gently roll each strip between your thumb and fingers or use a tool designed for pasta shaping, such as a pici maker if available. Alternatively, you can roll the strips into small, thick spaghetti-like shapes, pinching the ends to keep them from unraveling.
Lay the shaped pici on a floured surface or drying rack, ensuring they do not touch or stick together. Allow the pasta to dry slightly for 10-15 minutes, which helps prevent clumping during cooking.
Step 4: Preparing the Bread Crumbs
The bread crumbs are a vital component that adds texture and flavor. Use preferably stale, rustic bread—classic Tuscany-style bread is ideal. Cut the bread into small cubes, including the crust, which adds a toasted quality to the crumbs. For best results, process the bread into fine crumbs using a food processor or chop finely with a sharp knife.
In a large skillet or frying pan, heat 80 grams of extra virgin olive oil over low heat. Add the bread crumbs and cook gently, stirring constantly, until they become golden brown and crispy. This process takes approximately 5-8 minutes. Be attentive to avoid burning; the crumbs should be fragrant and toasted but not charred.
Step 5: Infusing Flavors with Garlic and Chili
While the bread crumbs are toasting, prepare the flavor base. Finely chop two fresh chili peppers, adjusting the amount based on your preferred heat level. Remove the seeds if you want milder heat. Mince three garlic cloves finely.
In the same skillet with the toasted bread crumbs, add the remaining 80 grams of extra virgin olive oil. Warm the oil over low heat, then add the minced garlic and chopped chili. Allow the garlic and chili to gently sauté for about 2-3 minutes, just until fragrant. Remove the garlic to prevent it from burning, which can impart bitterness, and leave the chili-infused oil in the pan to flavor the crumbs and pasta later.
Step 6: Cooking the Pasta
Meanwhile, bring a large pot of salted water to a rolling boil. Use approximately 4-6 liters of water for ideal cooking conditions. Add a generous amount of coarse sea salt, which is essential for flavoring the pasta from within. Drop the shaped pici into the boiling water, stirring gently to prevent sticking.
Cook the pici until al dente, which typically takes about 4-6 minutes, depending on the thickness of your strands. Use a slotted spoon or tongs to test a strand for doneness by biting into it; it should be tender yet retain a slight bite. Reserve about 1 cup of the starchy pasta cooking water before draining.
Step 7: Final Assembly
Drain the pasta quickly in a colander, then transfer it directly into the skillet with the garlic-chili oil and toasted bread crumbs. Toss gently to coat each strand thoroughly, adding a splash of the reserved pasta water to help emulsify the sauce and distribute the flavors evenly. Continue to sauté over low heat for 1-2 minutes, allowing the pasta to absorb the flavors and the crumbs to stick to the noodles.
Adjust seasoning with a pinch of fine salt if needed. For an extra layer of richness, optional grated Pecorino Romano cheese can be added at this stage, though traditional recipes often omit cheese to highlight the simplicity of ingredients.
Preparation Tips
- Flour selection: Use high-quality, finely milled flours for the best texture. Durum wheat semolina flour provides chewiness, while all-purpose flour adds tenderness.
- Resting dough: Do not skip resting, as it significantly improves dough elasticity and shaping ease.
- Shaping technique: Practice rolling and cutting to develop consistent strand thickness, which ensures even cooking.
- Bread crumbs: Stale bread yields better crumbs due to dryness, which toast more evenly and absorb flavors better.
- Flavor infusions: Adjust chili quantity to match your spice tolerance. For a smoky flavor, consider adding smoked paprika or lightly charred chili.
- Cooking water: Always reserve pasta water—it’s rich in starch and helps create a cohesive sauce.
Nutritional Information
| Nutrient | Per Serving (approximate) |
|---|---|
| Calories | 520 kcal |
| Protein | 14 g |
| Carbohydrates | 75 g |
| Fats | 20 g |
| Saturated Fat | 3 g |
| Fiber | 6 g |
| Sodium | 650 mg |
Tips and Tricks
- Consistency in shaping: Use a gentle, steady hand to create uniform pici strands—this ensures even cooking and aesthetic appeal.
- Flavor layering: Toast bread crumbs until golden; this adds depth and enhances aroma.
- Heat control: Keep the garlic and chili gentle to prevent burning, which can result in bitterness.
- Experiment with spices: Add herbs like thyme or rosemary to the bread crumbs for additional flavor complexity.
- Texture play: Incorporate chopped nuts or toasted breadcrumbs on top for extra crunch.
Add-ons
- Grated cheese: Pecorino Romano, Parmesan, or Grana Padano for added richness.
- Fresh herbs: Chopped parsley or basil for a fresh finish.
- Lemon zest: For a bright, citrusy note that complements the chili and garlic.
- Anchovy fillets: For an umami boost, finely chop and add to the garlic oil.
Side Dishes
- Simple mixed green salad with lemon vinaigrette to balance the richness of the pasta.
- Grilled vegetables like zucchini, eggplant, or peppers for a colorful vegetable medley.
- Crusty artisan bread to serve alongside for scooping or additional texture.
- Fresh tomato slices with basil and olive oil for a light, refreshing accompaniment.
Improvements and Variations
- Adding protein: Incorporate crispy pancetta, sautéed shrimp, or grilled chicken for a more filling meal.
- Vegan option: Use vegan bread crumbs and omit cheese; enhance flavor with nutritional yeast or vegan cheese alternatives.
- Alternative pasta shapes: Substitute pici with thick spaghetti or trofie for different textures.
- Herb-infused oils: Infuse olive oil with rosemary or thyme before sautéing garlic and chili for added aromatic complexity.
- Spice variations: Experiment with smoked paprika, cayenne, or harissa for varied heat levels and smoky flavors.
Save and Store
Freshly made pici can be stored in a single layer on a floured baking sheet or drying rack for up to 24 hours. Cover loosely with a clean cloth or plastic wrap to prevent drying out. For longer storage, freeze the uncooked pasta in portions, separated by parchment paper, and cook directly from frozen—adding an extra minute or two to boiling time.
Bread crumbs can be stored in an airtight container at room temperature for up to a week or frozen for extended shelf life. Keep the toasted crumbs separate from moisture to maintain crunchiness.
FAQ
Can I use store-bought bread crumbs?
Yes, but homemade stale bread crumbs yield better flavor and texture. Toasting store-bought crumbs enhances their aroma and crunch.
Can I make pici with gluten-free flours?
Traditional pici relies on gluten’s elasticity. Gluten-free alternatives such as rice flour or a gluten-free pasta mix can be used, but the texture may differ. Consider adding xanthan gum or psyllium husk for improved binding.
How spicy is this dish?
The heat level depends on the chili used. Adjust the quantity to suit your taste, and remove seeds for milder heat.
Can I prepare components ahead of time?
Yes. Prepare and shape the pasta a day in advance, store in the fridge covered with a damp cloth, and cook just before serving. Bread crumbs can be toasted and stored in advance as well.
Conclusion
Mastering Pici with Crumbled Bread offers a rewarding journey into traditional Italian rustic cuisine. The process emphasizes craftsmanship and patience, culminating in a dish that is both comforting and elegant. By focusing on quality ingredients and mindful techniques, you create an authentic experience that celebrates the essence of Tuscan culinary heritage. Whether served as a family dinner or a special occasion, this dish promises to delight with its rich textures, bold flavors, and simplicity. At Love With Recipes, we hope this comprehensive guide inspires you to embrace the art of handmade pasta and the joy of transforming humble ingredients into something extraordinary.
References
For further reading on traditional Tuscan pasta and bread crumb techniques, consider exploring:
- “Tuscan Food & Cooking,” by Jane Milton
- “The Silver Spoon: The Classic Italian Cookbook,” by The Silver Spoon Kitchen