Introduction
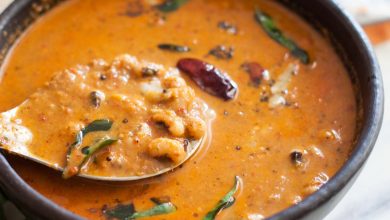
Welcome to Love With Recipes, where culinary traditions meet passionate cooking! Today, we delve into the heart of Karnataka cuisine with a classic and beloved dish—Avarekalu Huli Saru. This dish, celebrated for its rich, comforting flavors and wholesome ingredients, epitomizes the rustic charm of South Indian cooking. Made with tender field beans (Avarekalu or Lilva), fresh vegetables, and a fragrant coconut-based gravy, this recipe offers a symphony of textures and flavors that are both satisfying and nourishing.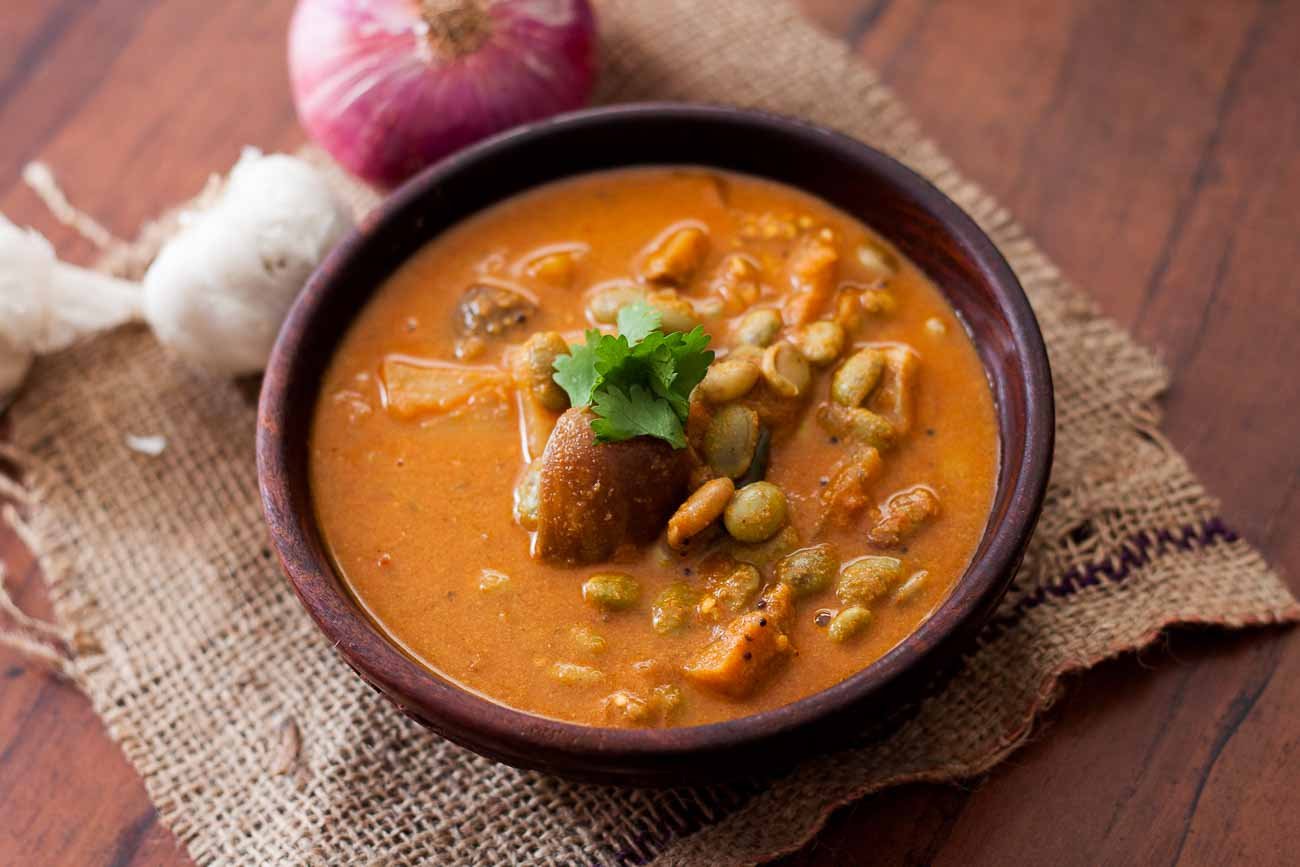
Huli Saru, a traditional Karnataka-style sambar, is a staple in many households, often served during festivals, special occasions, or as a hearty everyday meal. The unique combination of spices, coconut, and seasonal vegetables creates a flavor profile that is both complex and harmonious. The process involves soaking and preparing the beans, creating a flavorful masala, and slow-cooking the ingredients to perfection, ensuring each bite delivers authentic taste and comforting warmth.
This detailed recipe, curated for Love With Recipes, aims to provide a comprehensive guide to mastering Karnataka’s culinary art. Whether you’re an experienced cook or a beginner eager to explore South Indian flavors, the step-by-step instructions, preparation tips, and nutritional insights will elevate your cooking experience. So, gather your ingredients, ignite your stove, and embark on a journey to recreate this iconic dish that captures the essence of Karnataka’s culinary heritage.
Time
This recipe generally takes approximately 1 hour and 30 minutes from start to finish, including preparation and cooking time. Here’s a breakdown:
- Preparation Time: 30 minutes (soaking beans, chopping vegetables, preparing masala)
- Cooking Time: 50 minutes (pressure cooking, tempering, final simmering)
Note: Actual time may vary depending on your familiarity with the process and the efficiency of your kitchen appliances.
Needed Equipment
To prepare this Karnataka-style Avarekalu Huli Saru, gather the following essential tools to ensure smooth and efficient cooking:
- Pressure Cooker: For quick and thorough cooking of beans and vegetables.
- Blender or Mixer Grinder: To grind the coconut and masala into a smooth paste.
- Cooking Pot or Deep Pan: For sautéing vegetables and tempering.
- Cutting Board: For chopping onions, tomatoes, and vegetables.
- Chef’s Knife: Sharp and sturdy for precise chopping.
- Measuring Spoons and Cups: For accurate measurement of spices and ingredients.
- Wooden Spoon or Spatula: For stirring and sautéing.
- Small Skillet or Tadka Pan: For tempering spices.
- Serving Bowls and Ladles: For presentation and serving.
- Fine Strainer or Colander: To rinse beans and vegetables.
- Storage Containers: For storing leftover ingredients or prepared masala.
- Timer: To keep track of cooking durations.
- Kitchen Towels or Cloths: For cleaning and handling hot utensils.
Tags
This traditional Karnataka recipe is best tagged with the following keywords to enhance discoverability and categorization:
- South Indian Cuisine
- Vegetarian
- Festive Dish
- Healthy
- Vegan (if coconut oil is used)
- Gluten-Free
- Comfort Food
- Traditional Karnataka
- Field Beans
- Vegetable Stew
Serving Size
This recipe yields approximately 4 servings, making it ideal for a family meal or small gathering. Each serving provides a hearty portion, balanced with vegetables, beans, and flavorful gravy.
Adjust the quantities proportionally if you wish to serve more or fewer people, ensuring the flavor balance remains consistent.
Difficulty Level
This dish is categorized as Intermediate due to the multiple steps involved, including soaking, grinding, and pressure cooking. However, with careful attention to each step, it can be mastered by home cooks with basic culinary skills. Patience and precision are key to achieving an authentic flavor and perfect texture.
Allergen Information
This recipe contains the following potential allergens:
- Coconut: Present in the coconut-based gravy, which may cause reactions in those with coconut allergies.
- Mustard Seeds: Used in tempering, can trigger mustard allergies.
- Urad Dal: Split urad dal is used for tempering, which could be an allergen for some.
- Vegetables: Potato, brinjal, and onion may cause sensitivities for certain individuals.
For those with food allergies or sensitivities, substitute ingredients where possible or consult an allergist.
Dietary Preference
This recipe is naturally vegetarian and can be made vegan by using plant-based oils (such as sunflower or coconut oil) and ensuring the coconut is plant-based. It is also gluten-free, making it suitable for gluten-sensitive or celiac individuals. For low-fat variations, reduce the amount of oil used in sautéing and tempering.
Course
This dish is classified as a Main Course, served hot with rice or traditional accompaniments like Ragi Mudde or millet-based dishes.
Cuisine
Originating from Karnataka, South India, this recipe embodies the region’s rich culinary heritage, characterized by the use of fresh coconut, aromatic spices, and seasonal vegetables.
Ingredients in Tables
| Ingredient | Quantity | Notes |
|---|---|---|
| Avarekalu (Lilva Beans) | 1/2 cup | Soaked and peeled for better texture |
| Potato (Aloo) | 1, diced | Medium-sized, peeled |
| Brinjal (Eggplant) | 1, diced | Choose firm, fresh brinjals |
| Garlic | 15 cloves, crushed | Fresh garlic enhances flavor |
| Pearl Onions (Sambar Onions) | 1, finely chopped | Optional but adds depth |
| Tomato | 1, chopped | Ripe and firm |
| Salt | To taste | |
| Tamarind | 18 grams | Extract juice for tanginess |
| Fresh Coconut | 1/2 cup | Grated or shredded |
| Red Chilli Powder | 1 tablespoon | Adjust to spice preference |
| Coriander (Dhania) Leaves | 2 teaspoons, chopped | For garnish |
| Turmeric Powder (Haldi) | 1/8 teaspoon | For color and flavor |
| Mustard Seeds | 1/2 teaspoon | For tempering |
| Cumin Seeds (Jeera) | 1/4 teaspoon | Enhances aroma |
| White Urad Dal (Split) | 1/2 teaspoon | For tempering |
| Curry Leaves | 2 sprigs | Fresh or dried |
| Sunflower Oil | For sautéing | Use neutral oil |
Instructions
Step 1: Preparing the Beans
Begin by soaking the Avarekalu (field beans) in plenty of water for about 30 minutes. This step softens the beans and makes peeling easier, which improves the texture of the final dish. After soaking, drain the beans thoroughly and gently remove the skins. This process, while optional, enhances the dish’s smoothness and overall taste. To peel, gently pinch the soaked beans between your fingers or use a small spoon to help slide off the skins. Discard the skins or save them for composting. Properly peeled beans will cook faster and yield a more delightful mouthfeel.
Step 2: Creating the Coconut Masala
In a deep pan or pressure cooker, heat a tablespoon of sunflower oil over medium heat. Add the crushed garlic cloves, finely chopped pearl onions, and grated coconut. Sauté these ingredients for about 5-7 minutes, stirring occasionally, until the coconut turns golden brown and releases a fragrant aroma. This process develops the base flavor of the gravy. Once the mixture is golden and aromatic, allow it to cool slightly. Transfer the sautéed ingredients into a blender or mixer grinder, adding a little water if necessary to facilitate smooth grinding. Blend until you obtain a thick, smooth paste. This coconut masala will lend richness and depth to the gravy, balancing the earthiness of the beans and vegetables.
Step 3: Preparing the Vegetable Base
While the coconut masala is cooling, prepare the vegetables. In the same pressure cooker or a large pot, add a little more oil if needed. Sauté the crushed garlic, chopped pearl onions, and chopped tomato until the onions become translucent and the tomatoes soften, releasing their juices. This initial sautéing layer unlocks a complex flavor profile, forming the aromatic foundation of the curry. Stir frequently to prevent sticking or burning. Add the diced potato and brinjal, stirring well to coat them with the spice mixture. Cook for about 3-4 minutes to allow the vegetables to absorb the flavors. Then, add the soaked, peeled beans to the cooker, along with salt, red chili powder, turmeric powder, and tamarind extract. Mix thoroughly to combine all ingredients, ensuring spices are evenly distributed.
Step 4: Pressure Cooking the Main Ingredients
Pour in sufficient water—about 2 to 3 cups—to facilitate the cooking process and achieve the desired gravy consistency. Close the lid of the pressure cooker securely. Cook on high heat for approximately four whistles, which typically translates to about 10-12 minutes depending on your stove and cooker. This pressure cooking method ensures the beans, potatoes, and eggplant become tender, and flavors meld beautifully. Once the whistles are done, turn off the heat and allow the pressure to release naturally. Opening the lid after natural release preserves the integrity of the cooked ingredients and avoids splitting the vegetables.
Step 5: Tempering the Flavors
While the main ingredients are cooking, prepare the tempering. Heat a small skillet or tadka pan with a teaspoon of oil. Add mustard seeds and let them pop. Then, add cumin seeds, white urad dal, and curry leaves. Sauté until the urad dal turns golden brown and the mustard seeds are fully popped, releasing a burst of aroma. Pour this tempering over the cooked gravy in the pressure cooker or pot. This step is crucial for imparting the distinctive South Indian flavor and aroma to the dish.
Step 6: Final Assembly and Garnishing
Stir the tempering into the gravy thoroughly, ensuring even distribution of flavors. Check seasoning and adjust salt or spice levels if necessary. Garnish with freshly chopped coriander leaves for a burst of freshness and color. Serve hot with steamed rice, Ragi Mudde, or any traditional Karnataka accompaniment. The dish is best enjoyed immediately but can also be stored for later consumption, allowing flavors to deepen.
Preparation Tips
- Peeling Beans: Removing skins from Avarekalu enhances the smoothness of the gravy but is optional. To save time, you may skip peeling if you’re pressed for time; the texture will still be delicious.
- Grinding Coconut: Use fresh, grated coconut for authentic flavor. If fresh coconut isn’t available, frozen grated coconut works well too. For a vegan variation, ensure all ingredients are plant-based.
- Water Quantity: Adjust water based on desired gravy consistency. Less water yields a thicker curry, while more creates a soupy version suitable for pouring over rice.
- Spice Levels: Customize the spice intensity by varying the red chili powder. For milder versions, reduce the chili or omit it altogether.
- Vegetable Variations: Feel free to add seasonal vegetables like carrots or beans to enrich the dish further.
Nutritional Information
| Nutrient | Per Serving |
|---|---|
| Calories | 180 kcal |
| Protein | 5 g |
| Carbohydrates | 30 g |
| Fat | 7 g |
| Fiber | 8 g |
Tips and Tricks
- Pre-soaking Beans: Soaking beans reduces cooking time and enhances digestibility. Always soak for at least 30 minutes.
- Peeling Beans: Removing skins is optional but recommended for a smoother gravy.
- Grinding Technique: Use just enough water to grind the coconut into a smooth, thick paste; excess water can dilute the flavor.
- Cooking Time: Adjust pressure cooking time based on your cooker and bean freshness; overcooking can make vegetables mushy.
- Enhancing Aroma: Fresh curry leaves and proper tempering elevate the flavor significantly.
Add-ons and Variations
- Spice Boost: Add a teaspoon of garam masala or sambar powder for a more robust flavor.
- Protein Boost: Incorporate paneer cubes or cooked lentils for additional protein.
- Vegan Version: Use coconut oil instead of sunflower oil and ensure tamarind paste is free from animal derivatives.
- Extra Vegetables: Add carrots, green beans, or peas to diversify textures and nutrients.
Side Dishes
This hearty gravy pairs beautifully with:
- Steamed Basmati or Sona Masoori rice
- Ragi Mudde (finger millet balls)
- Jowar or Bajra roti
- Idli or dosa as a breakfast variation
Improvements
Enhance the dish further by experimenting with:
- Adding a touch of jaggery for subtle sweetness
- Incorporating freshly ground spices like black pepper or fennel seeds
- Using homemade sambar powder for a more authentic flavor
- Cooking the gravy longer on low heat for deeper flavor integration
Save and Store
Leftover Avarekalu Huli Saru can be stored in an airtight container in the refrigerator for up to 2 days. For longer storage, freeze in portions for up to a month. Reheat thoroughly before serving. To preserve the freshness and flavor, avoid reheating multiple times. Always check for spoilage before consumption.
To reheat, gently warm on the stovetop, adding a splash of water if the gravy thickens. The flavors will intensify over time, making it even more delicious on the next day.
FAQ
Q1: Can I prepare this dish without pressure cooking?
Yes, you can cook the beans and vegetables in a regular pot. It will take longer—approximately 45-60 minutes—but ensure to simmer on low heat until everything is tender. Cover with a lid and stir occasionally to prevent sticking.
Q2: How do I peel Avarekalu easily?
Soak the beans in water for 30 minutes, then gently pinch each bean to slide off the skins. Alternatively, blanch the soaked beans in boiling water for 2 minutes, then transfer to cold water and peel gently.
Q3: Can I make this dish vegan?
Absolutely. Use plant-based oils like sunflower or coconut oil, and ensure the coconut is fresh or frozen. Avoid any dairy or animal-based ingredients.
Q4: What can I substitute for tamarind?
If tamarind isn’t available, use lemon juice or vinegar sparingly to add acidity, adjusting to taste. Tamarind powder or paste is preferable for authentic flavor.
Q5: Is this dish suitable for gluten-free diets?
Yes. All ingredients are naturally gluten-free. Just ensure the spices and tamarind paste are processed in gluten-free facilities if necessary.
Conclusion
Recreating Karnataka’s beloved Avarekalu Huli Saru at home is a rewarding experience that connects you to a rich culinary tradition. Its layered flavors, wholesome ingredients, and comforting texture make it a perfect choice for a nourishing meal. By following this detailed guide, you’ll master the art of balancing spices, textures, and aromas to produce an authentic dish that delights family and friends alike.
Remember, the secret to an excellent Huli Saru lies in patience and attention to detail—from soaking the beans to slow-cooking the vegetables and tempering the spices. With love and care, your kitchen will echo with the flavors of Karnataka, bringing a piece of its culinary heritage to your table.
Enjoy every bite, and happy cooking! For more traditional recipes and culinary insights, visit Love With Recipes regularly.