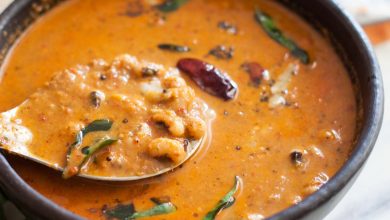
Green Chilli Chicken Fry Recipe
Discover the vibrant flavors of Indian cuisine with this delicious Green Chilli Chicken Fry, a perfect appetizer that brings a kick of spice to your dinner table. Marinated chicken is sautéed with aromatic spices, fresh herbs, and plenty of green chilies, creating a dish that’s both flavorful and satisfying. Ideal for pairing with Dal Fry and steamed rice, this dish promises to be a hit at any gathering. Let’s dive into the detailed recipe!
Ingredients
| Ingredient | Quantity |
|---|---|
| Chicken (cut into pieces) | 500 grams |
| Green chillies (adjust to taste) | 18 (can reduce) |
| Garlic cloves | 7 |
| Ginger (2-inch piece) | 1 |
| Fresh coriander (chopped) | 2 tablespoons |
| Onions (sliced) | 2 |
| Tomatoes (chopped) | 3 |
| Cloves | 4 |
| Cinnamon stick (1-inch) | 1 |
| Coriander powder | 1 tablespoon |
| Salt | To taste |
| Water | As needed |
| Lemon (half, juiced) | 1/2 |
| Oil | 2 teaspoons |
Nutritional Information (per serving)
| Nutrient | Amount |
|---|---|
| Calories | Approx. 300 |
| Protein | High |
| Carbohydrates | Moderate |
| Fats | Low |
| Fiber | Moderate |
Preparation Time
| Time | Duration |
|---|---|
| Prep Time | 15 minutes |
| Cook Time | 25 minutes |
| Total Time | 40 minutes |
Servings
| Servings | 4 |
|---|
Instructions
-
Marinate the Chicken: Begin by washing the chicken pieces thoroughly and patting them dry with a paper towel. In a bowl, combine the chicken, 1 teaspoon of salt, and the juice of 1/2 lemon. Mix well, cover the bowl, and let it marinate in the refrigerator for about 30 minutes to allow the flavors to meld.
Related Articles -
-
Prepare the Spice Paste: While the chicken marinates, prepare the spice paste. In a mixer grinder, add the green chillies, ginger, garlic, chopped coriander, and sliced onions. Grind these ingredients into a smooth paste and set aside.
-
Tomato Puree: In the same mixer, add the chopped tomatoes along with a splash of water to help blend. Grind until you achieve a smooth puree and set it aside.
-
Cooking the Chicken: Heat 2 teaspoons of oil in a large pan over medium heat. Once the oil is hot, add the cloves and cinnamon stick, allowing them to release their aromatic oils for about 30 seconds.
-
Add the Spice Paste: Next, add the prepared green chili paste to the pan and sauté for approximately 2 minutes until it becomes fragrant.
-
Cooking the Chicken: Add the marinated chicken pieces to the pan. Stir well and cook, allowing the chicken to change color and begin cooking through, approximately 5 to 7 minutes.
-
Incorporate the Tomato Puree: Pour in the tomato puree and mix well. Cook this mixture for about 3 to 4 minutes, letting the flavors combine and the sauce thicken.
-
Seasoning: Add the coriander powder and any remaining salt to taste. Stir to combine and cook for another 5 minutes, ensuring the chicken is well-coated with the spices.
-
Final Cooking: After the mixture has simmered, pour in 1/2 cup of water. Stir again and allow the chicken to cook thoroughly for another 10 minutes, or until fully cooked and tender.
-
Serve: Once the chicken is fully cooked and the sauce has thickened, remove it from heat. Serve your Green Chilli Chicken Fry hot, accompanied by Dal Fry and steamed rice for a delightful meal.
Tips for Perfection
- Adjust the number of green chillies according to your spice tolerance; for a milder flavor, reduce the quantity.
- Ensure that the chicken is cooked through and tender for the best texture.
- This dish can be prepared ahead of time and reheated, making it perfect for meal prep.
Enjoy!
Indulge in the rich and spicy goodness of this Green Chilli Chicken Fry, and delight your family and friends with a taste of India that is sure to please. Whether served as an appetizer or a main course, this dish embodies the essence of home-cooked Indian meals, bursting with flavor and warmth. Enjoy your culinary adventure!