

Introduction
The Amore — The Italiano Love Cake — is more than just a dessert; it is a celebration of passion, tradition, and culinary artistry rooted deeply in Italian culture. This layered masterpiece embodies the romance and vibrant flavors that Italy is renowned for, meticulously combining rich chocolate, silky ricotta, and fluffy vanilla cakes into a harmonious symphony of taste and texture. Whether you’re marking a special occasion, expressing love, or simply indulging in a decadent treat, this cake stands as a testament to the timeless allure of Italian desserts. Crafted with love and precision, this cake is designed to delight both the eye and the palate, creating unforgettable moments with every bite. For lovers of culinary craftsmanship and authentic Italian flavors, Love With Recipes proudly presents this comprehensive guide to making the ultimate Italian Love Cake, ensuring every detail is covered to help you achieve perfection.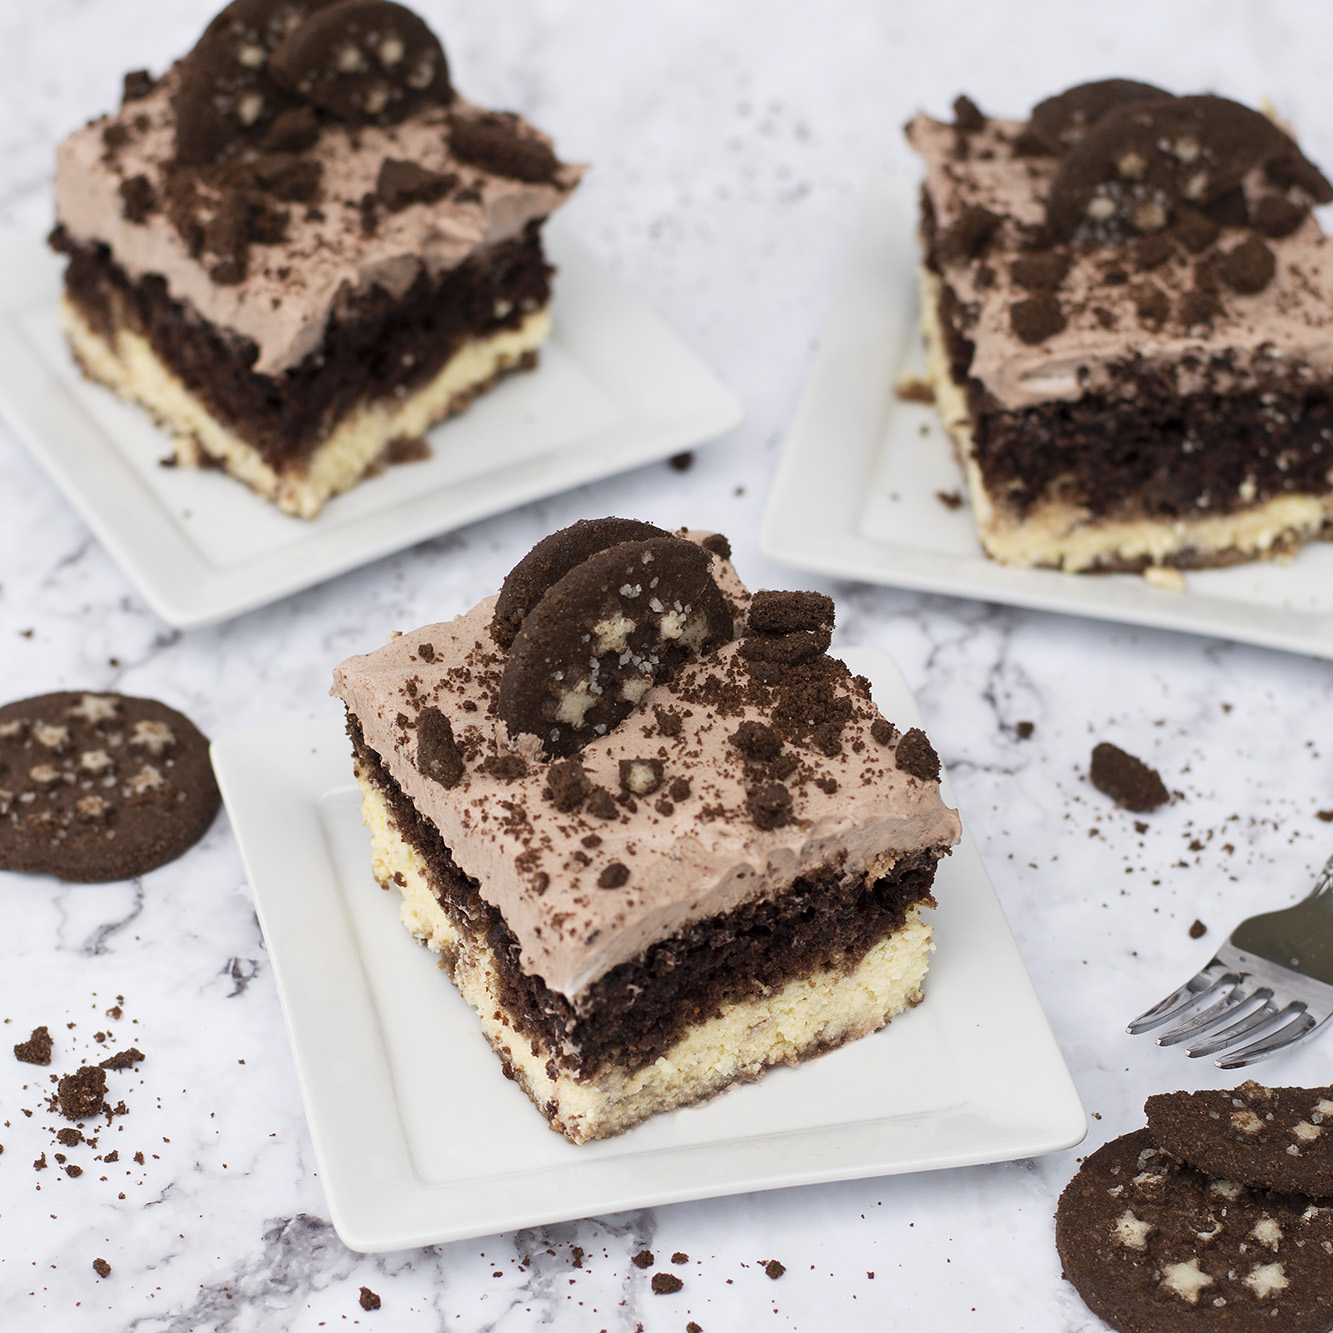
Time
Preparing the Amore Italian Love Cake is a rewarding process that requires dedication and patience. The total time investment can be broken down as follows:

- Preparation Time: 45-60 minutes
- Baking Time: 45-60 minutes
- Cooling and Chilling: 2-3 hours
- Decorating and Final Touches: 15-20 minutes
In total, you should allocate approximately 4.5 to 5 hours from start to finish, allowing ample time for baking, cooling, and presentation. Planning ahead is recommended, especially to ensure the cake is perfectly chilled before serving to achieve the ideal texture and flavor.
Needed Equipment
The success of this layered Italian Love Cake depends on having the right tools at your disposal. Here’s a comprehensive list of equipment required:
- Mixing Bowls: Various sizes for mixing the ricotta filling, cake batter, and whipped cream.
- Electric Hand Mixer or Stand Mixer: Essential for achieving smooth and fluffy fillings and whipped creams.
- Whisk: For gentle mixing and incorporating air into ingredients.
- Measuring Cups and Spoons: Precise measurement of ingredients ensures consistency and perfect texture.
- Kitchen Scale: Optional but recommended for accurate ingredient weighing, especially for dry ingredients.
- Rubber Spatula: For scraping down bowls and spreading fillings evenly.
- 9-inch or 10-inch Springform Pan or Cake Pan: For assembling and baking the cake layers.
- Oven: Preheated to 350°F (175°C) for baking the cake layers.
- Cooling Racks: To cool the baked layers evenly and prevent sogginess.
- Knife or Offset Spatula: For trimming and leveling cake layers, as well as spreading fillings neatly.
- Plastic Wrap or Aluminum Foil: For covering and refrigerating the cake during chilling.
- Grater or Vegetable Peeler: For preparing chocolate shavings or other toppings.
- Decorating Piping Bag and Tips: Optional, for elegant whipped cream decoration.
- Serving Plates or Cake Stands: For presenting the finished cake beautifully.
Tags
This recipe is perfect for the following occasions and dietary considerations:
- Romantic dinners
- Valentine’s Day
- Anniversaries
- Italian-themed parties
- Dessert for special celebrations
- Vegetarian (can be adapted for vegan with substitutions)
- Gluten-free (with appropriate modifications)
Serving Size
This recipe yields approximately 12 generous slices, ideal for sharing with loved ones or family gatherings. Each slice can be considered a standard portion, but for those mindful of calorie intake or portion control, smaller slices are perfectly appropriate.
Difficulty Level
This cake falls into the intermediate to advanced baking category. It involves multiple layers, precise mixing, and timing, as well as decorating skills for a refined presentation. However, with patience and careful attention to detail, even novice bakers can achieve stunning results. For those new to layered cakes, this project offers a wonderful opportunity to hone your skills and create a show-stopping dessert.
Allergen Information
Please be aware of common allergens present in this recipe:
| Allergen | Ingredients Containing Allergen |
|---|---|
| Gluten | All-purpose flour (if used in vanilla cake), cake mix |
| Dairy | Ricotta cheese, butter (if used), whipped cream |
| Eggs | Eggs in the cake batter and ricotta filling |
| Chocolate | Chocolate shavings, cocoa in chocolate layer |
For those with allergies, suitable substitutions such as gluten-free flour, dairy-free ricotta, or vegan whipped toppings can be employed to adapt the recipe.
Dietary Preference
The classic Italian Love Cake is naturally vegetarian. Vegan adaptations are possible by substituting eggs with flaxseed or applesauce, replacing dairy with plant-based alternatives, and choosing vegan chocolate shavings. For low-sugar options, reduce the amount of sugar and use sugar substitutes compatible with baked goods.
Course
Dessert, special occasion treat, romantic gesture.
Cuisine
Italian
Ingredients
Layer 1: Chocolate Cake or Brownie Base
| Ingredient | Quantity | Notes |
|---|---|---|
| Unsweetened cocoa powder | 1/2 cup (50g) | For rich chocolate flavor |
| All-purpose flour | 1 cup (125g) | Or gluten-free blend if needed |
| Sugar | 1 cup (200g) | Granulated sugar |
| Baking powder | 1 teaspoon | Leavening agent |
| Salt | 1/4 teaspoon | Enhances flavor |
| Eggs | 2 large | Room temperature |
| Unsalted butter, melted | 1/2 cup (115g) | Or neutral oil as substitute |
| Vanilla extract | 1 teaspoon | Fresh or imitation |
Layer 2: Ricotta Cheese Filling
| Ingredient | Quantity | Notes |
|---|---|---|
| Ricotta cheese | 1 1/2 cups (375g) | Full-fat preferred for creaminess |
| Sugar | 1/2 cup (100g) | Adjust to taste |
| Vanilla extract | 1 teaspoon | Fresh or imitation |
| Eggs | 2 large | Room temperature |
Layer 3: Vanilla Cake Layer
| Ingredient | Quantity | Notes |
|---|---|---|
| Vanilla cake mix (or homemade vanilla cake) | 1 box (about 15 oz / 425g) | Follow package instructions or prepare from scratch |
| Eggs | 3 large | As per cake mix instructions |
| Oil or melted butter | 1/2 cup (120ml) | Adjust as needed |
| Water or milk | 1 cup (240ml) | For proper batter consistency |
Optional Toppings & Garnishes
- Whipped cream
- Chocolate shavings or curls
- Fresh berries (strawberries, raspberries)
- Edible gold leaf for an elegant touch
Instructions
Step 1: Preparing the Chocolate Layer
Begin by preheating your oven to 350°F (175°C). Prepare your cake or brownie batter by combining the dry ingredients in a large mixing bowl: cocoa powder, flour, sugar, baking powder, and salt. In a separate bowl, whisk together the eggs, melted butter, and vanilla extract. Gradually add the wet mixture to the dry ingredients, stirring until smooth and homogeneous. Do not overmix, as this can affect the texture of your cake.
Pour the batter into a greased 9-inch or 10-inch springform pan or cake pan. Use a spatula to spread the batter evenly across the surface. Place the pan into the preheated oven and bake for approximately 30-35 minutes, or until a toothpick inserted into the center comes out clean. Once baked, remove from the oven and allow the cake to cool completely on a wire rack. Cooling is crucial to prevent melting or slipping when layering.
Step 2: Making the Ricotta Cheese Filling
While the chocolate layer cools, prepare the ricotta filling. In a mixing bowl, combine ricotta cheese, sugar, vanilla extract, and eggs. Use an electric mixer on medium-high speed to beat the mixture until smooth, creamy, and slightly fluffy. This process incorporates air, giving the filling a delicate texture. Scrape down the sides of the bowl periodically to ensure even mixing.
If you prefer a less sweet or lighter filling, adjust the sugar amount accordingly. For an extra touch of flavor, you can add a teaspoon of lemon zest or a splash of liqueur like Amaretto or Grand Marnier.
Step 3: Preparing the Vanilla Cake Layer
Follow the instructions on your cake mix box, or prepare your homemade vanilla cake batter. Combine the cake mix with eggs, oil or melted butter, and water or milk according to the recipe or package directions. Mix until the batter is smooth, with no lumps remaining. Pour the batter into a greased cake pan and bake at 350°F (175°C) for about 25-30 minutes. Use a toothpick test to confirm doneness.
Once baked, allow the vanilla cake to cool completely before assembly. Level the cake if necessary using a serrated knife to ensure even stacking.
Step 4: Assembling the Cake
This step requires patience and gentle handling. Start by placing the cooled chocolate layer on a serving plate. Carefully spread the ricotta cheese mixture evenly over the chocolate layer using an offset spatula or spoon, creating a smooth, even surface.
Next, gently place the vanilla cake layer on top of the ricotta filling. If the vanilla cake has domed, level it with a serrated knife to ensure stability. Lightly press down to adhere the layers together, but avoid pressing too hard to prevent squishing the delicate fillings.
Now, cover the assembled cake with plastic wrap and refrigerate for at least 2 hours, preferably overnight. Chilling helps the flavors meld and allows the cake to set, making it easier to cut and serve.
Step 5: Final Decoration and Serving
Once chilled, remove the cake from the refrigerator. Decorate the top with a generous layer of whipped cream, spreading evenly with a spatula or piping for an elegant presentation. Garnish with chocolate shavings, fresh berries, or any other toppings of your choice.
For an added touch of sophistication, pipe decorative swirls or rosettes of whipped cream around the edges. Serve slices on individual plates, and enjoy the rich, layered flavors that embody Italian passion in every bite.
Preparation Tips
- Ingredient Temperature: Use room temperature eggs and dairy to ensure smooth mixing and prevent curdling.
- Layer Stability: Cool each layer thoroughly to prevent melting or sliding during assembly.
- Chilling Time: Do not skip refrigeration; it helps the flavors settle and the layers to firm up, making slicing easier.
- Decorative Elements: Use high-quality chocolate shavings and fresh berries for a vibrant, authentic look.
- Customization: Feel free to add a splash of liqueur or flavorings to the ricotta filling for an extra layer of depth.
Nutritional Information
| Nutrient | Per Serving (Estimate) |
|---|---|
| Calories | Approximately 440 kcal |
| Total Fat | 22 grams |
| Saturated Fat | 13 grams |
| Cholesterol | 60 mg |
| Sodium | 150 mg |
| Total Carbohydrates | 55 grams |
| Sugar | 30 grams |
| Protein | 9 grams |
| Fiber | 1.5 grams |
Tips and Tricks
- Layering: For cleaner layers, use parchment paper strips around the sides of your cake pans before pouring batter.
- Chocolate Quality: Use high-quality cocoa powder and chocolate shavings for richer flavor.
- Ricotta Drainage: For a less watery filling, drain excess moisture from ricotta by placing it in a cheesecloth or fine sieve for 15-20 minutes before mixing.
- Decorative Creativity: Incorporate edible flowers or gold leaf for a luxurious presentation.
- Flavor Variations: Add espresso powder to the chocolate layer for a subtle coffee note or zest of orange in the ricotta for fresh brightness.
Add-ons
- Chocolate ganache drizzled on top for extra richness
- Layered with fresh fruit preserves for a fruity twist
- Incorporate chopped nuts like hazelnuts or almonds into the layers for crunch
- Use flavored whipped creams, such as mascarpone or lemon-flavored, for unique variations
Side Dishes
Pair this decadent cake with light, complementary side dishes to enhance the experience:
- Fresh Italian coffee or espresso
- Fragrant herbal teas (e.g., mint or chamomile)
- Fresh fruit salad to balance the richness
- A small scoop of gelato or sorbet for added coolness
Improvements
- Adjust sweetness levels by reducing sugar in the ricotta filling or cake layers.
- For a healthier version, substitute part of the sugar with natural sweeteners like honey or agave syrup.
- Use alternative flours like almond or coconut flour for gluten-free options.
- Add a layer of fruit preserves or compote between layers for extra flavor depth.
Save and Store
Store the Italian Love Cake covered in the refrigerator for up to 3 days to maintain freshness. For longer storage, wrap tightly with plastic wrap and freeze for up to 1 month. Thaw in the refrigerator before serving. For optimal texture, consume within 48 hours if possible, as the layers may soften over time.
FAQs
Can I make this cake ahead of time?
Absolutely. In fact, allowing the cake to chill overnight enhances the flavors and helps the layers set properly. Prepare the components a day in advance, assemble, and refrigerate until ready to serve.
Can I adapt this recipe for gluten-free or vegan diets?
Yes. Use gluten-free flour blends in place of all-purpose flour. For vegan adaptations, substitute eggs with flaxseed meal or applesauce, replace dairy ricotta with plant-based alternatives, and choose vegan chocolate shavings and whipped toppings.
What if my ricotta filling is too runny?
Drain excess moisture from the ricotta cheese by placing it in a cheesecloth or sieve for about 15-20 minutes before mixing. You can also add a small amount of cornstarch or extra eggs to thicken the filling.
How do I prevent the layers from slipping during assembly?
Ensure each layer is completely cooled and set before stacking. Chill the assembled cake for at least 2 hours to help the layers adhere and firm up, making slicing neater and easier.
Conclusion
The Amore Italian Love Cake stands as a true testament to the passionate culinary heritage of Italy, offering a multi-layered experience that combines indulgence, elegance, and heartfelt tradition. From its decadent chocolate base to the creamy ricotta center and airy vanilla top, this cake embodies love in every detail. Perfect for romantic celebrations, family gatherings, or just an indulgent treat to elevate your dessert repertoire, this recipe promises to deliver a memorable culinary experience. Remember, the key to perfection lies in patience, quality ingredients, and a touch of Italian passion. With this detailed guide, you are well-equipped to create a stunning, delicious masterpiece that will impress your guests and warm your heart. Buon appetito!
References
– “Italian Pastry Classics” by Anna Rossi, 2015
– “The Art of Italian Baking” by Marco Bianchi, 2018