

Introduction
Welcome to Love With Recipes, your ultimate culinary resource for exploring flavorful, wholesome, and authentic dishes from around the world. Today, we delve into a beloved Japanese classic—Chicken Teriyaki. This dish is renowned for its glossy, sweet-savory glaze that perfectly coats tender pieces of chicken, creating a harmonious balance of umami richness and subtle sweetness. Whether you’re a seasoned home cook or a beginner eager to expand your culinary repertoire, mastering Chicken Teriyaki offers a delightful experience that combines simple ingredients with straightforward techniques, resulting in a dish that is as impressive as it is comforting.
Chicken Teriyaki has transcended its origins to become a staple in many households globally, appreciated for its quick preparation, adaptable nature, and crowd-pleasing flavor profile. From casual weeknight dinners to celebratory gatherings, this dish fits seamlessly into various dining contexts. Its versatility allows you to serve it over rice, alongside stir-fried vegetables, or even in sushi rolls—making it a fundamental component of Japanese cuisine that continues to inspire innovative culinary creations.

In this comprehensive guide, we will explore every facet of Chicken Teriyaki—from its rich history and cultural significance to detailed ingredient breakdowns and step-by-step cooking instructions. We will also provide valuable tips on how to customize the dish, maximize flavor, and ensure nutritious balance, all while maintaining authenticity. As always, this recipe is crafted specifically for Love With Recipes, ensuring you receive high-quality, detailed, and user-friendly guidance to elevate your cooking skills and culinary satisfaction.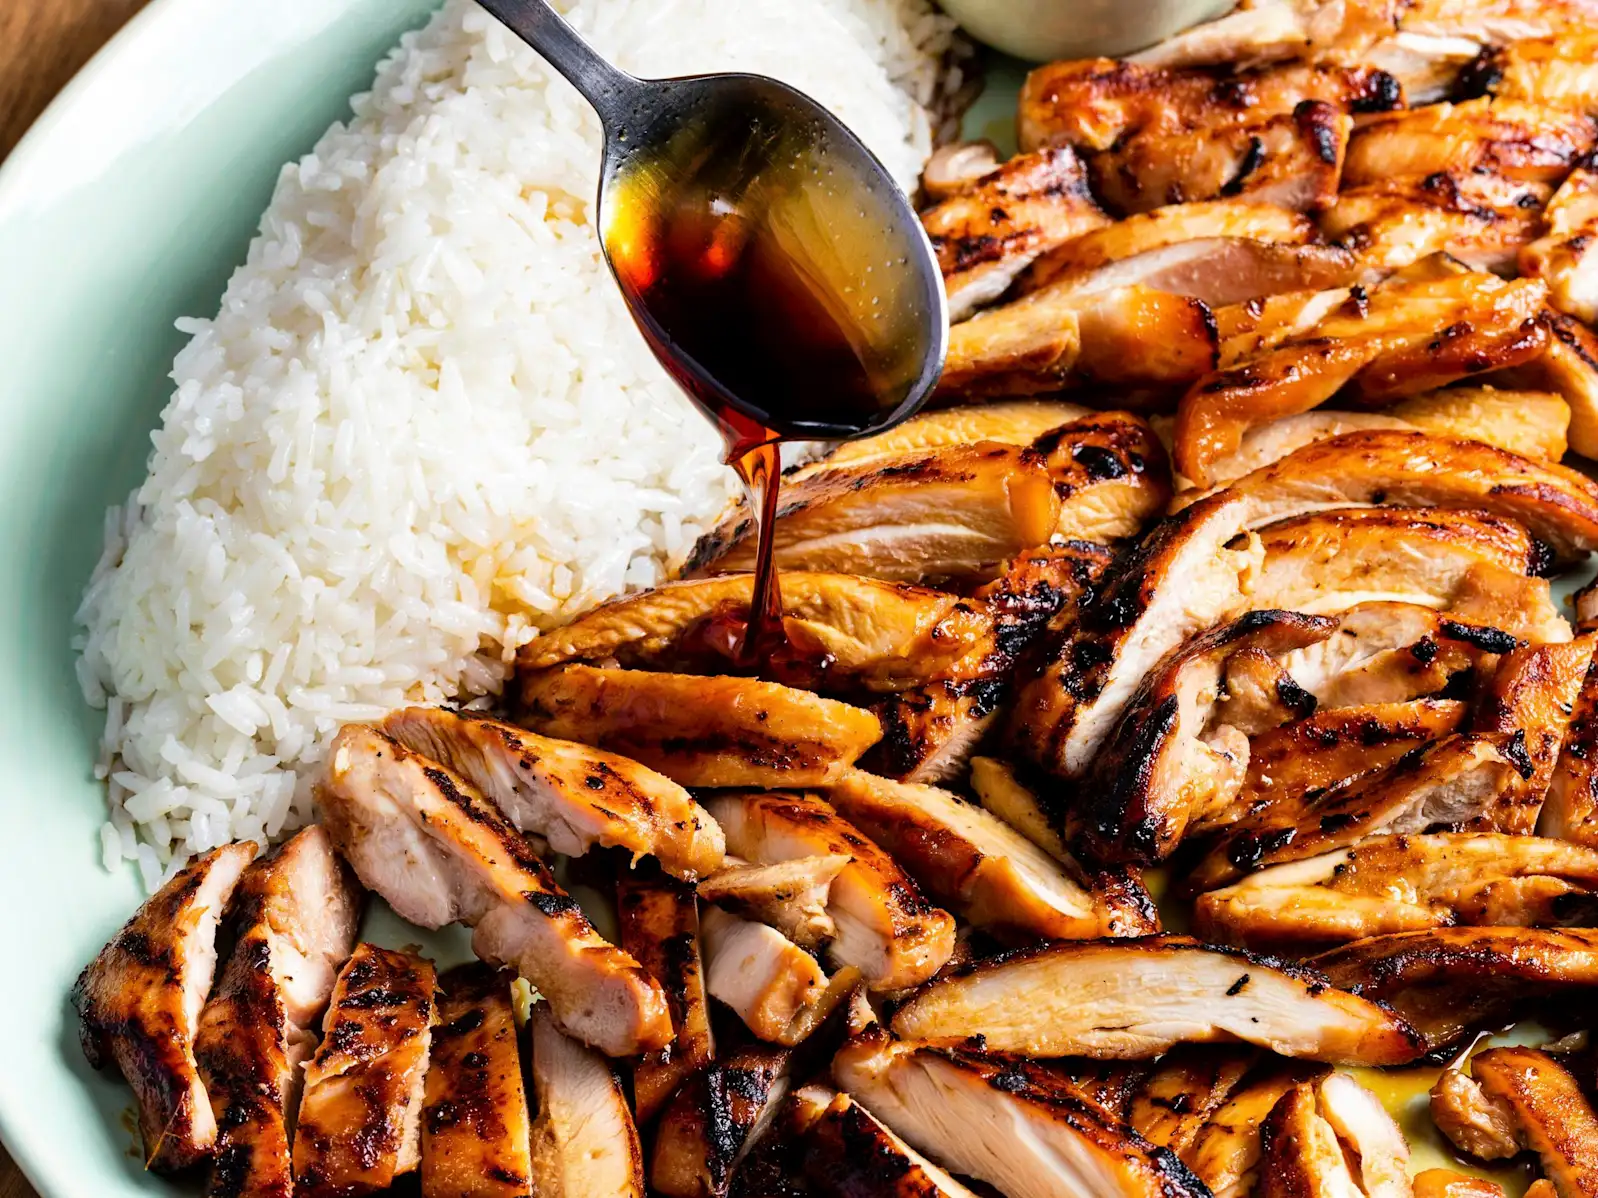
Time
The total time required to prepare and cook Chicken Teriyaki is approximately 45 minutes, which makes it an excellent choice for a quick yet satisfying meal. The breakdown of time is as follows:
- Preparation Time: 10-15 minutes
- Cooking Time: 20-25 minutes
- Resting and Garnishing: 5 minutes
This timeline allows for efficient meal prep without compromising on flavor or quality. It’s ideal for busy weeknights when you want a homemade dish that’s both quick and delicious, as well as for leisurely weekends when you wish to savor the process of cooking.
Needed Equipment
To craft a perfect Chicken Teriyaki, you’ll require a collection of essential kitchen tools that facilitate precise preparation and optimal cooking. Here is a comprehensive list of equipment:
Core Cooking Equipment
- Cutting Board: For chopping chicken and aromatics.
- Chef’s Knife: Sharp and sturdy for slicing chicken and mincing garlic and ginger.
- Measuring Cups and Spoons: To accurately measure soy sauce, mirin, sugar, and other ingredients.
- Mixing Bowls: For preparing the teriyaki sauce and marinating chicken.
- Saucepan or Skillet: A heavy-bottomed pan or cast iron skillet for cooking the chicken and simmering the sauce.
- Whisk or Wooden Spoon: For stirring the sauce and ensuring even mixing.
- Tongs or Spatula: To turn and handle the chicken pieces safely while cooking.
- Measuring Jug or Small Pitcher: For pouring and controlling sauce quantities.
- Kitchen Timer: To monitor cooking times precisely.
- Serving Dishes: For presenting the finished meal attractively.
Optional Additional Equipment
- Grater or Microplane: For fresh ginger and garlic.
- Food Storage Containers: To save leftovers securely.
- Steaming Basket or Rice Cooker: For preparing rice or vegetables concurrently.
Using quality equipment enhances your cooking experience, ensuring even heat distribution and ease of handling. For best results, keep your tools sharp and clean, and prepare all ingredients beforehand—mise en place—so you can focus entirely on the cooking process.
Tags
This recipe is suitable for the following dietary tags and preferences:
- Japanese Cuisine
- Asian-Inspired
- Gluten-Optional (if gluten-free soy sauce used)
- Low Carb (if served without rice)
- High Protein
- Family Friendly
- Quick & Easy
Serving Size
This recipe yields approximately four servings, making it perfect for family dinners or small gatherings. Each serving consists of a generous portion of chicken, coated in luscious teriyaki sauce, accompanied by rice and optional vegetables. Adjust portion sizes based on your needs, adding sides or increasing the number of servings as necessary.
Difficulty Level
Cooking Chicken Teriyaki is rated as easy to moderate, suitable for home cooks of all skill levels. The process involves straightforward steps—marinating, cooking, and simmering—making it accessible even for beginners. The key to success lies in managing heat levels and timing to achieve a glossy, flavorful sauce that clings to the chicken without burning or drying out.
Allergen Information
This dish contains potential allergens such as soy (soy sauce) and gluten (if regular soy sauce is used). To accommodate allergies or sensitivities, consider the following substitutions:
- Gluten-Free: Use gluten-free soy sauce or coconut aminos.
- Sulfites: Mirin and sake may contain sulfites; opt for sulfite-free versions if necessary.
- Ginger and Garlic: For those with sensitivities, use sparing amounts or omit.
Always read labels carefully and consult with health care providers if you have severe allergies or dietary restrictions.
Dietary Preference
This recipe can be adapted to various dietary preferences:
- Vegetarian: Substitute chicken with tofu or tempeh, and use vegetable broth or water in place of chicken stock.
- Pescatarian: Replace chicken with fish fillets such as salmon or cod.
- Keto: Serve over cauliflower rice to reduce carbohydrates.
- Paleo: Use coconut aminos and avoid processed sugars.
Course
This dish falls under the main course category, suitable for lunch or dinner. It pairs well with various side dishes and can be served as part of a multi-course Japanese meal or as a standalone entrée.
Cuisine
Japanese
Ingredients
Primary Ingredients
| Ingredient | Quantity | Notes |
|---|---|---|
| Boneless, skinless chicken thighs or breasts | 4 pieces (about 1.5 lbs) | Thighs are juicier; breasts are leaner |
| Soy sauce | 1/2 cup | Use low-sodium for healthier options |
| Mirin | 1/4 cup | Sweet rice wine; substitute with dry sherry if unavailable |
| Sugar | 1/4 cup | Adjust to taste; honey or maple syrup can be alternatives |
| Garlic | 2 cloves | Minced or grated fresh |
| Fresh ginger | 1-inch piece | Grated finely |
| Green onions | 2 stalks | Chopped for garnish |
| Sesame seeds | 1 tbsp | For garnish |
| Vegetable oil | 2 tbsp | For cooking |
Optional Ingredients and Variations
| Ingredient | Use/Notes |
|---|---|
| Honey or Maple Syrup | Alternative sweeteners for a different flavor profile |
| Sake | Additional depth; optional |
| Vegetables (Broccoli, Snap Peas) | For stir-fried sides |
| Cooked Rice | To serve alongside |
Instructions
1. Prepare the Teriyaki Sauce
Begin by creating a harmonious marinade and glaze that will infuse the chicken with flavor and provide that signature glossy finish. In a medium mixing bowl, combine the soy sauce, mirin, sugar, minced garlic, and grated ginger. Whisk thoroughly until the sugar dissolves completely, ensuring a smooth, cohesive sauce. This mixture serves as both the marinade and the cooking sauce, so balance and flavor intensity are crucial. For a more complex flavor, you may add a splash of sake or a teaspoon of honey, but the core ingredients are sufficient for a classic profile.
2. Prepare the Chicken
While the sauce is coming together, prepare your chicken. If using breasts, slice them into bite-sized pieces or strips approximately 1 to 1.5 inches thick. Thighs can be left whole or cut into similar-sized chunks for even cooking. Pat the chicken dry with paper towels to remove excess moisture, which promotes browning and caramelization during cooking. Season lightly with salt and pepper if desired, but remember that the soy sauce provides ample seasoning.
3. Marinate the Chicken
Place the chicken pieces into a large bowl or resealable plastic bag. Pour half of the prepared teriyaki sauce over the chicken, ensuring each piece is coated evenly. Cover the bowl with plastic wrap or seal the bag, then refrigerate for at least 10-15 minutes—preferably up to 30 minutes—for the flavors to penetrate the meat. Longer marination enhances tenderness and flavor, but even a brief marinade yields excellent results.
4. Heat the Pan
Preheat a heavy-bottomed skillet or cast-iron pan over medium heat. Add the vegetable oil and swirl to coat the surface evenly. The pan should be hot enough to sizzle when the chicken is added, but not so hot as to burn the oil or cause sticking. Proper heat management ensures a nice sear and prevents the chicken from steaming or drying out.
5. Cook the Chicken
Using tongs or a spatula, carefully add the chicken pieces to the hot pan. Arrange them in a single layer, leaving space between each piece for even cooking. Cook for 3-5 minutes per side, turning occasionally, until the chicken develops a golden-brown exterior and is cooked through (internal temperature of 165°F or 74°C). Avoid overcrowding the pan, which can lead to steaming rather than searing; cook in batches if necessary.
6. Add the Sauce and Simmer
Pour the remaining half of the teriyaki sauce into the pan with the cooked chicken. Reduce the heat to medium-low to allow gentle simmering. As the sauce heats, it will begin to thicken and cling to the chicken, creating that characteristic glossy coating. Use a spoon or brush to baste the chicken with the sauce, ensuring every piece is coated generously. Continue simmering for 5-7 minutes, stirring occasionally, until the sauce reaches a thick, syrupy consistency.
7. Garnish and Serve
Once the sauce has thickened and coated the chicken beautifully, remove the skillet from heat. Transfer the chicken to a serving platter, spooning over any remaining sauce. Garnish with chopped green onions and sesame seeds for added flavor, aroma, and visual appeal. Serve immediately over steamed rice or alongside your favorite stir-fried vegetables. For an authentic touch, offer additional sesame seeds and sliced green onions on the side.
Preparation Tips
- Marination Time: For maximum flavor, marinate the chicken for at least 30 minutes, or up to overnight in the refrigerator. This allows the meat to absorb the sweet and savory notes deeply.
- Uniform Chicken Pieces: Cut chicken into uniform sizes for even cooking. This is especially important when stir-frying or pan-frying to prevent overcooking or undercooking parts.
- Managing Heat: Use medium heat to prevent the sauce from burning and to allow the chicken to cook thoroughly without drying out. Adjust heat as needed during cooking.
- Reducing the Sauce: Be patient as the sauce thickens. Rushing this step may result in a thin glaze that doesn’t cling properly.
- Alternative Cooking Methods: For a healthier option, bake the chicken at 375°F (190°C) for 20-25 minutes, then brush with sauce and broil for a few minutes to achieve caramelization.
Nutritional Information
| Nutrient | Per Serving (approximate) |
|---|---|
| Calories | 250-300 kcal |
| Protein | 25-30 grams |
| Carbohydrates | 15-20 grams |
| Sugars | 10-15 grams |
| Fat | 8-10 grams |
| Saturated Fat | 2-3 grams |
| Sodium | 600-900 mg |
Note: These values depend on specific ingredients and portion sizes. Using reduced-sodium soy sauce or alternative sweeteners can modify the nutritional profile.
Tips and Tricks
- Use Quality Soy Sauce: Opt for naturally brewed soy sauce for richer flavor and better authenticity.
- Adjust Sweetness: Customize the sweetness level by increasing or decreasing sugar or honey. Tasting the sauce before cooking helps tailor it to your preference.
- Adding Aromatics: Incorporate sliced onions, garlic, or ginger into the stir-fry for extra depth.
- Thickening the Sauce: If the sauce isn’t thickening enough, dissolve a teaspoon of cornstarch in cold water and add it gradually while simmering.
- Presentation: Serve on a bed of steamed jasmine or sushi rice for an authentic experience. Garnish with additional green onions and sesame seeds for visual appeal.
- Make-Ahead: Prepare the sauce in advance; reheat and cook chicken just before serving for maximum freshness.
Add-ons
- Sautéed Vegetables: Broccoli, snap peas, bell peppers, or mushrooms complement the dish beautifully.
- Pickled Ginger: Adds a tangy contrast and refreshes palate.
- Hard-Boiled Eggs: Serve sliced on top for additional protein.
- Spicy Variations: Add a dash of chili flakes or sriracha for heat.
Side Dishes
To create a complete Japanese-inspired meal, consider pairing Chicken Teriyaki with:
- Steamed White or Brown Rice
- Japanese Pickles (Tsukemono)
- Stir-Fried Vegetables
- Miso Soup
- Seaweed Salad
- Edamame Beans
Improvements
Enhance your Chicken Teriyaki with these culinary upgrades:
- Homemade Sauce: Prepare your own teriyaki sauce from scratch using natural ingredients for a fresher taste and full control over sodium and sugar levels.
- Marinate Longer: For deeper flavor, marinate the chicken overnight, allowing the meat to absorb more of the sauce’s complexity.
- Broil for Caramelization: Finish the dish with a brief broil to achieve a slightly charred, caramelized exterior that adds depth.
- Add Fruit Elements: Incorporate pineapple chunks or orange zest into the sauce for a tropical twist.
- Use Grilled Chicken: For smoky flavor, grill the chicken instead of pan-frying.
Save and Store
Leftovers can be stored safely for up to 3 days in an airtight container in the refrigerator. To reheat, gently warm the chicken in a skillet over low heat or microwave in short bursts, adding a splash of water or broth if needed to prevent drying out. For best results, reheat the chicken with the sauce to preserve moisture and flavor.
If you wish to freeze leftovers, do so in a freezer-safe container for up to 2 months. Thaw overnight in the refrigerator before reheating. Keep in mind that the texture of the chicken may change slightly after freezing and thawing.
FAQ
Can I make Chicken Teriyaki healthier?
Absolutely. Use leaner cuts like chicken breasts, opt for low-sodium soy sauce, and serve with steamed vegetables or cauliflower rice. Reducing added sugars and avoiding frying also boosts healthfulness.
Can I substitute the soy sauce with a gluten-free alternative?
Yes, replace traditional soy sauce with gluten-free options like coconut aminos, which provide a similar umami flavor without gluten.
How do I prevent the sauce from burning?
Cook over medium or medium-low heat, and stir frequently during the simmering stage. Adding cornstarch slurry can help thicken the sauce quickly, reducing the risk of burning.
Can I use chicken drumsticks instead?
While not traditional, chicken drumsticks can be used if cooked thoroughly. Adjust cooking times accordingly, and consider removing the skin for a leaner dish.
What are some vegetarian options?
Replace chicken with tofu, tempeh, or seitan. Marinate and cook similarly, and serve with vegetable stir-fry and rice.
Conclusion
Creating authentic Chicken Teriyaki at home is a rewarding culinary venture that combines simplicity with sophisticated flavor. Through careful selection of ingredients, precise cooking techniques, and thoughtful garnishing, you can craft a dish that rivals restaurant quality. Its versatility makes it suitable for various dietary needs and occasions, making it a staple in your home cooking repertoire. Remember, the key to perfection lies in balancing the sauce’s sweetness and saltiness, managing heat effectively, and embracing your modifications to tailor the dish to your taste buds. As always, Love With Recipes encourages you to experiment, enjoy the process, and savor the delicious results of your culinary efforts. Happy cooking!
References
- Japanese Cooking: A Simple Art by Shizuo Tsuji
- The Food of Japan by Shizuo Tsuji