Introduction
In the vast landscape of Canadian desserts, the butter tart holds a special place as a quintessential treat, celebrated for its rich, sweet, and buttery flavor profile. Traditionally made with eggs and a flaky pastry crust, the butter tart embodies the comforting essence of Canadian baking heritage. However, for those with egg allergies, dietary restrictions, or simply seeking a vegetarian or vegan alternative, creating an egg-free version that preserves the authentic taste and texture can be a delightful challenge.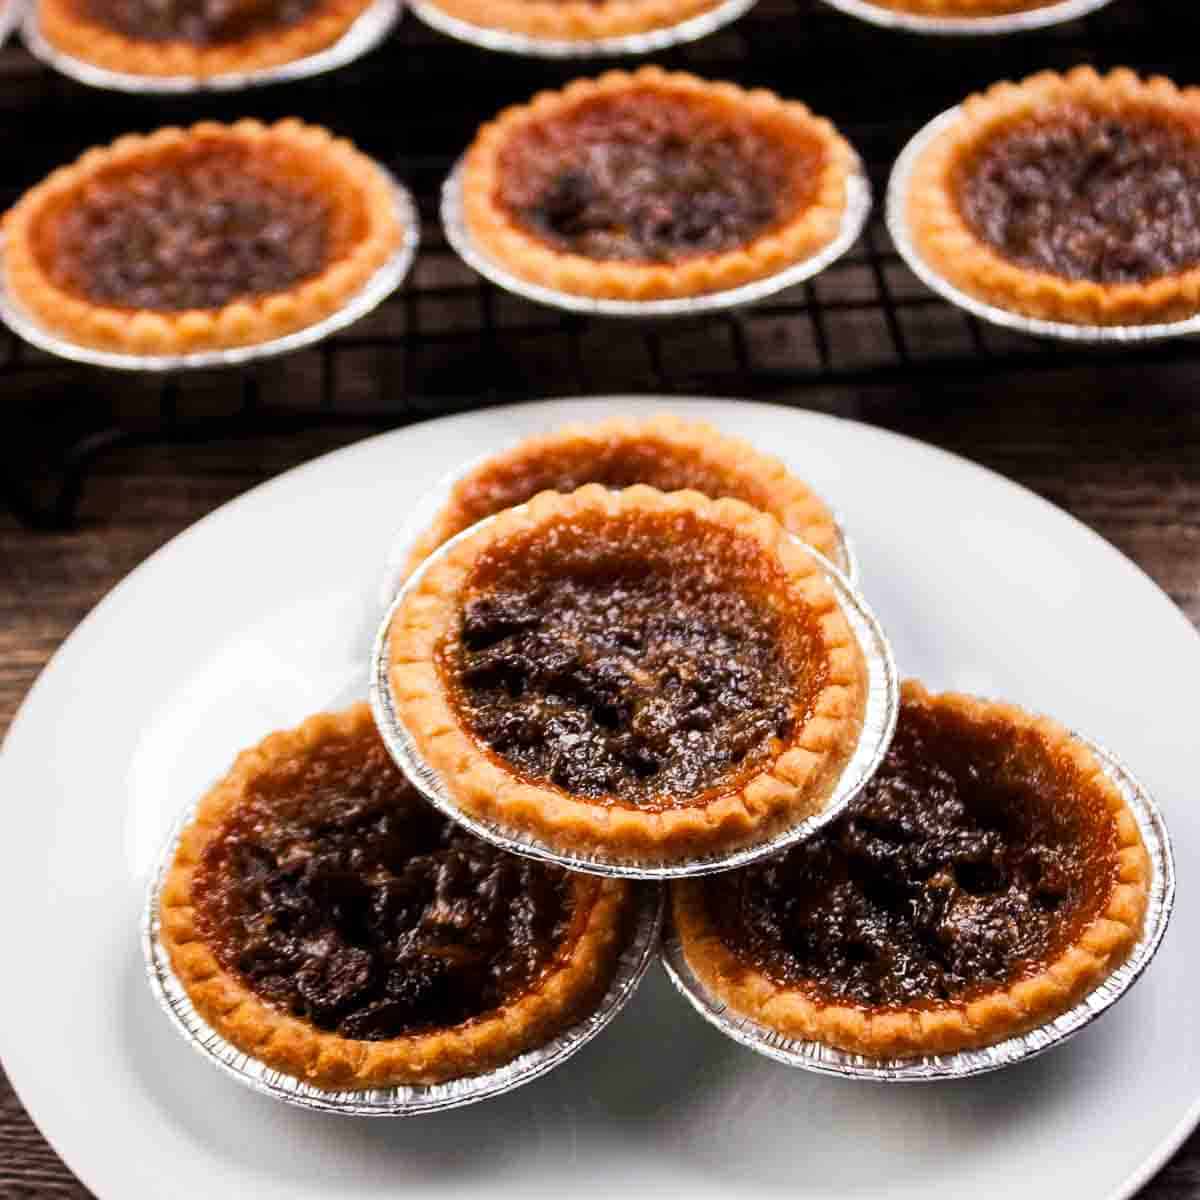
This comprehensive guide, featured on Love With Recipes, delves deep into the art of crafting a Canadian egg-free butter tart. From selecting the finest ingredients to mastering the perfect dough and filling, this recipe is designed to offer an immersive baking experience. Expect a well-balanced, gooey center encased in a tender, flaky crust, enriched with warm spices and sweet raisins, delivering a nostalgic taste that echoes the beloved original.
Embark on this culinary journey to recreate a timeless Canadian classic without eggs, ensuring accessibility and inclusivity while maintaining the signature flavors that make butter tarts a cherished dessert across generations.
Preparation Time
Active Preparation: Approximately 45 minutes
> Resting & Chilling: 45-50 minutes
> Total Time: Approximately 1 hour 30 minutes
Needed Equipment
- Oven with precise temperature control
- Mixing bowls of various sizes
- Measuring cups and spoons
- Rolling pin
- Pastry cutter or knife
- Greased muffin or tart pans (preferably non-stick or silicone)
- Plastic cling wrap or silicone wrap
- Small saucepan or double boiler (for soaking raisins)
- Wire cooling racks
- Wooden spatula or mixing spoon
- Pastry brush (optional, for egg wash or butter brushing)
- Refrigerator for chilling dough and shells
- Small sieve or sifter (for flour and spices)
- Kitchen scale (for precise measurement of butter and ingredients)
Tags
- Eggless
- Canadian Dessert
- Butter Tart
- Vegetarian
- Sweet Pastry
- Holiday Baking
- Vegan Adaptable
- Gluten Optional (if using gluten-free flour)
Serving Size
Each batch yields approximately 12 individual butter tarts, designed to serve 12 people generously, with each tart roughly 4 inches in diameter. These can be served warm or at room temperature, making them suitable for dessert tables, tea parties, or festive gatherings. For larger groups, simply double or triple the quantities accordingly.
Difficulty Level
Intermediate — The process involves multiple steps including dough preparation, chilling, shaping, and baking; however, with patience and attention to detail, it can be mastered by home bakers with some experience in pastry and dessert making. The key complexities lie in achieving the perfect flaky crust and a gooey, well-set filling.
Allergen Information
| Allergen | Presence in Recipe |
|---|---|
| Gluten | Yes — from all-purpose flour |
| Dairy | Yes — from butter and Greek yogurt |
| Raisins | Yes — dried fruit |
| Nut-Free | Yes — no nuts used |
| Vegan | Can be adapted; substitute dairy with plant-based alternatives |
Dietary Preference
- Vegetarian
- Egg-Free
- Can be Vegan (with substitutions)
- Nut-Free
Course
Dessert, Snack, Tea-time treat
Cuisine
Canadian
Ingredients
Dry Ingredients
| Ingredient | Quantity |
|---|---|
| All Purpose Flour (Maida) | 2½ cups (300 grams) |
| Salt | ½ teaspoon |
| Brown Sugar (Demerara) | ¼ cup (50 grams) |
| Cinnamon Powder (Dalchini) | ½ teaspoon |
| Nutmeg Powder | ¼ teaspoon |
| Corn Flour | 2 teaspoons |
Wet Ingredients
| Ingredient | Quantity |
|---|---|
| Butter (cold, cut into small pieces) | 230 grams (1 cup) |
| Butter (softened for filling) | ¼ cup (57 grams) |
| Hung Curd (Greek Yogurt) | ½ cup (120 ml) |
| Vanilla Extract | 1 teaspoon |
| Raisins | ½ cup (soaked and drained) |
Additional Ingredients
- Hot water (for soaking raisins)
Instructions
1. Preheat the Oven and Prepare the Muffin Pans
Begin by setting your oven to a high temperature of 250°C (482°F), ensuring it reaches the desired heat for baking the butter tarts. While the oven preheats, generously grease your muffin or tart pans with butter. This step is crucial to prevent sticking and to facilitate easy removal of the delicate egg-free butter tarts once baked. If you’re using silicone molds, you can lightly spray them with non-stick cooking spray or brush with a thin layer of melted butter.
2. Prepare the Dough
In a large mixing bowl, place the 2½ cups of all-purpose flour and ½ teaspoon of salt. Use a pastry cutter, fork, or your fingertips to incorporate the cold, cubed butter into the flour mixture. The goal is to achieve a crumbly texture resembling coarse breadcrumbs, with small, pea-sized lumps of butter still visible. This process is vital for creating the flaky, tender crust characteristic of butter tarts.
Gradually add cold water, about one teaspoon at a time, mixing gently with a spatula or your fingertips until the dough begins to come together. Avoid overworking the dough to preserve its flakiness. When the dough forms a cohesive ball, wrap it tightly in plastic cling wrap or silicone wrap and refrigerate for 30 minutes. Chilling allows the gluten to relax and the butter to firm up, which is essential for achieving a flaky crust.
3. Soak the Raisins
While the dough chills, prepare the raisins to ensure they are plump and juicy. Place the ½ cup of raisins in a small bowl and pour hot water over them until fully submerged. Let them soak for at least 30 minutes. This process rehydrates the raisins, preventing them from drying out the tart filling and ensuring a burst of sweetness in each bite. After soaking, drain the excess water thoroughly and set the raisins aside.
4. Make the Filling
In a medium-sized mixing bowl, combine the ½ cup of hung curd (Greek yogurt) and ¼ cup of softened butter. Use a wooden spatula or a whisk to blend until smooth and creamy. Add the 2 teaspoons of corn flour to this mixture, which acts as a stabilizer, helping the filling set and preventing it from becoming too runny during baking.
Stir in the ¼ cup of brown sugar (Demerara), the vanilla extract, cinnamon powder, and nutmeg powder. Mix thoroughly until the mixture is uniform and slightly thickened. Carefully fold in the drained raisins, distributing them evenly throughout the filling. This aromatic, sweet, and spice-infused filling is the heart of the butter tart, rich with flavors, yet egg-free and suitable for various dietary needs.
5. Shape the Tart Shells
Once the dough has chilled sufficiently, transfer it to a lightly floured work surface. Use a rolling pin to roll the dough out to about 1/4 inch (6mm) thickness. To ensure even thickness and ease of handling, turn the dough periodically and lightly dust with flour as needed.
Using a round cutter approximately 4 inches in diameter, cut out circles and gently press each into the prepared muffin or tart pans. Be careful to fit the dough snugly against the sides of each mold, avoiding stretching, which can cause shrinking during baking. Once filled, place the lined pans back into the refrigerator for an additional 15 minutes. Chilling the shells prevents shrinking and helps maintain their shape during baking.
6. Fill and Bake the Butter Tarts
Preheat your oven to 250°C (482°F) once more if needed. Remove the tart shells from the refrigerator and evenly distribute the prepared filling into each shell, filling them about three-quarters full. Do not overfill, as the filling will expand slightly during baking.
Place the muffin pans on the middle rack of the oven and bake for 15-20 minutes. The goal is to achieve a lightly browned, bubbling filling with a golden crust. For a gooier, more decadent tart, aim for the 15-minute mark; for a firmer, more set texture, extend baking to 20 minutes. Keep a close eye towards the end to prevent over-baking, which could dry out the filling or burn the crust.
7. Cooling and Removing
Once baked, remove the tarts from the oven and allow them to cool in the pans for approximately 10 minutes. This resting period helps the filling set further, making them easier to handle. Using a butter knife or small spatula, carefully loosen the edges of each tart from the pan, then gently lift them out and transfer to wire cooling racks.
Allow the butter tarts to cool completely before serving. They can be enjoyed warm or at room temperature, depending on preference. For added indulgence, serve with a scoop of vanilla ice cream or a dollop of whipped cream.
Preparation Tips
- Use cold butter and water: Keeping these ingredients cold ensures a flaky crust that doesn’t become tough or greasy.
- Do not overwork the dough: Overmixing develops gluten, which can toughen the pastry. Mix just until the ingredients come together.
- Chill thoroughly: The chilling process is crucial for preventing shrinking and maintaining pastry texture.
- Pre-soak raisins: This prevents them from drying out during baking and ensures a juicy burst of sweetness.
- Adjust baking time: Keep a close eye on the tart during the last few minutes to reach your preferred filling consistency.
- Use a ruler or guide for rolling: Achieving uniform thickness ensures even baking and presentation.
Nutritional Information (Per Serving)
| Nutrient | Amount |
|---|---|
| Calories | 320 kcal |
| Total Fat | 18 g |
| Saturated Fat | 10 g |
| Carbohydrates | 35 g |
| Fiber | 2 g |
| Sugars | 10 g |
| Protein | 4 g |
Tips and Tricks
- Flavor Variations: Incorporate chopped nuts like pecans or walnuts into the filling for added texture and flavor. Alternatively, add a splash of bourbon or rum to the filling for a boozy twist.
- Sweetness Adjustment: Modify the amount of brown sugar based on your sweetness preference or the sweetness of the raisins used.
- Spice Enhancements: Experiment with additional spices such as cloves, allspice, or cardamom for a more complex flavor profile.
- Crust Variations: For a gluten-free version, substitute all-purpose flour with a gluten-free blend or almond flour, adjusting water as needed.
- Presentation: Dust the cooled tarts with powdered sugar or drizzle with caramel for an elegant finishing touch.
Add-ons and Variations
- Chocolate chips mixed into the filling for a chocolate butter tart variation.
- Fresh berries or sliced fruits as topping before serving.
- Use coconut sugar instead of brown sugar for a lower glycemic index.
- Incorporate grated lemon or orange zest into the filling for citrusy brightness.
Side Dishes
- Vanilla ice cream or whipped cream
- Fresh mixed berries
- Tea or coffee for a cozy pairing
- Light fruit compote or coulis
Improvements and Customizations
- For a vegan version, replace butter with coconut oil or vegan butter and use plant-based yogurt.
- To make the crust more flavorful, incorporate a teaspoon of almond extract or lemon zest into the dough.
- Experiment with different dried fruits such as cranberries, apricots, or cherries for varied flavor profiles.
- Enhance visual appeal by brushing the crust edges with plant-based milk or a vegan egg wash before baking.
Save and Store
Allow the butter tarts to cool completely before storing. Keep them in an airtight container at room temperature for up to 2 days for optimal freshness. For longer storage, arrange the cooled tarts in a single layer in a container and refrigerate for up to 1 week. To reheat, warm in a preheated oven at 180°C (356°F) for 5-7 minutes, or microwave for about 20 seconds for a quick treat.
FAQ
Can I make these butter tarts vegan?
Yes, by substituting dairy ingredients with plant-based alternatives such as vegan butter and coconut yogurt, you can enjoy a vegan version without compromising flavor.
Can I freeze the eggless butter tarts?
Absolutely. Once cooled, wrap each tart individually in plastic wrap or foil, then place in a freezer-safe container. They can be frozen for up to 3 months. Thaw at room temperature or gently reheat in the oven before serving.
What if I don’t have Greek yogurt?
You can substitute with regular full-fat yogurt, vegan yogurt, or even silken tofu blended until smooth for a dairy-free, egg-free filling.
How do I prevent the crust from shrinking?
Chilling the dough thoroughly and chilling the shaped tart shells before baking are essential steps. Ensuring the oven is hot enough also helps set the crust quickly, reducing shrinkage.
Can I use gluten-free flour?
Yes, substitute with a gluten-free baking blend that includes xanthan gum or add ½ teaspoon xanthan gum to improve elasticity and texture.
Conclusion
This eggless Canadian butter tart recipe offers a harmonious balance of buttery, sweet, and spicy flavors, delivering the comforting essence of a beloved classic with a modern, inclusive twist. Perfect for holidays, family gatherings, or a simple indulgence, these tarts demonstrate that tradition can be reimagined without eggs while maintaining the soul of the original dessert. With patience and attention to detail, anyone can master this recipe, creating a show-stopping treat that pays homage to Canadian baking heritage. Visit Love With Recipes for more inspiring recipes and culinary adventures.