

Introduction
Embarking on the journey of recreating traditional Polish cuisine offers not only a delightful culinary experience but also a cultural immersion into a rich gastronomic heritage. Pierogi, the iconic Polish dumplings, have become synonymous with comfort, celebration, and home-cooked warmth. At Love With Recipes, we understand the importance of authenticity paired with simplicity, which is why this comprehensive recipe for Pierogi Dough is designed to guide both novice and seasoned cooks through the process of making perfect dough for your favorite fillings. From the initial mixing to the final crispy fry, every step is crafted to ensure the dough becomes a tender, pliable, and flavorful shell for your culinary creations. Whether you prefer classic potato and cheese, savory cabbage, or adventurous sweet fillings, mastering this dough is the first step towards creating memorable, homemade pierogies that will impress family and friends alike.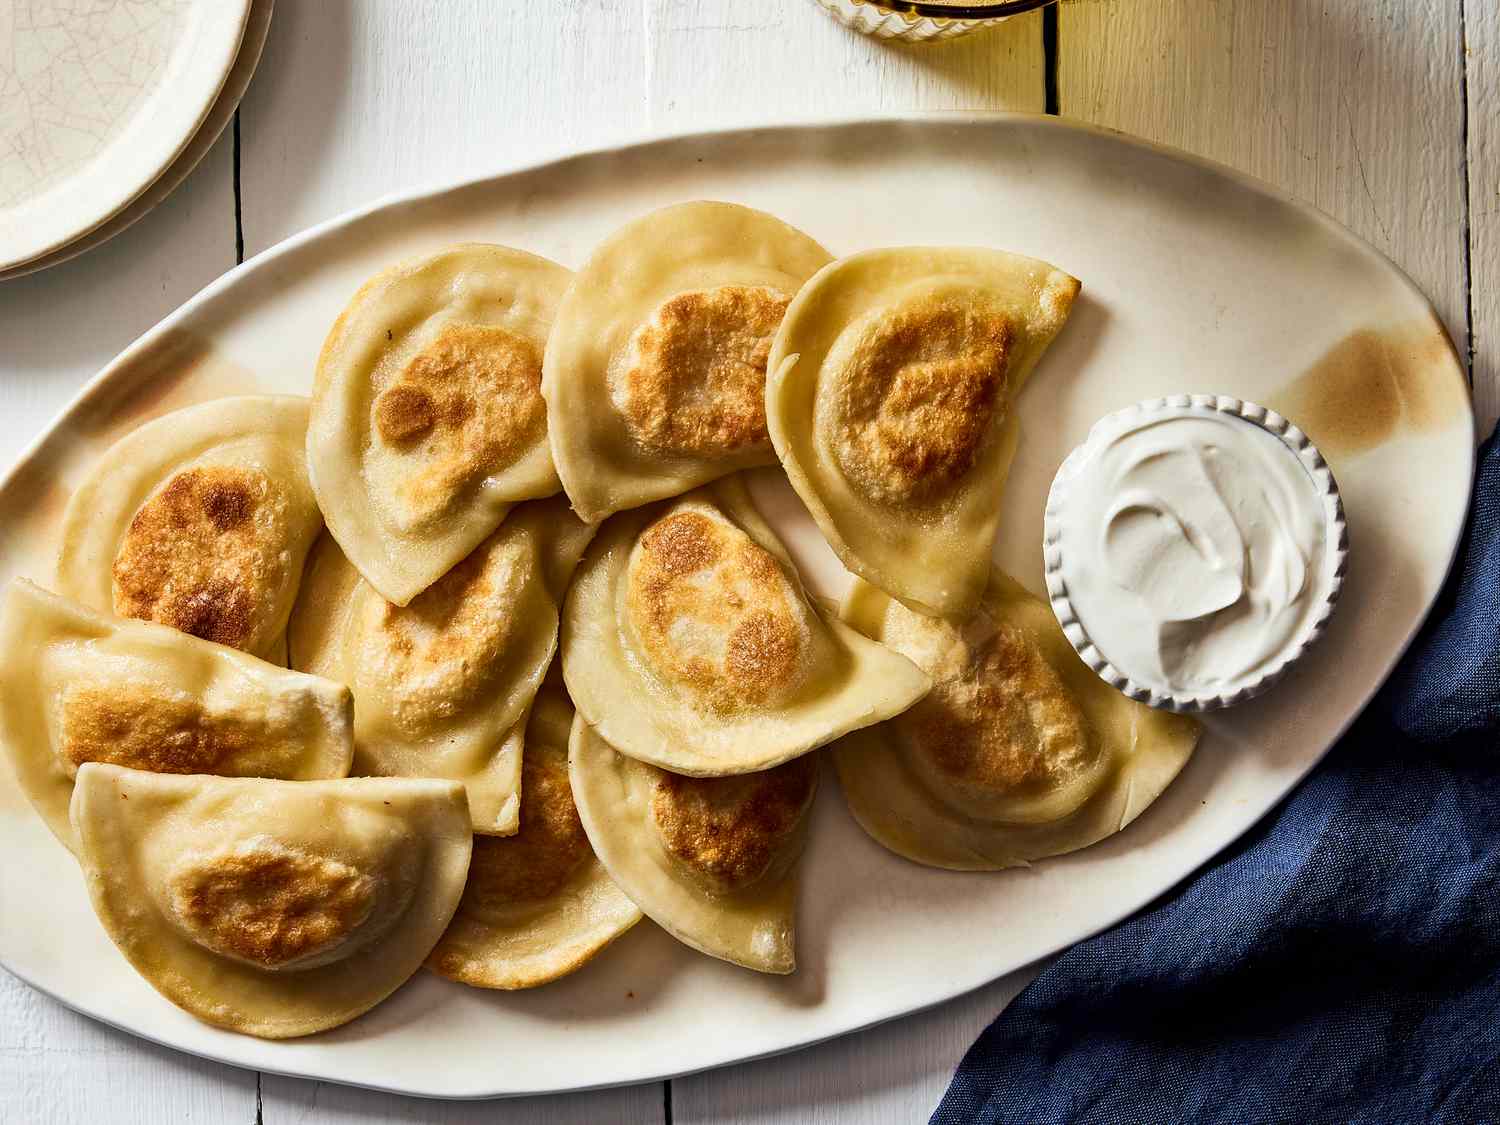
Time
- Total Time: Approximately 1 hour 15 minutes
- Preparation Time: 1 hour
- Cooking Time: 15 minutes
Needed Equipment
- Large mixing bowl
- Measuring cups and spoons
- Rolling pin
- Round cutter (biscuit cutter, glass rim, or cookie cutter)
- Slotted spoon
- Large pot for boiling
- Frying pan or skillet
- Cooking thermometer (optional but recommended)
- Kitchen towel or plastic wrap for resting dough
- Sharp knife or dough cutter
- Cooking spoon or spatula
- Cooling rack or paper towels
- Piping bag or teaspoon (for filling, optional)
- Measuring scale (optional, for precise ingredient measurement)
Tags
European, Healthy, Traditional, Comfort Food, Homemade, Polish Cuisine, Dumplings, Vegetarian, Savory, Kid-Friendly, Family Favorite

Serving Size
This recipe yields approximately 24 pierogies, which comfortably serve 4 to 6 people as a main course or 8 to 12 as appetizers or side dishes. The typical serving size is 3 to 4 pierogies per person, depending on appetite and accompaniments.
Difficulty Level
Intermediate — While the dough itself is straightforward, achieving the perfect texture and sealing the pierogies requires some attention to detail and practice. However, with patience, even beginners can master this craft, especially with the detailed steps provided by Love With Recipes.
Allergen Information
| Allergen | Present | Notes |
|---|---|---|
| Gluten | Yes | Contains all-purpose flour |
| Egg | Yes | Used in dough |
| Dairy | Minimal | Butter used in frying, optional for fillings |
| Other | No | No nuts, soy, or shellfish used |
Dietary Preference
Vegetarian options are easily adaptable by choosing fillings such as potato and cheese, cabbage, mushroom, spinach, or fruit preserves. For vegan variations, substitute egg with plant-based binders like flaxseed or aquafaba and use dairy-free margarine or oils for frying.
Course
Main Course, Appetizer, Snack, Comfort Food
Cuisine
Polish 🇵🇱, European
Ingredients
Ingredient Details and Quantities
| Ingredient | Quantity | Purpose |
|---|---|---|
| All-purpose flour | 2 cups | Main structure of the dough |
| Large egg | 1 | Binding and elasticity |
| Warm water | 1/2 cup | Hydrates flour, creates dough |
| Salt | 1 teaspoon | Flavor enhancement |
| Butter (for frying) | 2 tablespoons | Flavor and crispiness |
Instructions
Step 1: Gathering and Preparing Ingredients
Begin by assembling all your ingredients. Measuring accurately ensures consistency and the best results. Use a digital kitchen scale if precision is desired, especially for flour and water. Make sure your butter is melted or softened for even frying. If you plan to fill the pierogies with specific ingredients, prepare your fillings beforehand and keep them ready at room temperature or chilled as needed.
Step 2: Mixing the Dough
In a large, dry mixing bowl, combine 2 cups of all-purpose flour with 1 teaspoon of salt. Use a whisk or fork to blend the dry ingredients thoroughly. Create a well in the center of the flour mixture. In a separate small bowl, lightly beat the large egg. Pour the beaten egg into the well. Next, add the 1/2 cup of warm water gradually, while gently mixing with a fork or your fingertips to incorporate the flour from the edges inward. The warm water helps activate the gluten in the flour, resulting in a pliable dough. Continue mixing until the mixture begins to come together as a shaggy dough ball.
Step 3: Kneading the Dough
Transfer the shaggy dough onto a lightly floured surface. Use your hands to knead the dough, turning and folding repeatedly. Knead for approximately 8-10 minutes or until the dough feels smooth, elastic, and slightly tacky but not sticky. Proper kneading develops gluten structure, which gives pierogi their characteristic tender yet firm bite. If the dough feels too sticky, dust with a small amount of flour; if too dry, add a teaspoon of water at a time. The goal is a cohesive, smooth dough that holds together without cracking.
Step 4: Resting the Dough
Wrap the kneaded dough tightly in plastic wrap or cover with a clean kitchen towel. Rest it at room temperature for at least 30 minutes. Resting relaxes the gluten, making the dough easier to roll out and less prone to shrinking during shaping. For added convenience, you can prepare the dough a few hours in advance and refrigerate it, ensuring it comes to room temperature before rolling.
Step 5: Rolling and Cutting
After the resting period, divide the dough into two equal portions to facilitate rolling. Lightly flour your work surface and rolling pin. Take one portion and flatten it with your hands before rolling out from the center outward. Roll the dough to a thickness of approximately 1/8 inch (about 3 mm). Keep the dough as even as possible for consistent cooking. Use a floured round cutter—2 to 3 inches in diameter—to cut circles from the rolled-out dough. Recombine scraps and reroll to maximize yield. The size of the circles depends on your preferred filling amount, but generally, 2.5 to 3 inches diameter yields a nice balance between filling and wrapper size.
Step 6: Filling and Sealing
Place a golf ball-sized scoop or teaspoon of filling in the center of each dough circle. Do not overfill, as this can cause tearing during sealing or boiling. Fold the dough over the filling to create a half-moon shape. Pinch the edges firmly together, starting from one side and working around to ensure a tight seal. For extra security, press the edges with a fork to create a decorative pattern and prevent leaks during boiling. Ensure there are no air pockets inside, as trapped air can cause the pierogies to burst during cooking.
Step 7: Cooking the Pierogies
Bring a large pot of salted water to a rolling boil. Carefully add the pierogies, making sure not to overcrowd the pot—cooking in batches if necessary. Stir gently to prevent sticking. Cook for 5-8 minutes or until the pierogies float to the surface, indicating they are cooked through. Use a slotted spoon to remove them and transfer to a plate. For an extra layer of flavor, you can sauté the boiled pierogies immediately in butter or oil after boiling.
Step 8: Frying for Texture and Flavor
In a skillet, melt 2 tablespoons of butter over medium heat. Once hot, add the boiled pierogies in a single layer. Fry for 2-3 minutes on each side or until golden brown and crispy. Frying adds a delightful crunch and enhances flavor through caramelization. Turn carefully to avoid breaking the delicate dough. Serve hot with your preferred accompaniments.
Preparation Tips
- Use cold or room temperature fillings: Warm fillings can cause the dough to become soggy or tear during sealing.
- Keep dough covered: Prevent drying out by covering dough or working in small batches.
- Seal edges well: Ensure no gaps to prevent filling leakage during boiling and frying.
- Experiment with fillings: Classic potato and cheese, sautéed cabbage, mushrooms, spinach, or even sweet fruit preserves for a dessert variation.
- Use fresh ingredients: Fresh flour, eggs, and butter contribute to a superior dough texture and flavor.
Nutritional Information
| Nutrient | Per Serving (3 pierogies) |
|---|---|
| Calories | 152 kcal |
| Fat | 4.2 g |
| Saturated Fat | 0.6 g |
| Cholesterol | 16 mg |
| Sodium | 300 mg |
| Carbohydrates | 27 g |
| Fiber | 1 g |
| Sugar | 1 g |
| Protein | 4 g |
Tips and Tricks
- Use a pasta machine: For perfectly even dough sheets, a pasta machine can help achieve consistent thickness.
- Chill the dough: Slightly chilled dough is easier to handle and less sticky.
- Freeze unused dough: Wrap tightly in plastic wrap and freeze for up to 3 months. Thaw in the refrigerator before use.
- Get creative with shapes: Use different cutters or molds for decorative pierogi designs.
Add-ons and Variations
- Cheese and Herb: Mix shredded cheese with chopped parsley or dill for a flavorful twist.
- Mushroom and Onion: Sauté chopped mushrooms and onions, cool, then fill for a hearty vegetarian option.
- Sweet Fillings: Fill with fruit preserves, sweetened ricotta, or chocolate-hazelnut spread for dessert pierogies.
- Spiced Variations: Add a pinch of nutmeg or paprika to the dough for subtle flavor enhancements.
Side Dishes
- Sour cream or Greek yogurt
- Caramelized onions
- Sauteed or roasted vegetables
- Fresh salad with vinaigrette
- Polish beet salad
Improvements
- Incorporate whole wheat flour for added fiber and nutrition, replacing up to half of the all-purpose flour.
- Add a splash of vinegar or lemon juice to the dough to enhance flavor and tenderness.
- Experiment with different fillings to diversify your menu and cater to dietary preferences.
- Use a stand mixer with a dough hook for more uniform kneading, especially for larger batches.
Save and Store
Uncooked pierogies can be stored in the refrigerator for up to 24 hours in an airtight container to prevent drying out. For longer storage, freeze the uncooked or cooked pierogies on a baking sheet until solid, then transfer to resealable plastic bags. Cook directly from frozen—boil for 5-8 minutes longer or fry until golden brown. Cooked pierogies can also be refrigerated for up to 3 days and reheated by boiling or pan-frying until hot and crispy.
FAQ
Can I make the dough vegan?
Yes. Replace the egg with a plant-based binder such as flaxseed meal mixed with water (1 tablespoon flaxseed meal + 3 tablespoons water per egg). Use vegan margarine or oil for frying. Ensure fillings are plant-based as well.
Can I prepare the dough ahead of time?
Absolutely. Wrap the dough tightly in plastic wrap and refrigerate for up to 24 hours. Let it come to room temperature before rolling out for best results.
Can I freeze raw pierogies?
Yes. Freeze uncooked pierogies on a baking sheet until solid, then transfer to airtight bags. Boil directly from frozen, adding an extra 2-3 minutes to the cooking time.
Are there gluten-free options?
Gluten-free flours like rice flour or a gluten-free baking blend can be used, but the texture may vary. Consider adding xanthan gum or guar gum to mimic gluten’s elasticity.
Conclusion
Mastering the art of pierogi dough is a rewarding process that opens the door to endless culinary creativity. With this detailed guide from Love With Recipes, you are equipped to craft authentic, tender, and flavorful Polish dumplings that can be customized with your favorite fillings and served in numerous ways. Whether as a hearty main course or a delightful appetizer, homemade pierogies bring warmth, tradition, and joy to any table. Embrace the process, experiment with variations, and enjoy every bite of these comforting treats. Your homemade pierogies will surely become a cherished staple in your culinary repertoire, connecting you to Polish heritage and delighting those around you.