

Introduction
Hawaiian Banana Bread is a culinary masterpiece that combines the comforting familiarity of traditional banana bread with the vibrant, tropical flavors that evoke the breezy, sun-drenched islands of Hawaii. This recipe, brought to you by Love With Recipes, is an ode to the lush landscapes, fragrant fruits, and laid-back vibe of the Pacific Islands. It’s not just a bread; it’s a sensory experience that transports your palate to a paradise where over-ripe bananas are transformed into a moist, fluffy, and decadently flavorful loaf. The secret lies in a meticulous technique—sifting cake flour thrice—that yields an incredibly tender crumb, complemented by the richness of margarine and the sweetness of ripe bananas. Whether you’re seeking a comforting breakfast, an impressive snack for guests, or a unique dessert, this Hawaiian Banana Bread will elevate your baking repertoire with its irresistible aroma and melt-in-your-mouth texture.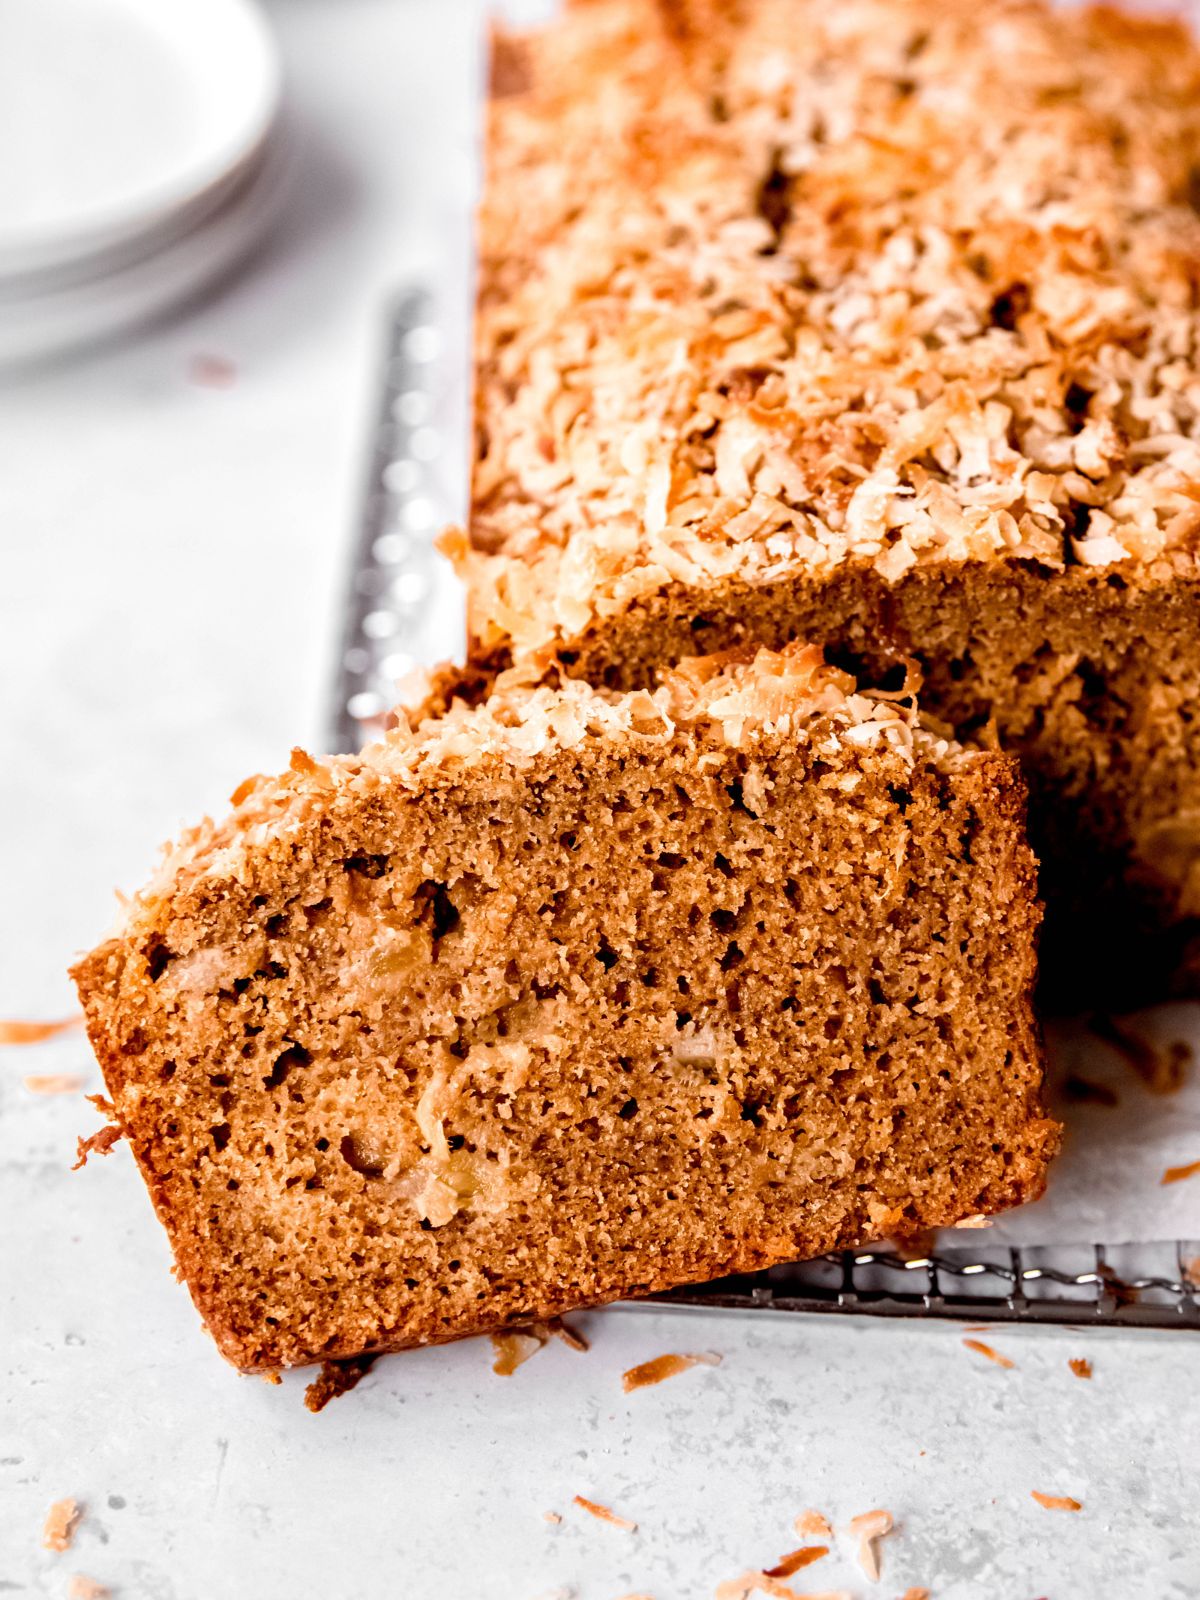
Time
The entire process takes approximately 1 hour and 15 minutes, including prep and baking time. This makes it an ideal recipe for a weekend baking session or a special occasion where you wish to impress with a tropical twist on classic comfort food. The prep work, from peeling bananas to greasing loaf pans, takes about 20 minutes, while the baking process spans roughly 55 minutes. The cooling period is crucial to achieve the perfect slice, so plan accordingly to savor this luscious bread at its peak freshness.

Needed Equipment
- Oven: A standard convection or conventional oven capable of maintaining a steady 350°F (175°C).
- Mixing bowls: At least two large mixing bowls—one for wet ingredients and one for dry ingredients.
- Whisk or electric mixer: For creaming sugar and margarine, and mixing batter thoroughly.
- Measuring cups and spoons: Accurate measurement tools for ingredients.
- Sifter or fine-mesh sieve: For sifting cake flour and dry ingredients three times.
- Rubber spatula or wooden spoon: For folding ingredients gently.
- Loaf pans (9x5x3 inches): Two pans, preferably non-stick or well-greased.
- Cooling rack: To cool the baked loaves evenly and prevent sogginess.
- Knife or bread slicer: For slicing the cooled bread.
- Optional: Pastry brush for greasing pans, digital kitchen scale for precise measurement, or a stand mixer for ease.
Tags
Banana Bread, Tropical Recipes, Hawaiian Cuisine, Quick Breads, Baked Goods, Kid Friendly, Comfort Food, Dessert, Breakfast, Snack, Easy Baking, Moist Bread
Serving Size
Each loaf yields approximately 8 to 10 slices, making the total servings around 16 to 20 slices for the two loaves. Portion sizes can be adjusted based on appetite and occasion, but generally, a slice per person is a generous serving for breakfast or snack purposes.
Difficulty Level
This Hawaiian Banana Bread is rated as Easy to Moderate. It’s suitable for novice bakers willing to follow precise steps, especially during the sifting process, and experienced bakers looking for a foolproof, tropical-inspired bread that demonstrates attention to detail. The key challenge lies in the triple sifting of the dry ingredients, which requires patience and careful technique but yields exceptional results.
Allergen Information
| Contains | Allergens |
|---|---|
| Eggs | Egg allergy considerations |
| Wheat (cake flour) | Gluten sensitivity or celiac disease |
| Milk/Fat (margarine) | Lactose intolerance or dairy allergy |
Note: Always choose dairy-free margarine or substitute with plant-based fats if needed to accommodate dietary restrictions.
Dietary Preference
Vegetarian. This recipe does not contain meat, fish, or poultry products. For vegan adaptations, substitute eggs with flaxseed meal or commercial egg replacer, and use vegan margarine or coconut oil instead of traditional margarine.
Course
Breakfast, Snack, Dessert
Cuisine
Hawaiian, Tropical, American
Ingredients
4 cupsGranulated Sugar
| Quantity | Ingredient |
|---|---|
| 2 | Bananas (ripe) |
| 1 cup (8 oz) | Margarine (softened) |
| 6 | Eggs |
| 2 1/2 cups | Cake Flour (see note below) |
| 1 tsp | Salt |
| 2 tsp | Baking Soda |
Note on Cake Flour: Cake flour is crucial for achieving the airy, tender crumb characteristic of this bread. If unavailable, you can make a substitute by replacing 2 1/2 cups of cake flour with 2 1/2 cups minus 2 tablespoons of all-purpose flour, plus 2 tablespoons cornstarch, sifted together thoroughly.
Instructions
Step 1: Preheat Oven and Prepare Pans
Set your oven to 350°F (175°C). Position a rack in the middle of the oven for even heat distribution. Generously grease two 9x5x3-inch loaf pans with butter, margarine, or non-stick spray. For extra assurance against sticking, dust the pans lightly with flour or line them with parchment paper. This step is simple but vital for a clean release of the bread after baking, especially considering the moist texture of the batter.
Step 2: Prepare Dry Ingredients—Sifting and Combining
In a large, dry mixing bowl, combine the cake flour, salt, and baking soda. Use a fine-mesh sieve or sifter to pass these ingredients through, then discard any large clumps. Sifting the dry ingredients not once, but thrice, is a hallmark of this recipe. This rigorous process aerates the flour, ensures uniform distribution of leavening agents, and contributes to the light, fluffy structure of the final loaf. To do this effectively:
- Place the flour, salt, and baking soda into the sifter.
- Tap the sifter gently over the bowl, allowing the mixture to fall through.
- Repeat this process two more times for optimal aeration and even distribution.
This meticulous step may seem excessive but is a secret weapon to achieve the signature tender crumb.
Step 3: Creaming Sugar and Margarine
In a separate large mixing bowl, combine the granulated sugar and softened margarine. Using an electric mixer or a sturdy whisk, beat until the mixture becomes pale, light, and fluffy. This process incorporates air into the batter, which is essential for a tender loaf. Scrape down the sides of the bowl periodically to ensure thorough mixing. The texture at this stage should resemble a creamy, homogeneous paste.
Step 4: Prepare Bananas and Incorporate Wet Ingredients
Peel the ripe bananas and mash them thoroughly using a fork or potato masher until smooth with only small lumps remaining. Ripe bananas should be soft, fragrant, and slightly browned—these are ideal for maximum sweetness and flavor. Add the mashed bananas to the sugar-margarine mixture, folding gently to combine. Crack eggs one at a time into the mixture, beating well after each addition. This gradual incorporation prevents curdling and ensures a smooth, cohesive batter. The mixture should be thick but moist, with a vibrant banana aroma filling your kitchen.
Step 5: Combine Dry and Wet Mixtures
Gradually add the sifted flour mixture to the wet ingredients in three additions, folding gently with a spatula or wooden spoon after each addition. It’s crucial to mix just until the ingredients are combined—overmixing can cause dense, tough bread. The batter will be thick but smooth, with no streaks of flour remaining. Use a gentle folding motion to preserve the airiness created during the creaming process.
Step 6: Fill Loaf Pans and Prepare for Baking
Divide the batter evenly between the two prepared loaf pans. Use the back of a spoon or an offset spatula to level the surface. This ensures even baking and aesthetically pleasing slices. Tap the pans lightly on the counter to release any large air bubbles trapped in the batter. Place the pans in the oven, positioning them on the middle rack for uniform heat exposure.
Step 7: Baking and Testing for Doneness
Bake the loaves for approximately 55 minutes. During baking, the bread will rise, develop a golden-brown crust, and emit a fragrant aroma reminiscent of tropical islands. To test doneness, insert a toothpick into the center of each loaf; if it emerges clean, the bread is ready. If not, bake for an additional 5-10 minutes, checking periodically to prevent overbaking. The baking time can vary slightly depending on oven calibration and pan material, so keep a close eye during the final minutes.
Step 8: Cooling and Serving
Remove the loaves from the oven and immediately transfer them onto a wire cooling rack. Allow the bread to cool in the pans for about 10 minutes, then gently turn out each loaf. Cooling completely before slicing is vital; warm bread is fragile and can crumble. Once cooled, slice with a serrated knife to reveal a tender crumb dotted with banana flecks and a moist interior. Serve plain, with softened butter, honey, or a tropical fruit compote for an authentic Hawaiian experience.
Preparation Tips
- Use ripe bananas: Overripe bananas are sweeter and mash more easily, imparting maximum flavor and moisture.
- Triple sifting: Do not skip this step. It ensures a light texture and prevents dense pockets of flour.
- Room temperature ingredients: Margarine, eggs, and bananas should be at room temperature to blend smoothly and evenly.
- Accurate measurements: Use a measuring cup or kitchen scale for precision—baking is a science, after all.
- Don’t overmix: Fold ingredients gently to preserve air bubbles that give the bread its fluffy structure.
- Baking times vary: Keep an eye on your loaves; start checking for doneness around the 50-minute mark.
Nutritional Information
| Per Serving (Estimate) | Amount |
|---|---|
| Calories | 2667 kcal (total for both loaves) |
| Fat | 103.4 g |
| Saturated Fat | 19.5 g |
| Cholesterol | 423 mg |
| Sodium | 3632 mg |
| Carbohydrates | 416.2 g |
| Fiber | 12.1 g |
| Sugar | 244.4 g |
| Protein | 31.5 g |
Tips and Tricks
- Enhance tropical flavor: Add shredded coconut, chopped macadamia nuts, or pineapple chunks into the batter for an even more Hawaiian-inspired loaf.
- Moisture retention: Store bread in an airtight container or wrap tightly in plastic wrap to prevent drying out.
- Texture variation: Sprinkle some toasted coconut flakes on top before baking for a crunchy crust.
- Sweetness level: Adjust sugar quantities based on banana ripeness and personal preference.
- Healthier options: Substitute half the sugar with honey or maple syrup, and use whole wheat cake flour for added fiber.
Add-ons and Variations
- Chocolate chips: Fold in 1 cup of mini chocolate chips for a decadent twist.
- Nutty crunch: Add chopped walnuts, pecans, or macadamia nuts into the batter for texture and flavor.
- Fruity infusion: Incorporate chopped pineapple, mango, or papaya for an extra burst of tropical fruitiness.
- Glaze: Drizzle with a simple glaze made from powdered sugar and coconut milk for added sweetness and visual appeal.
Side Dishes
- Fresh tropical fruit salad with mango, pineapple, and papaya.
- Creamy coconut yogurt or Greek yogurt topped with toasted coconut.
- Light whipped cream or vanilla mascarpone for a luxurious breakfast pairing.
- Hot coffee or tropical fruit smoothies to complement the sweet bread.
- Grilled pineapple slices or coconut rice for a full Hawaiian-themed meal.
Improvements and Customizations
- For a richer flavor, replace margarine with coconut oil, which adds a subtle tropical aroma.
- Add a teaspoon of vanilla extract or rum essence to enhance depth of flavor.
- Sprinkle cinnamon or nutmeg into the dry ingredients for warm, spicy notes.
- Use brown sugar instead of white for a caramel-like sweetness and more moisture.
- Experiment with different gluten-free flours if you have dietary restrictions, adjusting the amount accordingly.
Save and Store
To keep your Hawaiian Banana Bread fresh, store it properly:
- Room temperature: Wrap the completely cooled loaves tightly in plastic wrap or store in an airtight container. Consume within 2-3 days for optimal freshness.
- Refrigeration: For longer storage, place in an airtight container and refrigerate for up to a week. Allow slices to come to room temperature or warm slightly before serving.
- Freezing: Wrap individual slices or entire loaves in plastic wrap, then foil, or place in a resealable freezer bag. Freeze up to 3 months. Thaw at room temperature or reheat in the microwave or oven for fresh-baked warmth.
FAQ
Can I make this banana bread vegan?
Yes. Substitute eggs with flaxseed or chia seed gel (1 tablespoon ground seeds mixed with 3 tablespoons water per egg), and replace margarine with vegan butter or coconut oil. Ensure all other ingredients are vegan-friendly.
Can I use all-purpose flour instead of cake flour?
While all-purpose flour can be used as a substitute, the texture may be slightly denser. For best results, follow the note on making homemade cake flour by replacing 2 tablespoons of flour per cup with cornstarch.
Is this bread suitable for diabetics?
Because of its high sugar content and refined flour, this bread is not ideal for diabetics. For a healthier version, reduce sugar, use whole wheat or alternative flours, and add fiber-rich ingredients.
Can I add nuts or dried fruits?
Absolutely! Chopped nuts like macadamia, walnuts, or pecans add crunch, while dried fruits like cranberries or chopped pineapple can boost tropical flavor.
How do I prevent the bread from sinking in the middle?
Ensure your oven is properly calibrated, do not overmix the batter, and avoid opening the oven door during baking. Properly sifted dry ingredients and correct leavening also help maintain structure.
Conclusion
Creating Hawaiian Banana Bread is a celebration of texture, flavor, and tropical charm. Its tender crumb, moist interior, and fragrant aroma make it a crowd-pleaser for any occasion, from casual brunches to festive gatherings. This recipe’s meticulous process—especially the thrice-sifted cake flour—ensures a cloud-like softness that melts in your mouth, while the ripe bananas provide natural sweetness and moisture. The versatility of this bread allows for endless variations and personal touches, making it a truly customizable tropical delight. Whether you enjoy it plain, with a smear of butter, or topped with toasted coconut, this Hawaiian Banana Bread promises to be a treasured addition to your baking arsenal. Dive into this recipe today and bring a slice of paradise to your table, courtesy of Love With Recipes!
References
- Hawaiian Cookbooks and Food Heritage Resources
- Food Editor’s Favorites: Treasured Recipes (original source of inspiration)