

Introduction
Indulge in the luscious, creamy decadence of this Peanut Butter Pie, a dessert that embodies comfort and indulgence with every bite. Featured on Love With Recipes, this recipe is designed to bring together rich peanut butter, smooth cream cheese, and sweet powdered sugar into a harmonious dessert that’s both easy to prepare and guaranteed to satisfy any sweet tooth. Whether you’re celebrating a special occasion, hosting a potluck, or simply craving a decadent treat to enjoy with a glass of cold milk, this peanut butter pie is your perfect choice. Its luscious texture and irresistible flavor profile make it a crowd-pleaser that’s sure to become a favorite in your dessert repertoire.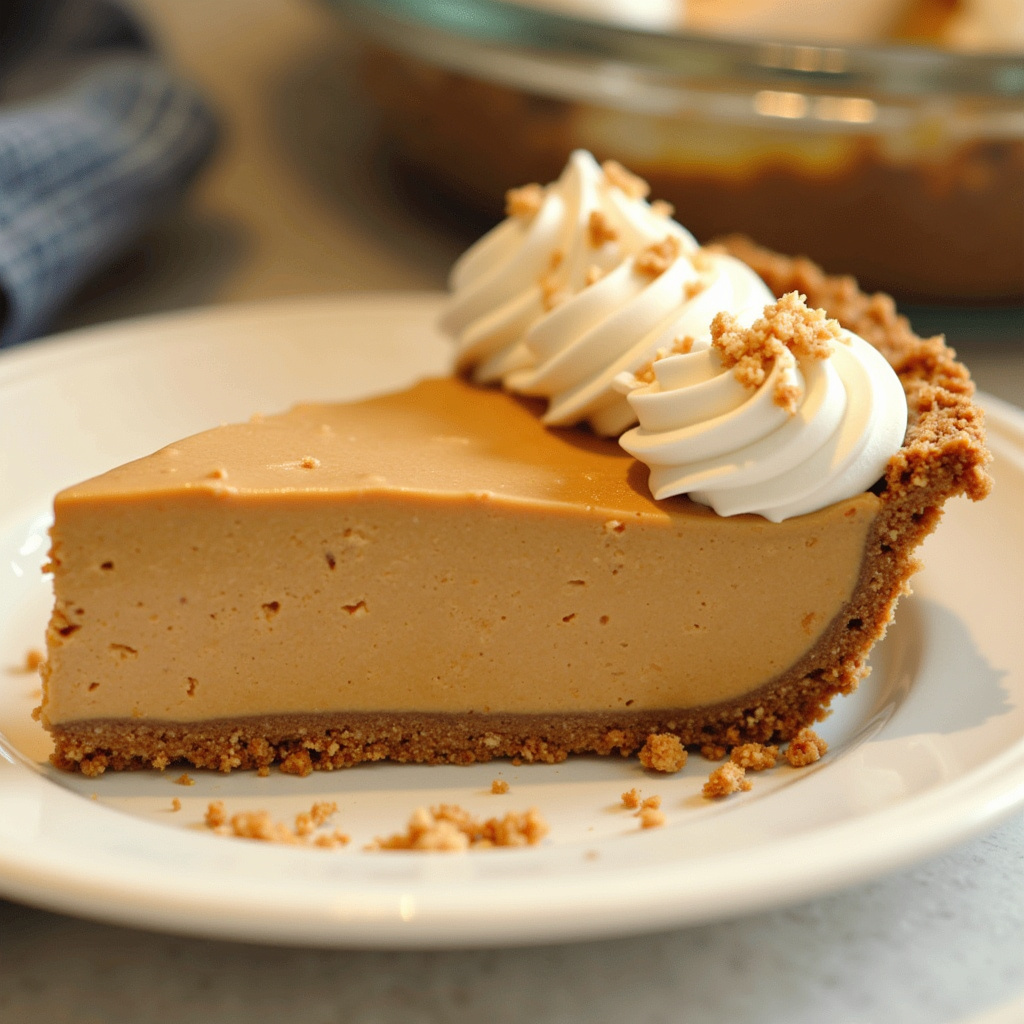
Time
- Preparation Time: 10 minutes
- Cooking/Freezing Time: 1 hour (includes chilling and freezing)
- Total Time: Approximately 1 hour 10 minutes
Needed Equipment
- Electric mixer or stand mixer
- Mixing bowls (medium and large)
- Rubber spatula
- Measuring cups and spoons
- 9-inch graham cracker crust (pre-made or homemade)
- Plastic wrap or aluminum foil (for covering)
- Freezer-safe container or plate (for chilling)
- Knife and cutting board (for optional toppings)
- Serving spatula or pie server
Tags
dessert, peanut butter, pie, easy, no-bake, creamy, rich, kid-friendly, potluck, holiday, summer, spring, winter, Thanksgiving, Christmas, comfort food, quick dessert

Serving Size
One slice of pie (approximately 1/8th of the pie)
Difficulty Level
Beginner Friendly — This recipe requires simple mixing and layering, making it accessible for cooks of all skill levels.
Allergen Information
- Contains: Peanuts (peanut butter), dairy (cream cheese, whipped topping)
- May contain traces of: Gluten (graham cracker crust), soy (in whipped topping)
Dietary Preference
Vegetarian. Not suitable for vegans due to dairy ingredients.
Course
Dessert
Cuisine
North American, Canadian
Ingredients
Ingredient Table
| Ingredient | Quantity | Notes |
|---|---|---|
| Powdered sugar | 1 cup | Divided into two portions |
| Peanut butter | 1 cup + 3/4 cup | Creamy or crunchy, depending on preference |
| Cream cheese | 8 oz (1 standard package) | Softened for easy mixing |
| Whipped topping | 8 oz | Chill before using for best results |
| Graham cracker crust | 1 pre-made or homemade | Standard 9-inch size |
Step-by-Step Instructions
1. Preparation of Ingredients
Begin by ensuring all ingredients are measured accurately and prepared appropriately. Soften the cream cheese by leaving it at room temperature for about 15-20 minutes before starting. If you are using store-bought whipped topping, keep it refrigerated until ready to use to maintain its fluffiness. Measure out the powdered sugar carefully, dividing it into two separate portions—one for the peanut butter mixture and the other for topping purposes.
2. Mixing the Peanut Butter and Powdered Sugar
In a large mixing bowl, combine 1 cup of powdered sugar with 1 cup of peanut butter. Use an electric mixer on medium speed or a sturdy whisk to blend the ingredients until smooth, creamy, and well combined. This mixture forms the base flavor of the pie and needs to be thoroughly mixed to ensure even distribution of sweetness and peanut flavor. Scrape down the sides of the bowl periodically to incorporate all ingredients evenly.
3. Layering the First Peanut Butter Mixture in the Crust
Spread half of the peanut butter and powdered sugar mixture evenly into the bottom of the graham cracker crust. Use a rubber spatula or the back of a spoon to smooth it out, creating an even layer that covers the entire base. This layer will serve as the foundation of your pie, providing a rich peanut butter flavor right from the first bite. Ensure the layer is smooth and level, as this will influence the final presentation.
4. Preparing the Cream Cheese and Peanut Butter Mixture
In a separate mixing bowl, combine the softened cream cheese, 3/4 cup of powdered sugar, and 3/4 cup of peanut butter. Using an electric mixer, beat these ingredients together on medium speed until the mixture is smooth, fluffy, and well integrated. This process might take about 2-3 minutes, and the mixture should be free of lumps. The goal is to achieve a creamy consistency that will layer perfectly over the initial peanut butter crust base.
5. Spreading the Cream Cheese Mixture
Once the mixture is ready, gently spread it over the peanut butter layer in the crust. Use a spatula or the back of a spoon to spread evenly, smoothing out the top to create a uniform layer. This layer adds a tangy richness that complements the sweetness of the peanut butter, creating a complex flavor profile that’s both creamy and decadent.
6. Adding the Remaining Peanut Butter Mixture as a Topping
Take the remaining peanut butter and powdered sugar mixture and sprinkle or dollop it over the top of the cream cheese layer. Use a spatula or the back of a spoon to spread and evenly distribute the topping. This final layer enhances the peanut butter flavor and gives the pie a visually appealing layered look. For extra visual appeal, you can swirl the layers slightly with a toothpick or skewer.
7. Freezing the Pie
Cover the pie tightly with plastic wrap or aluminum foil. Place it in the freezer for at least 1 hour to set and chill thoroughly. Freezing helps the layers firm up, making slicing cleaner and ensuring the flavors meld together. For best results, you can leave the pie in the freezer for up to 2 hours, especially if you prefer a firmer texture.
8. Serving and Garnishing
When ready to serve, remove the pie from the freezer and let it sit at room temperature for about 5 minutes to soften slightly for easier slicing. Use a sharp knife to cut into slices, wiping the blade clean between cuts for neat presentation. For an extra decadent touch, sprinkle chopped Reese’s peanut butter cups or drizzle chocolate syrup on top before serving. Serve with a cold glass of milk or your favorite beverage to balance the richness.
Preparation Tips
- Ensure cream cheese is softened to avoid lumps and facilitate smooth mixing.
- Use high-quality peanut butter for a richer flavor; natural or creamy options work well.
- If you prefer a less sweet pie, reduce the powdered sugar slightly or omit the topping layer.
- For a gluten-free option, substitute graham cracker crust with a gluten-free cookie crust made from crushed gluten-free cookies or graham crackers.
- Chill the whipped topping thoroughly before folding it into the mixture to maintain fluffiness.
Nutritional Information
| Nutrient | Per Serving (1 slice) |
|---|---|
| Calories | 1018.6 kcal |
| Fat | 72.8 g |
| Saturated Fat | 25.5 g |
| Cholesterol | 83.9 mg |
| Sodium | 698.3 mg |
| Carbohydrates | 77.7 g |
| Fiber | 5.1 g |
| Sugar | 56.6 g |
| Protein | 24.2 g |
Tips and Tricks
- For a richer flavor, consider adding a splash of vanilla extract to the cream cheese mixture.
- If you prefer a crunchier texture, sprinkle chopped peanuts or crushed cookies on top before serving.
- To make the pie extra smooth, sift the powdered sugar before mixing it into the peanut butter and cream cheese.
- Use a hot knife dipped in warm water to cut through the pie cleanly, especially for thick layers.
- For a more decorative presentation, pipe whipped topping around the edges before garnishing.
Add-ons and Variations
- Chocolate Drizzle: Melt chocolate chips and drizzle over the top for added richness.
- Reese’s Peanut Butter Cups: Chop and sprinkle over the pie before serving for an extra peanut butter hit.
- Banana Slices: Add slices of banana between layers for added fruitiness.
- Toffee Bits: Sprinkle toffee bits on top for crunch and caramel flavor.
Side Dishes
This pie pairs beautifully with:
- Fresh berries (strawberries, raspberries, or blueberries)
- Vanilla ice cream or frozen yogurt
- Whipped cream or additional whipped topping
- Crushed pretzels for a salty contrast
Improvements and Customizations
- For a healthier twist, substitute half the peanut butter with almond or cashew butter and reduce the powdered sugar.
- Add a layer of chocolate ganache beneath the peanut butter layer for a richer dessert.
- Use low-fat cream cheese and light whipped topping to cut down on calories while maintaining flavor.
Save and Store
Keep leftovers covered in the refrigerator for up to 3 days. For longer storage, wrap the entire pie tightly with plastic wrap or aluminum foil and freeze for up to 1 month. To serve, thaw in the refrigerator for several hours or overnight. The pie maintains its creamy texture and flavor even after freezing, making it ideal for preparing in advance for parties or special gatherings.
Frequently Asked Questions (FAQ)
Can I make this pie ahead of time?
Absolutely! The pie benefits from resting in the freezer for at least 1 hour to set fully. You can prepare it a day in advance, wrap it well, and store it in the freezer. Just remember to thaw it slightly before slicing for best presentation and texture.
Can I substitute the graham cracker crust with a homemade crust?
Yes. For a homemade crust, combine crushed graham crackers or digestive biscuits with melted butter and press into a pie pan. Bake at 350°F (175°C) for 8-10 minutes until firm and cooled before adding the filling.
Is this recipe suitable for gluten-free diets?
Yes, if you use gluten-free graham crackers or cookies for the crust. Ensure all other ingredients are certified gluten-free.
How can I make this pie vegan?
Replace cream cheese with a vegan cream cheese alternative, and use coconut whipped topping instead of traditional whipped topping. Adjust powdered sugar to suit taste, using organic or vegan-friendly sweeteners.
Conclusion
This Peanut Butter Pie is a quintessential comfort dessert that combines the richness of peanut butter with the tangy smoothness of cream cheese, all layered in a crispy graham cracker crust. Its simplicity in preparation, paired with its decadent flavor, makes it a perennial favorite among family and friends. Perfect for holidays, potlucks, or a weeknight treat, this pie offers a satisfying balance of sweetness, creaminess, and peanutty goodness. As always, Love With Recipes encourages you to personalize this recipe with your favorite toppings and add-ins to make it uniquely yours. So gather your ingredients, follow the detailed steps, and indulge in a slice of this irresistible treat. Happy baking!