

 Introduction
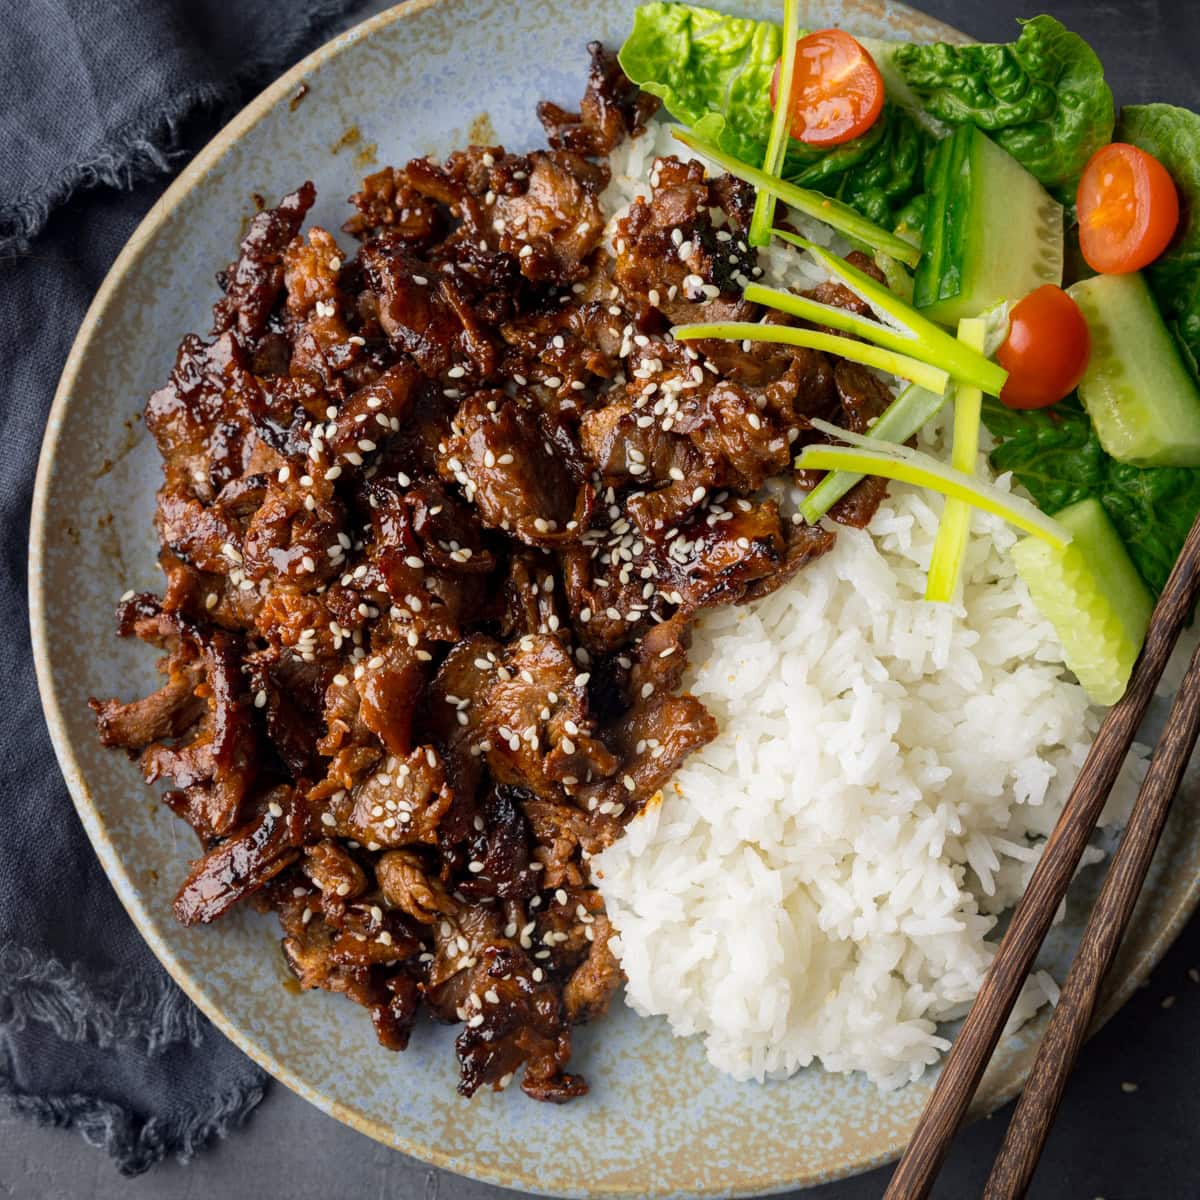
Welcome to the comprehensive guide to preparing a delectable and authentic beef yakiniku, a Japanese-style grilled beef dish that has gained popularity worldwide for its rich flavors and simple preparation method. At Love With Recipes, we believe that good food is about experience, flavor, and sharing, which is why we have curated this extensive, detailed recipe to help you master the art of beef yakiniku in your own kitchen. This recipe emphasizes quality ingredients, precise techniques, and thoughtful presentation, ensuring a memorable dining experience whether you are cooking for family, friends, or yourself.
Beef yakiniku, traditionally cooked over an open flame or grill, lends itself beautifully to stovetop preparation, making it accessible even in limited kitchen spaces. The essence of this dish lies in the tender, thinly sliced beef, marinated and cooked with a harmonious blend of garlic, shallots, chilies, ginger, and rich sauces. The addition of a quick marinade step involving black tea enhances tenderness, providing a subtle depth of flavor that elevates the dish beyond the ordinary. The balanced combination of sweet soy sauce (kecap manis), oyster sauce, and seasonings creates a savory-sweet profile that is both addictive and satisfying.

Time
This recipe takes approximately 30 minutes from start to finish, including preparation, cooking, and serving. The breakdown is as follows:
- Preparation: 15 minutes
- Marinating (optional but recommended): 30 minutes (can be done in advance)
- Cooking: 10-15 minutes
- Plating and resting: 2-3 minutes
For optimal flavor, marinate the beef in black tea and seasonings for at least 30 minutes prior to cooking, which allows the meat to absorb flavors and become more tender.
Needed Equipment
- Sharp chef’s knife
- Cutting board
- Small bowl for marinating
- Measuring cups and spoons
- Medium-sized saucepan or frying pan
- Wooden or silicone spatula
- Grater or fine knife for ginger
- Serving dish or platter
- Tongs or chopsticks for serving
- Optional: Kitchen thermometer (for checking oil temperature)
Tags
Japanese cuisine, beef recipes, quick dinner, stir-fry, stir-fried beef, Asian dishes, flavorful sauces, tender beef, easy recipes, love with recipes
Serving Size
This recipe serves approximately 2-3 people as a main course, with generous portions of beef and vegetables. Adjust quantities accordingly for larger groups or as part of a multi-course meal.
Difficulty Level
This recipe is classified as easy to intermediate. It involves basic knife skills, understanding of stir-frying techniques, and balancing flavors. Suitable for home cooks with some cooking experience looking to expand their Asian cuisine repertoire.
Allergen Information
| Allergens | Present in this recipe | Notes |
|---|---|---|
| Soy | Yes | Contains soy-based sauces (soy sauce, oyster sauce, kecap manis) |
| Shellfish | Potentially, if oyster sauce contains shellfish extract | Check labels if allergies are severe |
| Garlic | Yes | |
| Ginger | Yes |
Note: This recipe does not contain gluten-free ingredients unless specified. For gluten-free adaptation, use gluten-free soy sauce and oyster sauce.
Dietary Preferences
This dish is suitable for omnivorous diets. To make it vegetarian or vegan, substitute beef with plant-based protein options such as tofu or tempeh and use plant-based sauces.
Course
Main Course
Cuisine
Japanese-inspired, Asian cuisine
Ingredients
Beef and Vegetables
| Ingredient | Quantity | Notes |
|---|---|---|
| Beef (preferably sirloin or ribeye, thinly sliced) | 500 grams | Slice thinly for quick cooking; ask your butcher for pre-sliced beef if possible. |
| Garlic | 2 cloves | Minced freshly for maximum flavor. |
| Shallots | 2 | Finely chopped. |
| Green chilies | 5 | Sliced diagonally for visual appeal and flavor. |
| Small onion | 1 | Sliced thinly for texture. |
| Ginger | 1 small piece (~1 inch) | Finely chopped or grated. |
| Cooking oil | As needed | Neutral oil such as vegetable or canola. |
Sauces and Seasonings
Black pepperTo taste
| Ingredient | Quantity | Notes |
|---|---|---|
| Hot water | 1 cup | Medium-sized cup, hot but not boiling. |
| Oyster sauce | To taste (~1-2 tbsp) | Add gradually to control flavor. |
| Sweet soy sauce (kecap manis) | To taste (~1-2 tbsp) | Adjust sweetness as preferred. |
| Salt | To taste |
Instructions
Step 1: Preparing the Beef
Begin by carefully inspecting the beef. Choose high-quality cuts such as sirloin or ribeye for optimal tenderness and flavor. Using a sharp chef’s knife, slice the beef against the grain into very thin strips, approximately 1/8 inch thick. The key to quick, even cooking and tenderness is slicing thinly and uniformly. To facilitate slicing, partially freeze the beef for about 15-20 minutes beforehand, which firms up the meat and makes slicing easier.
Next, prepare a marinade using black tea. Brew a strong cup of black tea (about 1 cup), then allow it to cool slightly. Place the sliced beef in a small bowl or resealable bag, pour the tea over the beef, and let it soak for at least 30 minutes. This step enhances tenderness and imparts subtle flavor notes, as the tannins in tea can help break down connective tissues in the beef. If you are short on time, you can skip the tea but note that the meat may be slightly less tender.
Step 2: Preparing the Vegetables and Aromatics
While the beef marinates, prepare your vegetables and aromatics meticulously. Finely chop the shallots and mince the garlic to maximize their flavor release during cooking. Use a sharp knife and a stable cutting board to avoid accidents and ensure uniform pieces. Slice the green chilies diagonally to enhance visual appeal, balance heat distribution, and release more aromatic oils. Thinly slice the small onion, which will cook quickly and add a slight crunch and sweetness at the end. Grate or finely chop the ginger, as its pungent, fresh flavor complements the aromatic profile of the dish.
Step 3: Heating the Pan and Sautéing Aromatics
Place a medium-sized frying pan or skillet over medium heat. Add a generous amount of cooking oil—approximately 2-3 tablespoons—enough to coat the bottom of the pan and allow for proper sautéing. Allow the oil to heat until shimmering but not smoking, which ensures proper searing and flavor development.
Once hot, add the minced garlic, chopped shallots, sliced green chilies, and ginger to the pan. Sauté these aromatics, stirring frequently with a spatula, until they become fragrant and slightly golden, about 1-2 minutes. Be attentive not to burn the garlic, as it can turn bitter. This step builds the flavor foundation for the dish, releasing essential oils and flavor compounds.
Step 4: Cooking the Beef
Increase the heat slightly to ensure quick cooking of the thin slices. Add the marinated beef strips to the pan in a single layer if possible, or in batches to avoid overcrowding. Use tongs or a spatula to stir-fry the beef, ensuring each piece gets contact with the hot surface. Cook for about 2-3 minutes, or until the beef turns brown and is just cooked through. The thin slices will cook rapidly, so avoid overcooking to maintain tenderness.
Step 5: Adding Water and Reducing
Pour in the hot water (approximately 1 cup) into the pan. The hot water helps to create a light sauce and tenderize the beef further. Bring the mixture to a gentle simmer, stirring occasionally. Allow it to cook for about 3 minutes or until the liquid reduces to approximately one-fourth of the original volume. This concentrated reduction intensifies the flavors and creates a slightly saucy consistency.
Step 6: Seasoning with Sauces and Spices
Reduce the heat to low to prevent burning. Stir in the sweet soy sauce (kecap manis), which provides sweetness and a rich, molasses-like flavor, and oyster sauce for depth and umami. Add gradually, tasting as you go, to reach your desired flavor profile. Season with salt and black pepper according to your preference; remember that soy and oyster sauces are already salty, so adjust carefully. Mix everything thoroughly, ensuring that the beef and vegetables are coated evenly with the sauces.
Step 7: Final Touches and Serving
Finally, add the sliced onions to the pan. Stir briefly to distribute them evenly. The residual heat will keep the onions slightly crisp, adding texture and sweetness to the dish. Turn off the heat once the onions are just starting to soften. Transfer the beef yakiniku to a serving platter immediately. Garnish with additional sliced chilies or green onions if desired for extra color and flavor.
Serve hot, accompanied by steamed rice, pickled vegetables, or your favorite side dishes. The crispy onions and aromatic sauce make each bite flavorful and satisfying.
Preparation Tips
- For perfectly sliced beef, freeze it slightly beforehand; this makes thin slicing easier and cleaner.
- Use quality soy and oyster sauces for depth of flavor; opt for natural, minimally processed products when possible.
- Adjust the amount of chili based on your spice tolerance—remove seeds for milder heat.
- Marinate the beef in black tea for at least 30 minutes; longer marination enhances tenderness and flavor.
- Ensure your pan is adequately preheated before adding ingredients for optimal searing.
Nutritional Information
| Nutrient | Per Serving (approximate) |
|---|---|
| Calories | 350 kcal |
| Protein | 25 grams |
| Fat | 20 grams |
| Carbohydrates | 15 grams |
| Sodium | 900 mg |
Note: These values are approximate and depend on the specific ingredients and portion sizes used.
Tips and Tricks
- Use high-quality, fresh beef for the best flavor and tenderness.
- Thin slicing is crucial; ask your butcher to slice the beef or partially freeze it for easier slicing.
- Adjust seasonings based on preference—more soy for saltiness, more sugar for sweetness.
- For added flavor, sprinkle sesame seeds or chopped green onions before serving.
- Serve with a squeeze of fresh lime or lemon to add brightness.
Add-ons
- Sesame seeds for garnish
- Chopped green onions or cilantro
- Pickled vegetables or kimchi
- Spicy mayo or chili oil for extra heat
Side Dishes
- Steamed jasmine or sushi rice
- Japanese pickles (tsukemono)
- Simple miso soup
- Seaweed salad
- Steamed vegetables (broccoli, bok choy, etc.)
Improvements
- Marinate the beef longer—up to 2 hours—for deeper flavor.
- Use a grill or grill pan for a more authentic smoky flavor.
- Add a splash of sake or mirin during cooking for enhanced sweetness and aroma.
- Include additional vegetables like bell peppers or mushrooms for variety.
Save and Store
If you have leftovers, store the beef yakiniku in an airtight container in the refrigerator for up to 2 days. Reheat gently in a skillet over low heat to preserve tenderness. For longer storage, freeze in individual portions for up to a month. Note that reheating may slightly alter texture, but the flavors will remain delicious.
FAQ
Can I substitute beef with chicken or tofu?
Yes, you can substitute beef with thinly sliced chicken breast, chicken thigh, or firm tofu. Adjust cooking times accordingly, as these ingredients may cook faster or require different preparation techniques.
Can I make this dish gluten-free?
Absolutely. Use gluten-free soy sauce (tamari) and oyster sauce labeled gluten-free. Ensure all sauces and seasonings are verified gluten-free before use.
What is the best cut of beef for yakiniku?
Typically, tender cuts like sirloin, ribeye, or tenderloin work best due to their marbling and tenderness. Ask your butcher for pre-sliced yakiniku or Korean BBQ beef slices.
How spicy is this dish?
The dish can be made mildly spicy or very hot depending on the green chili amount and variety used. Adjust the number of chilies and remove seeds for milder heat.
Conclusion
This simple beef yakiniku recipe offers a perfect balance of tenderness, flavor, and ease of preparation. By focusing on quality ingredients, proper slicing, and a thoughtful combination of sauces, you can recreate an authentic Japanese-inspired dish in your own kitchen. Whether served as part of a larger Asian feast or enjoyed on its own with rice and side dishes, this dish delivers satisfying flavors that will impress everyone at your table. Remember, the joy of cooking lies in experimenting with flavors and techniques, so feel free to customize this recipe to suit your taste preferences. Happy cooking!
References
- Japanese Cooking: A Simple Art by Shizuo Tsuji
- The Food of Japan by Sonoko Sakai