

Introduction
Arachuvitta Rasam, often celebrated as Kalyana Rasam within Tamil Nadu’s rich culinary tapestry, embodies the essence of South Indian home cooking with a touch of festive elegance. This traditional rasam is distinguished by its vibrant aroma, complex layers of flavor, and the meticulous process of grinding fresh spices to elevate its taste profile. Rooted deeply in Tamil Nadu’s culinary history, this dish is a staple that graces wedding feasts, temple offerings, and everyday meals, symbolizing warmth and hospitality. The name “Arachuvitta” signifies the freshly ground spice paste—”araivu” meaning grinding, and “tittu” referring to the mortar and pestle or grinding process—that forms the soul of this dish. The earthy tang of tamarind, combined with the fiery kick of green chilies, the robust aroma of cumin and black pepper, and the richness of ghee, creates an intoxicating flavor experience. Served hot alongside steamed rice and complemented by simple side dishes like vegetable poriyal, this rasam exemplifies the harmonious balance of spice, sourness, and comfort that characterizes South Indian cuisine.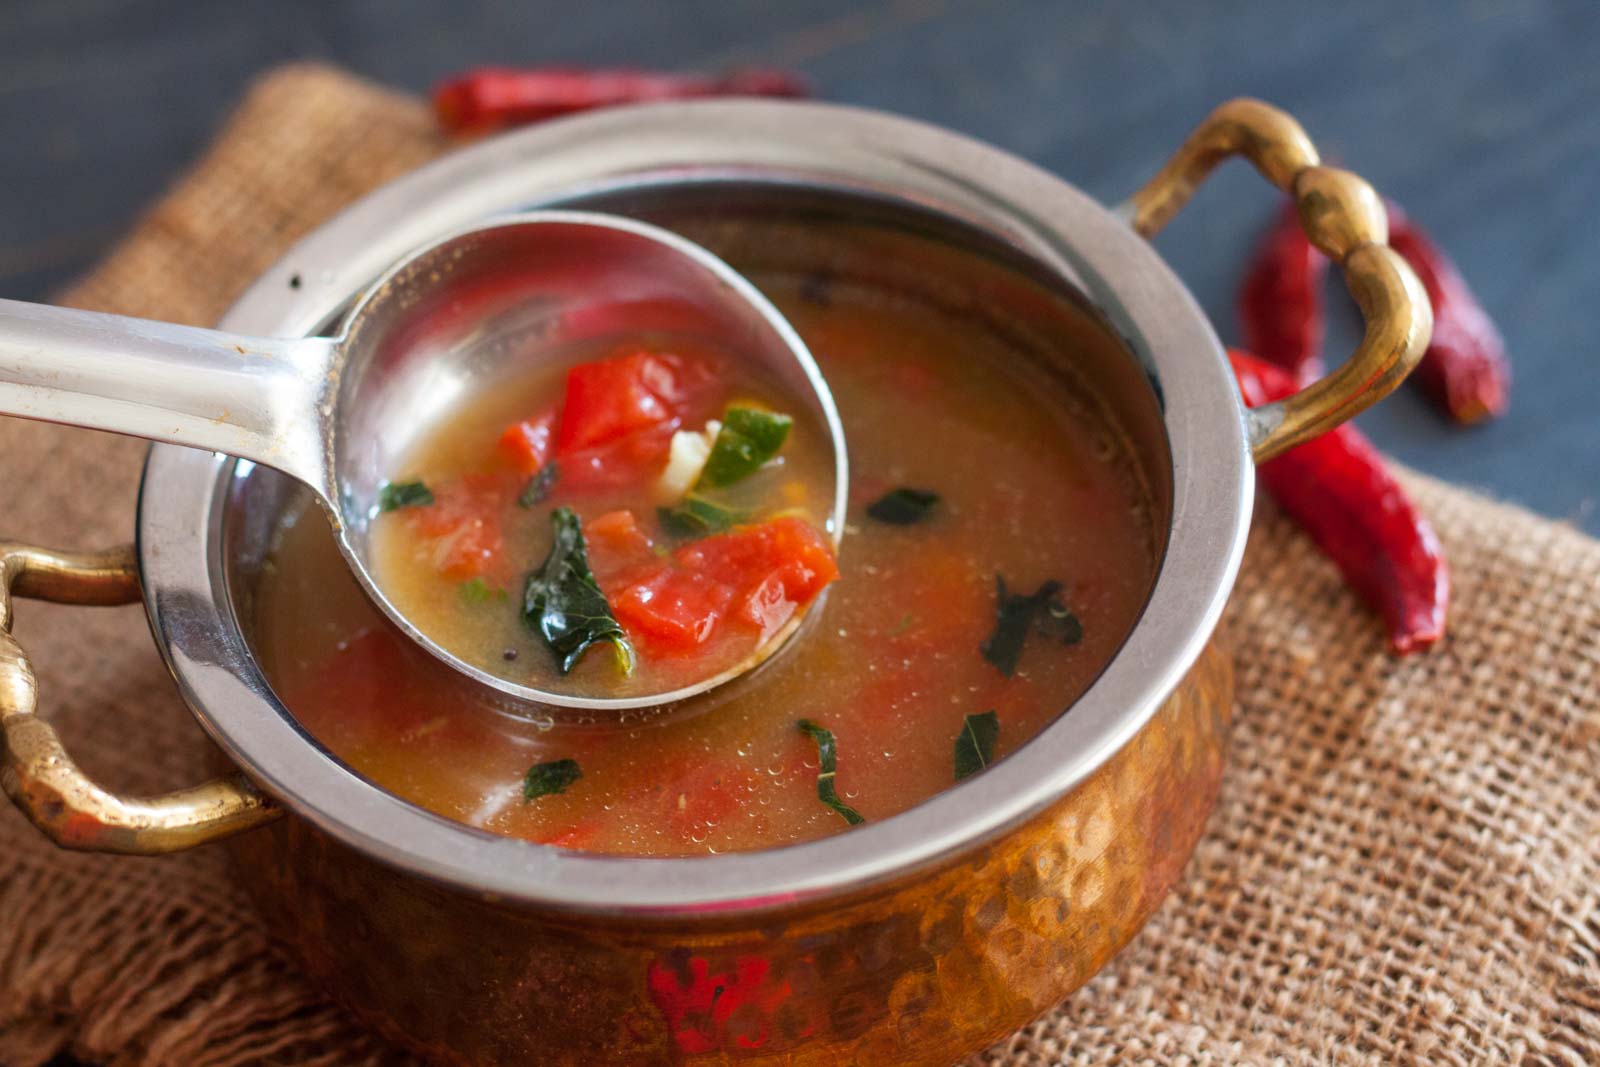
Time
Preparation Time: approximately 10 minutes
Cooking Time: approximately 20 minutes
>Total Time: around 30 minutes

Needed Equipment
- Mixing bowls (for soaking and grinding)
- Hand blender or stone grinder (for spice paste)
- Measuring spoons and cups
- Large wok or kadai (for cooking rasam)
- Small frying pan or tadka pan (for tempering)
- Mortar and pestle (optional, for spice pounding)
- Strainer or sieve (for tamarind extract)
- Knife and chopping board
- Stirring spoons (wooden or silicone)
- Serving bowls and ladles
Tags
Vegetarian, South Indian, Spicy, Traditional, Vegan (if ghee replaced with oil), Festive, Authentic Tamil Nadu Cuisine
Serving Size
Serves 4-6 people
Difficulty Level
Intermediate — requires some preparation, including grinding fresh spices and tempering.
Allergen Information
- Mustard seeds — common allergen
- Possible traces of nuts or gluten depending on ingredients used in processing
Dietary Preference
Vegetarian; can be made vegan by substituting ghee with plant-based oil.
Course
Lunch, Light Meal, Side Dish
Cuisine
South Indian, Tamil Nadu
Ingredients
Complete List of Ingredients in Table Format
| Ingredient | Quantity |
|---|---|
| Tamarind | 20 grams (soaked in warm water) |
| Tomato | 1, finely chopped |
| Turmeric powder (Haldi) | 1/4 teaspoon |
| Cumin seeds (Jeera) | 1/2 teaspoon |
| Whole Black Peppercorns | 1/2 teaspoon |
| Green Chilli | 1, slit |
| Curry leaves | 1 sprig |
| Coriander (Dhania) Leaves | 2 sprigs, torn for garnish |
| Mustard seeds (Rai/Kadugu) | 1 teaspoon |
| Asafoetida (Hing) | A pinch |
| Ghee | 1 teaspoon |
| Salt | To taste |
| Arhar dal (Split Toor Dal) | 2-3 teaspoons |
| Cumin seeds (Jeera) | 1 teaspoon |
| Dry Red Chilli | 1 |
Instructions
1. Soaking the Tamarind
Begin by selecting a fresh, firm tamarind pod, approximately 20 grams in weight, which is roughly equivalent to a small lemon-sized ball. Place this tamarind in a small bowl and pour warm water over it—enough to fully submerge the tamarind. Let it soak for about 10 minutes. This process softens the tamarind, making it easier to extract its pulp and flavor. After soaking, use your fingers or a spoon to mash the tamarind against the side of the bowl, squeezing out as much pulp as possible. Strain the pulp through a fine sieve or strainer, pressing gently to extract the maximum amount of juice and flavor. Discard the fibrous remnants and set the tamarind extract aside. This extract forms the tangy base of your rasam, imparting its characteristic sourness and depth.
2. Preparing the Toor Dal Paste
While the tamarind is soaking, take the split toor dal (arhar dal) and rinse it thoroughly under cold running water. Transfer the rinsed dal into a bowl and cover with enough water to soak for 30 minutes. This soaking process softens the dal, facilitating smoother grinding and better incorporation into the rasam. After soaking, drain the water and transfer the dal to a stone grinder or a high-speed hand blender jar. Add a teaspoon of cumin seeds and a dry red chili to the dal. Grind these ingredients together until a smooth, homogeneous paste forms. The texture should be slightly thick but pourable. This freshly ground dal paste provides richness, body, and a subtle nutty flavor to the rasam, enhancing its traditional profile. If using a hand blender, pulse until smooth, ensuring no lumps remain. For authentic flavor, a traditional stone grinder is preferred, but a good quality electric blender suffices if necessary.
3. Cooking the Rasam Base
Once the tamarind extract and dal paste are prepared, heat a large wok or kadai over medium heat. Pour in the tamarind extract, followed by the finely chopped tomato, slit green chili, turmeric powder, and a generous amount of water—about 2 to 3 cups, depending on your preferred consistency. The addition of tomatoes introduces natural sweetness and enhances the depth of flavor. Stir well to combine all ingredients. Bring this mixture to a rolling boil, which activates the flavors, softens the tomato pieces, and allows the raw tamarind smell to dissipate. Reduce the heat to simmer and cook for approximately 10 minutes, stirring occasionally. This simmering process melds the flavors together, creating a tangy, aromatic broth that forms the core of your rasam.
4. Incorporating the Ground Dal Paste
Add the freshly prepared toor dal paste into the simmering rasam base. Stir thoroughly to ensure the paste is evenly distributed and integrated into the broth. This step is crucial because it thickens the rasam and imparts a hearty, wholesome texture. Season with salt according to your taste—start with about half a teaspoon and adjust as needed. Continue to simmer the mixture for another 10 minutes, stirring occasionally to prevent sticking. If the rasam appears too thick, add a little more water to reach your desired consistency. The rasam should be thin enough to sip but rich enough to coat the palate. Once the flavors have melded, and the rasam has come to a boil again, turn off the heat. The result is a fragrant, tangy, and spicy broth, ready for tempering.
5. Preparing the Tadka (Tempering)
In a small frying pan or tadka pan, heat the teaspoon of ghee over medium heat. Once hot, add the mustard seeds. Allow them to crackle and pop—this releases their aroma and flavor. During this process, take a mortar and pestle and roughly pound the cumin seeds and black peppercorns together—this enhances their flavor and releases essential oils. Add these freshly ground spices to the hot ghee along with the curry leaves. Sauté for a few seconds until the curry leaves crackle and become fragrant. Add a pinch of asafoetida, which enhances the aroma and aids digestion. Immediately pour this hot tempering into the cooked rasam, stirring gently to distribute the flavors evenly. This tempering infuses the rasam with a robust aroma and depth, elevating it from simple broth to a complex, flavorful dish.
6. Final Garnishing and Serving
Once the tempering is incorporated, give the rasam a gentle stir. Garnish generously with freshly torn coriander leaves for a burst of freshness and color. Serve the hot rasam immediately, ideally alongside steamed rice, which balances its spice and tang. For an authentic South Indian meal, pair it with a side of vegetable poriyal—such as carrot or beans—or with crispy medu vada in sambar for a more elaborate meal. The warmth of the rasam, combined with the aromatic rice and side dishes, creates a harmonious and satisfying dining experience. Remember, rasam is best enjoyed hot, so serve promptly for maximum flavor and aroma.
Preparation Tips
- Use fresh tamarind for the best tang and aroma. Dried or packaged tamarind blocks work well, but freshness enhances flavor.
- Soaking the toor dal longer improves grinding and results in a smoother paste, which contributes to the rich texture of the rasam.
- Grinding the cumin seeds and black peppercorns just before adding them to the tempering maximizes their aromatic oils, providing a more intense flavor.
- Adjust the spice levels by increasing or decreasing green chilies and black pepper according to your preference.
- Ghee is traditionally used for tempering, but you can substitute with coconut oil or any neutral oil for a vegan version.
- Always taste the rasam after seasoning, and adjust salt and sourness with tamarind or lemon juice as needed.
Nutritional Information
| Nutrient | Approximate per serving (1 cup) |
|---|---|
| Calories | 60-80 kcal |
| Protein | 3-4 grams |
| Carbohydrates | 10-12 grams |
| Dietary Fiber | 2-3 grams |
| Fat | 2-3 grams |
| Sodium | 300-400 mg (varies based on salt and tamarind) |
| Vitamins & Minerals | Rich in Vitamin C, Iron, Calcium, and antioxidants from spices and tamarind |
Tips and Tricks
- For a more intense flavor, roast the cumin seeds and black peppercorns lightly before grinding.
- Use fresh curry leaves and coriander for the best aroma and flavor; dried leaves won’t provide the same freshness.
- Adding a teaspoon of jaggery can balance the tanginess if desired, especially if your tamarind is very sour.
- For a thicker rasam, increase the amount of toor dal paste or add a small amount of rice flour slurry.
- Allow the rasam to sit covered for 5-10 minutes after cooking; this resting period enhances flavor melding.
Add-ons
- Freshly chopped onions or garlic can be added during the simmering process for additional flavor.
- A squeeze of lemon juice at the end can enhance the sourness and freshness.
- Adding a dash of coconut milk near the end can create a richer, creamier version for those who prefer a milder taste.
Side Dishes
- Steamed Basmati or short-grain rice
- Vegetable poriyal (e.g., carrot, beans, cabbage)
- Medu Vada or crispy idlis
- Fried plantains or banana chips
- Appalams (crispy lentil wafers)
Improvements
- Enhance flavor complexity by adding a few fenugreek seeds during grinding.
- Use homemade tamarind paste for a fresher, more robust tang.
- Experiment with additional spices like coriander seeds or fennel seeds for variation.
- Incorporate a small piece of jaggery if you prefer a slightly sweet undertone balancing the sourness.
Save and Store
This rasam is best enjoyed fresh, but leftovers can be stored in an airtight container in the refrigerator for up to 24 hours. Reheat gently on the stovetop, adding a splash of water if needed to loosen the consistency. Do not freeze, as the texture may change upon thawing. To make in advance, prepare the rasam base and temper separately, combining just before serving to preserve the aroma and flavor.
FAQ
Can I make this rasam vegan?
Yes, simply replace ghee with plant-based oil like coconut or sunflower oil. All other ingredients are plant-based.
Can I adjust the spice level?
Absolutely. Increase or decrease the green chili, black pepper, or red chili as per your heat preference. For milder rasam, omit the red chili entirely.
What if I don’t have a mortar and pestle?
You can use a spice grinder or a high-powered blender to grind the cumin, black pepper, and dry red chili until fine. For the most authentic flavor, traditional pounding is recommended, but modern appliances work well too.
How do I know when the rasam is perfectly cooked?
The rasam is ready when the raw tamarind smell disappears, the tomatoes are soft, and the flavors have melded into a tangy, aromatic broth. The rasam should come to a gentle boil after adding the dal paste, indicating it’s fully cooked.
Is it necessary to add the dal paste?
Yes, the dal paste adds body, richness, and authentic flavor. Skipping it results in a thinner, less hearty rasam.
Conclusion
Crafting the perfect Tamil Nadu-style Arachuvitta Rasam is a labor of love that celebrates traditional flavors, fresh ingredients, and meticulous preparation. Its comforting warmth and complex aroma make it an essential dish in South Indian households, embodying the rich culinary heritage of Tamil Nadu. By following the detailed steps and tips outlined, you can recreate this iconic dish at home, impressing family and friends with an authentic taste of South India. Whether served as part of a festive meal or a simple weeknight dinner, this rasam offers a nourishing, flavorful experience that highlights the art of South Indian cooking. Remember, the key lies in the freshness of spices, proper tempering, and patience to allow flavors to develop fully. Enjoy the process and savor every sip of this aromatic, tangy delight.
References
- “South Indian Cooking” by Vasantha Shivkumar, HarperCollins, 2015.
- “The Complete Book of South Indian Cooking” by Ranjani Rao, Roli Books, 2012.